Okta
There are two main steps required to set up SSO using Okta on Gumlet:
- Create an Okta application
- Enable SSO login on Gumlet
Create an Okta application
First, you need to create an application on Okta and generate an IdP Metadata XML file.
You may refer to the official documentation by Okta here or follow our brief guide below:
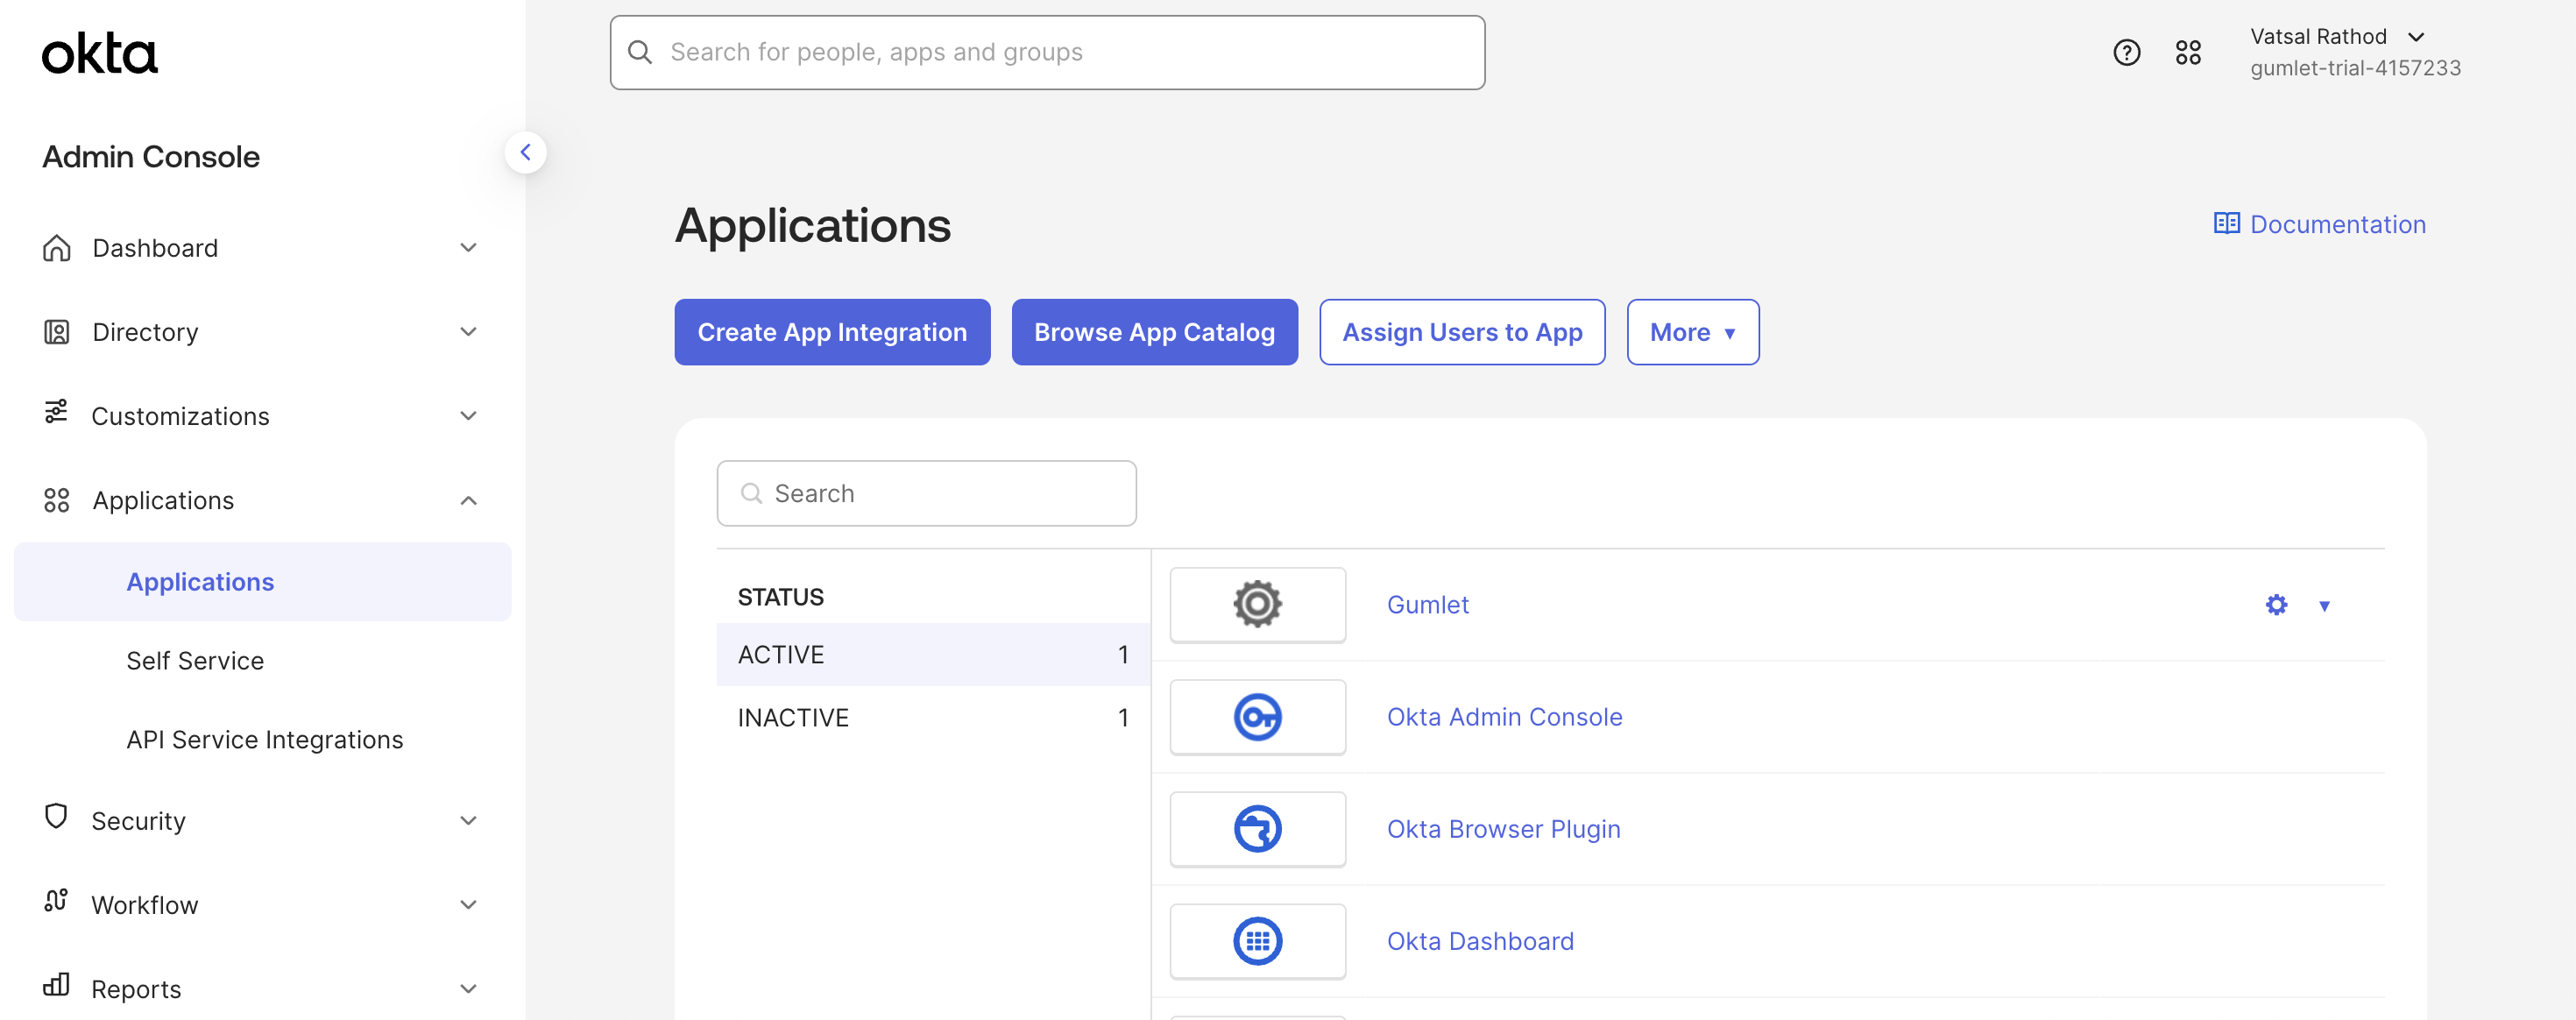
- Log in to the Okta portal and open the organization admin panel
- Navigate to the "Applications" screen using the side navigation menu
- Click the "Create App Integration" button
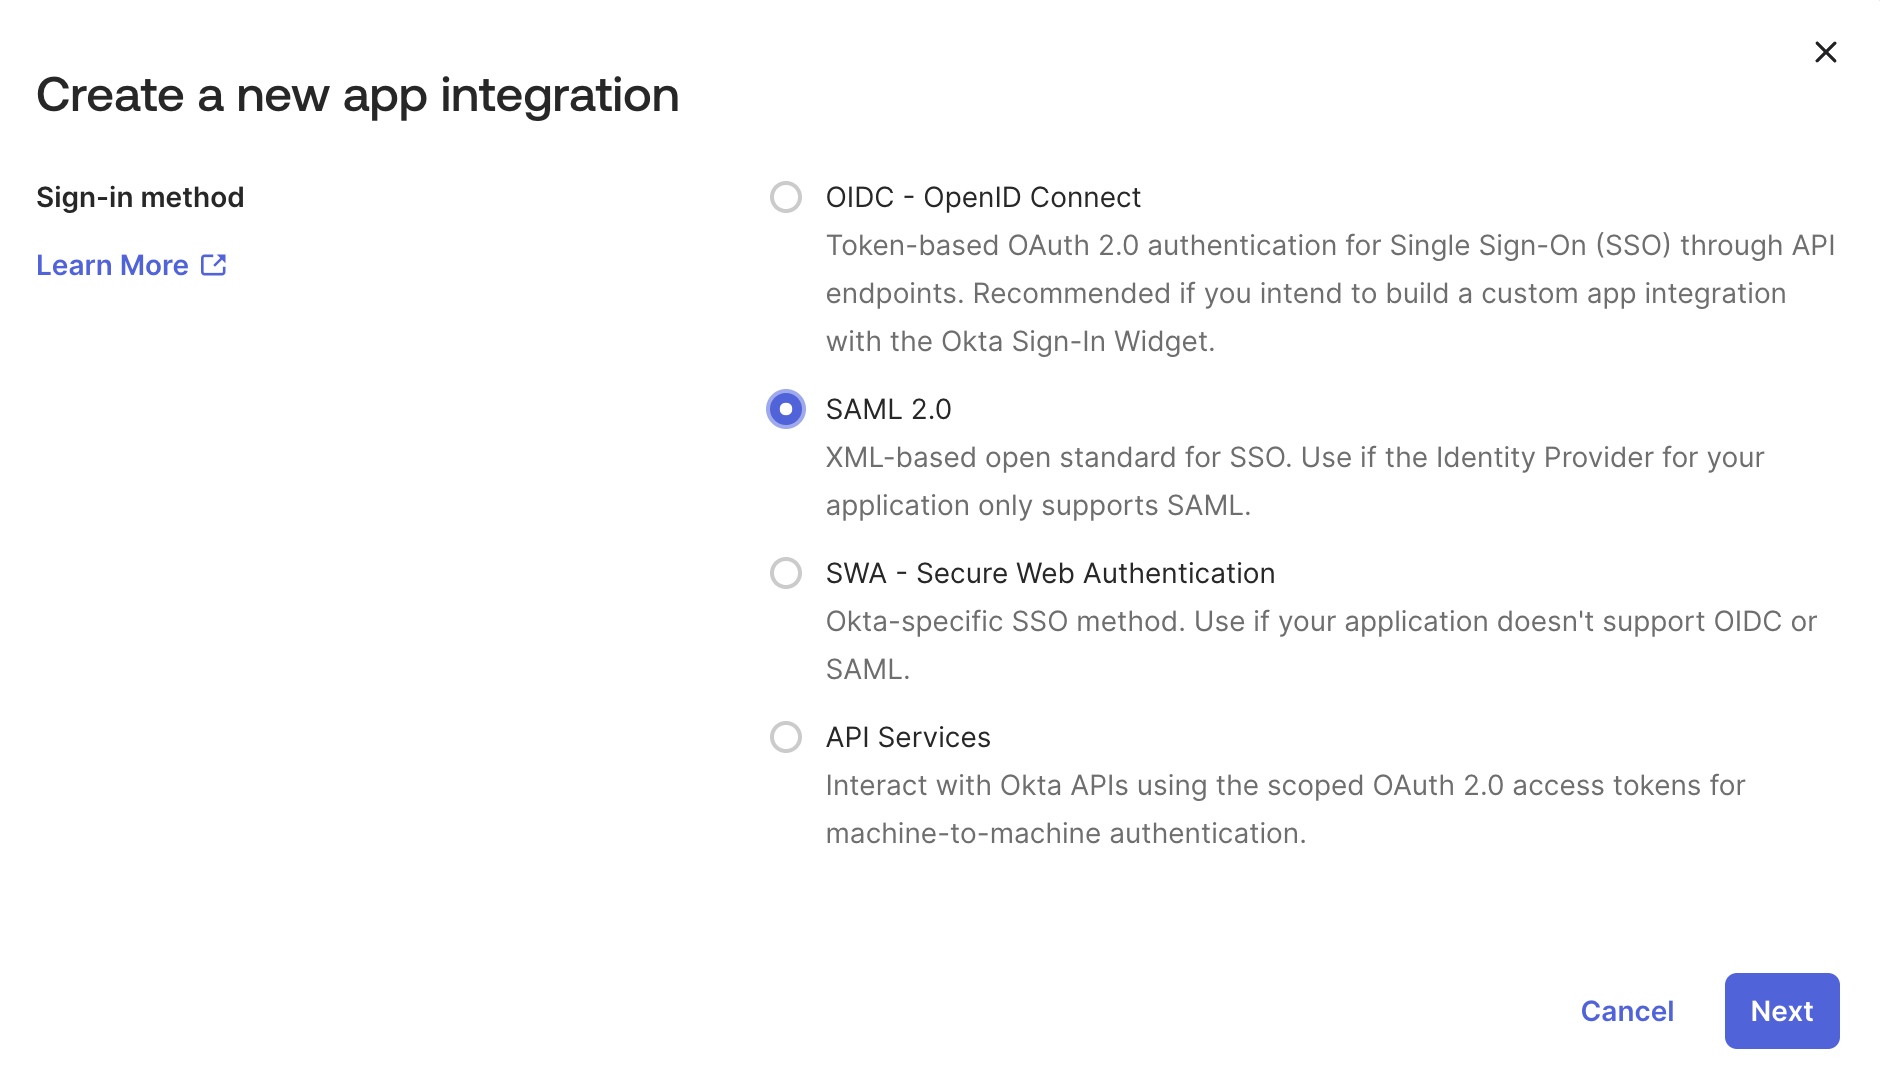
- In the modal popup that opens, choose the "SAML 2.0" radio button as shown below, then click "Next"
- Input a name for the application, we will use "Gumlet" for this guide, then click "Next"
Create App Integration
SAML 2.0 application
Configure single sign-on options
Basic SAML configuration
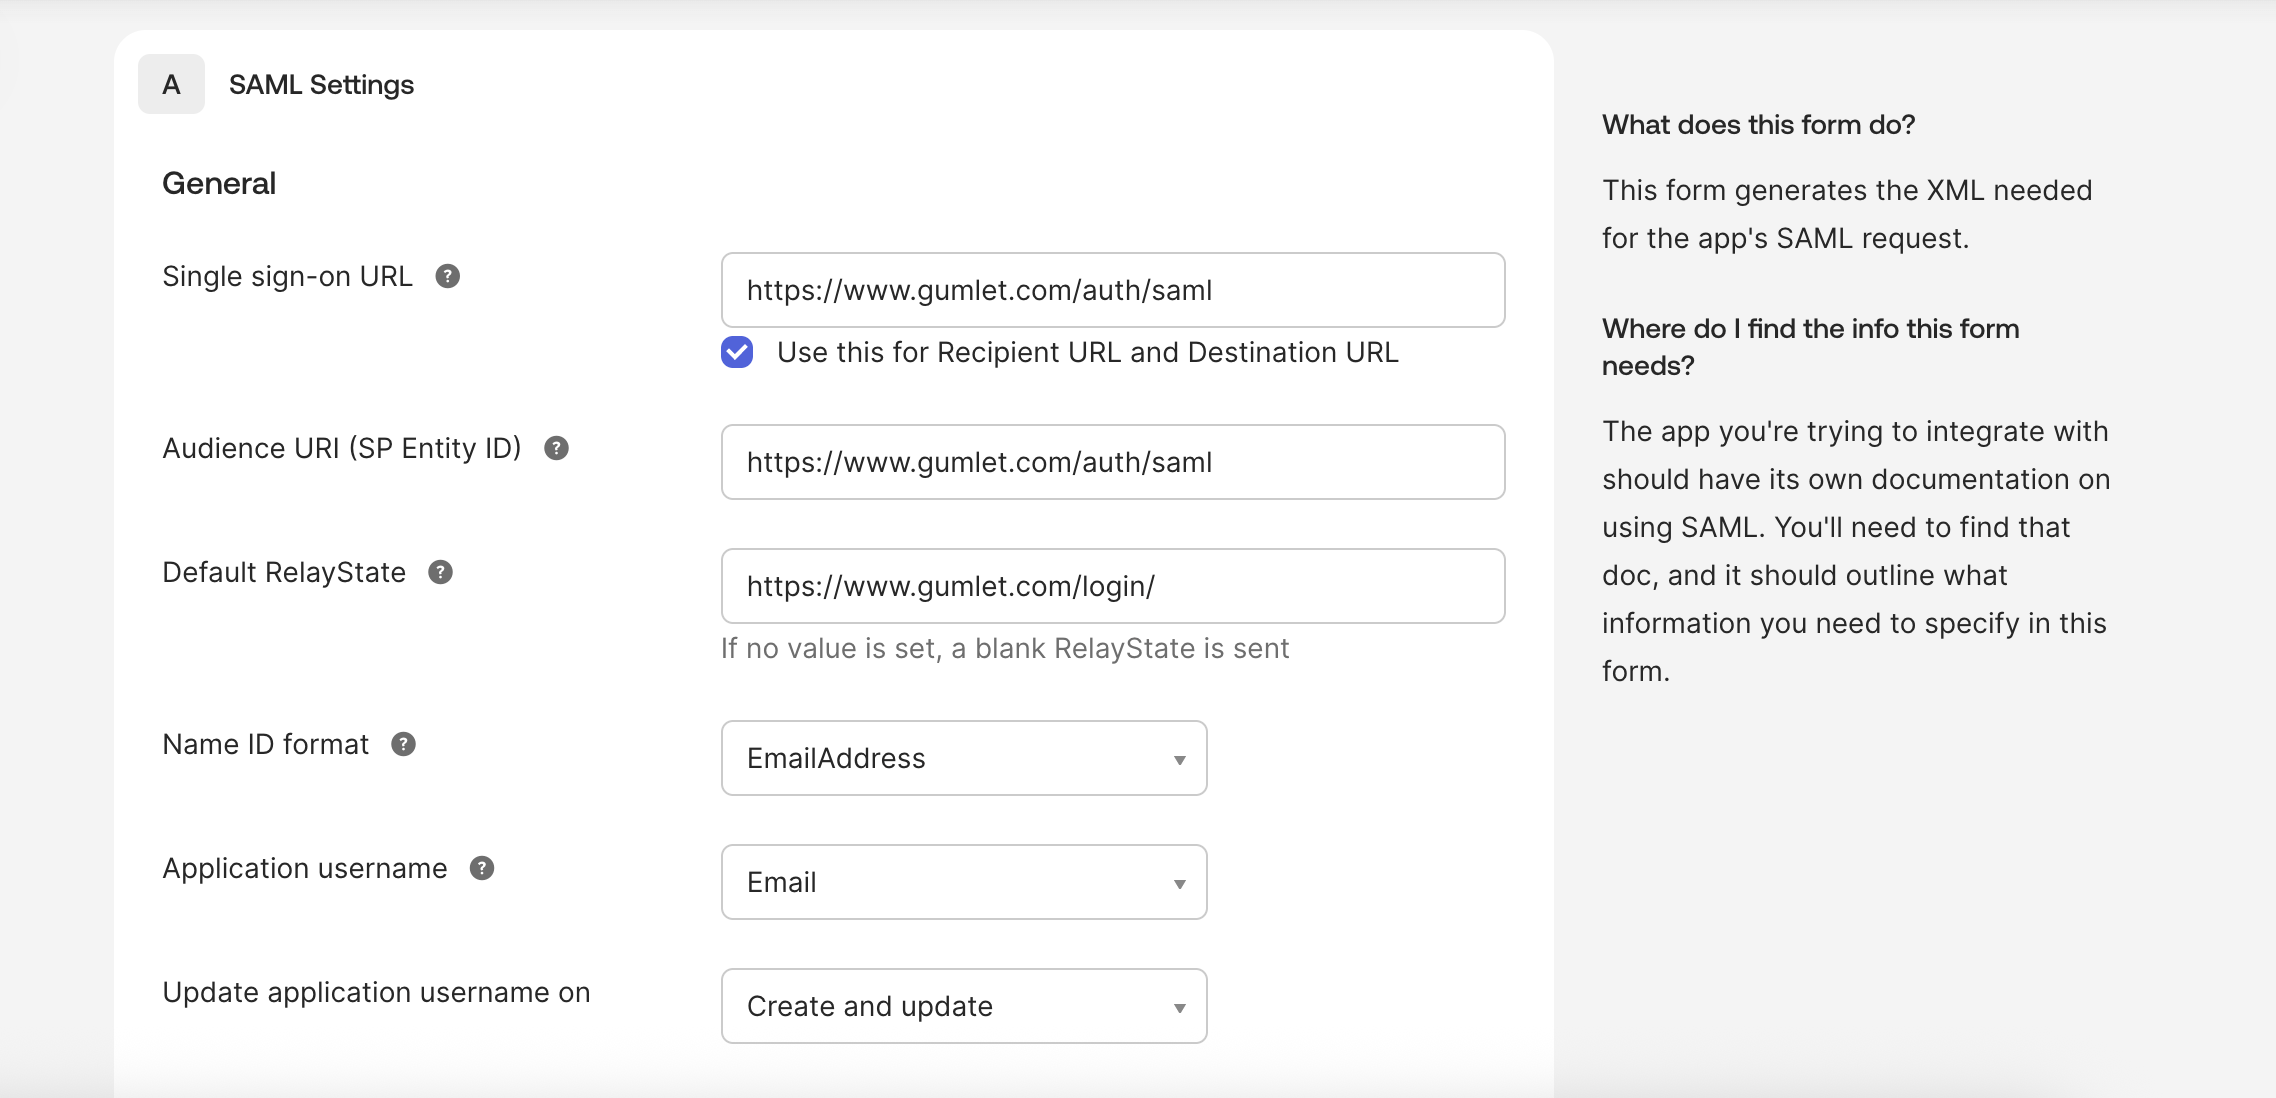
On the next screen, we will configure various authentication parameters as shown:
| Field | VALUES |
|---|---|
| Single sign-on URL | https://www.gumlet.com/auth/saml |
| Audience URI | https://www.gumlet.com/auth/saml |
| Default RelayState | https://www.gumlet.com/login/ |
| Name ID format | EmailAddress |
| Application username | Email |
| Update application username on | Create and update |
Note: Name ID is the unique email address of the user that will be used to identify them on Gumlet.
SAML settings
Attributes and claims
Now you need to specify three more keys that Gumlet uses to authorize and provision your users:
| Field | Description | Claim composition |
|---|---|---|
| gumlet_org_id | The Gumlet organization ID of your account. | <your_gumlet_org_id> |
| gumlet_role | The Gumlet Role/s for your account. It'll be a comma-separated value | analyst,developer,video-developer,accountant |
| full_name | The full name of the user. It can be a combination of their first name and last name in the Okta universal directory. | user.firstName + " " + user.lastName |
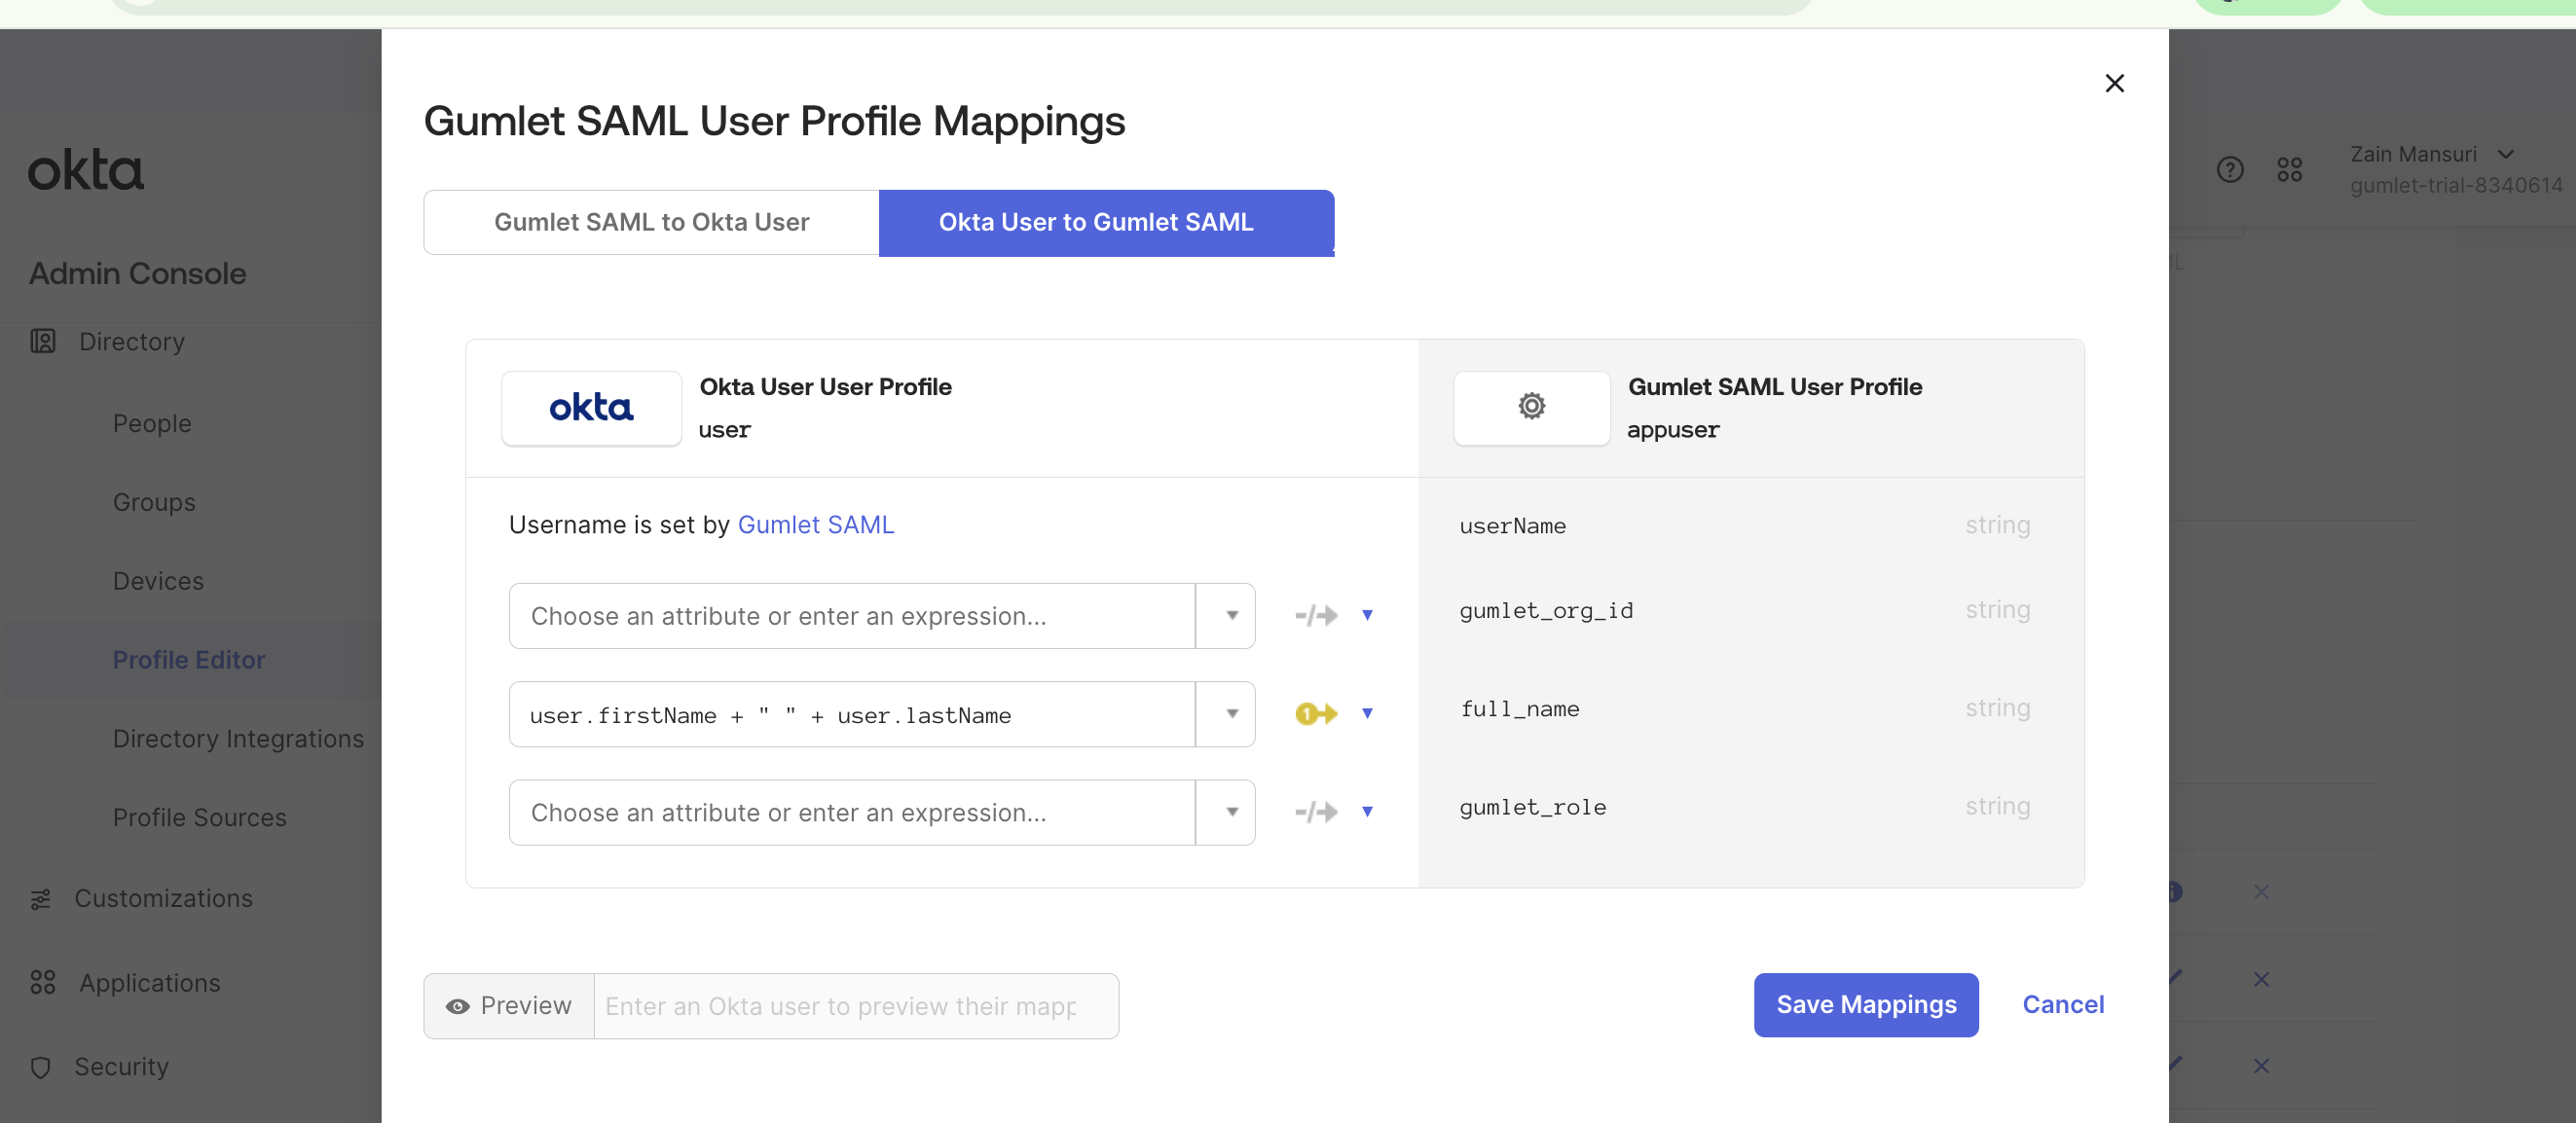
To do this, you need to create "Profile Mappings" on Okta. Read the official guide here or follow the quick version below.
Navigate to "Directory > Profile Editor", and create user attributes that will be mapped and sent to Gumlet during authentication.
Click on the "Add Attributes" Button to add custom attributes.
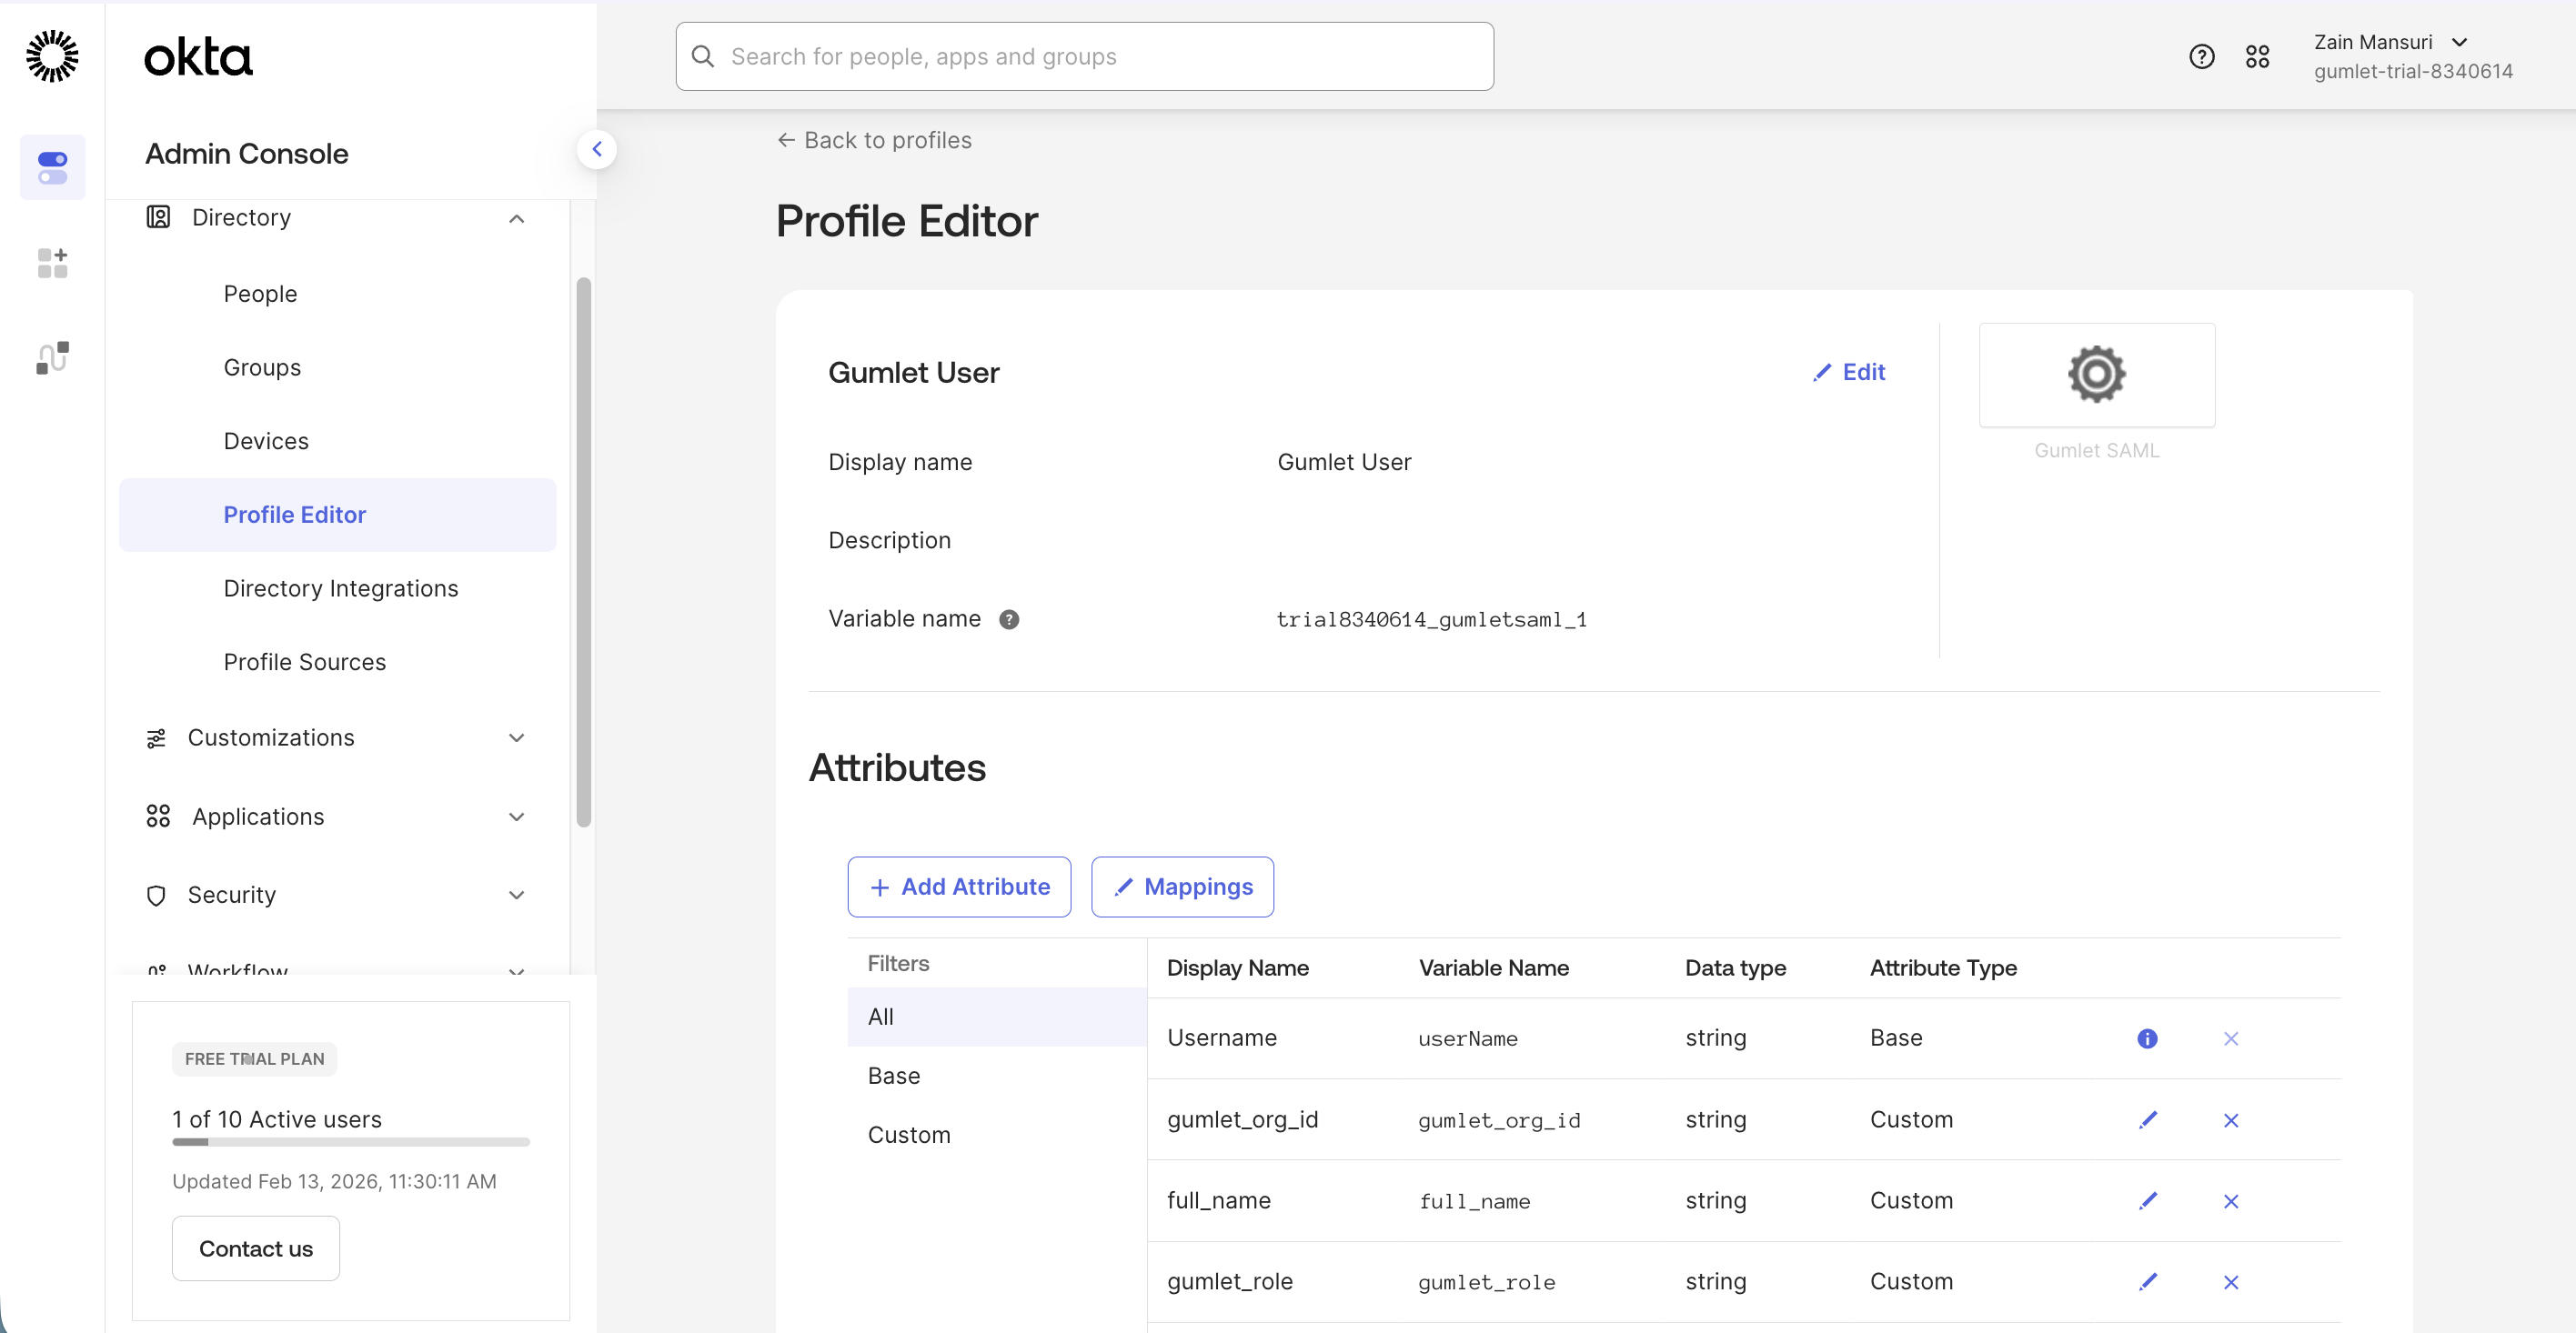
Once done, click on the "Mappings" button to map custom attributes.
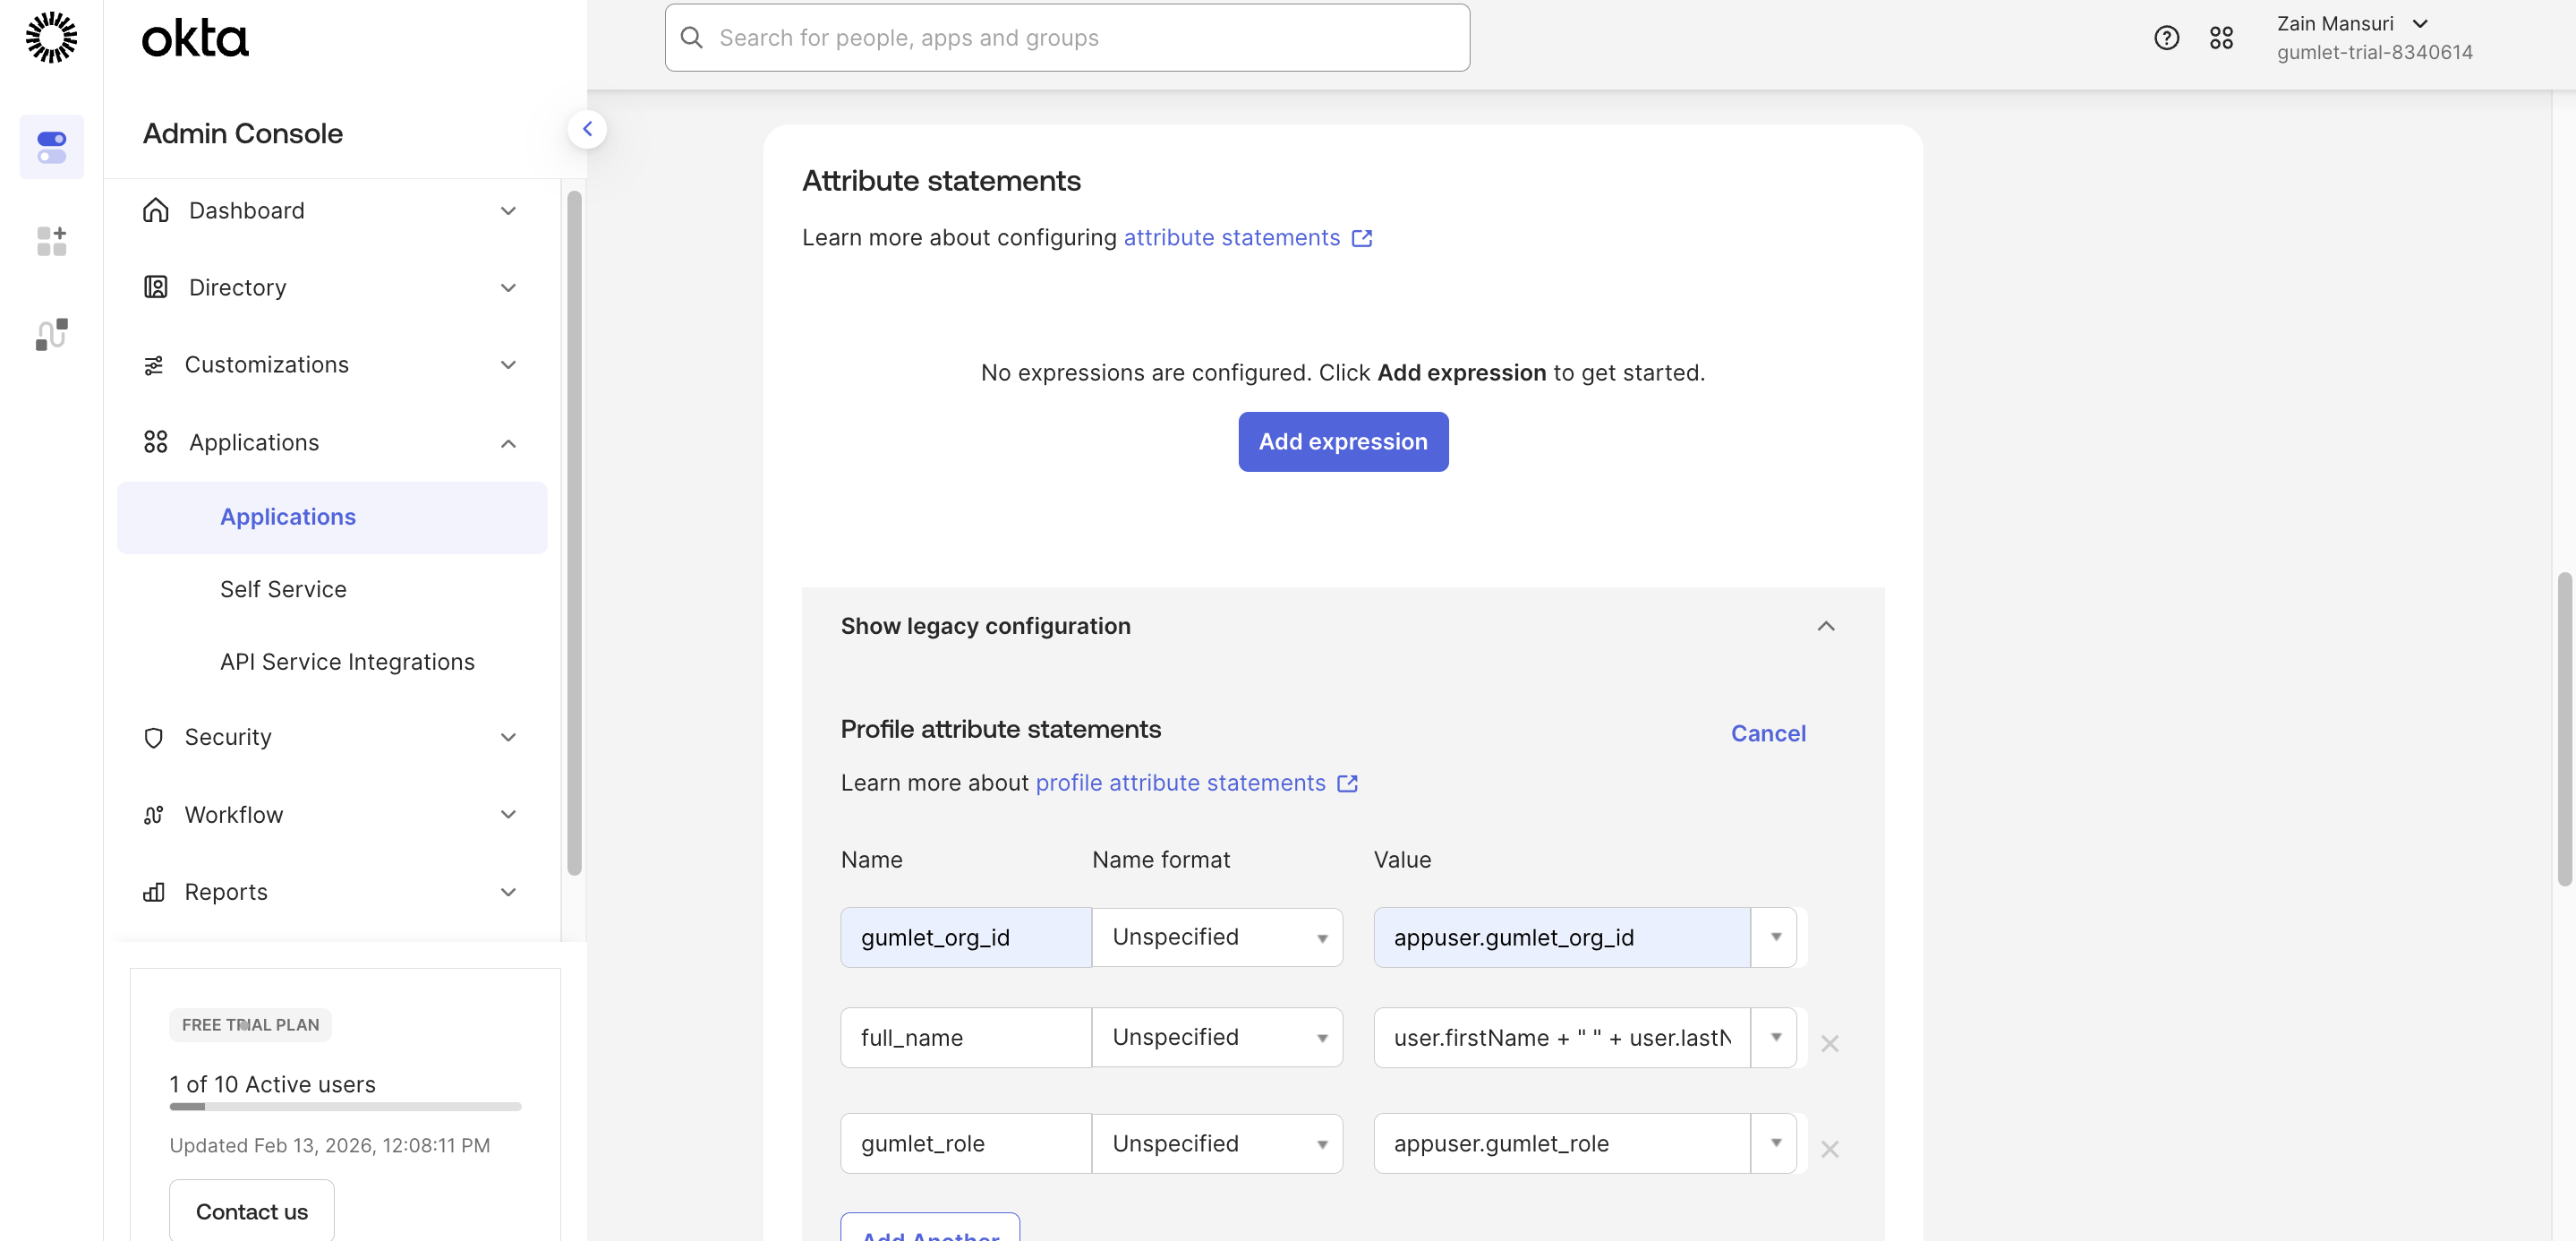
Back on the SSO application page, in the Sign On Section, scroll down and look for Attribute statements. In the Attribute Statements Expand Show legacy configuration and add Profile attribute statements as shown below. Without adding attributes, Gumlet won't be able to identify your request.
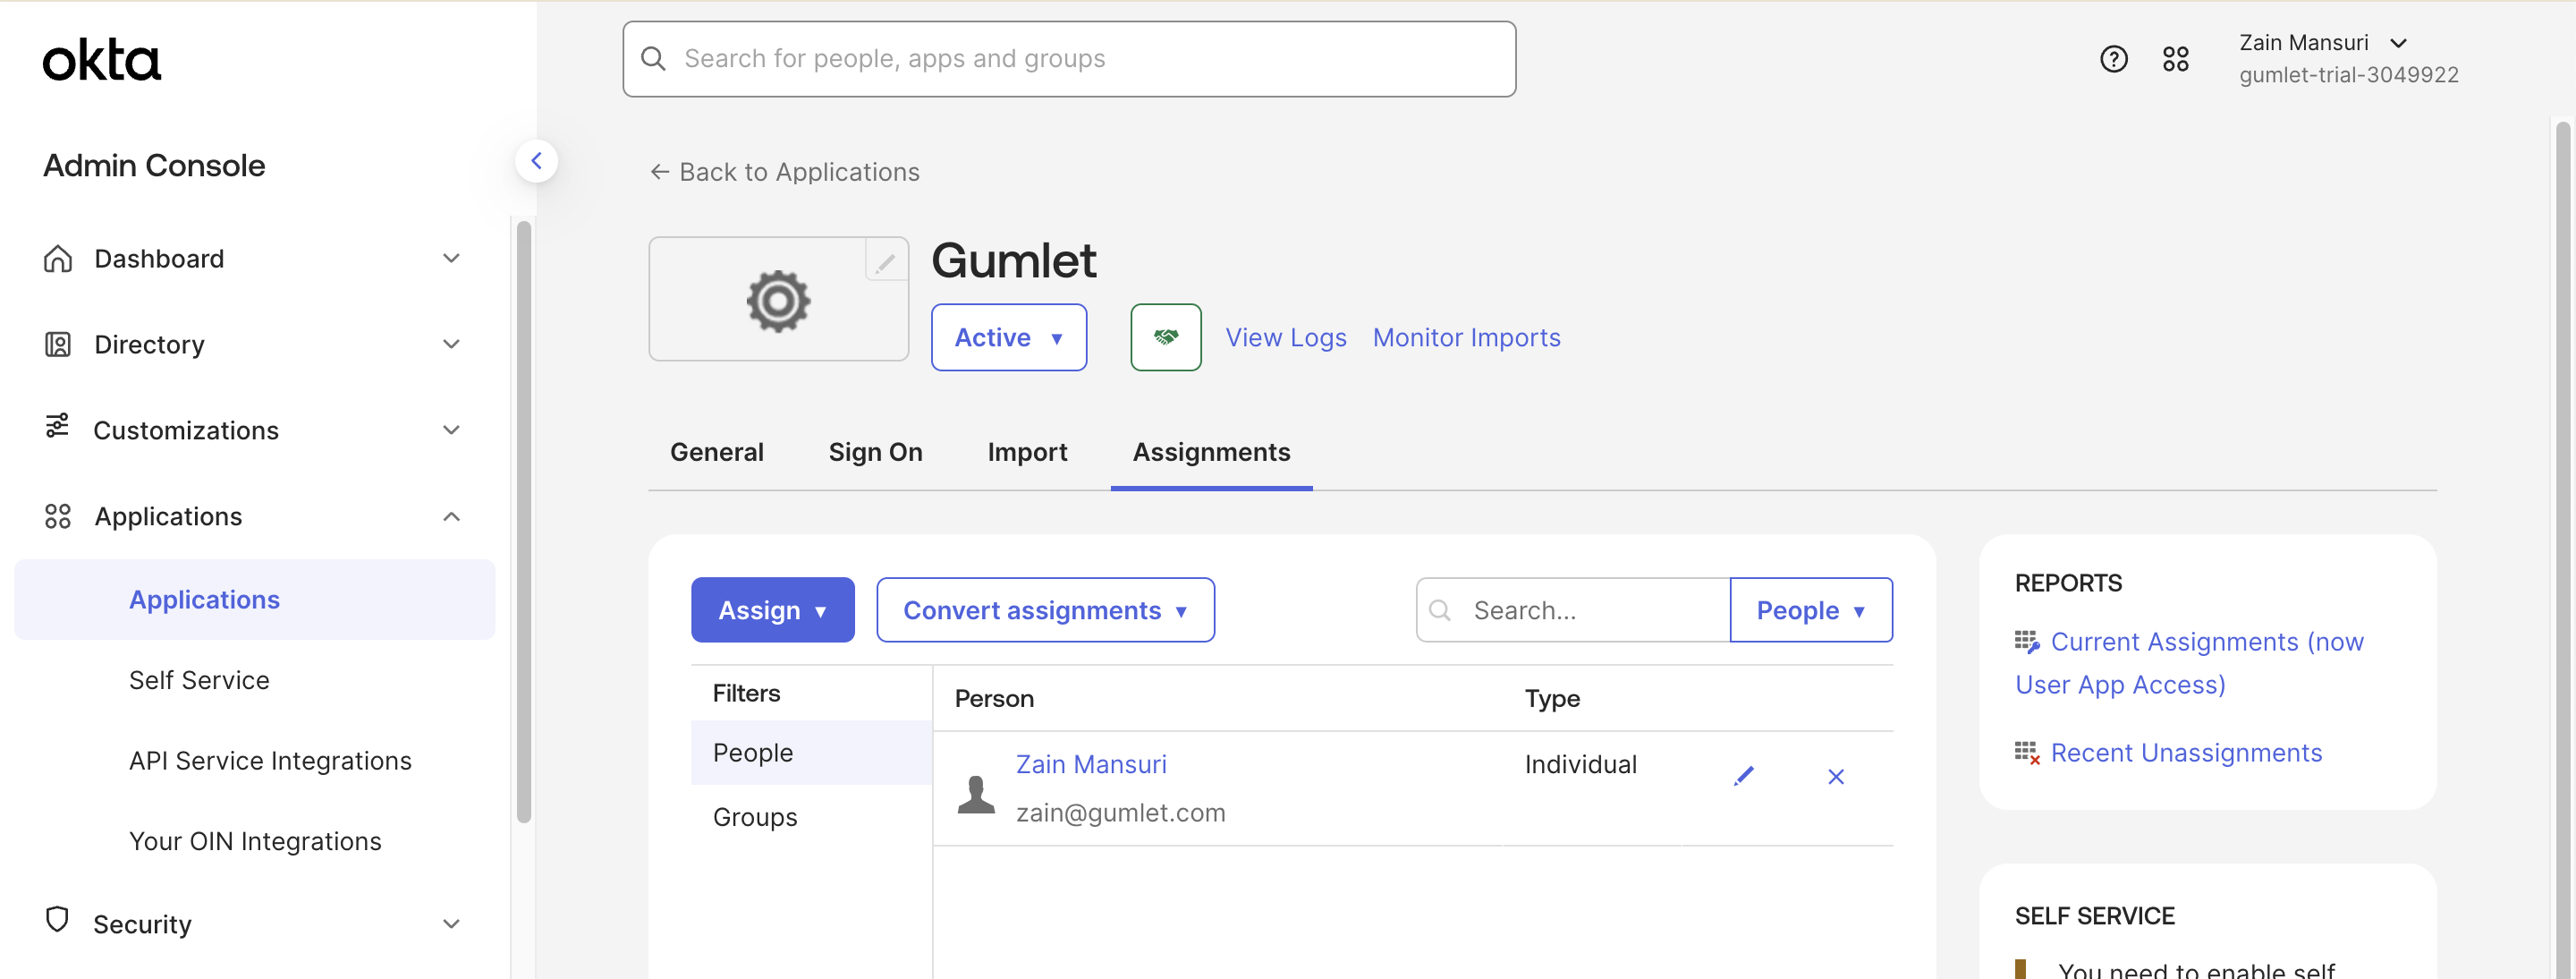
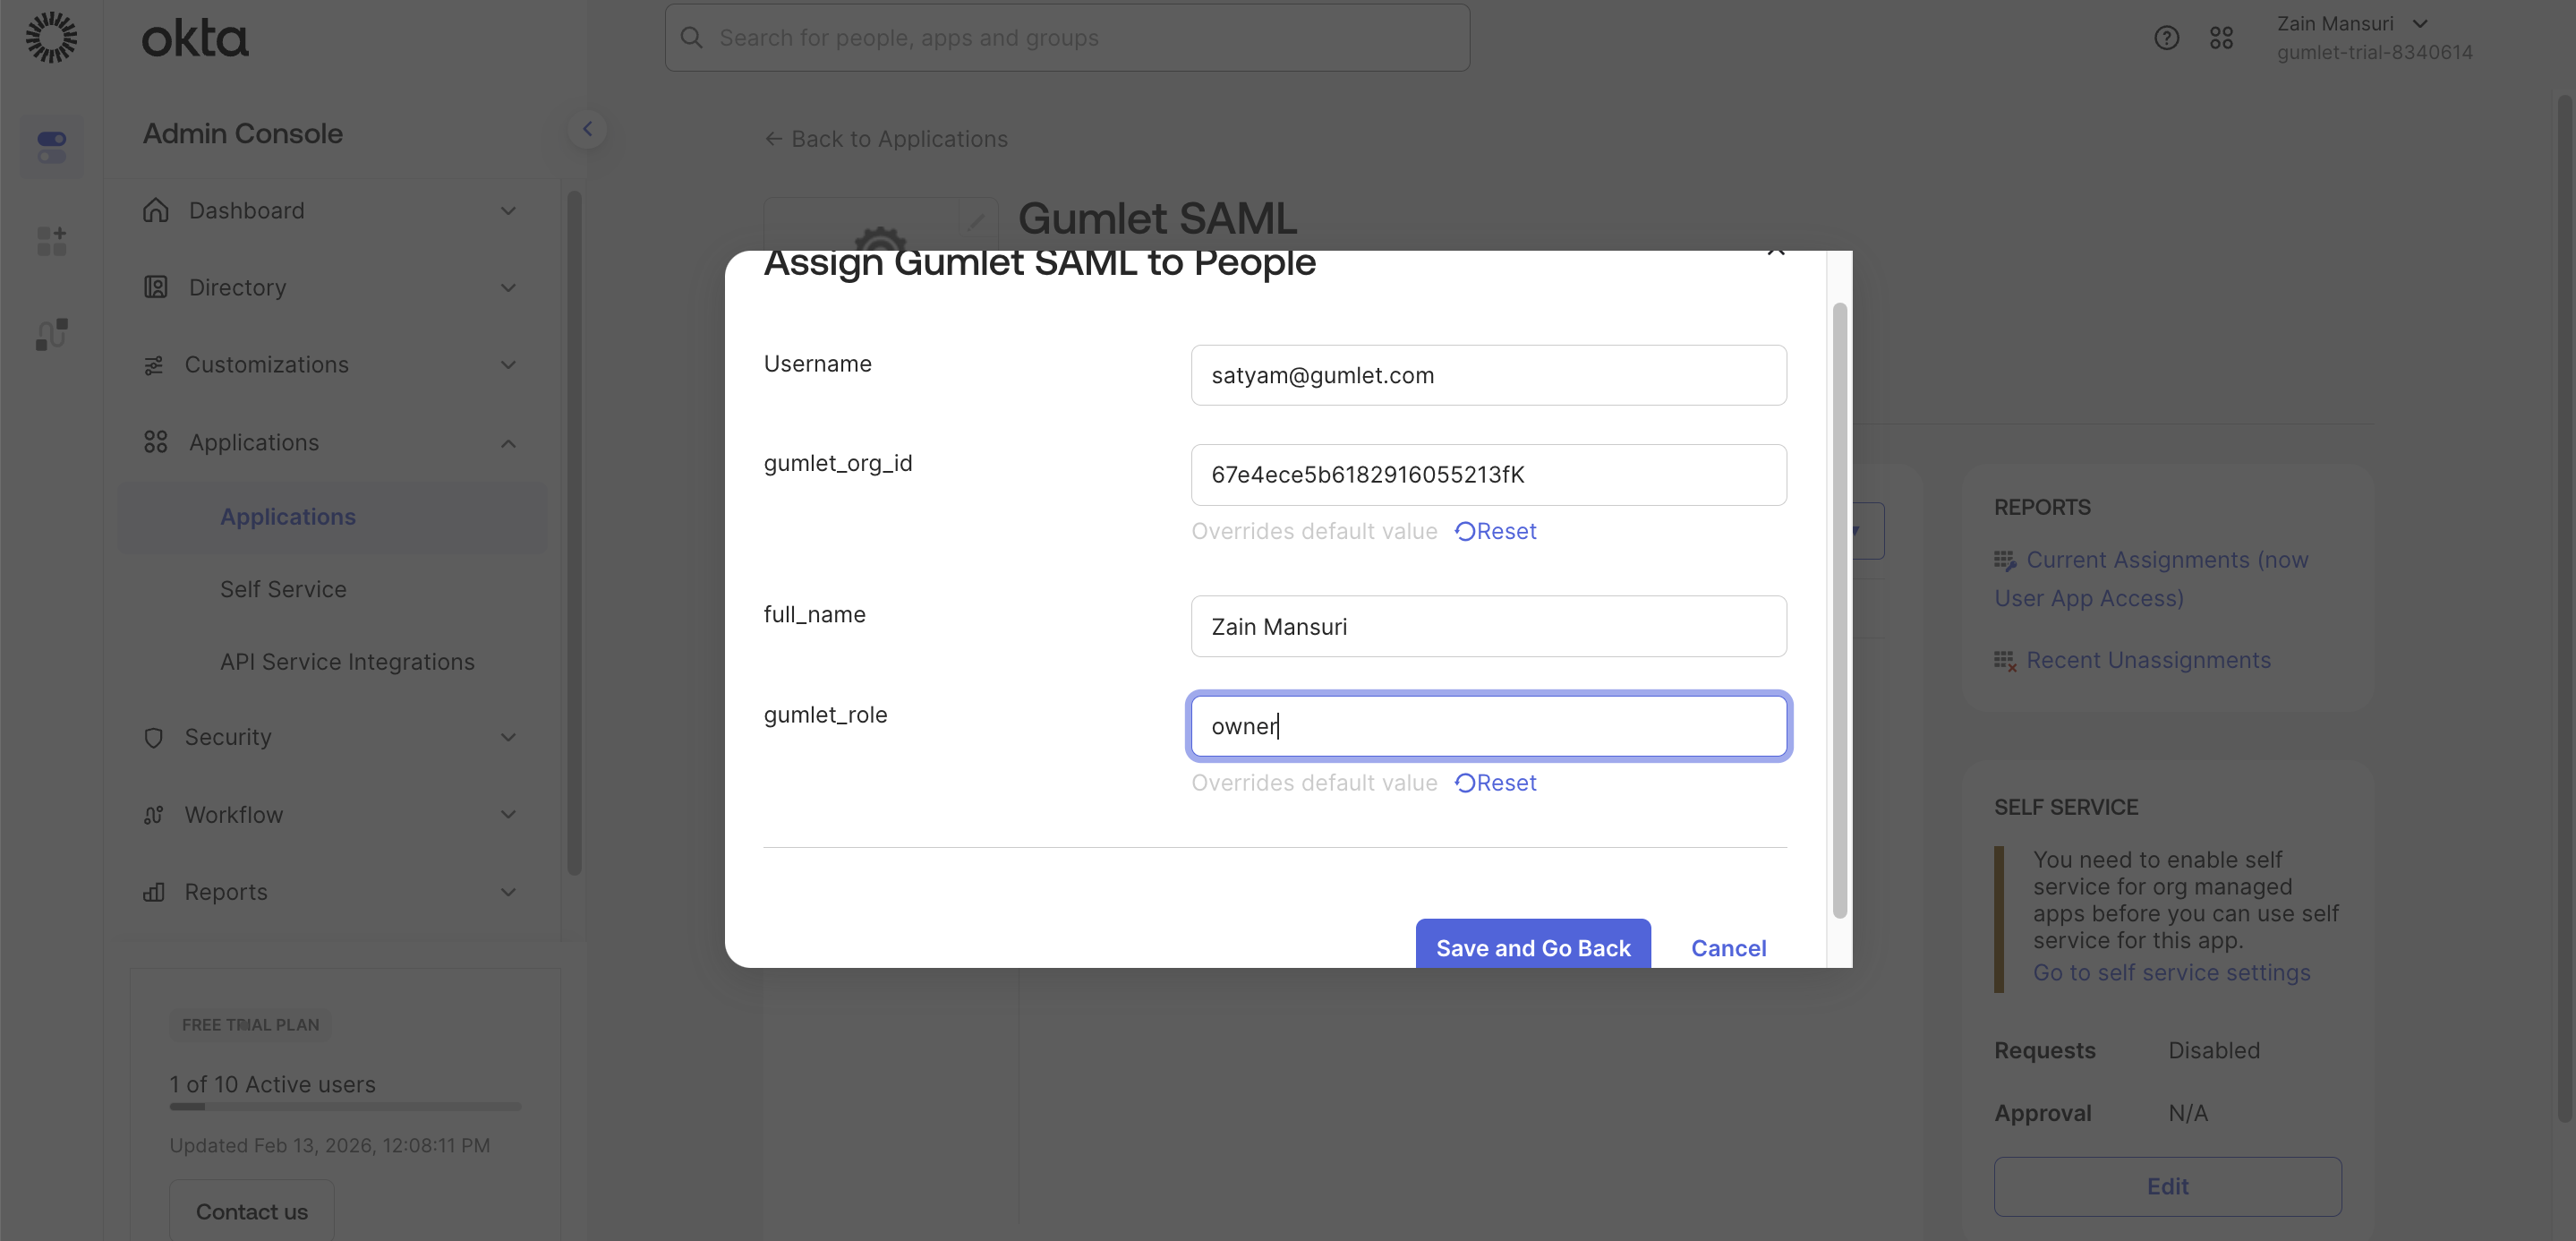
Assign the application to users as shown below to finish this step.
Assign User
IdP Metadata XML
Navigate to the SAML setup instructions screen and scroll to the section with the IdP Metadata XML file. Copy and save it in a safe location. You will need to upload this XML file to your Gumlet account in a later step.
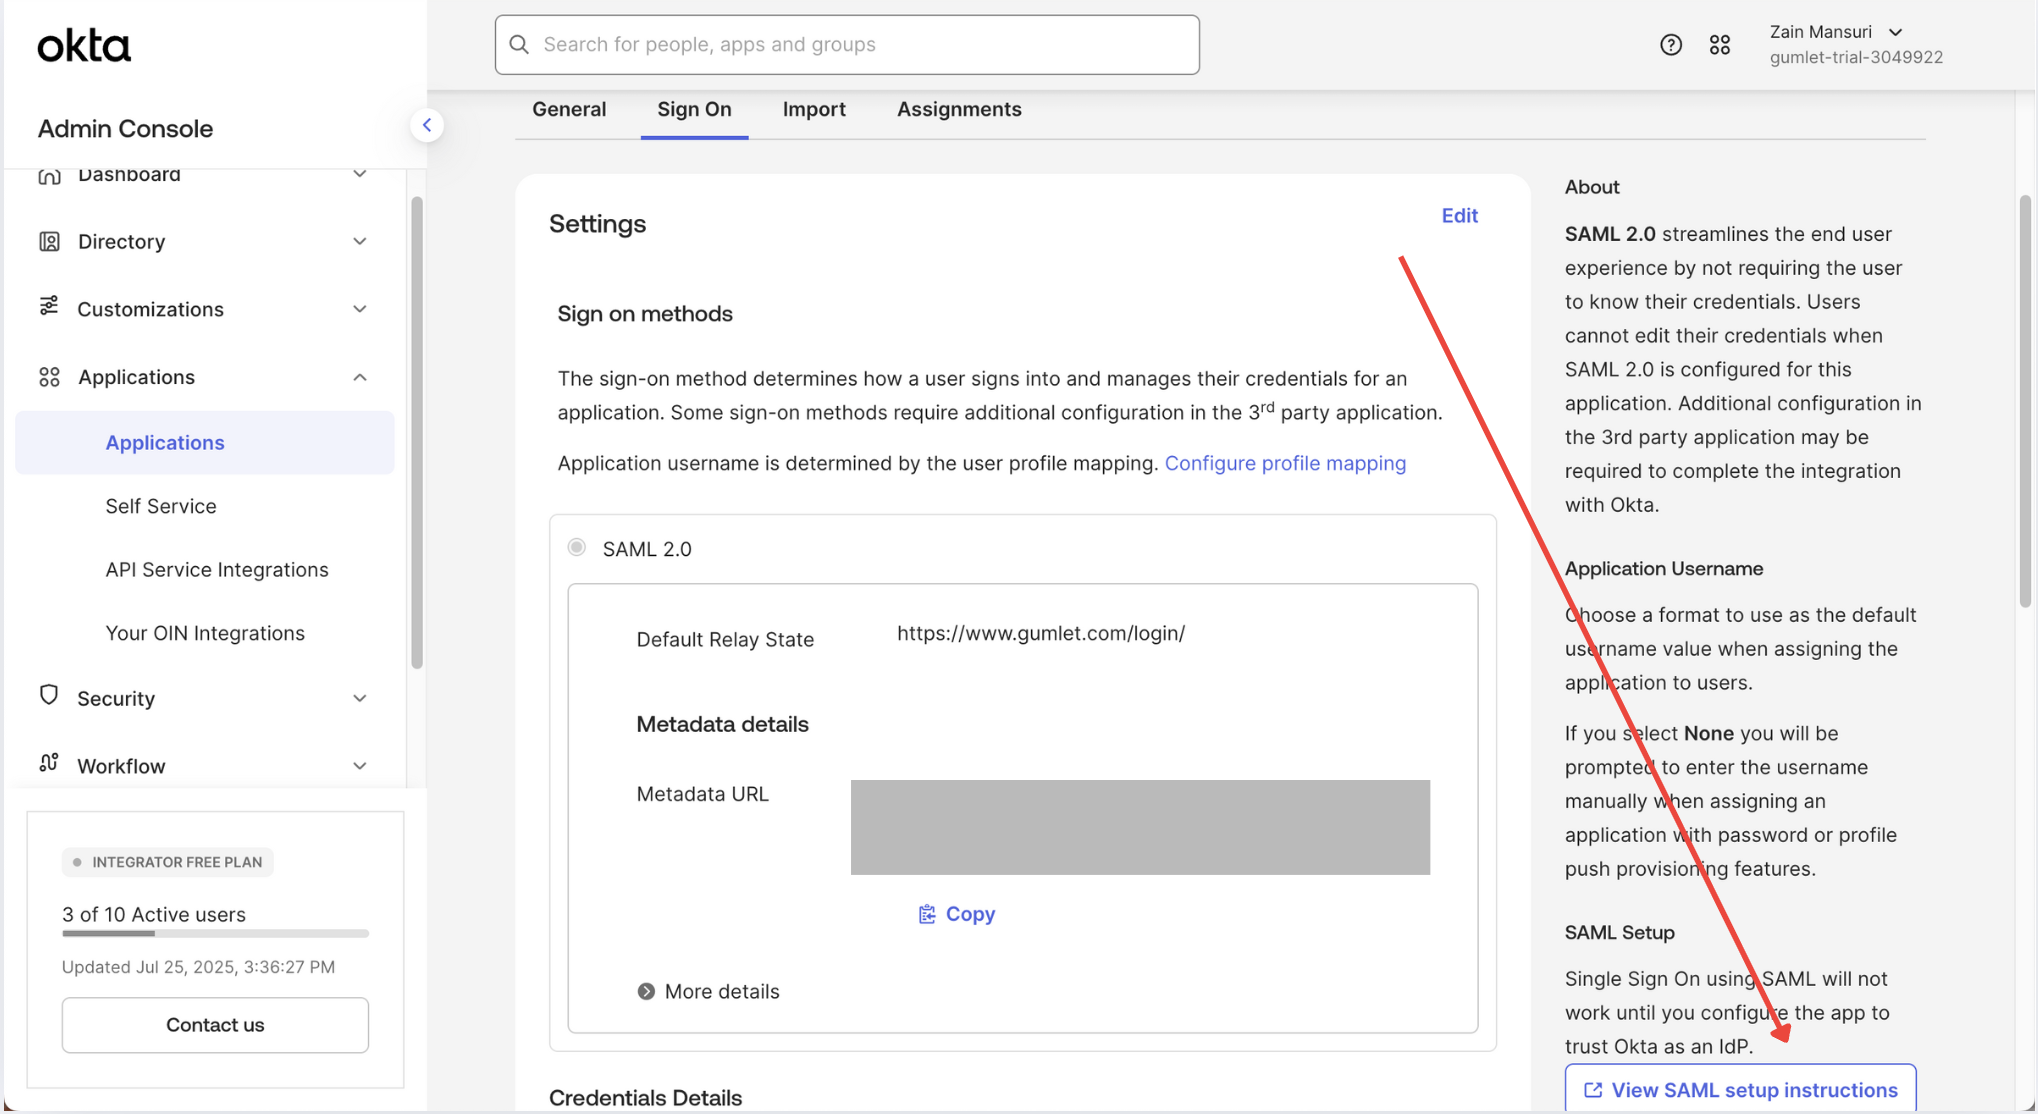

Copy and save the IdP Metadata XML
Enable SSO login on Gumlet
- Login into Gumlet with Admin account
- Goto Organization setting -> SSO page
- Open the IdP Metadata XML file (which was downloaded previously) in a text editor of your choice.
- Copy and paste the entire contents of the file into the Metadata XML input box.
- Click Save button to enable SSO for your organization.
Your users should now be able to use Okta SSO to log into Gumlet.
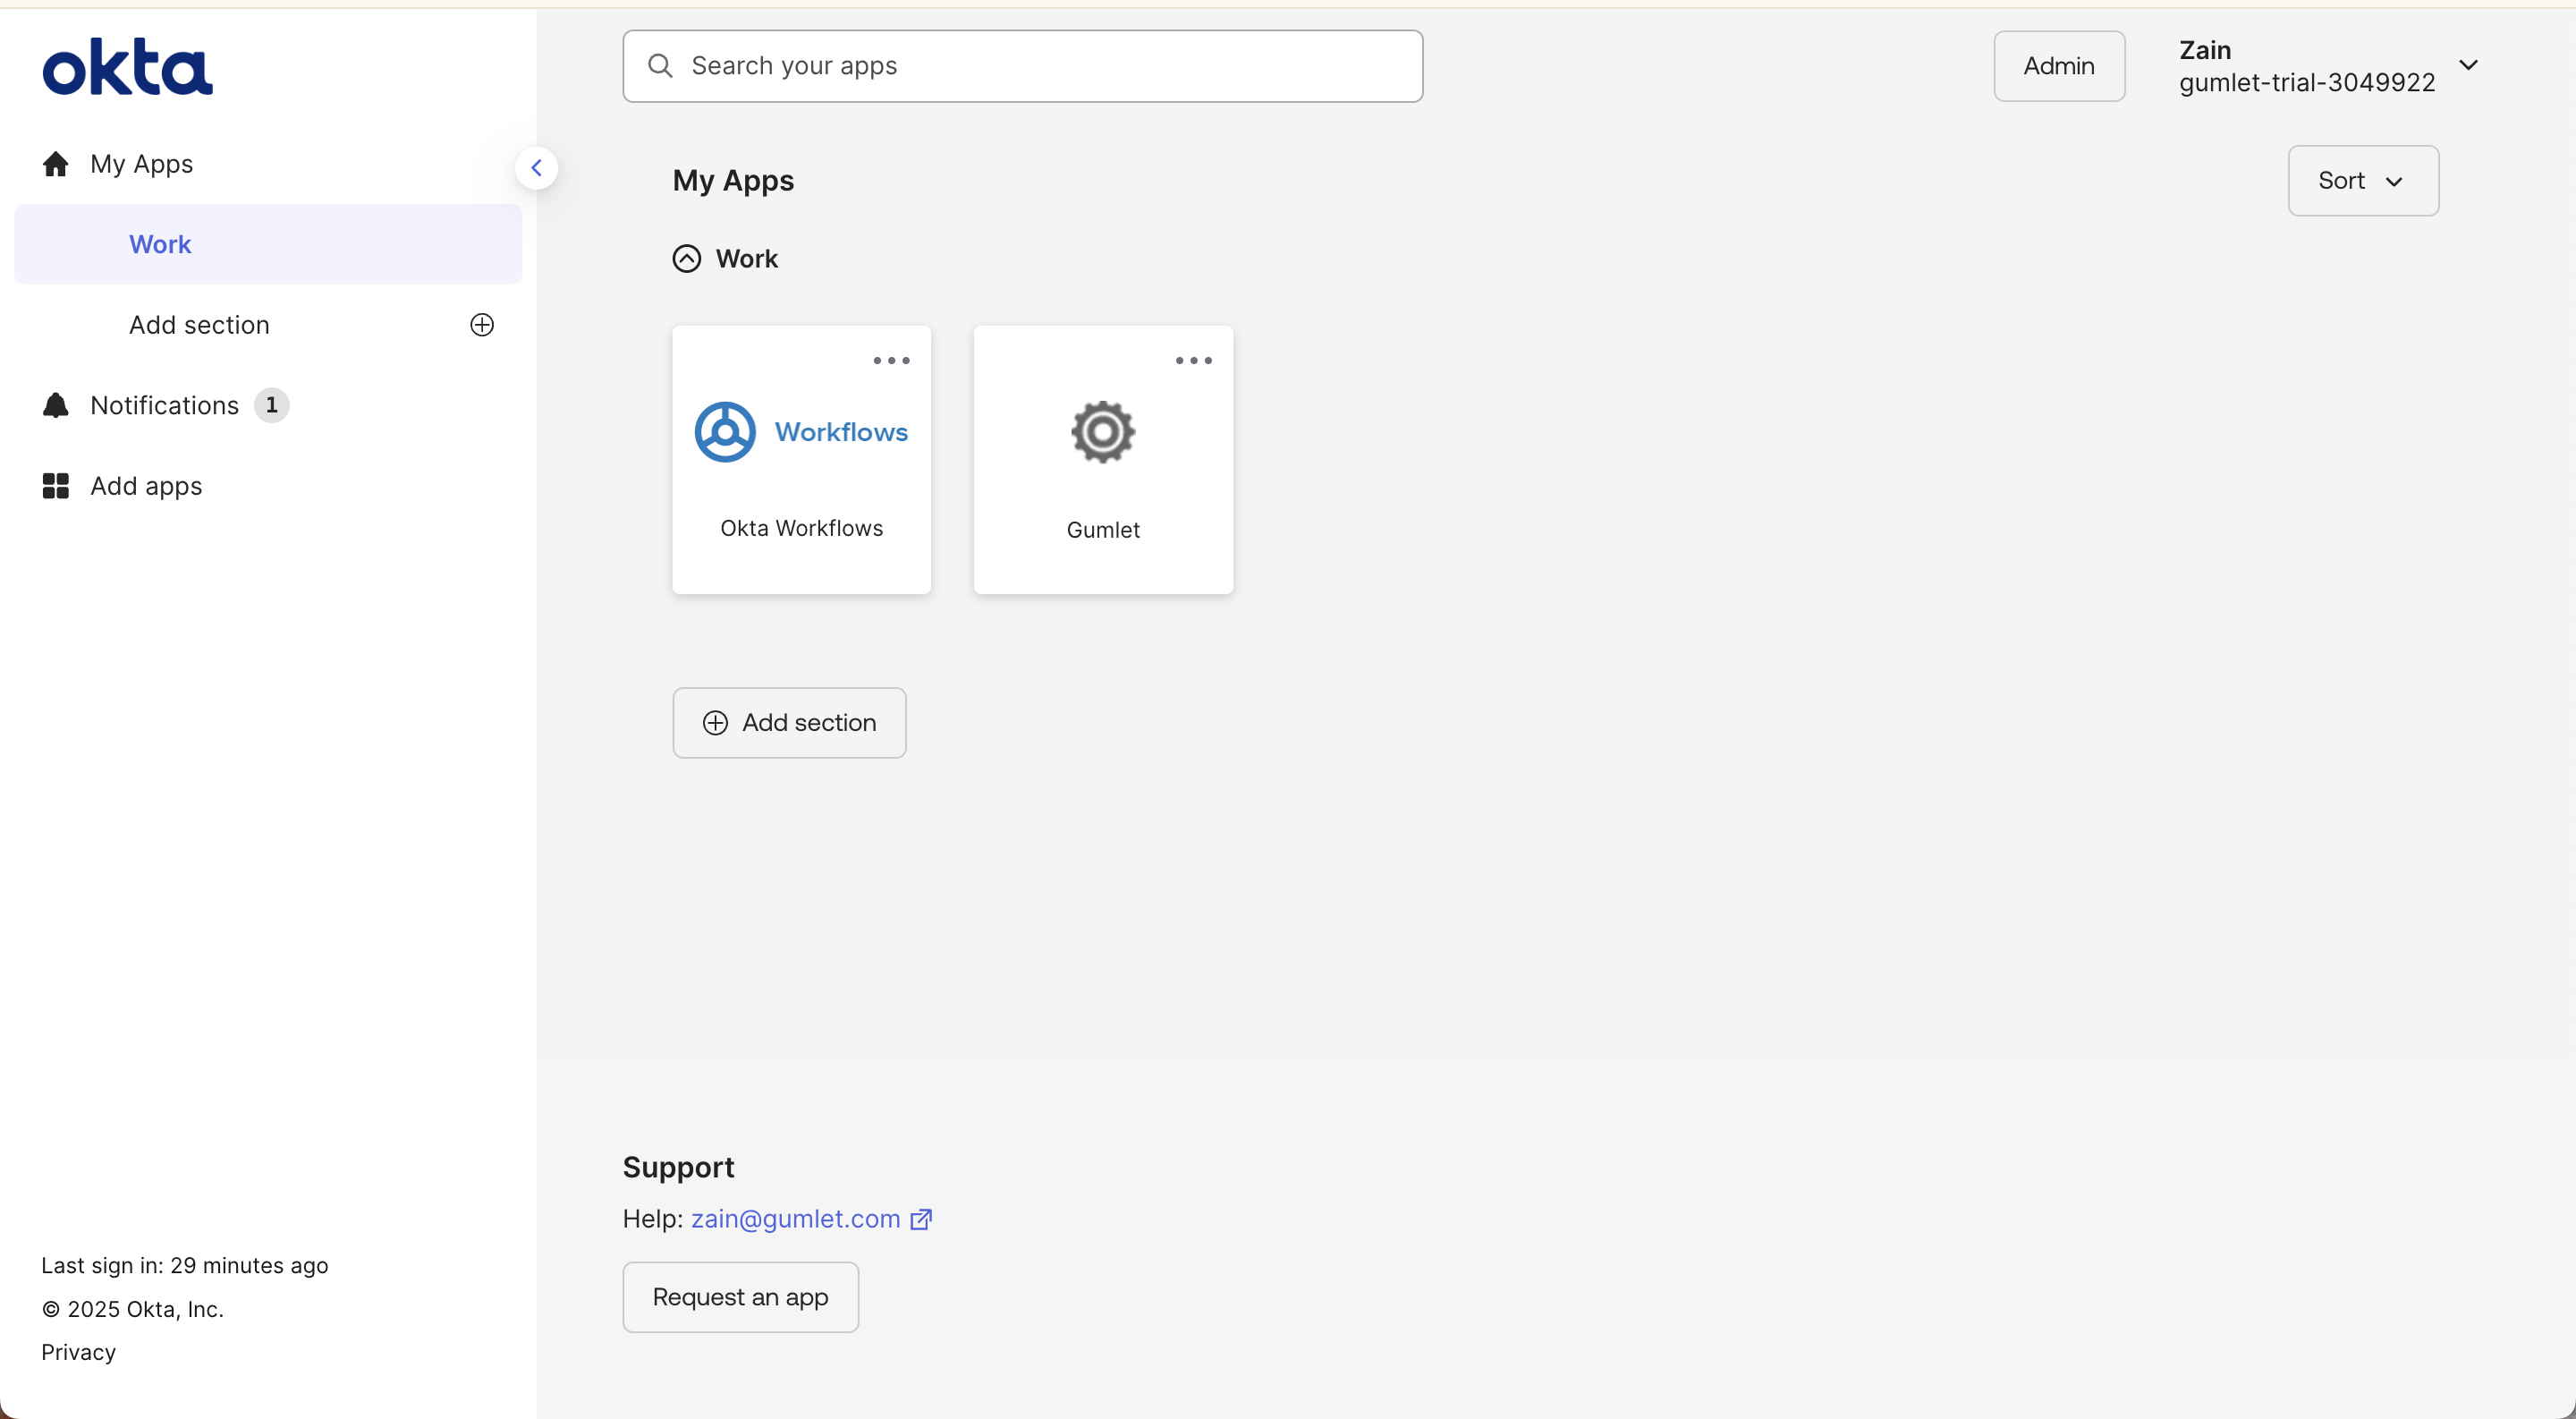
Login to Gumlet
You can login through the Gumlet app by navigating to their end-user dashboard on Okta.
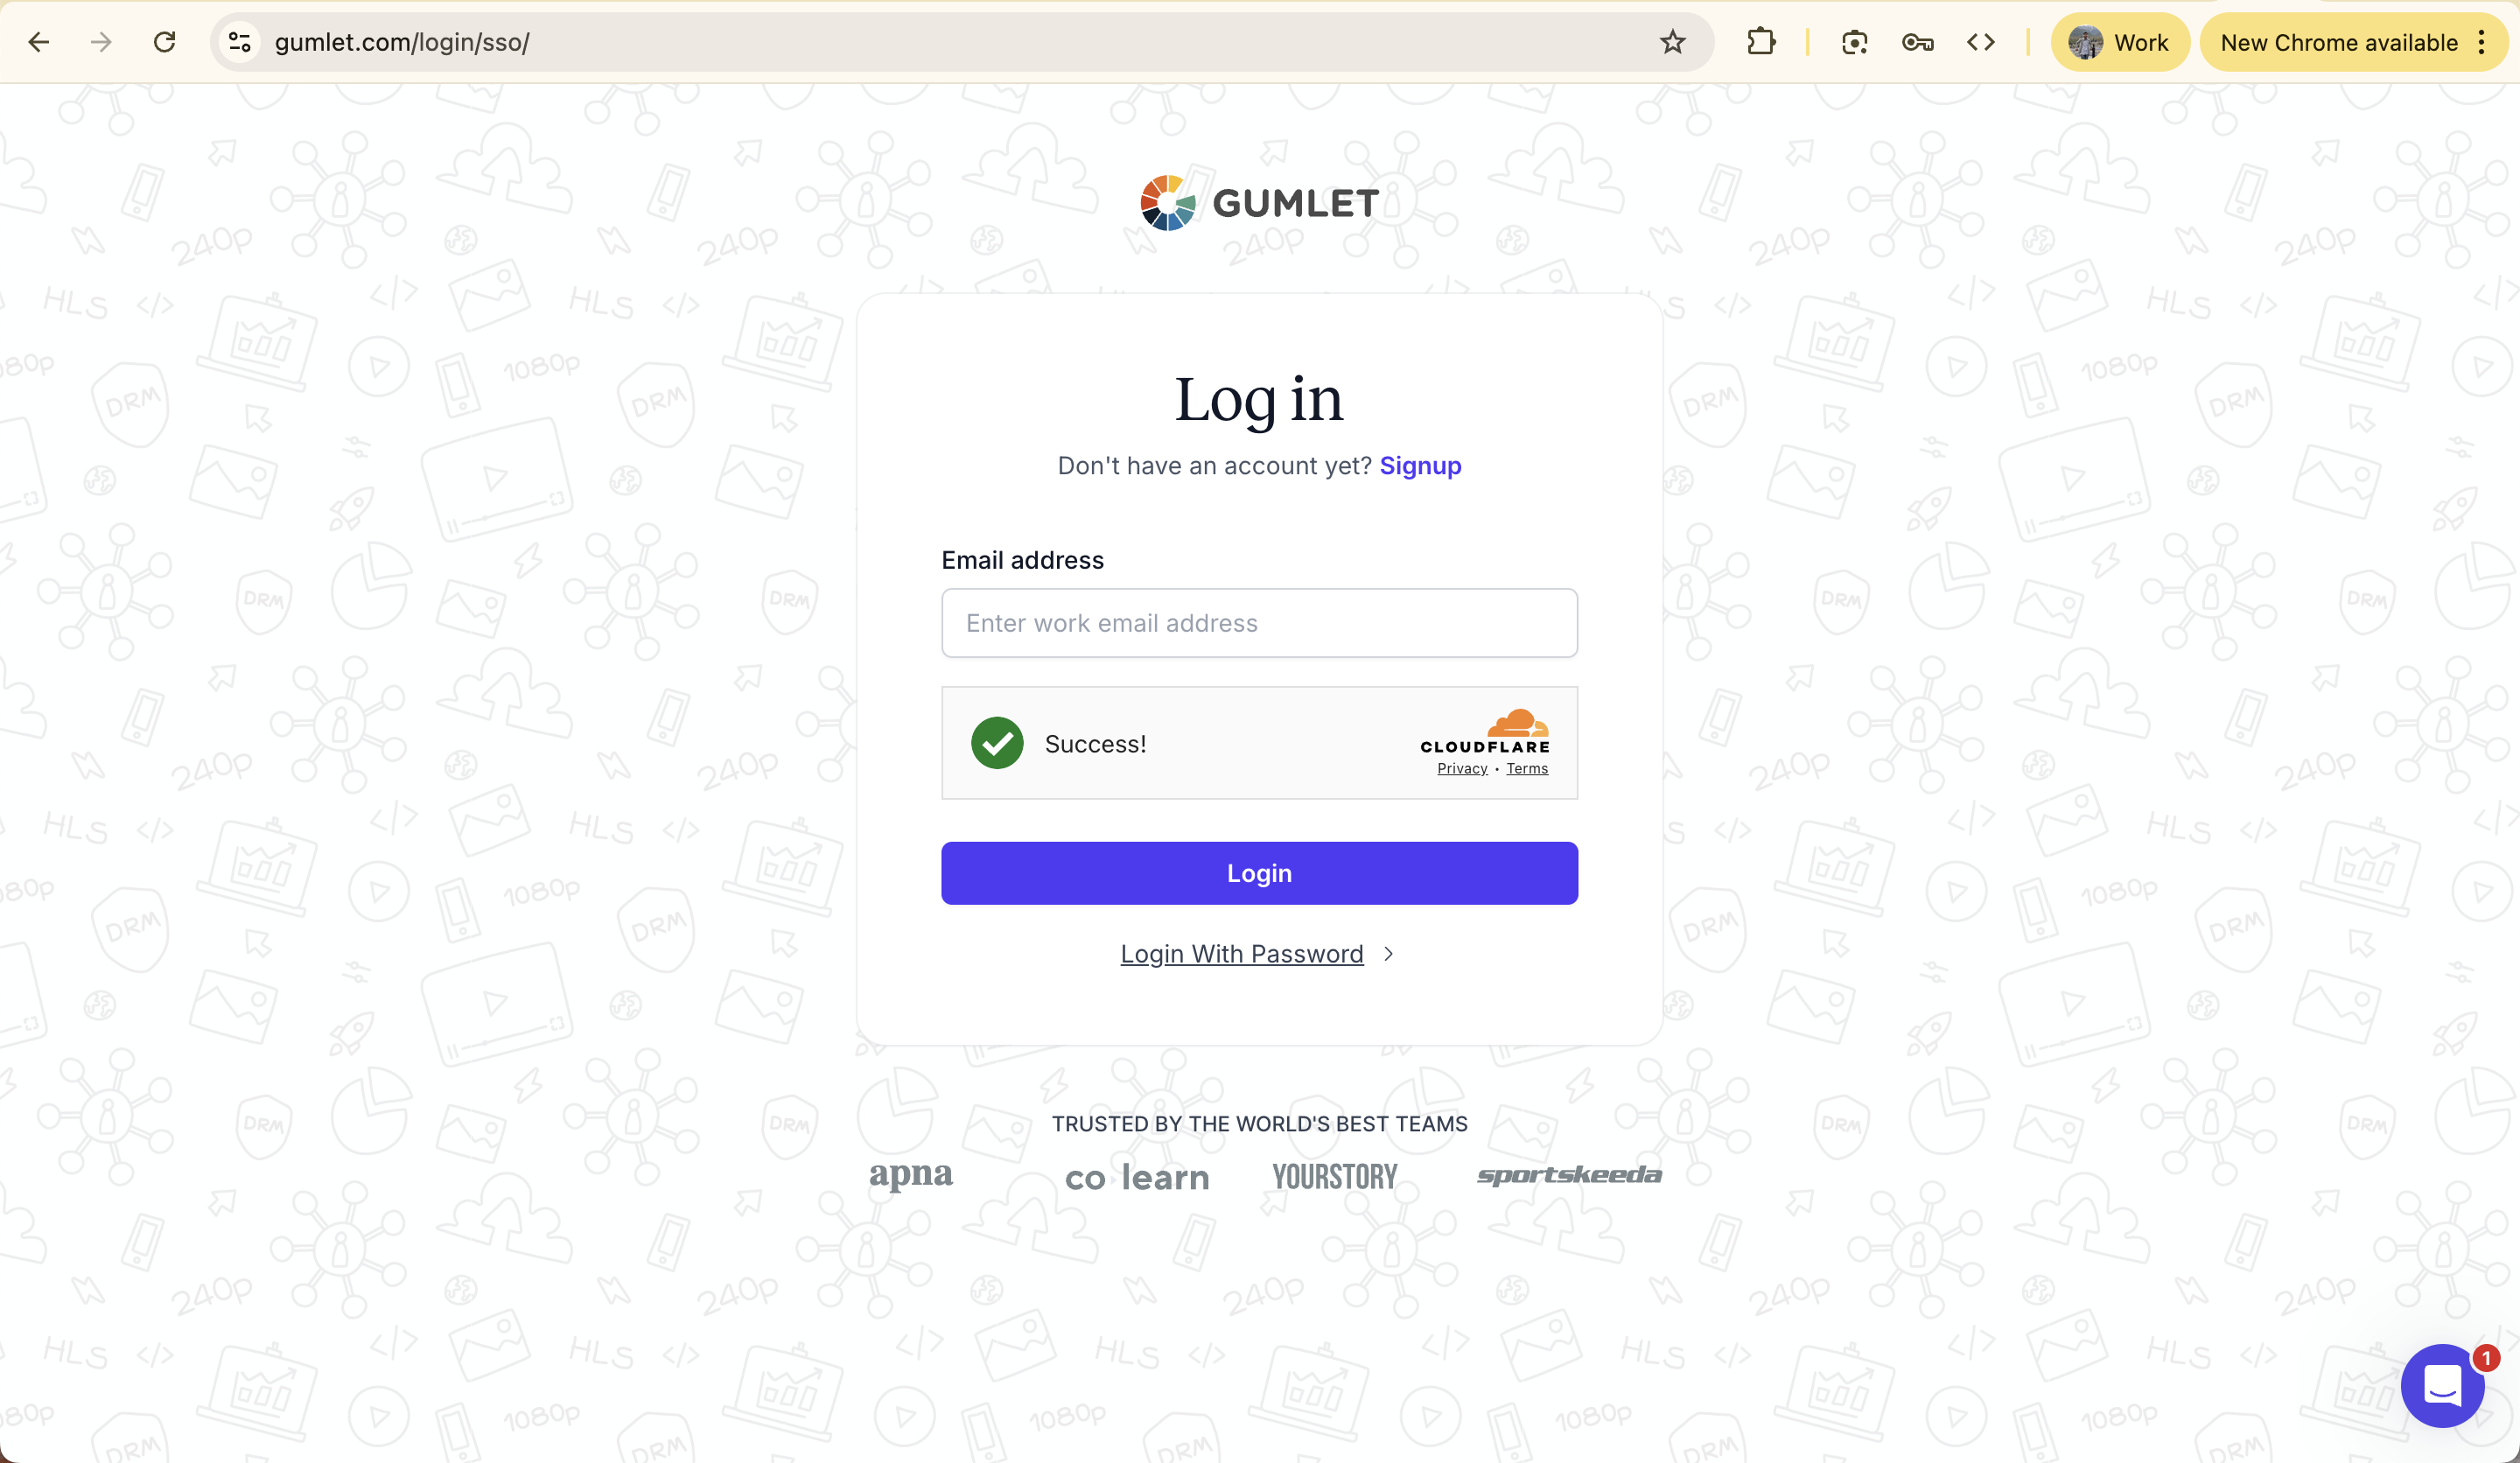
You can also use Gumlet SSO login page for signing in to Gumlet directly.
Disable SSO login on Gumlet
to disbale SSO login for your organization follow this steps
- Login to Gumlet using Admin account
- Goto Organization setting -> SSO page
- Click on Disable button and confirm with Yes to remove SSO feature.
Updated 5 months ago