Shopify
How does Gumlet Shopify Extension works.
Shopify is an e-commerce platform that has gained significant traction in recent years, thanks to its comprehensive feature set, ease of use, and affordable pricing for starting an e-commerce store.
Integrating Gumlet on the Shopify store improves image quality and delivery speed. Here are the steps to optimize images on your Shopify website.
Step 1: Configure Shopify origin on Gumlet
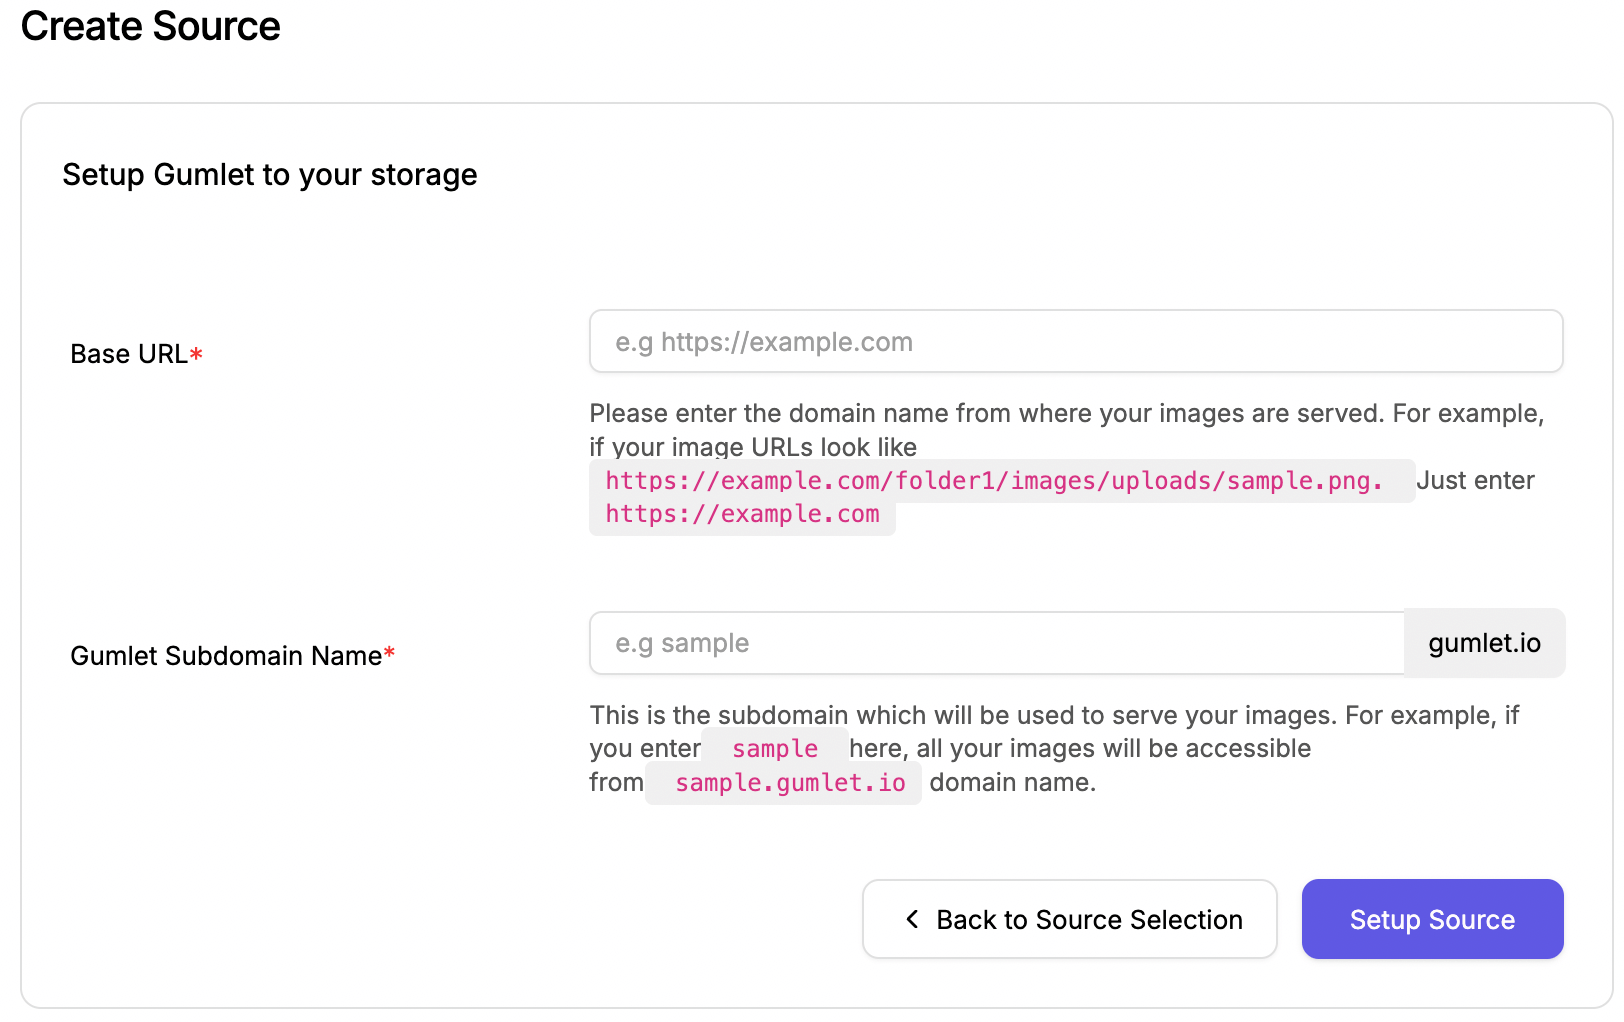
Go to Create Source on Gumlet dashboard and select Web Folder as the source type. You need to add Base URL in the input. In Shopify, this is your CDN base URL, i.e. https://cdn.shopify.com or https://cdn2.shopify.com.
You can check this under the network panel tab in Chrome, shown in the screenshot below:
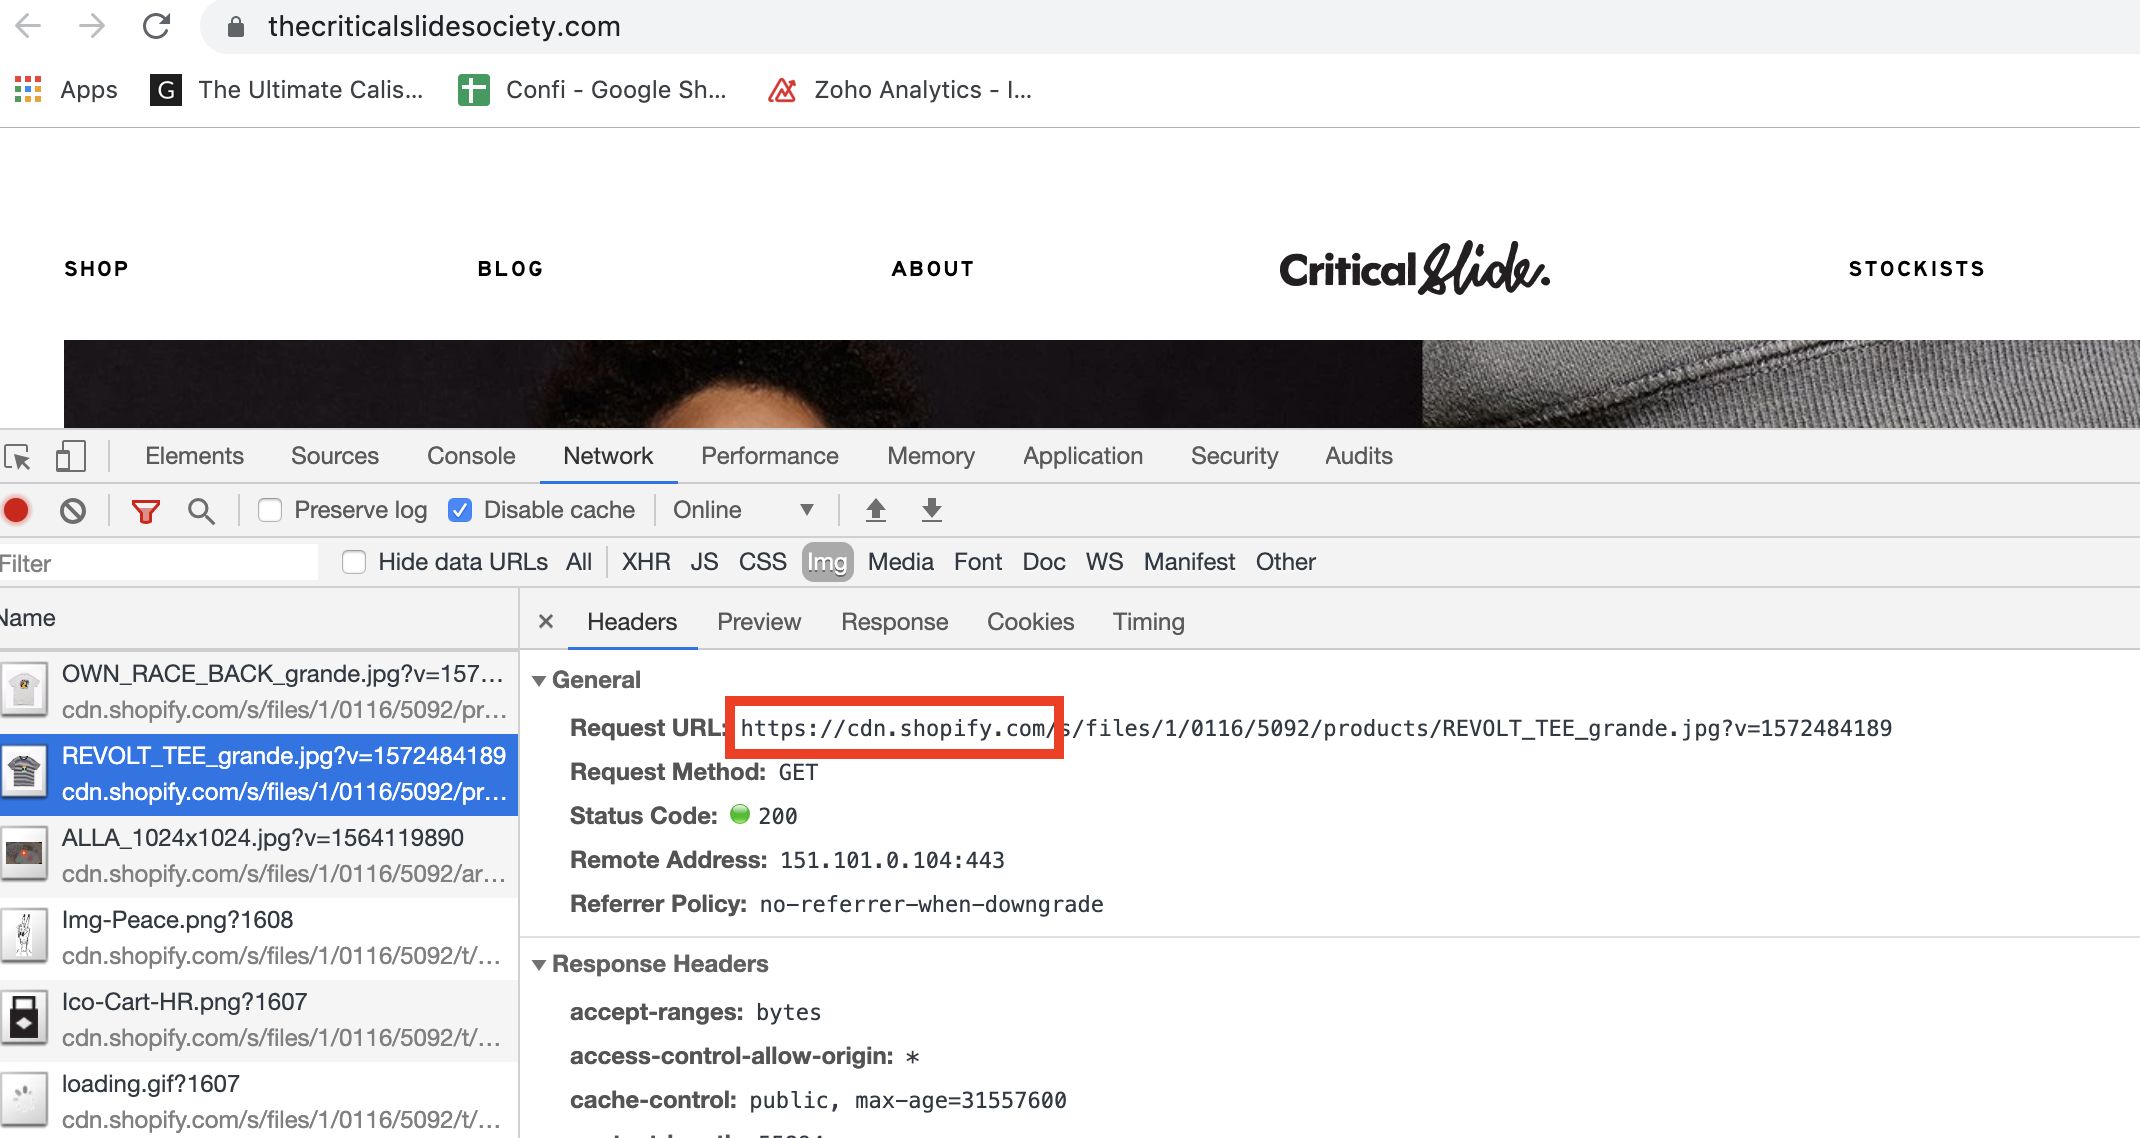
Please add it to the Gumlet dashboard Base URL field.
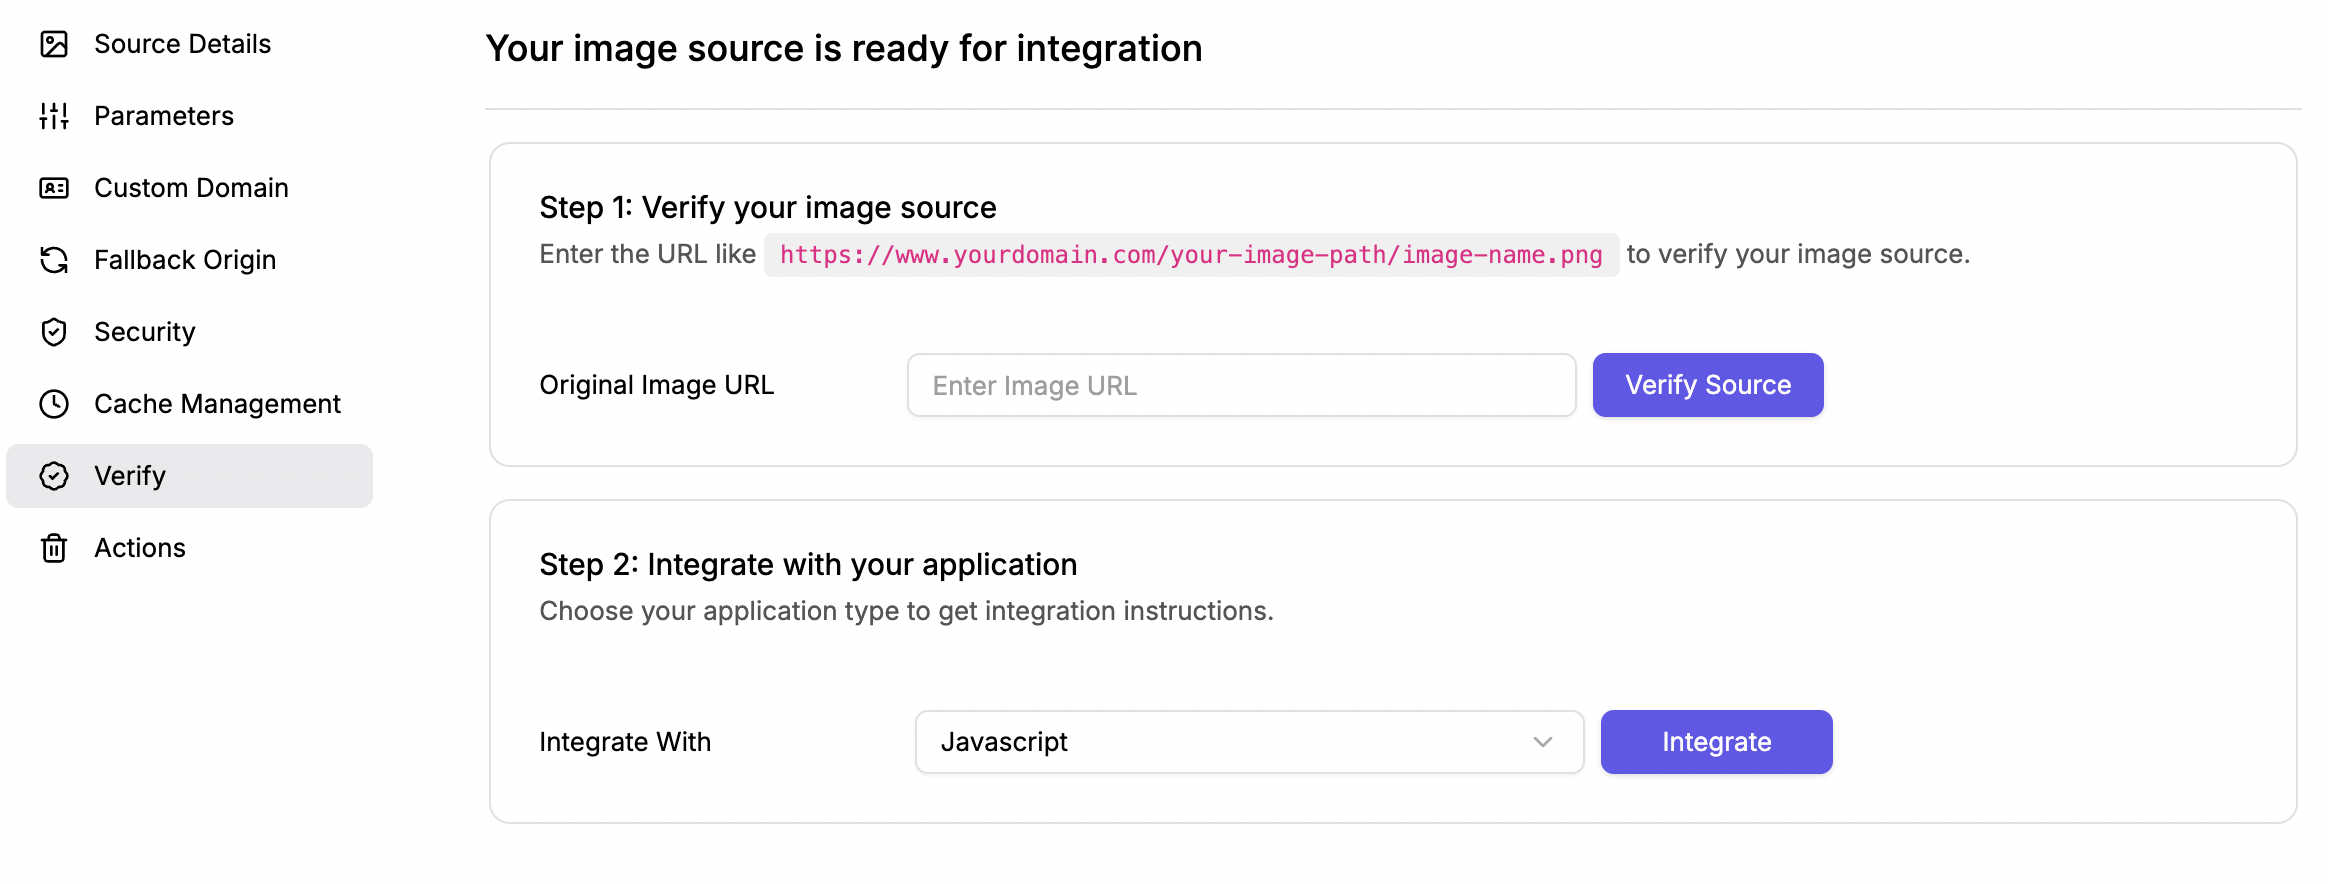
Step 2: Verify Source
Please add any Shopify URL in the next screen and click on the button Verify Setup. If everything is fine, it will show that the source is successfully set up.
Step 3: Create settings_schema.json
If the above image is displayed correctly, we can now make the necessary changes in our Shopify settings and theme files to switch the image delivery and optimization to Gumlet.
From your Shopify admin, click "Online Store"> "Themes". Find the theme you want to edit, click the ... button, and then click Edit HTML/CSS.
Under Config, click settings_schema.json and copy the code below as the last section of the config file and hit save.
{
    "name": "Gumlet",
    "settings": [
        {
            "type": "paragraph",
            "content": "Check out Gumlet's [Gumlet.com and Shopify integration](https://docs.gumlet.com/update/docs/shopify) to learn more about this."
        },
        {
            "type": "checkbox",
            "id": "enableGumlet",
            "label": "Enable Gumlet"
        },
        {
            "type": "text",
            "id": "gumletUrl",
            "label": "Gumlet url endpoint",
            "info":"The source domain you set within Gumlet. Example: `https://example.gumlet.io/`."
        },
        {
            "type": "text",
            "id": "gumletShopifyCdnUrl",
            "label": "Shopify CDN domain",
            "info":"Do not change this unless you have a proxy in place. Not sure? Leave it as is."
        }
    ]
}
Step 4: Create gumlet.liquid file
Create a new file gumlet.liquid under the Snippets directory. Please copy the code below into that file, and save it
{% capture GUMLET %}
 {% comment %}
 <!--
 Convert a Shopify CDN path into an Gumlet path, with parameters.

 * Refer to the Gumlet documentation to learn about all the available parameters: https://docs.gumlet.com/reference/image-transform-size
 -->
 {% endcomment %}
 {% if settings.enableGumlet %}
 {% for i in (1..1) %}
 {% comment %}
 <!-- Check to ensure the src exists and that the Gumlet url theme settings are not blank. If blank, stop! -->
 {% endcomment %}
 {% unless src or settings.gumletUrl != blank %}
 {{ src }}
 {% break %}
 {% endunless %}

 {% comment %}
 <!-- Check to ensure the src has the Shopify CDN url in it. If it doesn't this does not need to run any further -->
 {% endcomment %}
 {% assign cdnUrl = settings.gumletShopifyCdnUrl | strip %}
 {% unless src contains cdnUrl %}
 {{ src }}
 {% break %}
 {% endunless %}

 {% assign gumletUrl = settings.gumletUrl | strip %}

 {% comment %}
 <!-- Create a list of all the Gumlet filters we want to use -->
 {% endcomment %}
 {% assign filters = 'bri,con,cs,exp,gam,high,hue,invert,sat,shad,sharp,usm,usmrad,vib,auto,bg,blend,bm,ba,balph,bp,bw,bh,bf,bc,bs,bx,by,border,pad,faceindex,facepad,faces,ch,chromasub,colorquant,dl,dpi,fm,lossless,q,mask,nr,nrs,colors,palette,prefix,dpr,flip,or,rot,crop,fit,h,rect,w,blur,htn,mono,px,sepia,txt,txtalign,txtclip,txtclr,txtfit,txtfont,txtline,txtlineclr,txtpad,txtshad,txtsize,txtwidth,trim,trimcolor,trimmd,trimpad,trimsd,trimtol,mark,markalign,markalpha,markbase,markfit,markh,markpad,markscale,markw,markx,marky' | split:',' %}

 {% comment %}
 <!-- Build up the list of filters to add to the url -->
 {% endcomment %}
 {% assign imgWithQuerystring = "?" %}

 {% if src contains '?' %}
 {% assign imgWithQuerystring = '' %}
 {% endif %}

 {% for _filter in filters %}
 {% if [_filter] %}
 {% assign imgWithQuerystring = imgWithQuerystring | append:_filter | append:'=' | append:[_filter] | append:'&' %}
 {% endif %}
 {% endfor %}

 {% assign modifySrc = src | split:'?' | first | append: "?" %}
 {% assign newSrc = modifySrc | strip | replace:cdnUrl,gumletUrl | append:imgWithQuerystring %}
 {% endfor %}

 {{ newSrc | default:src }}
 {% else %}
 {{ src }}
 {% endif %}
{% endcapture %}{{ GUMLET | strip | replace:'  ' | strip_newlines }}
Step 5: Enable Gumlet
Navigate to Online store ➡️ Themes ➡️ Customize theme. In the sidebar, under general settings, open Gumlet and enable it. Fill out the two fields below:
- Default URL endpoint - It should be
https://example.gumlet.io - Shopify CDN domain - Its value should be
//cdn2.shopify.comor//cdn.shopify.com
Hit the Save button.
Step 6: Edit theme files
Now we get to editing your theme files. We first need to identify the files responsible for the image output on your store and begin editing them.
Backup your theme filesBefore making changes in these files, it is recommended that you download and save them securely to be able to restore it later, in case of error.
The exact process will vary depending on your theme, but the basics will be the same. Find places in your theme where existing images are being output, and replace them with the Gumlet Liquid tag you created. Here's an example:
Before:
{{ product.featured_image }}After:
{% assign feat_img_url = product.featured_image  | image_url %}
{% render 'gumlet', src:feat_img_url w:600 %}
Here's another example of using Gumlet to build a responsive image using quicklysrcset and sizes:
{% assign feat_img_url = product.featured_image  | image_url %}

<img
 src="{% render 'gumlet', src:feat_img_url w:960 %}"
 srcset="
 {% render 'gumlet', src:feat_img_url w:320  %} 320w,
 {% render 'gumlet', src:feat_img_url w:480  %} 480w,
 {% render 'gumlet', src:feat_img_url w:540  %} 540w,
 {% render 'gumlet', src:feat_img_url w:640  %} 640w,
 {% render 'gumlet', src:feat_img_url w:720  %} 720w,
 {% render 'gumlet', src:feat_img_url w:800  %} 800w,
 {% render 'gumlet', src:feat_img_url w:960  %} 960w,
 {% render 'gumlet', src:feat_img_url w:1280 %} 1280w,
 {% render 'gumlet', src:feat_img_url w:1600 %} 1600w
  "
 sizes="(min-width: {{ settings.page_width }}px) {{ settings.page_width | minus: 100 | times: media_width | round }}px, (min-width: 990px) calc({{ media_width | times: 100 }}vw - 10rem), (min-width: 750px) calc((100vw - 11.5rem) / 2), calc(100vw - 4rem)"
 alt="{{ media.preview_image.alt | escape }}"
 {% unless lazy_load == false %}loading="lazy"{% endunless %}
/>
FAQs
Can I disable Gumlet with a single click?
Yes, you can enable and disable Gumlet in your Shopify store with a single click. Navigate to Online store ➡️ Themes ➡️ Customize theme. In the sidebar, under general settings, open Gumlet and enable/disable it.
Can Gumlet automatically detect the right image dimension and load it?
Yes, we will automatically detect the right parameters for image size and apply them. It will make sure that Gumlet delivers optimum-sized images to your end users.
Updated 12 months ago