Getting Started
Detailed guide for live streaming through gumlet
Gumlet live streaming API makes it easy to push a live stream and play it back at high quality for a global audience. This tutorial will guide you on how to live stream your content with Gumlet live streaming.
Note
Currently, Live Video Streaming features and APIs are in private beta. Please contact us at [email protected] to try this out
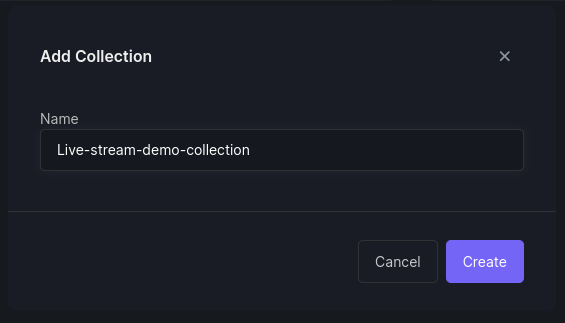
Create Live Video Collection
To use live streaming APIs first step is to create a new live video collection.
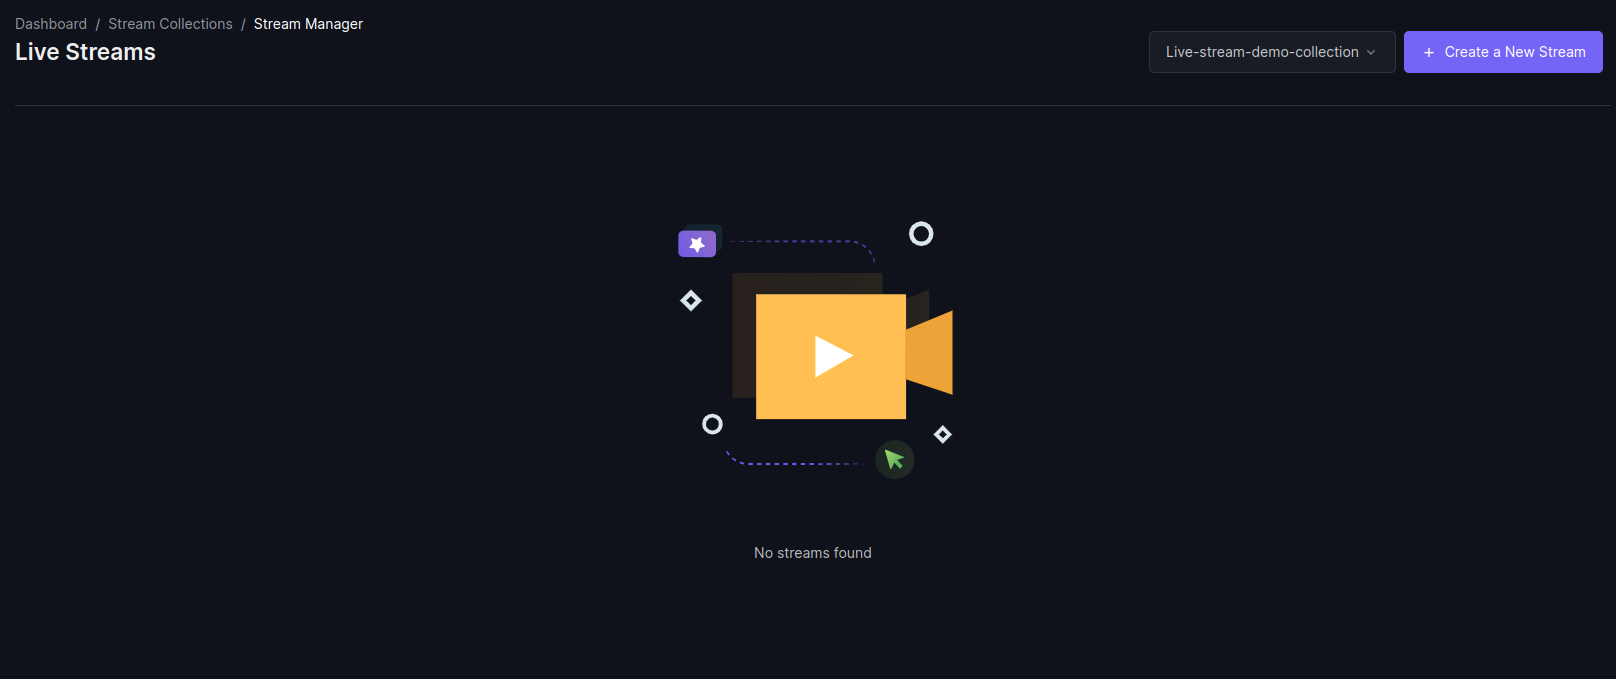
Once a live video collection is created you can start live streaming your content with either Gumlet Dashboard or REST APIs.
Using Dashboard
1. Go to the stream manager of the above-created collection
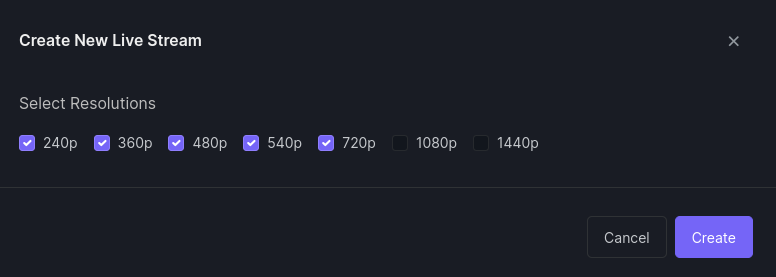
2. Start new live stream and set necessary parameters
3. Copy Stream URL (RTMP) and start streaming
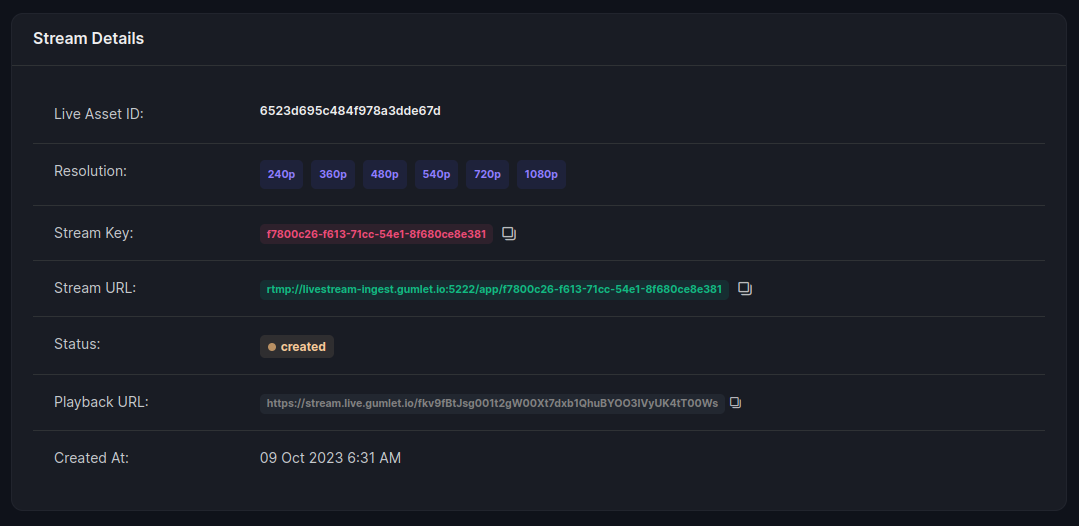
4. Play live stream
Play your live stream using HTTP Live Streaming (HLS) playback URL provided in the above step on any capable device.
5. Once done with streaming your content, mark the live stream complete
Using REST APIs
1. Create Live Stream Asset
The first step is to create a live stream asset with parameters as per your requirement.
The response will include a stream_url which can be used as RTMP server URL to ingest live stream content.
curl -L -X POST 'https://api.gumlet.com/v1/video/live/assets' \
-H 'Authorization: Bearer <YOUR_API_KEY>' \
-H 'Content-Type: application/json' \
-d '{
    "live_source_id": <LIVE STREAM COLLECTION ID>,
    "resolution": "240p,360p,480p,720p,1080p"
}'
{
    "status": "created",
    "stream_key": "6165251168d80250ed8d44cd",
    "live_asset_id": "6165251168d8022abd8d44cc",
    "live_video_source_id": <LIVE STREAM COLLECTION ID>,
    "input": {
        "resolution": [
            "240p",
            "360p",
            "480p",
            "720p",
            "1080p"
        ]
    },
    "stream_url": "rtmp://livestream-ingest.gumlet.io:1935/app/6165251168d80250ed8d44cd",
    "output": {
        "playback_url": "https://video.gumlet.io/<LIVE STREAM COLLECTION ID>/<LIVE ASSET ID>/master.m3u8"
    },
    "created_at": 1634018577862,
    "updated_at": 1634018577862
}
2. Start broadcasting
Using stream_url from the above step, live stream your content with the help of software that can push a RTMP stream.
And use Gumlet Live Stream Dashboard to view real-time analytics.
3. Play live stream
Play your live stream using HTTP Live Streaming (HLS) playback URL provided in the above step on any capable device.
4. Mark live stream complete
Once Gumlet stops receiving data at stream_url it marks the live stream in a disconnected state.
But you can mark your live stream complete using a PUT request on <https://api.gumlet.com/v1/video/live/assets/:live_asset_id/complete>.
Once a live asset is marked complete, it can no longer be used to ingest the live stream on Gumlet.
Configure OBS as Broadcast Software with Gumlet
OBS is a free and open-source software for video recording and live streaming.
It can be used as broadcasting software to push the RTMP stream to Gumlet.
1. Download and install OBS from here.
2. Add Gumlet RTMP server URL and stream key in OBS settings

3. Set output resolution and FPS

4. Select input source and start streaming
OBS give you a lot of input source (Window Capture, Screen Capture, local video file etc) options to select from according to your requirement.
After selecting a input source click on Start Streaming button on bottom-right corner in OBS.
Updated 25 days ago