Timeline, Settings & My Library
Understand the main areas of the Gumlet editor - the timeline where you edit, Settings where you manage your project, and My Library where uploaded files live.
Editor layout
| Area | Purpose |
|---|---|
| Header | Save, Replace Video, Help, Theme (Light / Dark) |
| Sidebar | Add content (Video, Text, Image, Background, Zoom) and open Settings |
| Canvas | Live preview; drag and resize overlays |
| Timeline | Arrange, trim, split, and layer clips |
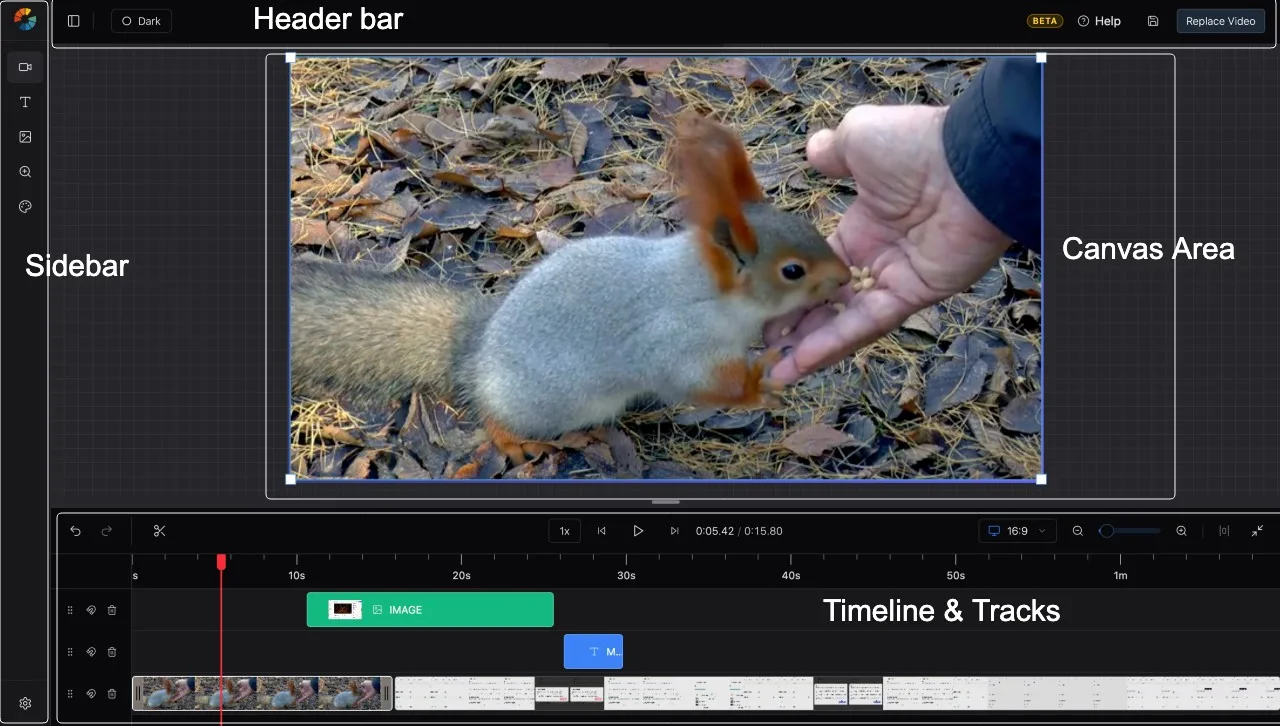
Timeline
The timeline is where your video takes shape. Clips and overlays appear as blocks on horizontal tracks.

Tracks
- Your Gumlet source video loads on the timeline when you open the editor.
- Add more tracks by placing items on empty rows, or use existing tracks for layering.
- Track header controls:
- Reorder track — drag the grip to move the track up or down
- Magnet — enable/disable magnetic timeline (snaps clips together)
- Delete track — remove an empty or unwanted track
Playhead and transport
| Control | Action |
|---|---|
| Click timeline | Move playhead (seek) |
Space | Play / Pause |
⌘/Ctrl + ← | Jump to start |
⌘/Ctrl + → | Jump to end |
| Time display | Shows current / total duration |
Zoom
| Control | Action |
|---|---|
| Timeline Zoom slider | Zoom in/out on the timeline |
| Zoom Out / Zoom In buttons | Step zoom |
| Reset Zoom | Return to default |
⌘/Ctrl + - | Zoom out |
⌘/Ctrl + + | Zoom in |
⌘/Ctrl + Scroll | Zoom with mouse wheel |
Context menu
Right-click a selected item for Duplicate, Split at playhead, and Delete.
Settings
Open the sidebar Settings icon (gear).
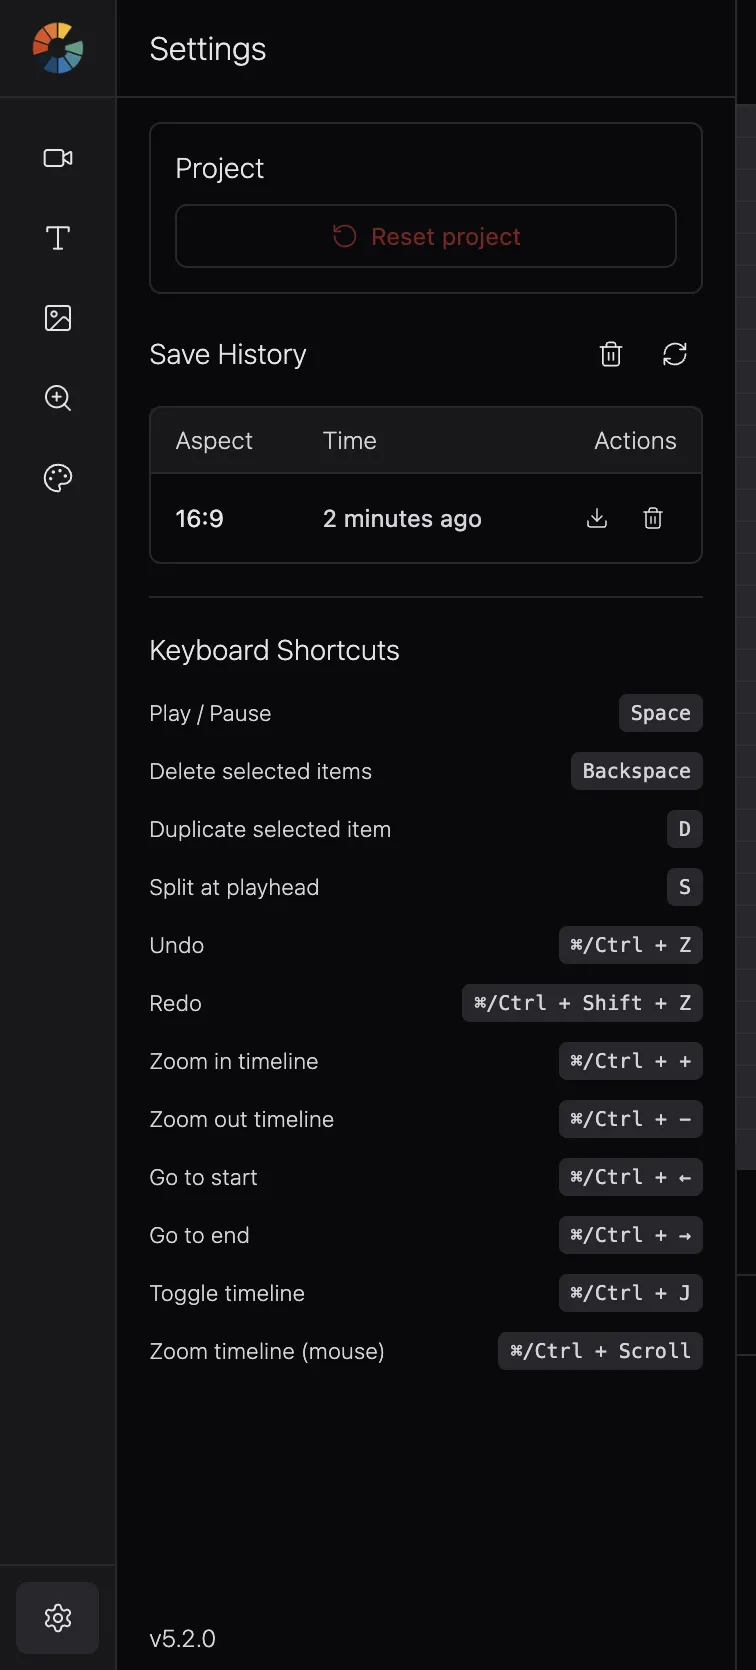
Reset project - permanently deletes the saved timeline for this asset on the server and in your browser. Use only when you want to start over. This cannot be undone.
Save History
Lists autosave checkpoints for the current asset. Use Load this save to restore an earlier version of your timeline.
Keyboard Shortcuts
Full list of editor shortcuts. See also Trim, split, cut & crop.
Save your project
| Action | How |
|---|---|
| Autosave | Every 5 seconds to browser storage |
| Manual save | Header save icon or ⌘/Ctrl + S |
| Cloud sync | Timeline syncs to Gumlet project storage while you edit |
Cloud vs local on reload
If you return and both a cloud snapshot and local autosave differ, choose:
- Load cloud version — use the last synced cloud copy
- Keep my work — continue from local autosave
My Library (uploaded files)
My Library appears in the Video and Image sidebar panels. It holds files you upload from your device.
Upload
| Panel | How to upload |
|---|---|
| Video | Click the Upload icon in the panel toolbar |
| Image | Click Upload inside the My Library tab |
How files appear
- Grid of thumbnails with filename, file size, and upload time
- Click a file to add it to the project, or drag onto the canvas/timeline
- Hover a file and click trash to remove it from the library
Note: Clearing browser site data removes My Library files. You will need to re-upload them.
Sidebar panels reference
| Icon | Panel | Use for |
|---|---|---|
| Video | Video | Upload and add video clips |
| Text | Text | Text overlays and titles |
| Image | Image | Upload and add images |
| Background | Background | Composition background color |
| Zoom | Zoom | Zoom In / Zoom Out effects on clips |
| Settings | Settings | Project reset, save history, shortcuts |