# Welcome Gumlet is an all-in-one platform for storing, transcoding, and streaming media files. Here, you get all the tools to get started in minutes! ## Videos ## Images --- updatedAt: 2026-03-05T14:45:20.000Z --- # What is Gumlet? Publishing a video online on your own, without using popular video hosting platforms like YouTube is hard. It involves transcoding your original video files in various resolutions, figuring out correct bitrates, selecting the optimal formats, and many other settings. Not to mention the computing cost, engineering efforts, and time spent to build and maintain a tech pipeline. To avoid all of the above, Gumlet has built a video product that offers ⚡️**Automatic Optimisation**: Get the highest video compression output while keeping the video quality the same. You can access optimized videos from anywhere in the world. 🤖 **Auto Format**: The output video stream will have multiple formats available. (HLS or MPEG-DASH). This lets the client device choose the most efficient stream. 🌼 **Single, Simple, Solution**: We manage and optimize the entire pipeline of transcoding > storage > streaming > analytics for you. 📋 **Lead Forms and CTA**: You can embed lead forms and CTA on your videos to power your marketing. 🌎 **CDN delivery**: As always, the videos are delivered via a world-class low-latency CDN for the best viewing experience. 🛠 **Powerful API:** Many operations like overlay, crop, clip, etc. are available. [Read documentation](/reference/tag/video-assets/post/video/assets). 🔐 **DRM Support:** Protect your content with DRM to prevent unauthorized access and downloads. # Quick Start Guide Upload your first video in less than 1 minute When you first log in to the Gumlet dashboard, a sample video is ready for you to get started. ![](/7b5df485433e-quick-start-guide-video-01.webp) Do more with new [video dashboard](https://dash.gumlet.com/video/dashboard): * Upload & Import Videos * Customize Player Experience * Create a branded video channel * Create playlists Below are the steps to upload videos and start streaming: ### 1. Upload Video You can upload videos to a workspace by clicking on the `Browse Video` button. You choose files from your device. You can also import from other storage providers such as OneDrive, Dropbox, Google Drive, or a URL. ![Video Upload Box](/2b950d725617-quick-start-guide-video-02.webp) You can also drag and drop videos directly inside this box for quick upload ### 2. Start Streaming Gumlet enables high-speed processing of your videos, so they are stream-ready in under 5 seconds. You can click on the video, go to the video details page, and click the **Embed & Share** button to access different options for starting the stream. ![Video Settings Page](/b430b6bfb940-quick-start-guide-video-03.webp) _Tip_: You can edit player settings and customize player to match your brand. --- updatedAt: 2026-03-05T14:47:57.000Z --- # Publish First Video Embed & share or use the playback URLs On the video details page, the **Embed & Share** button will allow you to publish your videos. ![Video Settings Page](images/publish-first-video-01.webp) ## Embed Video To play videos on your website, blog, or any other CMS, Gumlet's embed code is an easy way to get started. It has a player, video meta configuration, SEO snippet, and security features. You can configure your player settings under [Player Customizations](/video/player-customization). ![Embed Video](images/publish-first-video-02.webp) **Tip**: For advanced embed parameters, check it out [here](/video/embed-stream). ## Embed in Email With Gumlet, you can Embed Videos in your emails and take the reader to a specific page with the video. You can customize the embeddable thumbnail size and the destination URL. Select an email client for native support and **Copy Embed Code** to engage your audience. ![](images/publish-first-video-03.webp) ## URLs There are multiple options to share your videos. You can share a video page, thumbnail, playback URL, and MP4 URL. ![](images/publish-first-video-04.webp) ### Share URL A Gumlet-hosted video page that can be shared with your audience across emails, social media, and other channels without designing a page. It supports all the configurations that you configured for your workspace. ### Thumbnail URL The thumbnail can be used as a poster to promote a movie, series, course, or session. The thumbnail URL supports all [image operations](/image/image-transform-api/image-transform-size) listed here. ### Playback URL We provide you with two types of playback URLs: * M3U8 * DASH (MPEG-DASH) ### MP4 URL The MP4 is a widely used format across different platforms, CMS, and apps. You can directly use the MP4 URL within the HTML's video tag. If an MP4 file is generated, you can let your users download the video, or you can hide/show the download button. ## WordPress Video Plugin You can also use Gumlet's WordPress plugin for videos. Here is the guide to install the plugin and use it - [Gumlet WordPress Video Plugin](/video/embed-stream/gumlet-wordpress-video-plugin) --- updatedAt: 2026-10-28T00:00:00.000Z --- # Video FAQs Frequently asked questions for all your video needs ## 🎬 Video Management ### How do I download my original videos? You can download the original video from the video settings page. Go to **Video CMS** and click on the video you want to download. You will see a menu on the right-side panel named **Download**. Click on the `Download Video` button to download the original. ### How to move videos from Vimeo to Gumlet without downloading and uploading manually? Use the Vimeo import integration: connect your account, select files/folders, then confirm [Processing Settings](/video/manage-videos/processing-settings-section) before import. Full steps: [Import from Vimeo](/video/upload-videos/import-from-vimeo). ### Can I import videos directly from YouTube using a URL? Currently, you cannot import videos directly from YouTube via URL. This feature is on our roadmap and you can track its status [here](https://feedback.gumlet.com/feature-requests/p/import-from-youtube). In the meantime, you can upload videos using supported methods: your device, Google Drive, Dropbox, Amazon S3, Vimeo, or Wistia. See [Upload Videos](/video/upload-videos) for more information. ### How can I download multiple videos with one click? To download multiple videos in one click, you need to use the API. Please use list asset API and get mp4 URLs and mp4 output playback URLs like: `https://video.gumlet.io/{workspace_id}/{asset_id}/main.mp4` Alternatively, you can use our [ChatGPT plugin](https://chatgpt.com/plugins/plugin_asdk_app_6a956527ac488191b306c03418ae081f) to do it using chat. ### What is a storage minute? Storage minutes is the number of input video minutes that Gumlet stores. For example, if you bring a 60-minute video to Gumlet, you will use 60 minutes of storage in your account. ### Is there a limit on the number of video files that can be uploaded via drag-and-drop? There is no limit to the number of files that can be uploaded via drag-and-drop. However, we recommend uploading no more than 100 files at a time; it's always safer to upload fewer. ### How can I move a video from one workspace to another workspace in the dashboard? You cannot transfer videos between workspaces. The workspace entity is designed to be separate and should not move data across. ### I deleted some videos, but the video storage is not updating. What to do? Sometimes it takes time for the storage to update after deleting the videos. If it still doesn't reflect after 30 minutes, our team can perform a manual check. ### Does Gumlet prevent or warn about uploading duplicate files? Gumlet does not warn you or prevent you from uploading the same file again. Each upload is treated as a new asset with its own asset ID, even if the file content is identical, which can result in duplicate videos in your library. ### Does increasing the 360-minute video limit cost more? No, the pricing remains the same when you upgrade the 360-minute video limit. ### How do I rotate a video 90 degrees? Currently, our platform does not support 90-degree video rotation. You can submit a feature request [here](https://feedback.gumlet.com/). ### Does the platform support anamorphic, vertical, square, and wide videos without restrictions? Yes. You can upload vertical, square, wide, and anamorphic videos without any issues. When you copy the embed code, it automatically accounts for the video's aspect ratio so it displays correctly. ### Where can I locate the comments option for video reviews? You can find the comments in the Video Details section of the video review. ### Can channel members comment on videos, or do I have to invite people? The channel members cannot comment on the videos. The comments in Gumlet are for internal teams with use cases like pre-publish review. If you want someone to add a comment, you need to invite people in your account settings. ### Why does Gumlet show processed sizes larger than my original video upload? When you upload a video, Gumlet transcodes it into multiple resolutions and formats (for example, HLS, DASH, MP4) to support adaptive playback. The asset size shown in the dashboard is the total of all these output variants, which can be 2× (or more) than the original file size. During playback, viewers only download the specific resolution they need, and only that data counts toward your bandwidth usage. ## 📊 Analytics & Privacy ### Does Gumlet store my data? Gumlet stores video views and other analytics data to provide you with a detailed analysis of your videos' performance. At Gumlet, we believe privacy is most important, so you can disable analytics data collection in the workspace settings [here](https://dash.gumlet.com/video/workspaces). ### How does Gumlet's video bandwidth billing work, and how can I monitor my usage? All plans include a monthly bandwidth quota in GB; however, you can use more bandwidth and pay for the additional usage. You can check the pricing plans [here](https://gumlet.com/pricing). Bandwidth is consumed per view, based on the resolution actually streamed — not the original file size (see [why processed sizes look larger than the original upload](#why-does-gumlet-show-processed-sizes-larger-than-my-original-video-upload)). For example, a viewer watching a 1 GB 4K video at full quality consumes about 1 GB; if playback quality changes mid-stream, usage is the sum of the chunks actually downloaded at each resolution. As a rough guide, a 2,000 GB monthly bandwidth allowance typically covers approximately 1,800–2,200 full views per month, though this varies with your videos' average size and resolution mix. To monitor usage: - Track bandwidth, storage, and transcoding minutes in [Video Usage Analytics](https://dash.gumlet.com/video/analytics). - Review your current usage and estimated invoice on the [Billing page](https://dash.gumlet.com/organization/billing) — see [Overage Billing](/billing/overage-billing) for how the billing cycle and overage charges work. - Set up proactive [Alerts](/video/usage-monitoring/alerts) on bandwidth, transcoding, or storage usage so you're notified before you approach your plan limit. ### How to use video analytics with my video player? We have video SDKs available for different video players in our documentation; feel free to refer to those here [Insights SDKs](/video-analytics/analytics-sdks). Gumlet's embed player natively supports video analytics; please consider using it if it's feasible. ## 💬 Subtitles & Captions ### How to add subtitles to videos? There are two ways to add subtitles to videos in Gumlet: 1. Enable AI subtitles in [processing settings](https://dash.gumlet.com/video/processing) (uses [AI credits](/billing/ai-features) on eligible accounts). 2. Upload SRT files from the video settings page. Details: [Video Settings → Subtitles](/video/manage-videos/video-settings#subtitles). ### Why are subtitles not being detected in my videos? If your video is musical or a song, it may not detect the correct language. If that's not the case, let us know the asset ID, and our tech team will review it. ### How to prevent AI-generated subtitles for my videos? Turn off **AI generated subtitles** in [processing settings](/video/manage-videos/processing-settings-section#ai-generated-subtitles) and save. New uploads (and [reprocessed](/video/manage-videos/video-settings#reprocess-video) videos) will skip AI subtitles. ### Can I change the color of the subtitles? Yes you can fully customise look and feel of the subtitles. Visit [Player Settings](https://dash.gumlet.com/video/player) section of the workspace and you will see *Captions Settings*. You can adjust the look of subtitles there. ### How can I show a specific subtitle when sharing a URL? There is no parameter to force a specific subtitle on a share URL. The default subtitle follows the original audio language. ## 🌐 Embedding & Integration ### Can I embed videos on third-party Learning Management Systems (LMS) and platforms? Yes, you can embed videos on any platform that supports embedding. Gumlet provides iframe (HTML) code, HLS (M3U8) URL, MP4 URL, and DASH (MPD) URL. Gumlet also supports [Embed.ly](https://embed.ly/), [oEmbed](https://oembed.com/), and [Iframely](https://iframely.com/). Gumlet can be used with Circle.so, WordPress, Medium, Thinkific, Moodle, Salesforce, Webflow, and custom-designed frameworks & tools. ### How do I integrate Gumlet and GetResponse? To integrate Gumlet with GetResponse, ensure you are using the correct embed URL format. Use the Gumlet embed URL `play.gumlet.io/embed/` instead of the share URL that begins with "Gumlet.tv." This should resolve the issue with embedding videos on your GetResponse page. ### Where is the workspace_id, as I am going to implement the Gumlet? You can get your Workspace ID directly on [dashboard](https://dash.gumlet.com/video/workspaces). Click `copy workspace id` button beside the workspace name and it should be copied to clipboard. ### Is there an API call to retrieve a list of all video titles and their corresponding HLS links in video title order? Use: `curl --request GET \ --url 'https://api.gumlet.com/v1/video/assets/list/workspace_id?sortBy=title&orderBy=asc' \ --header 'accept: application/json'` Or see [List Assets API](https://docs.gumlet.com/reference/tag/video-assets/get/video/workspaces/workspace_id/list) Alternatively, you can use our [ChatGPT plugin](https://chatgpt.com/plugins/plugin_asdk_app_6a956527ac488191b306c03418ae081f) and ask it to give you a list as a CSV. ### Why does my video play in lower resolution while the original video is HD / 4k? Gumlet player adjusts playback quality based on the container size and the device's internet speed. If the container playing the video is only 1080px, it won't display 4K video. Similarly, if the internet speed does not support high-quality streaming, our adaptive bitrate algorithm will automatically switch to a lower-resolution video. ## 🎨 Player Customization ### How can I change player settings? You can customize the player and settings as per your needs. Gumlet supports custom colors, logos, player settings (such as disabling or enabling controls), and more. It may take upto 10 minutes for the updated settings to take effect. ### How can I add a dynamic watermark, such as a user's email or ID? 1. Enable dynamic watermark in [Player Settings > Advanced Settings](https://dash.gumlet.com/video/player). 2. Pass `watermark_text` in the embed URL, for example: `https://play.gumlet.io/embed/{id}?watermark_text=EMAIL` Apple does not allow custom overlays such as watermarks during native iOS playback. If DRM is enabled on iOS, screen recording is already blocked, so a dynamic watermark is not required there. If the watermark is missing in an iOS app, log the embed URL and confirm `watermark_text` is present. ### Can you embed a Gumlet video on your website without displaying the play button? Yes, it's possible to embed a Gumlet video without displaying the play button. You can disable player controls in the player settings or pass `background=true` in the embed code. For more details, you can refer to the [documentation](/video/embed-stream). ### How can I remove the Gumlet logo from the player? Go to Player Settings and disable `Powered by Gumlet`. This is available on all paid Plans. ### How can I change the play icon color of a particular video in Gumlet? Use `player_color` param in embed URL: `https://play.gumlet.io/embed/?player_color=%F0F0F0` ### How can I increase the control size in the Gumlet player? Currently, increasing the control size in the Gumlet player is not supported. You can submit a feature request [here](https://feedback.gumlet.com/) for our product team to consider. ### How can I ensure my videos expand to full screen in WordPress? Use the [WordPress Video Plugin](https://wordpress.org/plugins/gumlet-video/) for best compatibility. ### How can I control the player using JavaScript? E.g., muting, changing playback speed, etc. Use our [Player.js](https://github.com/gumlet/player.js) library to control the embedded video. **Note:** This is not supported on standalone HTML files. ### How can I enable descriptions in embedded videos? Descriptions are not currently available in the embedded video player. If you’d like this feature, please submit a feature request. ## 🔐 DRM & Video Protection ### Do I need my own Widevine and FairPlay credentials to use DRM? No. Gumlet automatically adds Widevine and FairPlay credentials to your account, so you can upload videos and enable DRM in processing settings immediately—you do not need to apply on the Apple Developer Portal first. _Note: Enterprise accounts need to bring their own FairPlay credentials._ ### How can I prevent screenshots and screen recording when DRM is enabled? Ensure you have enabled DRM in your video profile settings: [Tutorial](https://gumlet.tv/watch/65dedb6f20c39971cd19c1b8/) ### How can I restrict playback so videos only play on my website? Enable Access Allowed Referrers in [Video Protection Settings](https://dash.gumlet.com/video/security) and add the domains (or app bundle IDs) that may embed your videos. Gumlet checks the HTTP Referer header and allows playback only from those hosts. After you save the whitelist, test playback from each domain and monitor analytics to confirm videos are not playing elsewhere. See [Video Protection Settings](/video/manage-videos/video-protection-settings-section) for wildcards, mobile apps, and related options. ### Do you encrypt videos to prevent them from being downloaded? Yes. Combine these based on how strictly you need to protect playback: 1. **Signed URLs and token authentication** — only authorized viewers can play the video. 2. **HLS encryption** — in Video Processing Settings, process as HLS so playback uses encrypted streams. MP4 output URLs can still exist for download or API use (for example `main.mp4` from the List Assets API). For videos you want to protect, share the embed or HLS/DASH playback URL rather than the MP4 link. ### My video is not castable. How do we fix the problem? - If DRM, dynamic watermarking, or domain whitelisting is enabled, casting won't be available. ### Thumbnail selection is not working on my DRM video. Is it related to DRM protection? Yes, DRM blocks frame extraction for thumbnails. This feature only with non-DRM videos. ### Can I use DRM with MP4 videos? We don't support DRM with MP4 videos. DRM can only be used with HLS / DASH video streams. ### Does Gumlet have a timer function that allows videos to be played for a limited period? Yes, you can use a time-expiry URL to generate a unique URL that expires after a set time. The video won't be playable after the expiry time. ## 💰 Monetization & Ads ### How do we implement AVOD in the Gumlet video? Use a VAST Tag URL. See: [VAST Tag Documentation](/video/player-customization#vast-tag) ### Does your video player support the pay-per-view (PPV) model or have an integration with Stripe? Not yet. Add your vote at [Gumlet Feedback](https://feedback.gumlet.com/) ## 🚀 Features & Roadmap ### Is there a feature similar to YouTube that suggests related videos to play at the end of a video? No current support. Upvote at [Related Videos Feedback](https://feedback.gumlet.com/feature-requests/p/related-videos) ## 👥 Users & Access ### If I add a user with the same email to different channels, does that count as one? Yes. A single email across multiple channels is counted as one user. ## 🛠️ Troubleshooting ### Why does the Gumlet dashboard show a "You're Offline" banner when my internet connection is working, and how can I fix it? This message can appear if the dashboard's connection check is blocked or cached. To resolve it: hard refresh the dashboard (Ctrl/Cmd + Shift + R), clear your browser cache and cookies, open the dashboard in an incognito/private window, disable any VPN, proxy, or browser extensions, or switch to a different network if possible. If the banner still appears, capture a screenshot or short screen recording and share it along with your browser name/version and operating system. ### I updated my video settings, title, description, subtitles, or chapters, but they are not being reflected in the actual video. Why? Gumlet caches settings. Please wait 10–15 minutes before the changes take effect. ### Why is my video in `upload-pending` state? Videos that remain in `upload-pending` state even after several minutes, and also after reloading the dashboard, mean the video upload has failed. We recommend you upload that video again. ### Why is my uploaded video in `pre-queued` or `queued` state? Gumlet processes videos in a pipeline, in the order of upload. Videos in `pre-queued` or `queued` state mean the videos are waiting to be picked up by our system. Most of the time, this resolves within a few minutes, and your videos will be ready soon. If you still encounter issues, please provide us with the video ID, and we will be happy to review it. ### I received an error stating that the video duration exceeds the 240-minute duration limit. What can I do? On all of our self-serve plans, we have a soft limit of 240 minutes on the maximum video duration we can process. Please get in touch with our support team to request an increase in the limit, along with a valid reason, and we will respond at the earliest opportunity. _If you think you are seeing this by mistake, reply to this message, and our team will help you._ ## 📞 Support ### How to Contact Customer Support via Email? Email ### Does Gumlet provide a built-in QR code generator? No. However, you can use any third-party QR code tool to generate a QR code using your Gumlet video link or embed URL. ## 📺 Playback & Streaming ### How can I address playback issues and share my live stream for viewing in a browser? Use HLS.js or an iframe embed. m3u8 links don't work natively in some browsers. ### How can I ensure my videos always use a specific resolution when sharing the URL? Use query param: `lock_highest_res=true` for a high-resolution default. ### How to start a live stream? Here is a video [Demo](https://gumlet.tv/watch/650981c2e61360f23fe1aeda/) to start a live stream; refer to [docs](/live-stream/get-started/create-a-live-stream) for a guide. ### Are there any limits to live streaming on Gumlet? Gumlet applies a 12-hour limit per live stream. The maximum content duration per video (including saved live streams) is also 12 hours. ### What protection options are available for live streams? None. Live streams do not support the protection options available for on-demand videos, including: * Geo-blocking * Domain restriction * Password protection * DRM * Signed URLs * Dynamic watermarks * Time-based expiry URLs These options apply only to on-demand videos. See [Video Protection](/video/manage-videos/video-protection-settings-section). ### Does the Creator plan support HLS and MP4 URLs? No. Creator plans can only use the embed code and the Gumlet player. HLS and MP4 URLs are not available. ### Is there an affordable alternative to Vimeo Live for pre-scheduling and embedding live streams? Yes. You can use Gumlet’s one-way live streaming service combined with an RTMP encoder such as OBS. Simply schedule your stream in OBS, point it to the Gumlet RTMP endpoint, and embed the Gumlet player on your site. To receive pricing and any additional setup instructions, share your expected use case: total live streams per month, average stream duration, and monthly streaming bandwidth consumption. ## 🗂️ Workspaces & Tags ### How can I rename a workspace? Go to [Workspaces Dashboard](https://dash.gumlet.com/video/workspaces) and select the workspace to edit. ### How can I add or edit tags? Can I delete a tag? Visit [Video Library](https://dash.gumlet.com/video/manage) and click the video. Or select in bulk and click `Edit Tags`. Adding and editing tags is supported this way; deleting/removing a tag entirely is not currently supported. ## 📡 Channels & Playlists ### How do I view and manage my channel subscriptions? You can view and manage your channel by visiting the Video Library > Channel settings. ## ✂️ Video Editing ### Can I mute audio or adjust the volume at a specific point in a video clip? Yes. You can split the video into multiple clips based on where you want the changes to happen. Once split, select the specific clip in the left panel to adjust its volume or remove the audio entirely without removing the video track. # Upload from Device Upload your original videos to Gumlet storage Uploading your original files to Gumlet is the easiest way to get started using Gumlet. When you do this, we store the original input file and all output files. ## Add files You can click upload and then select upload from device in [Video Library](https://dash.gumlet.com/video/manage). Drag and drop files in the upload box, or choose **My Device**. Upload should start automatically, and you can monitor the progress. ![](/adf63c74df05-upload-from-device.webp) Please note, there is no limit on file size, but files which are not video/audio will result in a processing error and will be deleted. ## Original file The files you upload are stored in their original form without any modifications. You always have the option to download the original file if needed. For streaming, we use the optimized and processed version, which helps reduce streaming bandwidth. If you ever delete a video from Gumlet, its original input file and all output files will be removed after 30 days. If you accidentally delete a video, you have up to 30 days to request its restoration. # Record from Dashboard Record your content from Gumlet Dashboard Recording your videos on Gumlet is the easiest way to create content. We record your screen, camera, and speech to produce a video that you can embed. ## Record videos ### Initiate Recording Click Upload Video on the dashboard, then click Record Screen. ![](/e5f02e0c93fa-record-from-dashboard-01.webp) _Note: The maximum recording limit is two hours, i.e. 120 minutes._ ### Grant mic and camera access ![Choose Allow while visiting the site or Allow this time](/9598f3532cf7-record-from-dashboard-02.webp) _Note: You can choose which camera and microphone to use if you have multiple_ ### Position the recording widget ![Drag-n-drop to position your camera](/7c83509ccf53-record-from-dashboard-03.webp) ### Start Recording Please give the prompt screen-sharing access. You can choose a tab, a window, or full screen. ![](/b01021c8e3d6-record-from-dashboard-04.webp) ### Stop and review When you are done, you can stop the recording from the widget. Review the recording before uploading to Gumlet. ![](/39c1a0cf1840-record-from-dashboard-05.webp) ### Upload Video Upload the video or Re-record if you didn't like the current version. The Gumlet recorder doesn't work on mobile devices. You can only record in a desktop browser. --- updatedAt: 2026-03-05T14:58:02.000Z --- # Cloud Storage Add files to Gumlet from a cloud storage of your choice We support multiple different cloud services from which we can fetch your original video to process and stream. Currently, we support these cloud storage providers. * Dropbox * OneDrive * [Google Drive](/video/upload-videos/import-from-google-drive) You can click on a provider of your choice. You will be asked to permit Gumlet to read files from your storage provider. Once you grant permission, you can browse files in your cloud storage right from the upload box. ![Sample Dropbox browser for file upload](images/cloud-storage-video-upload.webp) Here, you can see there is one file in the Dropbox account that can be selected for upload. Once you select and upload your desired files, Gumlet will fetch them and then create processed versions which are ready to stream. Please note that we will not modify or delete your original files. You retain full control of those files regardless of how you use Gumlet. # Import from Google Drive Import private and shared files from Google Drive to Gumlet Importing files from Google Drive has never been easier. Import shared and [private files](#provide-permissions-to-gumlet-to-access-private-files) from Google Drive to Gumlet and stream to the world. ![Click on New Video on Video CMS](/decf503240fb-import-from-google-drive-01.webp) ## How to Import Files 1. Click on the `Upload Video` button on your [video CMS](https://dash.gumlet.com/video/manage?page_redirect_from=video_dashboard) and select Google Drive from the screen. 2. Click on `Sign In with Google` ![](/46308f8dc236-import-from-google-drive-02.webp) 3. Select an account where you have videos and click `Continue` on the next steps to provide permissions. ![](/a0d91831e0c0-import-from-google-drive-03.webp) 4. Select Videos and Audios from the Google Drive File Picker and click `Select` button to proceed. 5. All the selected videos and audios will be sent for processing. By default, only the public (_**Anyone with the link**_ permission) files will be sent for processing. To import private files, you must provide viewer access to Gumlet ## Provide permissions to Gumlet to access private files 1. Go to your [Google Drive](https://drive.google.com) 2. Click on `Share` button on a folder settings. ![](/6f8f5a9f3c03-import-from-google-drive-04.webp) 2. Add email `gdrive-readonly@gumlet.iam.gserviceaccount.com` with viewer permission, Gumlet can download the videos when you import them. ![](/82f33c91e152-import-from-google-drive-05.webp) 3. Click on `Share` button and you are done. 4. Follow the guide [above](#how-to-import-files) to import videos. --- updatedAt: 2026-03-05T15:04:02.000Z --- # Import from Object Storage Upload files to Gumlet from different storage providers We support Object storage providers from where we can fetch your original video to process and stream. We recommend [creating a new workspace](https://dash.gumlet.com/video/workspaces) and selecting your Object Storage provider to set this up. Alternatively, you can also edit your existing workspace settings. ![Workspace source configuration](images/cloud-storage.webp) On the workspace edit screen, you can select a provider of your choice and configure the credentials. ### Amazon S3 Bucket Gumlet needs `GetObject` and `ListBucket` permissions to access the videos. Create and add an access token with these permissions while creating the workspace. ### Digital Ocean Spaces You can import videos stored in DigitalOcean Spaces as a video source. Create a new access token as described in [this article](https://www.digitalocean.com/community/tutorials/how-to-create-a-digitalocean-space-and-api-key) and create a workspace with these credentials. ### Wasabi Storage Gumlet supports fetching videos from [Wasabi storage](https://wasabi.com/). Configure storage similar to Amazon S3, with the same permissions, for Wasabi Storage. ### Hetzner Storage Gumlet supports fetching videos from [Hetzner storage](https://www.hetzner.com/). Configure storage for Hetzner Storage similar to Amazon S3, with the same permissions. ### Google Cloud Storage Use videos stored in [Google Cloud Storage](https://cloud.google.com/storage) bucket as a source. Gumlet needs read bucket and list object permissions to access the videos. Please create a service account with those permissions, create a JSON key, and add that key while creating a workspace. You can find a tutorial at [Create and manage service account keys](https://cloud.google.com/iam/docs/creating-managing-service-account-keys). ### Azure Gumlet supports fetching videos from [Azure cloud storage](https://azure.microsoft.com/en-us/product-categories/storage/). Create a [storage account](https://docs.microsoft.com/en-us/azure/storage/common/storage-account-create?tabs=azure-portal) and a container inside your storage. Gumlet needs an SAS (Shared Access Signature) token to access content. You can create a new SAS token as described in [this article](https://docs.microsoft.com/en-us/azure/cognitive-services/translator/document-translation/create-sas-tokens?tabs=Containers). ### Linode Storage Gumlet supports fetching videos from [Linode storage](https://www.linode.com/products/object-storage/). Configure Linode Storage similarly to Amazon S3, with the same permissions. ### Backblaze storage Gumlet supports fetching videos from [Backblaze storage](https://www.backblaze.com/b2/cloud-storage.html). Configure the storage similar to Amazon S3 with the same permissions for Backblaze Storage. ### Zoom Recordings Bring your Zoom cloud recordings to Gumlet. You need to make a custom app to bring new recordings automatically to Gumlet. Here is the tutorial on setting up [Zoom Import](/video/upload-videos/import-from-zoom). --- updatedAt: 2026-03-05T15:04:44.000Z --- # Import Zoom Recordings Import Zoom cloud recordings automatically to Gumlet Add Zoom as a source in your workspace. All the new recordings will be optimized and added to your workspace. ### Create a Workspace Navigate to the [create worskpace](https://dash.gumlet.com/video/workspaces) page and select Zoom as the Origin Type. ![](images/import-from-zoom-01.webp) ### Generate a Secret Token You need to generate a secret token from your Zoom account. Here is a step-by-step guide to generate a secret token in your Zoom account and receive recordings as soon as they are finished. #### Create a Zoom App Go to the [Zoom App Creation](https://marketplace.zoom.us/develop/create) page and create a **Webhook Only** app. ![](images/import-from-zoom-02.webp) Once you fill in the important details for the app, you need to set up permissions to send events to Gumlet. ![Enable Event Subscriptions](images/import-from-zoom-03.webp) Copy the Secret Token from the above screen and add it to the Workspace settings in Gumlet [here](/video/upload-videos/import-from-zoom#create-a-workspace). #### Subscribe to Recordings Completed Event Click on the **Add Event Subscription** button and add the endpoint URL as `https://api.gumlet.com/v1/video/assets/zoom/event/{workspace_id}`, replace `{workspace_id}` with the actual workspace ID from your [dashboard](https://dash.gumlet.com/video/workspaces). ![Add webhook URL](images/import-from-zoom-04.webp) Click the **Validate** button to confirm the URL is correct. Click the **Add Events** button to select the required event to share the recording information with Gumlet. ![Select All Recordings Completed](images/import-from-zoom-05.webp) Save the settings and **Continue**. Your app is activated now. All new recordings will now be processed to Gumlet automatically. ![](images/import-from-zoom-06.webp) Note: This feature requires a paid Zoom account to function. The cloud recordings are available only to paid members. --- updatedAt: 2026-09-09T00:00:00.000Z --- # Import from Vimeo Get rid of Vimeo with this migration guide If you currently use Vimeo to host your videos, our Import tool helps you move your entire library to Gumlet with just a few clicks. It connects to your Vimeo account, imports your original video files along with folders, chapters, subtitles, audio tracks, and thumbnails, and then makes them available inside your chosen Gumlet workspace. This is ideal when you want to fully switch away from Vimeo while keeping the same content library, but with Gumlet’s player, delivery, and analytics. ## Requirements * An active Vimeo Standard, Vimeo Pro or higher plan * A paid Gumlet account ([subscribe here](https://dash.gumlet.com/organization/billing?utm_source=docs&utm_campaign=vimeo-migration)) ## What gets migrated from Vimeo? Gumlet imports all your core video assets from Vimeo, but Vimeo-only interactive elements and historical analytics are **not** copied. | Item | Migrated to Gumlet | Notes | | --------------------------------- | ------------------ | ------------------------------------------------------------ | | Folders | Yes | Top-level folders are created in Gumlet | | Subfolders | Yes | Folder hierarchy is preserved | | Original video file | Yes | Imported as the source video | | Chapters | Yes | Imported as chapters / markers | | Thumbnails | Yes | Default video thumbnail is imported | | Audio tracks (multi-audio) | Yes | Original files with multiple audio channels are imported | | Subtitles / captions | Yes | Migrate existing transcriptions and translations. Generate others with Gumlet AI | | Forms (Vimeo native) | No | Not migrated; recreate forms in Gumlet if needed | | CTAs / end screens (Vimeo native) | No | Not migrated; use Gumlet end screens / player tools | | Analytics | No | Historical stats stay in Vimeo; Gumlet tracks new views only | | Other Vimeo-only interactive apps | No | Any native Vimeo apps/elements do not migrate | ## Step-by-step: import from Vimeo 1. Go to the [Import page](https://dash.gumlet.com/video/import-videos) and click **Connect** under Vimeo. ![](images/import-from-vimeo-01.webp) 2. Authorize your Vimeo account on the Vimeo authorization screen. 3. Select the **Destination workspace** in Gumlet. 4. Choose **files and folders** you want to import. ![](images/import-from-vdocipher-04.webp) 5. Click **Import Videos**. Review the **Processing Settings** modal before the import starts. These settings apply to this import and become the default for future imports in that workspace. ![Processing Settings modal before Vimeo import, including AI subtitles, chapters, and description](images/import-from-vimeo-03.webp) Confirm MP4 downloads, DRM, and AI options (subtitles, chapters, description). AI features show credit costs when enabled — see [AI Features & Credits](/billing/ai-features). 6. Click **Save and Import** to start the migration. ## Import progress and migration report * Track live import progress from your Gumlet dashboard: . * Get an email notification when the import job finishes with a quick summary of imported videos. * Open the detailed **Vimeo migration report** on the same page to see imported, skipped, and failed videos with reasons. Download the migration summary from this page for your records or team review. ## Update Embed Code All your videos are imported to Gumlet. If you use Vimeo Embeds, you must replace your URL prefix with a Gumlet prefix to support the same URL structure to play your videos directly. The Vimeo Embed URL looks like `https://player.vimeo.com/video/831802811` Replace `https://player.vimeo.com/video` with `https://play.gumlet.io/embed` Your new URL will be like `https://play.gumlet.io/embed/831802811` ## Limitations and known caveats * No support for Vimeo free plans (API download restriction). If you do not have a Vimeo Standard or higher account, the import won't work. ![](images/import-from-vimeo-04.webp) * Migration is slower than standard uploads, even on paid Gumlet plans — Gumlet retains the original Vimeo video IDs during import to keep folder structure and existing references consistent, which adds time to the process. The dashboard can be closed while it runs. --- updatedAt: 2026-03-05T15:10:30.000Z --- # Import from Wistia Upgrade your user experience with this migration guide Have you been using Wistia to host and manage your videos? We have a quick way to import all the videos to Gumlet. You will need * A paid account with Gumlet (if not, you can subscribe to a plan [here](https://dash.gumlet.com/organization/billing?utm_source=docs&utm_campaign=vimeo-migration)) Now head over to [Import Page](https://dash.gumlet.com/video/import-videos). You will find Wistia and click on 'Connect.' You will then need an API token from Wistia to import your videos. ![](images/import-from-wistia-01.webp) ## Generate a token on Wistia To generate a token from Wistia, follow the following steps: ### Go to Wistia Account Settings * Navigate to account settings from the top-right corner. ![Wisita Account Settings](images/import-from-wistia-02.webp) * Go to API Access in the bottom-left corne.r ![](images/import-from-wistia-03.webp) ### Generate an API Token Select `Read all project and video data` and create a token. ![](images/import-from-wistia-04.webp) Copy the password and add it to the [Gumlet Migration Dashboard](https://dash.gumlet.com/video/import-videos). ![](images/import-from-wistia-05.webp) ## Final Steps to Import Once the token is verified, you can preview the projects available for import. ![](images/import-from-wistia-06.webp) ### Select a Destination The destination is where all your imported videos will be stored. This is the same as the workspace. Select a workspace from the list, and we will process and keep your videos in the selected workspace. ### Select Projects Select projects that you want to import to Gumlet. We will automatically create playlists and organize your files. Clicking the **Import Videos** button will initiate the Import Process. ![Import Progress](images/import-from-wistia-07.webp) Sit back and relax. We will do all the heavy work to import and process videos for you. You will find all your Imported Videos in the selected workspace. Happy Streaming. --- updatedAt: 2026-07-31T08:28:50.000Z --- # Import from Mux Migrate from Mux to Gumlet If you currently use Mux to host and protect your videos, our Import tool helps you move your entire library to Gumlet with just a few clicks. Requirements: * Access token from a Mux account, with read and write access of \`Mux Video\` * A paid Gumlet account ([subscribe here](https://dash.gumlet.com/organization/billing?utm_source=docs&utm_campaign=mux-migration)) ![](images/import-from-mux-01.webp) ## Step-by-step: import from Mux 1. Go to the [Import page](https://dash.gumlet.com/video/import-videos) and click **Connect** under Mux. 2. Create the access token from the Mux dashboard. 1. Click on **Settings** in the left sidebar 2. Create a new token with read and write permissions for Mux Video 3. Add newly created Token ID and Secret Key on Gumlet. 3. Select the **Destination** workspace in Gumlet. 4. Select \*\*videos\*\* you want to import. ![](images/import-from-mux-02.webp) 5. Click **Import Videos** to start the migration. ## Import progress * Track live import progress from your [Gumlet dashboard](https://dash.gumlet.com/video/import-videos/). * Get an email notification when the import job finishes, along with a quick summary of the imported videos. ## Update Embed Code All your videos are imported to Gumlet. If you use Mux Embeds, you must replace your URL prefix with a Gumlet prefix to support the same URL structure to play your videos directly. Mux Embed URL looks like `https://player.mux.com/` Replace `https://player.mux.com/` with `https://play.gumlet.io/embed/` Your new URL will be like `https://play.gumlet.io/embed/` --- updatedAt: 2026-07-31T06:13:16.000Z --- # Import from Vdocipher Migrate from Vdocipher to Gumlet If you currently use Vdocipher to host and protect your videos, our Import tool helps you move your entire library to Gumlet with just a few clicks. Requirements: * An API key from a Vdocipher account, with Downloads enabled * A paid Gumlet account ([subscribe here](https://dash.gumlet.com/organization/billing?utm_source=docs&utm_campaign=vimeo-migration)) ![](images/import-from-vdocipher-01.webp) ## Step-by-step: import from Vdocipher 1. Go to the [Import page](https://dash.gumlet.com/video/import-videos) and click **Connect** under Vdocipher. ![](images/import-from-vdocipher-02.webp) 2. Get the API key from the Vdocipher dashboard. 1. Click on **Config** in the sidebar 2. Then generate an API key by clicking on the API key button. 3. A new key will be generated and available for use. ![](images/import-from-vdocipher-03.webp) 3. Select the **Destination workspace** in Gumlet. 4. Choose **files and folders** you want to import. ![](images/import-from-vdocipher-04.webp) 5. Click **Import Videos** to start the migration. ## Import progress * Track live import progress from your Gumlet dashboard: . * Get an email notification when the import job finishes, along with a quick summary of the imported videos. ## Update Embed Code All your videos are imported to Gumlet. If you use Vdocipher Embeds, you must replace your URL prefix with a Gumlet prefix to support the same URL structure to play your videos directly. The Vdocipher Embed URL looks like `https://player.vdocipher.com/v2/?otp=20160313versASE3232uiNHivbGDtJoBS4icnDU3DmjedrB8hnuHeRX5lcUBYkgj&playbackInfo=eyJ2aWRlb0lkIjoiYWViM2VmN2ZhYmE5NDM5MGE1ZTBmYTVlODc2OThiNjgifQ==` Replace [`https://player.vdocipher.com/v2/`](https://player.vdocipher.com/v2/) with `https://play.gumlet.io/embed/vc` Your new URL will be like `https://play.gumlet.io/embed/vc?otp=20160313versASE3232uiNHivbGDtJoBS4icnDU3DmjedrB8hnuHeRX5lcUBYkgj&playbackInfo=eyJ2aWRlb0lkIjoiYWViM2VmN2ZhYmE5NDM5MGE1ZTBmYTVlODc2OThiNjgifQ==` ## Limitations * Migration is slower than standard uploads; the dashboard can be closed while it runs. * You need to enable Download in your Vdocipher account. Navigate to Security > Advanced > click on the "Enable Download" button --- updatedAt: 2026-03-12T09:50:35.000Z --- # Request a Video via Link Collect video files from partners or freelancers without sharing access to your account You can request videos from your collaborators or customers by sharing a secure upload link. They can upload video files directly to your Gumlet workspace without needing a Gumlet account. ## When to use this * Collecting video testimonials or user-generated content (UGC) * Getting raw footage from freelancers or partners * Allowing non-technical teams to send videos without logging into the dashboard ## How it work ![](images/request-a-video-via-link-01.webp) 1. Share this link with anyone who needs to send you a video. 2. The recipient opens the link, and uploads their file. 3. The video is added into your selected folder & playlist and processed like any other upload. ## Create a request link 1. Go to **Video Library** in your Gumlet dashboard. ![](images/request-a-video-via-link-02.webp) 2. Click "Request Video" the dropdown under the "Upload Video". 3. Add video details, select folder and playlist to manage video directly in your account. ![](images/request-a-video-via-link-01.webp) 4. Click **Save** and copy the generated URL. --- updatedAt: 2026-07-06T08:03:56.000Z --- # Upload & Import Videos Bring your videos from different storages to Gumlet This is the elementary step to start your streaming journey with Gumlet. Gumlet lets you upload videos from your mobile, desktop, or tablet. We also have integrations with the most popular cloud partners. We have built state-of-the-art integrations with Vimeo, Wistia, and Zoom to automatically import videos. [Upload from Device](/video/upload-videos/upload-from-device) [Cloud Storage](/video/upload-videos/cloud-storage-video-upload) [Import from Object Storage like AWS S3, GCP, Azure, Linode, Digital Ocean etc.](/video/upload-videos/cloud-storage) [Import Zoom Recordings](/video/upload-videos/import-from-zoom) [Import from Vimeo](/video/upload-videos/import-from-vimeo) [Record from Dashboard](/video/upload-videos/record-from-dashboard) [Import from Wistia](/video/upload-videos/import-from-wistia) [Import from Vdocipher](/video/upload-videos/import-from-vdocipher) [Import from Google Drive](/video/upload-videos/import-from-google-drive) [Request a Video via Link](/video/upload-videos/request-a-video-via-link) # Recycle Bin Recover deleted videos from the Recycle Bin to your video library The Recycle Bin allows you to easily manage your digital content. If you accidentally delete a video, there's no need to panic - you can quickly restore it from the Recycle Bin and recover your work. ![](/579aeac66157-recycle-bin.webp) ## Steps to Access the Recycle Bin and Restore a Video 1. **Navigate to Video Library** 2. **Access the Recycle Bin** 3. **Restore a Video:** * Browse through the list of deleted videos in the Recycle Bin. * Select the video you wish to restore and click the Restore Button. Deleted videos can only be restored within 30 days of deletion. Videos are deleted permanently after 30 days and cannot be restored after the period. _Note: Deleted videos do not count toward your storage usage. However, restoring a deleted video will occupy space in your video storage quota._ --- updatedAt: 2026-06-11T06:43:11.000Z --- # Video Library ## Search & Filter Finding your content is faster with our asset search. ![Video search and filter](images/video-cms-01.webp) ### Search by Title or asset\_id You can search files via a `title`, `description` or `asset_id` and you will find it. ### Filter by Tags You can filter your videos with the tags that you assigned to them. ### Filter by Status Naturally, we show all the videos that your workspace holds. You can filter them based on status, like `Ready`, `Processing`, etc. ### Using APIs All actions available through the dashboard are also accessible via REST APIs. You can check [List Assets](https://docs.gumlet.com/reference/tag/video-assets/get/video/workspaces/workspace_id/list) API for details. ## Tags Use Tags to categorize your videos based on events, dates, and teams. A video can have multiple tags. ### Adding a tag 1. Select the video(s) to which you want to add the tag(s). 2. Click on `Edit tags` on the top panel. 3. Add tags and Save. ![](images/video-cms-02.webp) P.S. - You can create as many tags as you want and tag videos. #### An alternate way to add/remove tags You can also add or remove a tag for a video on the [Video Settings](/video/manage-videos/video-settings) page. --- updatedAt: 2026-02-26T11:57:56.000Z --- # Workspace Settings Configure the workspace settings You can create workspaces to organize your videos better and manage access controls and permissions to specific features such as analytics, videos, and usage. ## Workspace Settings Configure the source of videos and upload videos to Gumlet securely and seamlessly with pre-configured defaults. ![](images/edit-workspace.webp) *Tip: If you do not want to track user behavior for the videos inside a specific workspace, you can disable Analytics.* --- updatedAt: 2026-02-26T12:06:24.000Z --- # HDR & Color Space How we handle 8‑bit and 10‑bit video, and why HDR sources can sometimes look 'washed out' in certain browsers. ## 8‑bit and 10‑bit in Gumlet When you upload a video, Gumlet can generate: * **8‑bit renditions** (typically Rec. 709, SDR) for maximum compatibility. * **10‑bit renditions** (used for HDR workflows) for higher dynamic range and better gradients on supported devices. Both ladders can be packaged into a single HLS manifest, so compatible players and browsers can automatically pick the best stream. * Mainstream browsers and devices fall back to 8‑bit SDR when HDR is not available. * HDR‑capable pipelines can leverage 10‑bit streams for better quality. ## How this relates to HDR HDR workflows usually rely on 10‑bit depth, wider color spaces, and different transfer functions (for example, BT.2020 + PQ for HDR10). Gumlet’s pipeline can: * Preserve 10‑bit/HDR information in dedicated renditions, and * Provide 8‑bit/SDR renditions for environments that do not support HDR. Your HLS playlist can therefore contain: * 8‑bit SDR variants for broad compatibility. * 10‑bit HDR‑ready variants for capable players. ## Why can colors look washed out? If a browser or player: * Does not fully support HDR, or * Mis‑handles 10‑bit streams and tone mapping, The result can be: * Low contrast, greyish highlights. * Desaturated colors compared to the same video in a different browser. In our internal tests, 8‑bit and 10‑bit variants in the same HLS stream played correctly in major browsers, but some niche Chromium‑based browsers rendered HDR variants incorrectly, producing washed‑out images, even though the encodes and metadata were valid. # Processing Settings Choose the right processing settings for your videos We create default processing settings when you create a new [video workspace](/video/manage-videos/edit-workspace). However, you can update the settings for your videos in a workspace. ![Video processing settings with general and AI options](/84326d830a50-processing-settings-01.webp) ## Supported Input Formats Gumlet supports hosting a wide variety of video and audio files, which are then processed and optimized for streaming across your preferred platforms. You can upload files in input formats such as: | | | | | | ----- | ------ | ------ | ----- | | `mp4` | `webm` | `mov` | `mkv` | | `mts` | `m4v` | `avi` | `mpg` | | `asf` | `wav` | `mp3` | `3gp` | | `m4a` | `flv` | `flac` | `aac` | | `aif` | `ogg` | `mxf` | `ogv` | | `ogx` | `opus` | `amr` | `mp1` | | `rm` | `wmv` | | | ## Supported Output Format We support the following video formats. You can deliver your video with any of them. ### ABR Adaptive-Bitrate output format lets you generate ABR streams from Gumlet. Gumlet automatically makes DASH and HLS streams available, so you always have them on hand when needed. #### HLS [HTTP Live Streaming](https://en.wikipedia.org/wiki/HTTP_Live_Streaming) (also known as **HLS**) was developed by Apple Inc. as an HTTP-based adaptive bitrate streaming protocol. Support for the protocol is widespread in media players, web browsers, mobile devices, and streaming media servers. **Gumlet also recommends using this format** for seamless video delivery and playback. HTTP Live Streaming allows video players to adapt to unpredictable network conditions without causing user-visible playback stalling. For example, on an unreliable wireless network, HLS allows the player to play a lower-quality video, thus reducing bandwidth usage. Any modern video player can play an HLS stream produced by Gumlet. Most web players, iOS, and Android devices support HLS playback. It's the best choice for universal playback. #### MPEG-DASH **Dynamic Adaptive Streaming over HTTP** (**DASH**), also known as **MPEG-DASH**, is an adaptive bitrate streaming technique that enables high-quality streaming of media content over the Internet delivered from conventional HTTP web servers. Similar to HLS. DASH is not supported in Apple products like iOS and Safari. This makes HLS the perfect choice as a universally supported streaming standard. ### MP4 **MPEG-4 Part 14** or **MP4** is a digital multimedia container format primarily used to store video and audio content. It allows streaming over the Internet. The most widely supported format requires no extra player or JavaScript. The downside of MP4 is that adaptive bitrate streaming is not supported; therefore, users will experience subpar quality and high data transfers. Note - the playback URL will be `.mp4` file. ## MP4 Version If you allow your users to download videos for offline viewing, generating an MP4 version can be helpful. When you enable this option, we add an MP4 stream in the output, which can be used to download the video for offline viewing. ## DRM You can enable DRM in processing settings. After you enable it, you can process a new video using this profile, and that video will be DRM-encrypted. ![](/4ead6c3f92a0-processing-settings-02.webp) _Note: Currently, you must buy a DRM add-on with your video hosting subscription. DRM allows processing of only five videos without the add-on._ Turning on DRM here only marks videos for DRM-ready processing. Here is the full DRM guide for set up, supported platforms, and limitations: [Start with DRM →](/developers/drm#step-by-step-guide-on-setting-up-drm). ## AI-generated Subtitles ![](/143421a4ce89-processing-settings-03.webp) If you enable this, Gumlet can automatically generate subtitles from the speech in the video file. Once you set this configuration in the video profiles, your processed videos will have subtitles. We utilize state-of-the-art voice-to-text machine learning methods to convert audio into text. Once those texts are generated, we generate the required manifest files to display subtitles in HLS or DASH streams. #### Generate subtitles Your audio language is detected automatically and we generate subtitles for that by default. If you want to **translate** those subtitles in other languages, you can select additional languages. * Additional subtitle language(s) You can generate up to 5 subtitle languages for a given video. To generate subtitles, go to the **Subtitles** section in the processing settings. If you want more than 5 AI-generated subtitles for your videos, book a time with our sales team [here](https://www.gumlet.com/schedule-demo/?utm_source=docs\&utm_medium=docs\&utm_content=processing-settings). [Here is the list](/video/tutorials/subtitle-language-list) of 184 supported languages. AI subtitles and translations consume AI credits. See [AI Features & Credits](/billing/ai-features#video-ai-features) for per-minute rates and plan allowances. ## Generate AI chapters and description We utilize AI to generate video chapters for your videos upon processing. The chapters are contextual and based on your video content. Additionally, we create a brief video description for your videos using AI. This combo of AI tools saves you time for publishing, and the best part is that you can edit all the generated content if ever needed. AI chapters and descriptions consume AI credits. See [AI Features & Credits](/billing/ai-features#video-ai-features) for per-minute rates and plan allowances. ## Video Codecs Gumlet supports H.264 (AVC) and AV1 as output video codecs. If you select both, Gumlet will output dual-codec HLS and DASH streams. Those devices supporting AV1 will automatically pick it, and those that don't support it will resolve to H.264. ### Audio codecs The default audio codec is `aac`. If your source uses a different audio codec, Gumlet will automatically transcode it to `aac` for streaming outputs. ## Resolutions If you have selected `ABR` as output, you can choose resolutions from 240p to 4k that you want to generate. ## Additional Settings ### Trimming Settings Trim videos while processing from the start or end. This parameter allows you to configure auto-trimming for all the videos. ### Crop Settings Crop videos while processing horizontally or vertically. This parameter allows you to configure auto-cropping for all the videos. ### Overlay & Padding #### Image Overlay Add Image Overlays to your videos, and customize the size and position. The image will be added to your videos.\ **Tip**: Add a watermark or logo to your videos with this config. #### Text Overlay Text overlay allows setting any text as an overlay on the video. Font size, color, font face, and position can be customized to suit your needs. #### Padding Padding allows you to add padded space around your videos. You can also choose padding color, padding size, and the place where you want to apply padding. Details for developers & AI tools This workspace uses a fixed ladder of output renditions from 240p up to 4K (where the source and profile allow it). Each rendition keeps the original frame rate, and bitrates are automatically chosen for good quality at each resolution. Changes to processing settings do not automatically re-encode videos that were already processed. New uploads use the updated settings. For existing assets, use **[Reprocess Video](/video/manage-videos/video-settings#reprocess-video)** on the video details page after you update the profile. Colorspace metadata In case the uploaded video metadata doesn't mention the colorspace used for encoding, there maybe slight color difference in the output video. --- updatedAt: 2026-04-22T10:35:21.000Z --- # Time based expiry URLs Generate temporary video embed code with time-based expiry URLs at the video level or workspace level, set a duration, and copy the generated embed code. Use time-based expiry URLs to generate embed code that works for a limited time and stops working after it expires. ## Overview Time-based expiry URLs help you control how long a video URL or embed remains valid. This is useful when you want to share videos for a fixed period, limit access after a campaign ends, or avoid leaving permanent links active. You can enable expiry URLs in two places: * **Video level** when you want to control expiry for one specific video * **Workspace level** inside **Signed URLs** when you want to manage this at the workspace level After you enable it, select how long the URL should remain active. Once that time duration passes, the URL expires and no longer works. ## Generate a time-based expiry URL 1. Navigate to the video settings page and click **Embed and Share**. 2. Enable expiry URLs at the **video level**. ![](images/time-based-expiry-urls-01.webp) 3. Select the **time duration** for how long the URL should work. The generated URL stays active for the selected duration and expires automatically after that. 4. Click **Generate** to create the expiry URL and copy the embed code. 5. To generate a preview URL, go to the URLs tab and click Copy. ![](images/time-based-expiry-urls-02.webp) ## When to use it Use time-based expiry URLs when you need temporary video access, such as: * time-limited campaigns * private customer shares * embed codes that should stop working after a set period ## Limitations * The video may stop playing after the time has passed, even if a viewer is still in the middle. * To generate secret URLs for MPD and M3U8, use our [signed URL code snippet](/video/manage-videos/video-protection-settings-section#signed-url). * If you have an MP4 file for your video, it will function without a secret token. To use expiry URLs, disable MP4 generation in the [Processing settings](/video/manage-videos/processing-settings-section). # Video Protection Protect your videos using expiry URLs, geo-blocking, and whitelisted websites Gumlet lets you layer multiple protection options to control who can watch your videos, where they can watch from, and for how long. Start with simple privacy controls, then add geo‑blocking, referrer whitelisting, and finally signed URLs if you need maximum security. These protection options apply to on-demand videos only. They are not available for live streams, including geo-blocking, domain restriction, and password protection. Gumlet's video protection works well with workspaces. All the videos inside the workspace will follow the security protocols configured at the workspace level. The security settings are available in your workspace settings. ![Video Security](/b80fafe89a20-video-protection-settings-01.webp) ## Available Video Playback Security Options We recommend starting with privacy, then adding geo‑blocking, referrer whitelisting, and finally signed URLs for advanced use cases. Use this guide to quickly decide which protection option to use for your videos. | Option | What it controls | Best for | Example use case | | ------------------- | --------------------------------------------------- | ----------------------------------------- | ------------------------------------------------------------------------------------------ | | Video Privacy | Who can see or find the video | Basic visibility and link‑based access | Make marketing videos public, course content unlisted or private, demos password‑protected | | Geo‑blocking | From which countries playback is allowed or blocked | Regional or compliance‑based restrictions | Allow only IN and US viewers, or block a few restricted countries while allowing the rest | | Whitelist Referrers | On which domain names or apps can videos be played | Locking playback to your domains and apps | Allow playback only on example.com, app.example.com, and your mobile apps | | Signed URL | Who can watch and for how long per URL | Per‑user, time‑bound, or paywalled access | Generate a 1‑hour link for paid customers, revoke access by letting URLs expire | ### Video Privacy Mark your videos as public, private, unlisted, or password-protected. #### Public The public status indicates that videos are publicly playable and can be indexed by search engines. When embedded, it adds SEO metadata to your page. #### Unlisted (this is the default) These videos are unlisted. These are available only when the link is shared. #### Private Private videos are available only in the Gumlet dashboard or in member-only channels. To share these videos, change the privacy settings. #### Password-Protected Add a password to your videos to make them bulletproof. The embedded videos also require a password to play. ### Geo‑blocking and Whitelisting Geo-based access management lets you control where your videos can be watched by allowing or blocking playback from specific countries or regions. Use it to comply with licensing rules, regional rights, or to keep content limited to your target markets. ![](/3d99f5a70852-video-protection-settings-02.webp) You can configure geo‑blocking in one of two modes: * **Whitelisted Countries**: allow playback only from the countries you select. * **Blocked Countries**: block playback from the countries you select while allowing playback from other countries. _Note: You cannot use whitelisted and blocked countries together. Choose one mode at a time for each workspace._ #### How does geo‑blocking or whitelisting work? When a viewer tries to watch a video, Gumlet checks their IP‑based location and applies the geo rules configured at the workspace level. If you use whitelisted countries, playback is allowed only from the selected countries. If you use blocked countries, playback is denied only from the selected countries, even if the viewer has the correct video link and referrer. ### Whitelist Referrers (Whitelisting domains and apps) The Referer HTTP request header contains the absolute or partial address of the page that made the request. The Referer header allows a server to identify the page from which visitors arrive. With allow-referer settings, you can ensure that your video is accessible only from a specific server/host. You can specify multiple referrers using which you want your video to be accessible. #### How to Allow Referrers for your websites? To make Gumlet videos playable on specific websites, you must add every domain and subdomain where the videos will be embedded to your Gumlet video settings. Only the domains you list there will be allowed to load and play your Gumlet-hosted videos. ![](/303e8d5208d9-video-protection-settings-03.webp) _Note: You can also use a wildcard to allow videos to play on multiple subdomains._ #### How to Whitelist an Android app? To allow Gumlet to whitelist your Android app, add the app bundle name to the whitelist referrers input box. You can get the bundle ID from your developer or the app's URL on the Google Play Store. ![](/274e4212ee1b-video-protection-settings-04.webp) For example - if the app URL is , the bundle ID would be `com.google.android.calendar`. Get the `id` parameter from the app URL. #### How to Whitelist an iOS app? To allow Gumlet to whitelist your iOS app, add the app bundle name to the whitelist referrers input box. You can get the bundle ID from your developer or follow the steps below. ![](/c6eeccb2599f-video-protection-settings-05.webp) For example, if the app URL is `https://apps.apple.com/us/app/whatsapp-messenger/id310633997`, copy the ID from the URL after the `/id` (the numeric part). Navigate to `https://itunes.apple.com/lookup?id={copied_id}` (sample: ). It will download a text file. Open the text file and copy the bundle ID as shown in the screenshot below: ![](/5ad40c5b02a9-video-protection-settings-06.webp) ### If you have apps built with circle.so, whitelist `circle.so` explicitly with Gumlet. ### If you want to whitelist multiple subdomains, you can use a wildcard (\*). For example, `*.gumlet.com` will allow you to play videos across all subdomains of gumlet.com ### If your apps do not send the x-requested-with header, you should send it explicitly. Sample header: `headers: { 'x-requested-with': "net.whatsapp.WhatsApp"}` ### Adding referral restriction will prevent crawler bots from scraping your video content. ### Signed URL ![](/05f721c9cc27-video-protection-settings-07.webp) When enabled, this option provides a 16-byte hexadecimal sign secret key to generate a secure token and an expiration timestamp (Expiration time should be at least the duration of the Video Asset or the expected period). Video playback URLs under the video workspace will only be accessible with correctly generated tokens by the secret key and within the expiration time. When the signed URL expires, the URL will no longer be playable, even if playback has already started. The code snippets convert the ordinary Gumlet playback URL into a signed URL. The code snippets below are intended for the M3U8 and MPD formats: ```javascript var crypto = require('crypto'); // Gumlet Video Playback URL var playBackUrl = "https://video.gumlet.io/5f462c1561cf8a766464ffc4/6192269e0822a81d955d1a4b/main.m3u8"; // Secret key provided by Gumlet var secret = "GNCP2ePfmdV3bHKqbiBAlXQXHKmI9+DZfLVptsvgUU4="; secret = Buffer.from(secret, 'base64'); // expiration time in seconds var tokenlifetime = 3600; var expiration = Math.round(Date.now()/1000 + tokenlifetime); var stringForTokenGeneration = playBackUrl.slice(23) + String(expiration); var signature = crypto.createHmac('sha1', secret).update(stringForTokenGeneration).digest('hex'); console.log(`Signed Playback URL: ${playBackUrl}?token=${signature}&expires=${expiration}`); ``` ```python import hmac from hashlib import sha1 from base64 import b64decode from datetime import datetime, timedelta # Gumlet Video Playback URL playback_url = "https://video.gumlet.io/5f462c1561cf8a766464ffc4/6192269e0822a81d955d1a4b/1.m3u8" # Secret key provided by Gumlet secret = b"GNCP2ePfmdV3bHKqbiBAlXQXHKmI9+DZfLVptsvgUU4=" secret = b64decode(secret) # expiration time in seconds token_life_time = 3600; expiration = datetime.now() + timedelta(seconds=token_life_time) expiration = int(expiration.timestamp()) string_for_token_generation = playback_url[23:] + str(expiration) string_for_token_generation = str.encode(string_for_token_generation) signature = hmac.HMAC(secret, string_for_token_generation, sha1).digest().hex() print("Token: {}".format(signature)) print("Signed Playback URL: {}?token={}&expires={}".format(playback_url, signature, expiration)) ``` ```ruby require 'base64' require 'openssl' # Gumlet Video Playback URL playback_url = "https://video.gumlet.io/5f462c1561cf8a766464ffc4/6192269e0822a81d955d1a4b/1.m3u8" # Secret key provided by Gumlet secret = "GNCP2ePfmdV3bHKqbiBAlXQXHKmI9+DZfLVptsvgUU4=" secret = Base64.decode64(secret) # expiration time in seconds token_life_time = 3600 expiration = Time.now.to_i + token_life_time string_for_token_generation = playback_url.slice(23, playback_url.length) + expiration.to_s signature = OpenSSL::HMAC.hexdigest('sha1', secret, string_for_token_generation) puts "Token: " + signature puts "Signed Playback URL: " + playback_url + "?token=" + signature + "&expires=" + expiration ``` The code snippet below is intended for the embed code URL: ```javascript var crypto = require('crypto'); // Gumlet Video Playback URL var host = "https://play.gumlet.io"; var playBackUrl = "/embed/6192269e0822a81d955d1a4b?watermark_text=test"; // Secret key provided by Gumlet var secret = "GNCP2ePfmdV3bHKqbiBAlXQXHKmI9+DZfLVptsvgUU4="; secret = Buffer.from(secret, 'base64'); // expiration time in seconds var tokenlifetime = 3600; var expiration = Math.round(Date.now()/1000 + tokenlifetime); var stringForTokenGeneration = playBackUrl +`${playBackUrl.indexOf('?') !== -1 ? '&' : '?'}signed_expires=` + String(expiration); var signature = crypto.createHmac('sha1', secret).update(stringForTokenGeneration).digest('hex'); console.log(`Signed Playback URL: ${host}${playBackUrl}${playBackUrl.indexOf('?') !== -1 ? '&' : '?'}signed_token=${signature}&signed_expires=${expiration}`); ``` ### You can create tamper-proof dynamic watermark using signed embed code. ## Best practices for video protection * Start simple, then layer protections\ Begin with the appropriate video privacy level, then add geo‑blocking and referrer whitelisting, and finally use signed URLs only when needed. * Protect high‑value content more strictly\ Use Unlisted or Private privacy, combine it with Allow Referrers, and add Signed URLs for paid, internal, or sensitive videos. * Keep your allowed list up to date\ Whenever you add new domains or mobile apps, remember to update your Allow Referrers configuration so legitimate viewers are not blocked. * Test from real viewer environments\ After changing geo‑blocking or referrer rules, test playback from different countries (via VPN) and from all your key domains and apps. * Monitor errors and viewer feedback\ Watch for spikes in failed plays in analytics and be ready to relax overly strict rules if genuine users are getting blocked. # Video Settings Manage your video's thumbnail, description, subtitles, privacy and much more. When you go inside a video details page by clicking on `Edit Details` or `Video thumbnail` in the Video CMS, you will see the complete details of that video, including thumbnail replacement, editing subtitles, adding video chapters, and much more. ![Video details page](/d29e9dd35865-video-settings-01.webp) ### Video Preview Before publishing your video, make changes to it. The player shown in the video preview page reflects the configuration selected in the [player settings](/video/player-customization). ### Title Update the title to be informative, crisp, and helpful. This is available at the top of the video details page, and you can also edit it inline in the video CMS listing. ### Description Add meaningful descriptions and notes to help the audience quickly learn more about the video. This will enable them to understand the video context and content before watching. You can add bullet points, modify the style (bold/italic/underline/headings), and add hyperlinks. ### Tags Add tags to manage videos in your video CMS. ### Video Privacy Choose who can watch this video by setting its privacy mode. * **Public** – Anyone can find and watch the video. * **Unlisted** – Only viewers with the direct link can watch; the video is not indexed by search engines. * **Private / Password‑protected** – Restrict access to specific viewers or protected channels. Set the privacy mode from the Video Settings page whenever you want to change who can see this video. For a full explanation of each privacy mode, SEO behavior, and protection best practices, see the [Video Privacy & Protection guide](/video/manage-videos/video-protection-settings-section). ### Thumbnail We automatically generate and add a thumbnail to your video. There are different ways of adding a thumbnail after the video is processed: 1. We extracts 5 suitable thumbnail frames from the video. You can pick any of these options as your thumbnail, or regenerate more options if none of them fit your needs. 2. Customize your thumbnail by uploading an image or GIF from your device 3. Select a specific frame from the video. 1. To select a thumbnail from the uploaded video: 1. Click on the **Select from video** button. 2. Scrub through the video and click **Select this frame** on the frame you want. 3. A new thumbnail for the video is set. ![](/c96f40567263-video-settings-02.webp) Note: The thumbnail URL supports all image operations listed in the [Image operations](/image/image-transform-api/image-transform-size) documentation. ### Subtitles Subtitles help you reach a wider audience and make your videos accessible. From the Video Settings page, you can: ![](/46163ee366cd-video-settings-03.webp) #### AI-generated subtitles You can configure the AI-based subtitles before processing. You can select up to five languages to generate automated subtitles, allowing your audience to choose the language they need. AI subtitles and translations consume AI credits. See [AI Features & Credits](/billing/ai-features#video-ai-features) for rates and plan allowances. #### Upload custom subtitles Upload SRT files directly to your videos. Select a language, then upload the SRT to process your video with custom subtitles. You can upload multiple SRT subtitle tracks (for example, English and Korean) to the same video. The Gumlet player lets viewers switch between all uploaded subtitles and automatically defaults to the subtitle matching the viewer's device or browser language. To manage subtitles for a specific video, open its **Video Settings** page and go to the **Subtitles** tab. _Note: To remove a subtitle, click the cross and click Update Subtitles._ ### API access * You can also manage thumbnails programmatically using the Video API. See the [Thumbnail update API](https://docs.gumlet.com/reference/tag/video-assets/post/video/assets/asset_id/thumbnail-select) for details. * Update title, description, tags, and privacy settings with Video API. See the [Video Update API](https://docs.gumlet.com/reference/tag/video-assets/post/video/assets/update) for details. * Subtitle tracks and files can also be managed through the Video API. Learn more in the [APIs documentation](/reference/tag/subtitle-upload/post/video/assets/asset_ID/subtitle/upload). * After generating a transcript, you can download it using the `GET /v1/transcripts/{transcript_id}` endpoint to retrieve it in your desired format (for example VTT or TXT). ### Video Engagement Gumlet offers tools to engage and educate your audience, such as multilingual subtitles, video chapters, and CTAs. Explore all the tools to increase brand recall, sales, and retention rates [here](/video/manage-videos/video-engagement-section). ### Video Analytics Gumlet's advanced video analytics provide the insights you need to improve your content, increase engagement, and improve effectiveness. Learn more about detailed analytics [here](/video/manage-videos/advanced-video-analytics). ### Audio Tracks Gumlet supports multi-lingual videos. You can upload audio in multiple languages, and your viewers can select the desired language to watch a video with the corresponding audio. ### Video Reviews Mark points on video, add reviews, and resolve with your team to publish videos quickly. Learn more about video reviews [here](/video/manage-videos/video-reviews-and-comments). ### Reprocess Video Use **Reprocess Video** when you change [Processing Settings](/video/manage-videos/processing-settings-section) and want older assets to pick up the new profile (for example AI subtitles, chapters, description, codecs, or resolutions). After you update processing settings, **Reprocess Video** becomes available on the video settings page for assets that were processed before that change. ![More actions menu with Reprocess Video on the video details page](/8618935dd05a-video-settings-04.webp) **How to reprocess** 1. Open the video in **Video Settings** (details page). 2. Click the **⋯** (more actions) menu next to **Embed & Share**. 3. Select **Reprocess Video**. Reprocessing runs the full pipeline from scratch — the same as a new upload of that source file — using your current processing settings. Existing playback URLs and asset IDs stay the same. Reprocessing consumes AI credits for any AI features enabled in the current processing settings (subtitles, translations, chapters, description, and so on). See [AI Features & Credits](/billing/ai-features#video-ai-features). ### Replace Video You can replace the video content without actually changing the video URL. Your title, description, tags, and other settings remain intact except the subtitles (if generated), and thumbnail. If you want to automate this flow, follow the [Replace Video API guide](/developers/vod-developers-section/replace-video). ![](/9dd12bf52fad-video-settings-05.webp) ### Download Original Gumlet stores the original version of your uploaded videos. You can download them through the video details page. In some cases, the video may not be available for download because it was not stored with Gumlet, per your processing settings. If you would like to change this setting, please contact our chat support. _Note: Only newly uploaded videos will be downloadable after changing the settings._ ### Delete Video When you don't want a specific video on Gumlet or want to free up some space, deleting the asset is your go-to setting. Deleting a video removes its duration from your total storage usage. For example, if you delete a 30-minute video, those 30 minutes are deducted from your storage usage. ### Technical Details Find all the technical details from video uploads to processing to be ready for streaming in one place. You can find information about: * who uploaded and when * what the original video metadata was * when your video started processing and when it was ready to stream * what are the different types of URLs to stream your video across the internet ![Video timeline](/96100e32af04-video-settings-06.webp) If you are a developer or familiar with APIs, explore the video's JSON data in more detail. --- updatedAt: 2026-04-27T12:57:55.000Z --- # Video Reviews Review videos with your team inside Gumlet, or share review links externally to collect client feedback with precise, time-based comments. Gumlet supports internal video reviews inside the dashboard, where teams can mark points at specific timestamps, reply to feedback, and resolve comments before publishing. Also, review-link workflow that let you collaborate with collaborators, making it easier to collect actionable feedback from clients without moving the conversation to email or chat. ## Internal reviews Internal reviews happen on the video details page inside Gumlet. Team members can open the **Comments** tab, mark a point in the video, add review notes, reply in a thread, and resolve comments once the requested changes are complete. ![](images/video-reviews-and-comments-01.webp) ### What you can do * Mark specific points in a video for visual feedback. * Add comments tied to exact moments in the video. * Reply to comments and keep discussion in one thread. * Resolve feedback after edits are complete so videos can move to publish faster. ### How internal reviews work ![](images/video-reviews-and-comments-02.webp) 1. Open a video details page in Gumlet. 2. Click the **Comments** tab. 3. Mark a point on the video timeline. 4. Add a comment with the required review note. 5. Reply to the review or resolve it after the edit is done. ![](images/video-reviews-and-comments-03.webp) ## External review links Review links let teams share a video with clients or collaborators and collect precise feedback outside the workspace. You can create a named review link, can set an expiry date, and then shares that link for review. ![](images/video-reviews-and-comments-04.gif) ### What reviewers can do External reviewers can leave time-based comments such as "remove these two seconds" or "make this guy’s face blur," making edit requests more specific and easier to execute. Teams can then act on the requested changes and resolve comments in the same review workflow. ### Create a review link 1. Open the relevant video in Gumlet. 2. Navigate to "Review Links" tab and click **Create review link**. 3. Add a link name for the reviewer, client, or project. 4. Set an expiry date and create a link. 5. The link will be copied to share with stakeholders. ## When to use each workflow | Workflow | Best for | Access model | Typical outcome | | --------------------- | ------------------------------------------------------------ | -------------------------------------------- | ----------------------------------------------------------- | | Internal reviews | Editorial QA, marketing review, team feedback | Inside the Gumlet dashboard for team members | Review threads are discussed and resolved before publish | | External review links | Client approval, stakeholder sign-off, partner collaboration | Shared link created from the video | External comments are collected as actionable edit requests | ## Notifications For internal comments, new comments, replies, or resolutions trigger email notifications by default. Teams that need customized workflows can also use [Gumlet’s Zapier integration](https://dash.gumlet.com/integrations/zapier) for tailored notifications and automations. ## Best practices Use internal reviews when feedback should stay limited to workspace collaborators, and use review links when feedback needs to come from external stakeholders. Clear, time-based comments such as "trim 00:12 to 00:14" or "blur this face here" reduce ambiguity and help editing teams act faster. --- updatedAt: 2026-04-06T10:38:34.000Z --- # Custom End Screens Learn how end screens work, why they help, and when to use more videos, buttons, share buttons, custom images, custom messages, or an empty screen after a video ends. You can use end screens to keep viewers engaged after a video ends, guide them to the next action, and make the final moment of playback useful. ## Overview An end screen appears after the video finishes. Instead of ending on a dead stop, you can use that space to recommend more content, drive a call to action (CTA, a prompt that tells the viewer what to do next), encourage sharing, or show custom branded content. End screens help you: * Keep viewers watching with follow-up content * Drive clicks to one focused next step * Increase reach through social sharing * Reinforce branding with custom visuals * Show a final message or announcement * Avoid an abrupt ending with a clean final screen ### How to end screens? ![](images/custom-end-screens-01.webp) 1. Navigate to [Video Library](https://dash.gumlet.com/video/manage) and click on a video thumbnail where you want to add an End Screen. 2. Click on **End Screen** on the video settings page. 3. Select the End Screen type from the dropdown. We offer many types of end screens, explained below. 4. Customize your End Screen and save settings. 5. On Embedding, your viewers will see the selected screen after the video ends. ## Types of end screens ### 1. More videos ![](images/custom-end-screens-02.webp) Use **More videos** to show 3 videos after the current video ends. This option works well when your goal is to keep viewers in your content flow. It gives them an immediate next choice instead of making them search for another video. #### How to add? 1. Click on **End Screen** on the video settings page. 2. Select **More Videos** from the dropdown. 3. You can either select 3 videos from the Video Library or select a playlist, so that we select the most recent videos. 4. Save Settings. **Why this helps** * Increases the chance that viewers continue watching * Reduces drop-off after the video ends * Helps surface related or follow-up content **Best for** * Series and playlists * Product education * Training libraries ### 2. Add a button ![](images/custom-end-screens-03.webp) Use the **Add a button** to show a single focused CTA after the video ends. This option is best when you want viewers to take a specific next step. A single button keeps the decision simple and directs attention to one destination. #### How to add? 1. Click on **End Screen** on the video settings page. 2. Select **Call to action** from the dropdown. 3. Add Title, Sutitle, Button text, and URL. 4. Save Settings. **Why this helps** * Keeps the next action clear and focused * Reduces distraction compared to showing multiple choices * Works well for conversion-oriented videos **Best for** * Sign-up flows * Demo requests * Download or contact actions ### 3. Share buttons ![](images/custom-end-screens-04.webp) Use **Share buttons** to let viewers share the video after it ends. This option helps turn engaged viewers into distributors. If a video is useful, timely, or worth recommending, sharing can help it spread faster. #### How to add? 1. Click on **End Screen** on the video settings page. 2. Select **Share Buttons** from the dropdown. 3. Save Settings. **Why this helps** * Makes sharing available at the moment the viewer finishes watching * Expands reach beyond your existing audience * Encourages viewers to promote content they found valuable **Best for** * Announcements * Campaign videos * Educational content * Community-driven or awareness content ### 4. Custom image ![](images/custom-end-screens-05.webp) Use **Custom image** to show an image with a link after the video ends. This option gives you more control over the visual presentation of the end screen. It works well when you want to match a campaign, highlight a partner, or create a branded destination. #### How to add? 1. Click on **End Screen** on the video settings page. 2. Select **Custom image** from the dropdown. 3. Select an image, image alternate text, and URL (if needed). 4. Save Settings. **Why this helps** * Gives you a flexible branded visual at the end of the video * Let's you direct viewers to a specific link * Works well when design and messaging need tighter control **Best for** * Promotions * Partner campaigns * Visual calls to action ### 5. Custom message Use **Custom message** to show a text area after the video ends. This option is useful when the most important information is text rather than a button or image. You can use it to leave a final instruction, explain a next step, or display a short note. #### How to add? 1. Click on **End Screen** on the video settings page. 2. Select **Custom Message** from the dropdown. 3. Add Title and Message. 4. Save Settings. **Why this helps** * Gives you space for a clear written message * Works when a viewer needs context or instructions * Helps reinforce the takeaway from the video **Best for** * Final reminders * Short announcements * Support or follow-up instructions * Event or campaign messaging ### 6. Empty screen Use **Empty screen** to show a black screen after the video ends. This option is the most minimal end screen. It removes visual noise and gives you a clean finish when you do not want to show recommendations, links, or messages. #### How to add? 1. Click on **End Screen** on the video settings page. 2. Select **Empty Screen** from the dropdown. 3. Add Title, Sutitle, Button text, and URL. 4. Save Settings. **Why this helps** * Creates a quiet, distraction-free ending * Avoids pushing viewers to another action * Keeps the close of the video visually simple **Best for** * Minimal branded experiences * Videos that need a clean stop * Cases where no follow-up action is needed ### 7. Lead Capture Form Use the **Form** to display a form in the video to capture a lead. You can add an automated flow of leads to your CRM, mailing lists, and other systems using Zapier, Make, or Pabbly. Learn more about lead capture forms [here](/video/manage-videos/video-engagement-section/lead-capture-inside-videos) . ## Choosing the right end screen Use this quick guide to choose the best option: * If you want viewers to continue watching, choose **More videos**. * If you want one strong conversion action, choose **Add a button**. * If you want viewers to help distribute the content, choose **Share buttons**. * If you want a branded visual that links somewhere, choose **Custom image**. * If you want to display text-based instructions or a note, choose **Custom message**. * If you want a clean, silent ending, choose **Empty screen**. * If you want to capture leads, choose **Form**. The best end screen depends on what should happen after the video ends. Start with the action you want from the viewer, then choose the end screen type that supports that goal. # Lead Capture inside Videos Add forms inside your video embed to capture leads Lead capture inside videos lets you collect viewer information directly from the Gumlet player using either Gumlet Form or HubSpot. Use lead capture for demos, webinars, gated content, and other videos where viewers are likely to share their details while watching. You can configure lead capture per video from Video Details → Form / Lead Capture in your Video Library. ## Types of forms You can use Gumlet Form for native in‑player lead capture, or connect integrations like HubSpot to use your existing CRM forms and lists. Gumlet supports the following lead capture options: | Form type | Description | | ------------------------------ | ----------------------------------------------------------------------------------- | | **Gumlet Form** | Use Gumlet’s native in-video form to collect leads inside the player. | | **HubSpot Form** | Embed an existing HubSpot form directly inside your video. | | **Gumlet Form + HubSpot Sync** | Use Gumlet’s form and automatically send captured leads to a selected HubSpot list. | ## How to set up lead capture 1. Open your **Video Library**. 2. Click the video thumbnail/title and go to **Video Details**. 3. Open **Form**. 4. Choose your **Form type** (Gumlet Form or HubSpot). 5. Configure fields and save. ### Use HubSpot with lead capture If you connect HubSpot from \*\*[Integrations](https://dash.gumlet.com/integrations/hubspot) \*\*, you can: * Select **HubSpot** in **Form / Lead Capture** to embed an existing HubSpot form inside your video. * Select **Gumlet Form** and choose a **HubSpot Sync List** to send Gumlet form leads to a HubSpot list. For detailed setup steps, permissions, and troubleshooting, see the [HubSpot Integration](/video/integrations/hubspot-integration) guide. ## What Gumlet offers Gumlet forms offer every customization that you might need. Here are the main things: * Add a title and subtitle * Form Type: Hubspot or Gumlet Form * Form position - whether you want it in the start, during the video or towards the end * Form alignment - left, right, and center * Sync with Hubspot List: Works with Gumlet form * You can also make the form skippable, which works well for offers, trailers, and low‑friction lead gen. ![](/38ad87e2d5f3-lead-capture-inside-videos.webp) _Tip: Didn't like the position or alignment? You can always update the form without changing the embed code._ By default, the leads you capture are shown in your Gumlet dashboard. You can export them as CSV or use integrations like **HubSpot**, Zapier, Make, or Pabbly to send leads directly to your CRM. ## When to use which option | If you want to… | Use this option | | ----------------------------------------------- | ------------------------------ | | Capture leads using Gumlet’s native experience | **Gumlet Form** | | Use an existing HubSpot form inside your video | **HubSpot Form** | | Keep Gumlet’s form UI and sync leads to HubSpot | **Gumlet Form + HubSpot Sync** | # Video Engagement Make your videos more engaging to your audience ## Video Chapters The video chapters help add an index to your video content. You can add chapters to your videos to make them engaging and helpful for viewers. ![Chapter edit UI on Gumlet](/c97c7a52eb83-video-engagement-01.webp) Steps to add chapters: * Move the timeline marker to add the chapter * Click on the clock icon on the right side to pick the marker time * Add a chapter label * Keep adding chapters as needed and save them. * To remove a chapter, click the cross and save the changes. Note: If you do not want to show a name for a part of the video, you can keep the chapter title as a single space. The chapter marker will still appear on the timeline without any visible label. You can also auto-generate chapters (and a video description) with AI during processing. AI chapters and descriptions use AI credits — see [AI Features & Credits](/billing/ai-features#video-ai-features). ## CTA (call to action) The CTAs are essential for brands to take their audience to Product Pages, Websites, or custom destinations. Configure call-to-action to increase brand awareness and drive sales. ![Click on \*\*Add Call to Action\*\* to add CTAs](/49990f660434-video-engagement-02.webp) You can customize your CTA: * position * background and font color * destination URL and behavior * entry and exit time A sample CTA looks like this: ![](/1ee9158beac2-video-engagement-03.webp) There is no limit on number of CTAs. ## Lead Capture Forms Video lead capture lets you collect your viewers’ contact information directly inside the video player. Add a lead capture form in under 30 seconds to start gathering details like name, email, or custom fields that matter to your business. These forms help you qualify leads, nurture prospects, and measure how your videos contribute to conversions. Learn more about form fields, styling options, and display rules [here](/video/manage-videos/video-engagement-section/lead-capture-inside-videos). ## Custom End Screen Gumlet lets you add customizable end screens to keep viewers engaged even after the video finishes. You can display a text message, a clickable URL button, an image banner, or a More videos section that recommends additional content from your library. These end-screen components guide viewers to specific actions, such as visiting a page, exploring your products, or watching related videos. Learn more about all the possible end screen layouts and customization options [here](/video/manage-videos/video-engagement-section/custom-end-screens). ### API access * Chapters for a video can also be managed via API. Refer to the [Create/Update Video Asset Chapters API](https://docs.gumlet.com/reference/tag/video-assets/post/video/assets/asset_id/chapters) to create, update, or remove chapters programmatically. * CTAs for a video can be set when creating or updating the asset via API. Refer to the [Create Video Asset API](https://docs.gumlet.com/reference/tag/video-assets/post/video/assets) for implementation details. --- updatedAt: 2026-03-06T08:22:59.000Z --- # Video Analytics Understand how your viewers are watching your videos. The deep insights from your videos put you ahead of your audience's needs. Gumlet's advanced video analytics provide the insights that enable you to enhance your content, increase engagement, and delight your audience. ![Analytics page for a given Video](images/advanced-video-analytics-01.webp) You can access the analytics page from two places: * Right from the video CMS table ![Click on the analytics icon in the CMS](images/advanced-video-analytics-02.webp) * From the video settings page ![Click on the quick analytics strip](images/advanced-video-analytics-03.webp) ### The metrics you can deep dive into with Video Analytics: * Video heatmap * Views on a daily, weekly, and monthly basis * Total impression on a particular date range * Total time played grouped in days/weeks/months * Average view rate -> views/impressions, how many video plays against the video loads * Geography of your audience, i.e., cities or countries * Top pages (referrers) from where your video is being watched * Top browsers and devices your audience uses for watching your content Gumlet collects data to help creators understand how their videos are doing from multiple angles, such as geographical distribution, platform (domain) distribution, device distribution, etc. ## Video Heatmap A video heatmap is an advanced analytics metric that helps you understand how your audience views your video. In a nutshell, it shows when your audience drops or skips the content. ![](images/advanced-video-analytics-04.webp) ### How to read the graph * The x-axis is the duration of the video. * The y-axis represents the percentage of total views. * The graph depicts the % of the total views watching a fragment of the video * e.g.- when a video is started, 100% of views have at least 1 second watched, so 1st fragment is 100% * e.g.- when there is an upside from the previous fragment, it means the user would have skipped the previous segment * e.g.- when there is a downside in the following fragment, it means the user skipped that segment or left the video (stopped/reloaded) #### Things to consider * The graph is calculated on the total number of views of the video. * The heatmap data remains unchanged when you modify the date range in the date picker on the analytics page. # Enable MP4 videos How to enable MP4 video output with Gumlet. ## How to Enable and Access MP4 Download Links for Your Videos on Gumlet Accessing MP4 download links for your videos on Gumlet involves setting up the correct processing settings. Below, we provide a step-by-step guide to help you successfully enable and access MP4 files. ### Enable MP4 Processing in Your Settings By default, your video processing profile may be set to HLS and DASH, displaying an HLS URL. To enable MP4 generation, follow these steps: 1. Navigate to your video processing settings within the Gumlet Dashboard. 2. Choose the option to edit the processing settings. 3. Locate and enable the 'Generate MP4' feature by selecting the corresponding radio button. 4. Save the updated settings. 5. All new videos after settings update will have MP4 version available for download. 6. If you want to enable MP4 on existing videos, you need to re-process the video by clicking on the video and then clicking on the "Re-process" button. Here is a [guide](https://docs.gumlet.com/video/manage-videos/video-settings#reprocess-video) on how to re-process a video. If you have already uploaded a video with MP4 disabled, you need to enable it and then reprocess the video. The processing setting changes do not reflect on the old videos. ## Troubleshooting MP4 Download Availability If you still cannot access the MP4 option after enabling it and confirming your plan eligibility, consider: Double-checking the video processing settings. Ensuring your subscription includes MP4 download capabilities. Contacting Gumlet support for further assistance if the issue persists. # Manage Videos Manage all your videos on a single panel Gumlet is built to improve user experience and engage your users. Gumlet video library is the central place to manage all your videos. You can head to the [video library](https://dash.gumlet.com/video/manage/) section, and you will see this screen: ![Video Library](/cfdbd7960018-manage-videos-01.webp) ### How your video library is structured Your Gumlet account is organized in a simple hierarchy so you always know where a setting applies: * **Workspace**\ Top-level container for all your videos, folders, subfolders, channels, playlists, and team members. Workspace settings act as defaults for everything you create. * **Folders and subfolders**\ Internal organization in the video library. Use them to manage videos for your team (projects, clients, departments). Folders and subfolders are not shown to viewers and do not change how a video is shared, embedded, or watched. * **Channels and playlists**\ Public-facing experiences. Playlists group videos for sharing and embedding. The [channel](/video/channels) is the public page that displays the playlists you include on it. * **Videos**\ The actual video assets that are uploaded, processed, protected, embedded, and tracked. Many settings can be customized per video to override workspace or channel defaults. These are two independent trees that share the same videos: | | Internal (video management) | Public (sharing and embedding) | | ----------- | --------------------------------------------------------- | -------------------------------------------------------------------------------------------- | | Structure | Workspace → folder → **subfolder** → video | Workspace → [channel](/video/channels) → [playlist](/video/channels/embed-playlists) → video | | Who uses it | Your team in the dashboard | Viewers on the channel page, playlist links, and embeds | | Typical use | Keep the library tidy (for example `Clients / Acme / Q3`) | Publish a course, series, or branded channel | A video can live in a folder for your team **and** appear in any number of playlists for viewers. Putting a video in a folder does not add it to a playlist or the channel. Adding a video to a playlist does not move it in the library. Folders and subfolders have **no relationship** to channels or playlists. Organize internally with folders. Publish with playlists, then attach those playlists to the channel (or [embed a playlist](/video/channels/embed-playlists) on its own). #### How channels and playlists relate * Create **playlists** as public sets of related videos (a course, a series, and similar groupings). * Add those playlists to the **channel** under Included Playlists, and reorder them for the channel page. * Share the [channel URL](/video/channels), invite [members](/video/channels/channel-membership), or embed an individual playlist. Viewers never see your folder tree. ### Manage videos with folders and subfolders Create folders to organize videos neatly in your video library. You can also create **subfolders** (folders inside other folders) to group related videos, separate projects or categories, and keep the library structured. #### How to create a folder? 1. Click on the Create Folder button in your video library. ![](/3e4116b341c2-manage-videos-02.webp) 2. Give it a name, and your folder is ready. #### How to create a subfolder? 1. Open the parent folder in the video library. 2. Click **Create Folder** and name it. That folder becomes a subfolder of the one you are in. 3. Or, from the library, use the 3 dots on a folder and **Move to Folder** to nest it under another folder. _Tip: You can nest multiple levels of subfolders. Moving a folder also moves the videos and subfolders inside it._ #### How to move videos in a folder? ![](/6572f23c9709-manage-videos-03.webp) 1. Click on the 3 dots against a video or select video(s). 2. Choose "Move to Folder" to move a single or multiple videos. 3. Select a folder or subfolder, or create a new one on the fly. ![](/5eff6d99a917-manage-videos-04.webp) 4. Click on the Move button to move the video to the selected folder. Deleting a folder will delete all the items inside that folder, including subfolders and videos. ### What can I configure at each level? Different settings apply at different levels in this hierarchy. Higher levels define defaults, and lower levels (especially individual videos) can override those defaults where allowed. | | Workspace | Folders / subfolders | Channels / Playlists | Single videos | | --------------------- | ------------------------------------------------------------------- | ------------------------------------------------------------------ | --------------------------------------------------------------------------------- | ------------------------------------------------------------------------------------------ | | Processing settings | Set default processing profile for new videos in the workspace. | No direct controls; videos inherit workspace defaults. | No direct controls; videos keep their own processing settings. | Override per video (only if set before upload or via API). | | Privacy & access | Default privacy for all newly uploaded videos in the workspace. | Folders and subfolders do not have separate privacy settings. | Channel-level visibility - public and membership where configured. | Per-video privacy (public, unlisted, password, signed URL, DRM, embed restrictions, etc.). | | Player customization | Default player theme, logo, colors, and controls for the workspace. | No player UI settings; used only for internal organization. | Channel/playlist layout and theme for channel pages and playlist embeds. | Per-video player overrides: controls, logo, colors, watermark, CTAs, forms, etc. | | Branding & domains | Custom domains for video preview, playlist and channel. | Not applicable. | Channel branding (cover image, description, social links, channel custom domain). | Video title, thumbnail, description, and SEO metadata. | | Security & protection | Global protection defaults (e.g., signed URLs, DRM availability). | Possible bulk actions on videos in a folder or subfolder. | Channel-level restrictions such as login/membership-based access. | Per-video signed URLs, DRM settings, password protection, allowed domains, CSP, and more. | | Analytics & reporting | Workspace-wide usage and analytics across all videos. | Filter analytics by folder using analytics tools. | Channel/playlist performance (views, watch time, conversions where applicable). | Detailed per-video analytics, engagement graphs, and user-level analytics where enabled. | | API customization | Workspace-level API keys, webhooks, and upload/manage APIs. | Use folder IDs in API calls to organize or filter lists of videos. | Channels and playlists can be created/managed via API where supported. | Set or update processing, privacy, player options, and metadata per video using the API. | Settings defined at the workspace or channel level act as sensible defaults. When you customize a specific video, its video-level configuration takes priority for that video. ### Configure via dashboard or API Anything you can configure from the dashboard (processing profiles, privacy, player options, metadata) can also be managed programmatically using the **[Video Upload / Manage](/developers/vod-developers-section/direct-upload)** APIs. Use workspace settings for consistent defaults, and use video-level API calls when you need to control behavior dynamically for each video. ### Switching Workspaces You can create more workspaces from the left sidebar > Workspaces. You can switch to a different workspace from the drop-down menu above the videos table in the video library. ![](/7ca207dfd0de-manage-videos-05.webp) --- updatedAt: 2026-09-28T00:00:00.000Z --- # Player Accessibility Everything about video player accessibility Our video player is designed with accessibility in mind, ensuring an inclusive experience for all users. The Gumlet video player is designed to align with WCAG 2.1 Level AA standards and covers key criteria under WCAG 2.2 Level AA. Below is an overview of the accessibility features provided: ## Keyboard Navigation * Full support for tab, space, enter, and arrow keys, and j, k, l * Ability to play, pause, adjust volume, and seek without a mouse ## Screen Reader Compatibility * Clear labeling for buttons and controls designed for popular screen readers (NVDA, JAWS, VoiceOver) * ARIA roles and attributes for better assistance ## Closed Captions & Subtitles * Support for multiple caption tracks for different languages. You can also [generate captions](/video/manage-videos/video-settings#subtitles) using AI. * Embedded transcripts for each video, making content accessible for users with hearing impairments ## Multilingual Audio Support * Upload multiple language audio files to support a wider audience from across the globe. ## Custom Thumbnail * Add [thumbnail](/video/manage-videos/video-settings#thumbnail) directly from video or upload a new one * Add GIF instead of static graphics ## Adjustable Playback Speed * Change playback speed for easier comprehension * Keyboard shortcuts for speed adjustment ## Focus Indicators * Highly visible focus outlines on all interactive elements for users navigating via keyboard ## Customizable Controls * Ability to reconfigure control layout to suit accessibility needs * Casting options for large screen support ## AI Chapters and List * Add AI generated [chapters](/video/manage-videos/video-engagement-section#video-chapters) or custom chapters to your videos * Viewers can navigate to specific chapters directly from timeline or from chapters list ## Keyboard shortcuts You can use following shortcuts to operate player with a keyboard. If you press `SHIFT + ?` keys, player will show the shortcut list. | Key | Action | | :---------------------- | :------------------------ | | `␣`/ `k` | Play/Pause | | Arrow up/down (`↑`/`↓`) | Volume up/down | | `←`/ `j` | Seek Backward | | `→`/ `l` | Seek Forward | | `c` | Toggle captions/subtitles | | `m` | Mute/unmute | | `f` | Toggle full screen | | `p` | Toggle picture-in-picture | | `Shift + <` | Slow down playback speed | | `Shift + >` | Speed up playback speed | | `Tab` | Navigate player controls | ## Need Help? For more information or accessibility support, please contact us. Accessibility is an ongoing commitment. We welcome feedback to improve your viewing experience. # Customize Video Player Generate customized player embed code and embed URL for a video ID Input your video asset ID to create customized advanced controls tailored to your video player requirements. [Gumlet Video Player Customizer](https://gumlet.github.io/video-player-customizer/) --- updatedAt: 2026-03-18T10:20:21.000Z --- # Floating Video Player Embed a floating (PIP) video to your website with CTA Embed video in always-on Picture-in-Picture (PiP) mode on your website—a powerful upgrade for your e-commerce experience. Make your store more lively and engaging with a floating video player that keeps content in view. [![Floating video player demo](images/floating-video-player.gif)](https://gumlet.github.io/embed-player-addons/e-commerce.html) ### Sample Embed Code for Floating Video Player ```
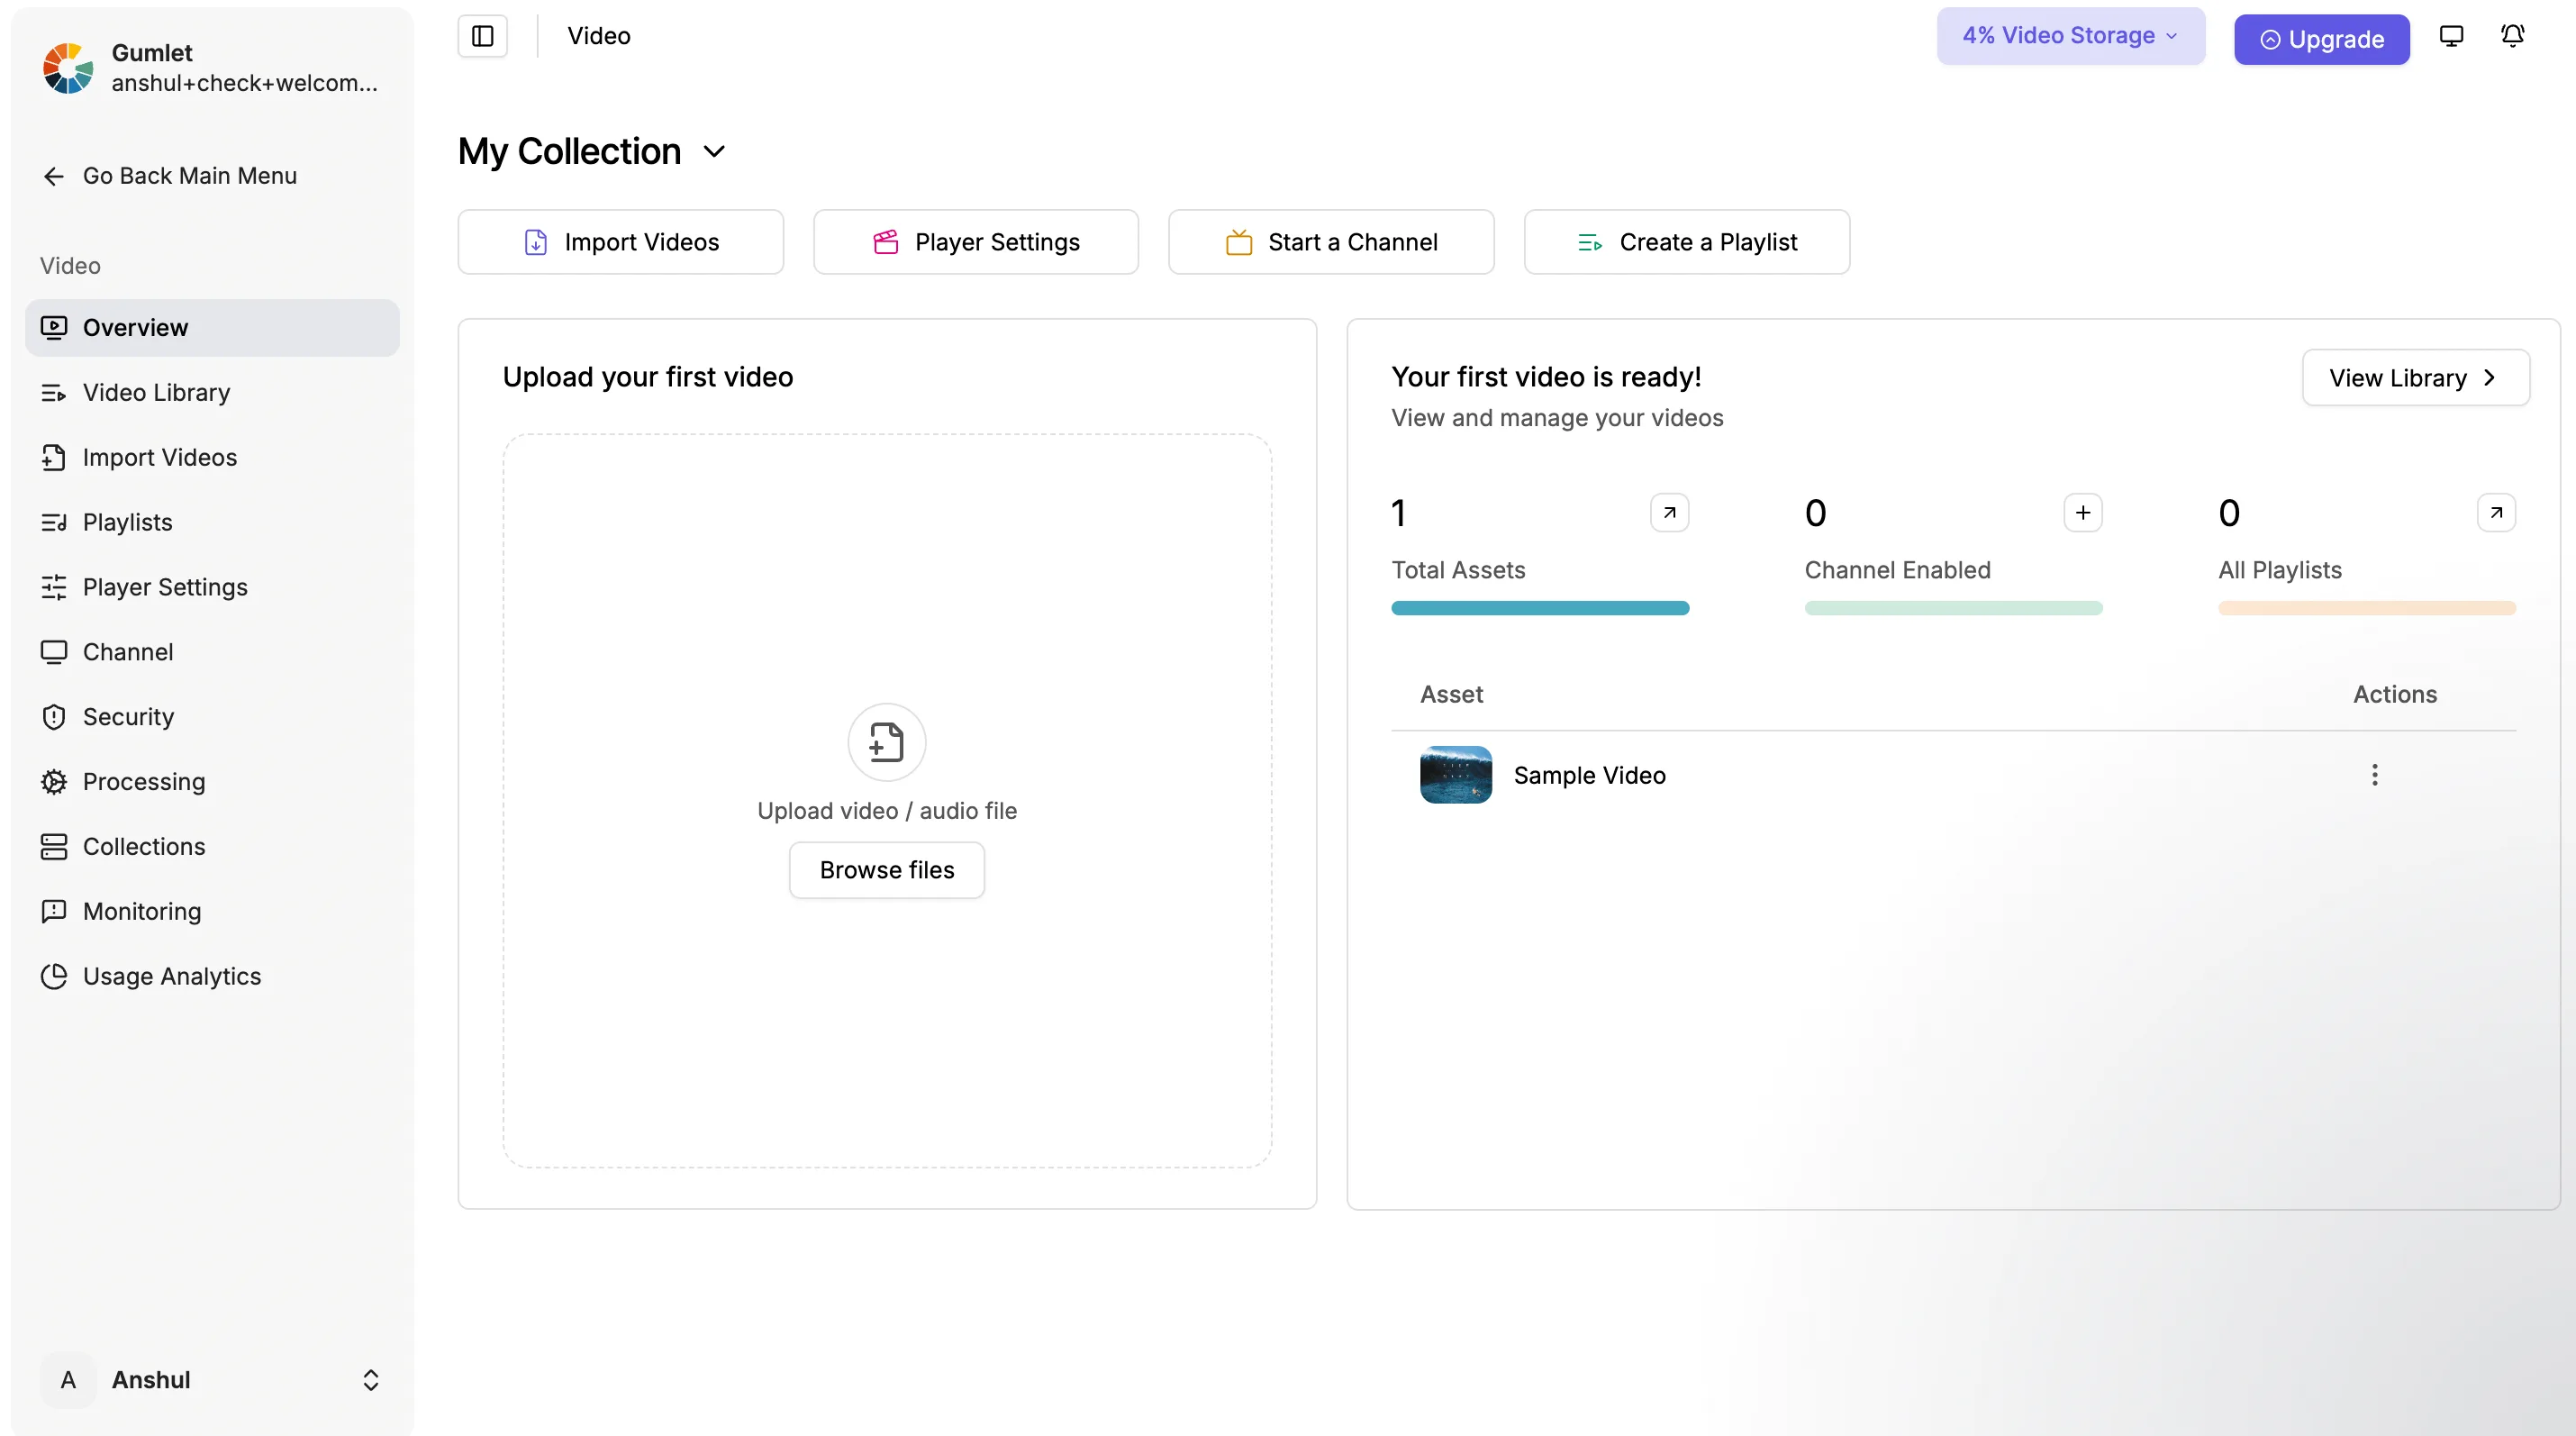
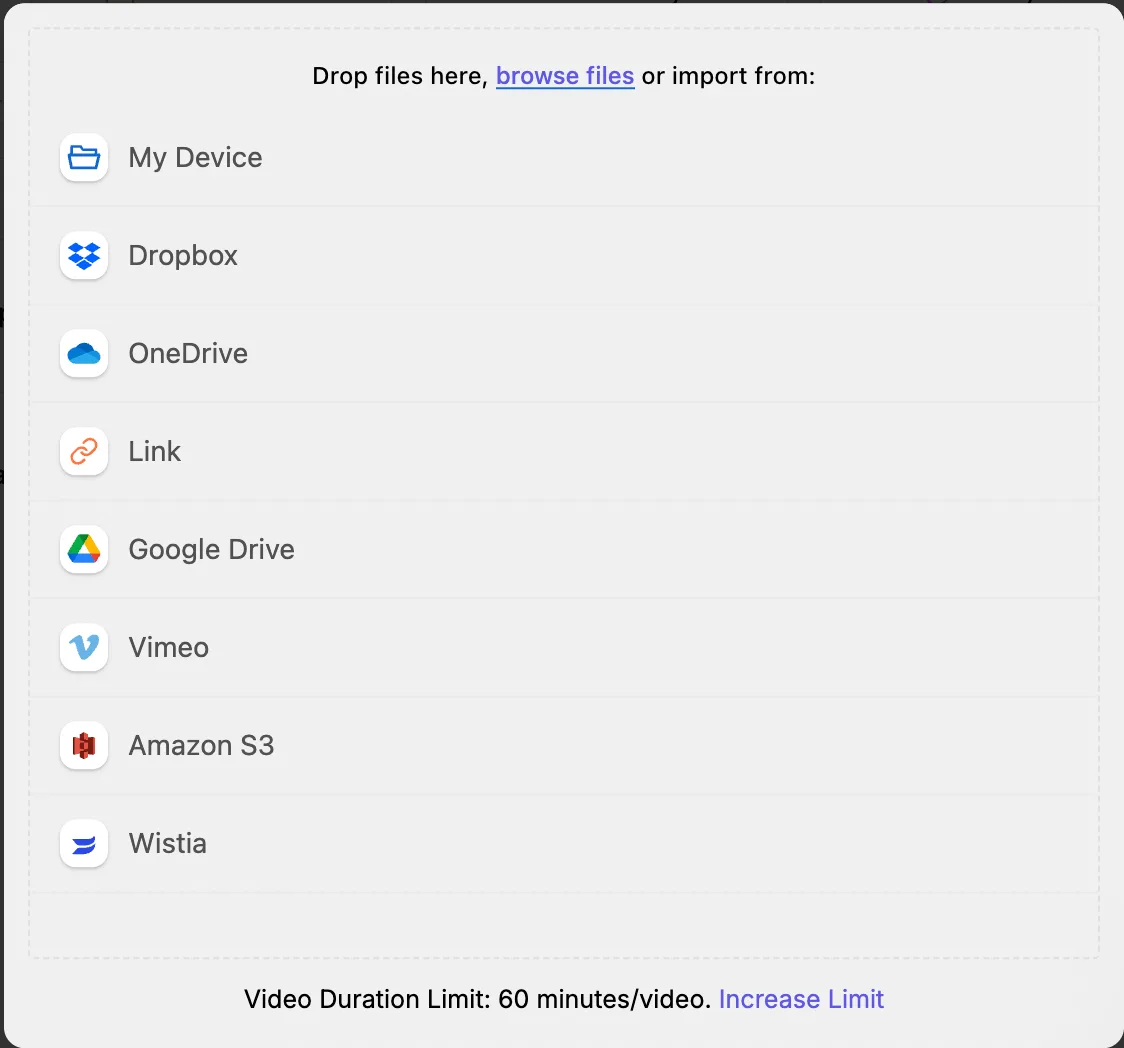
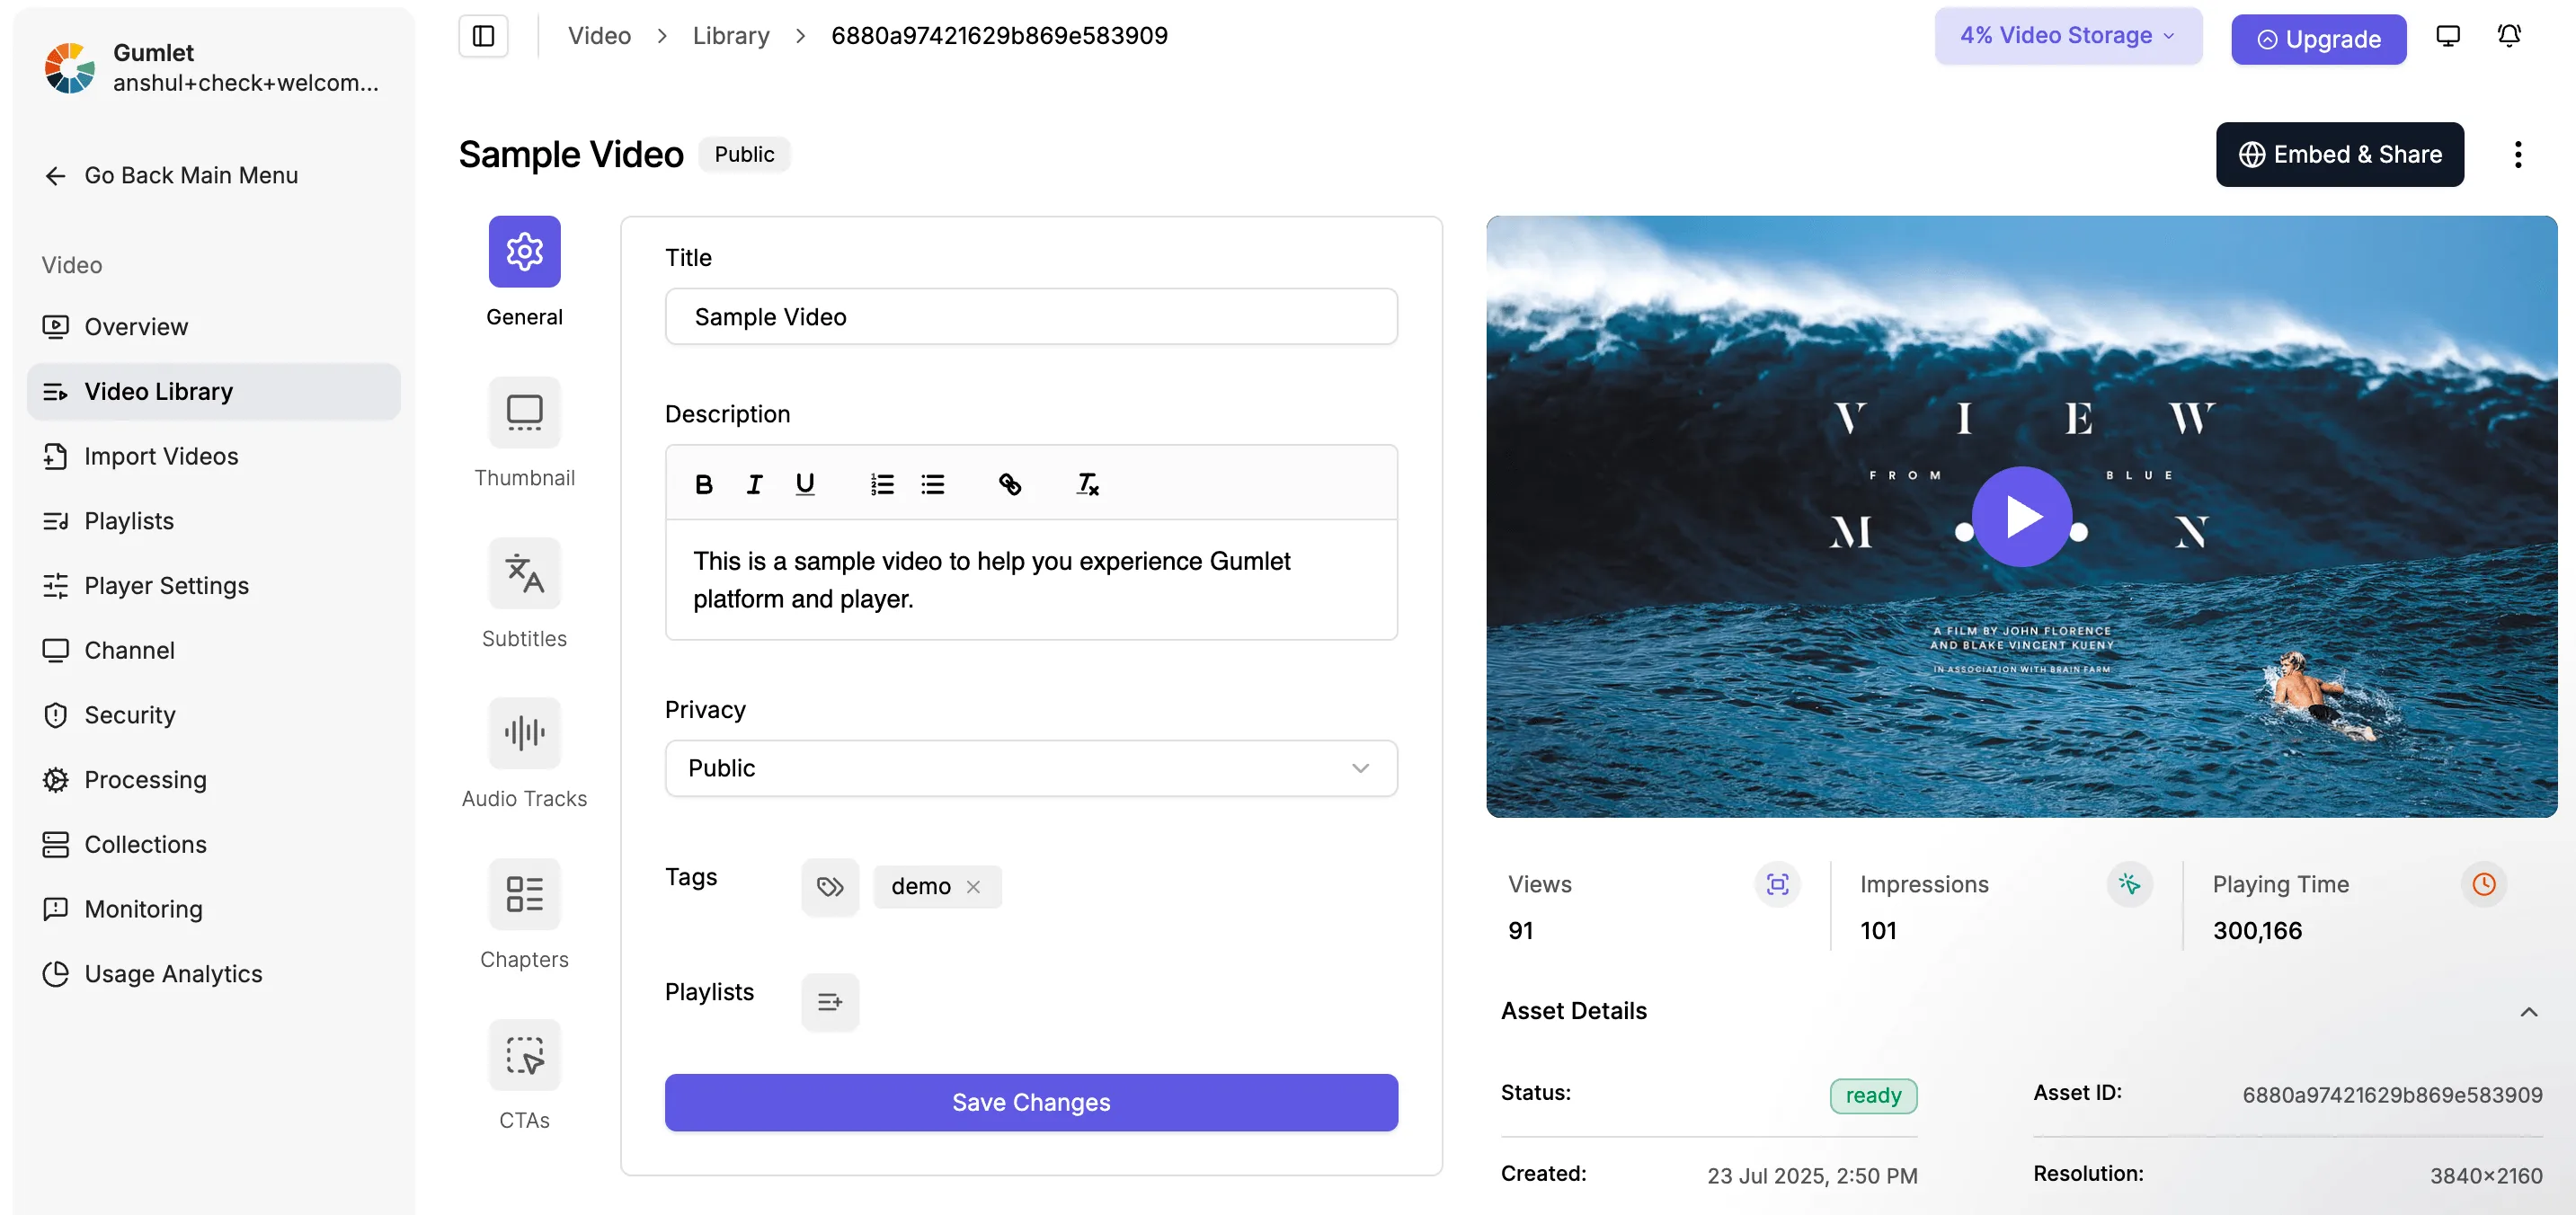
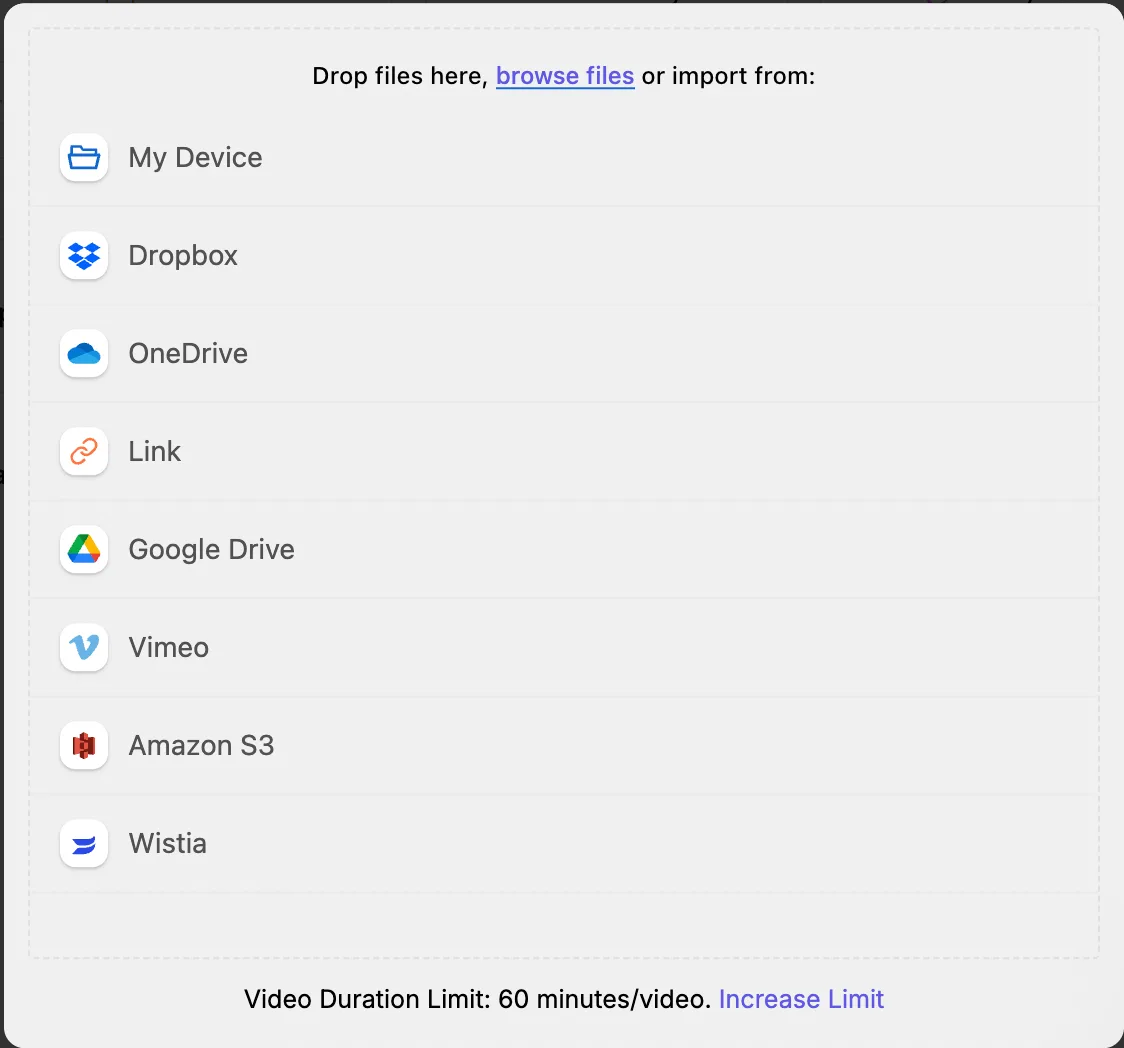
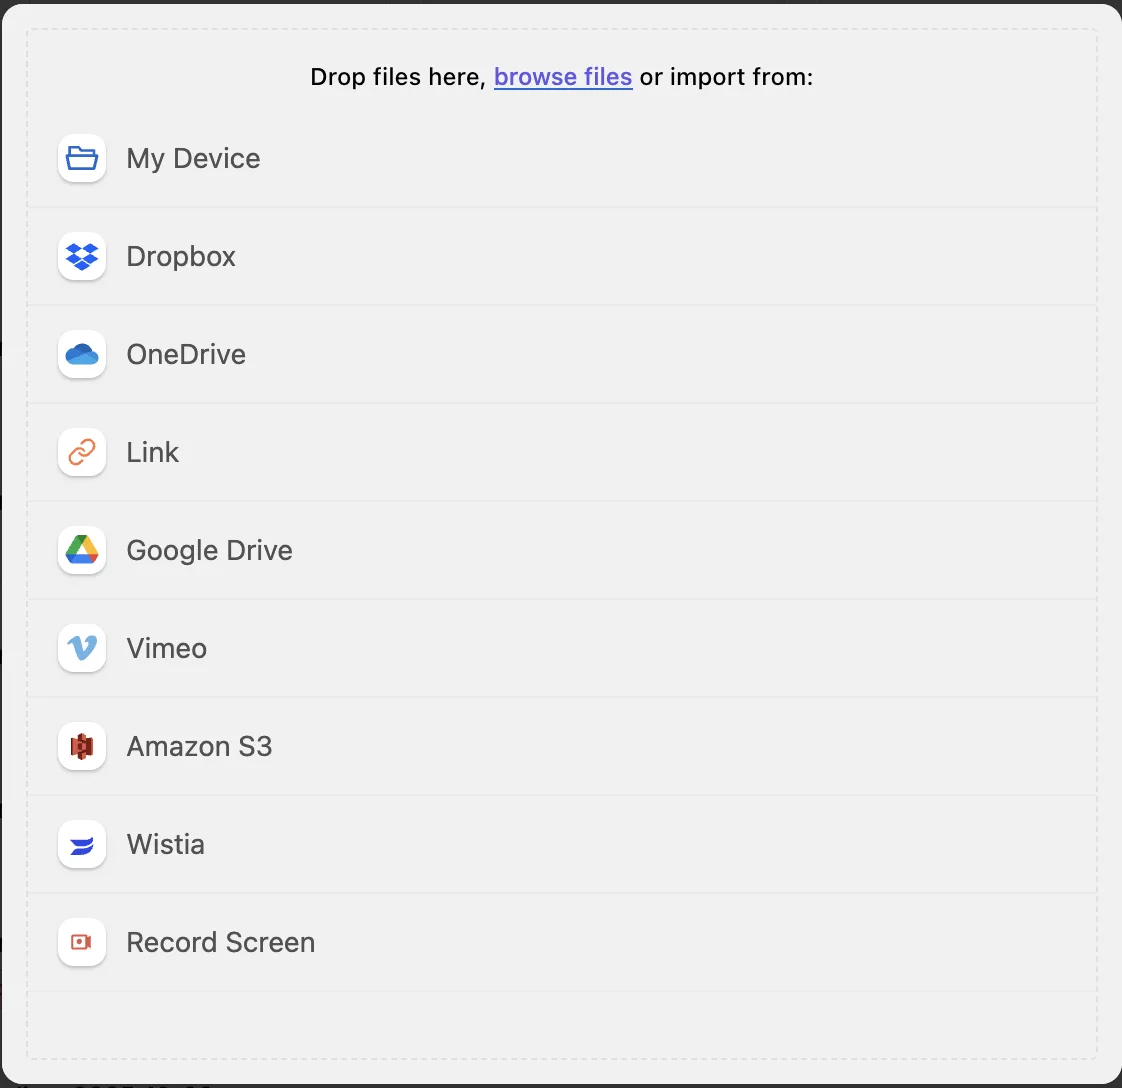
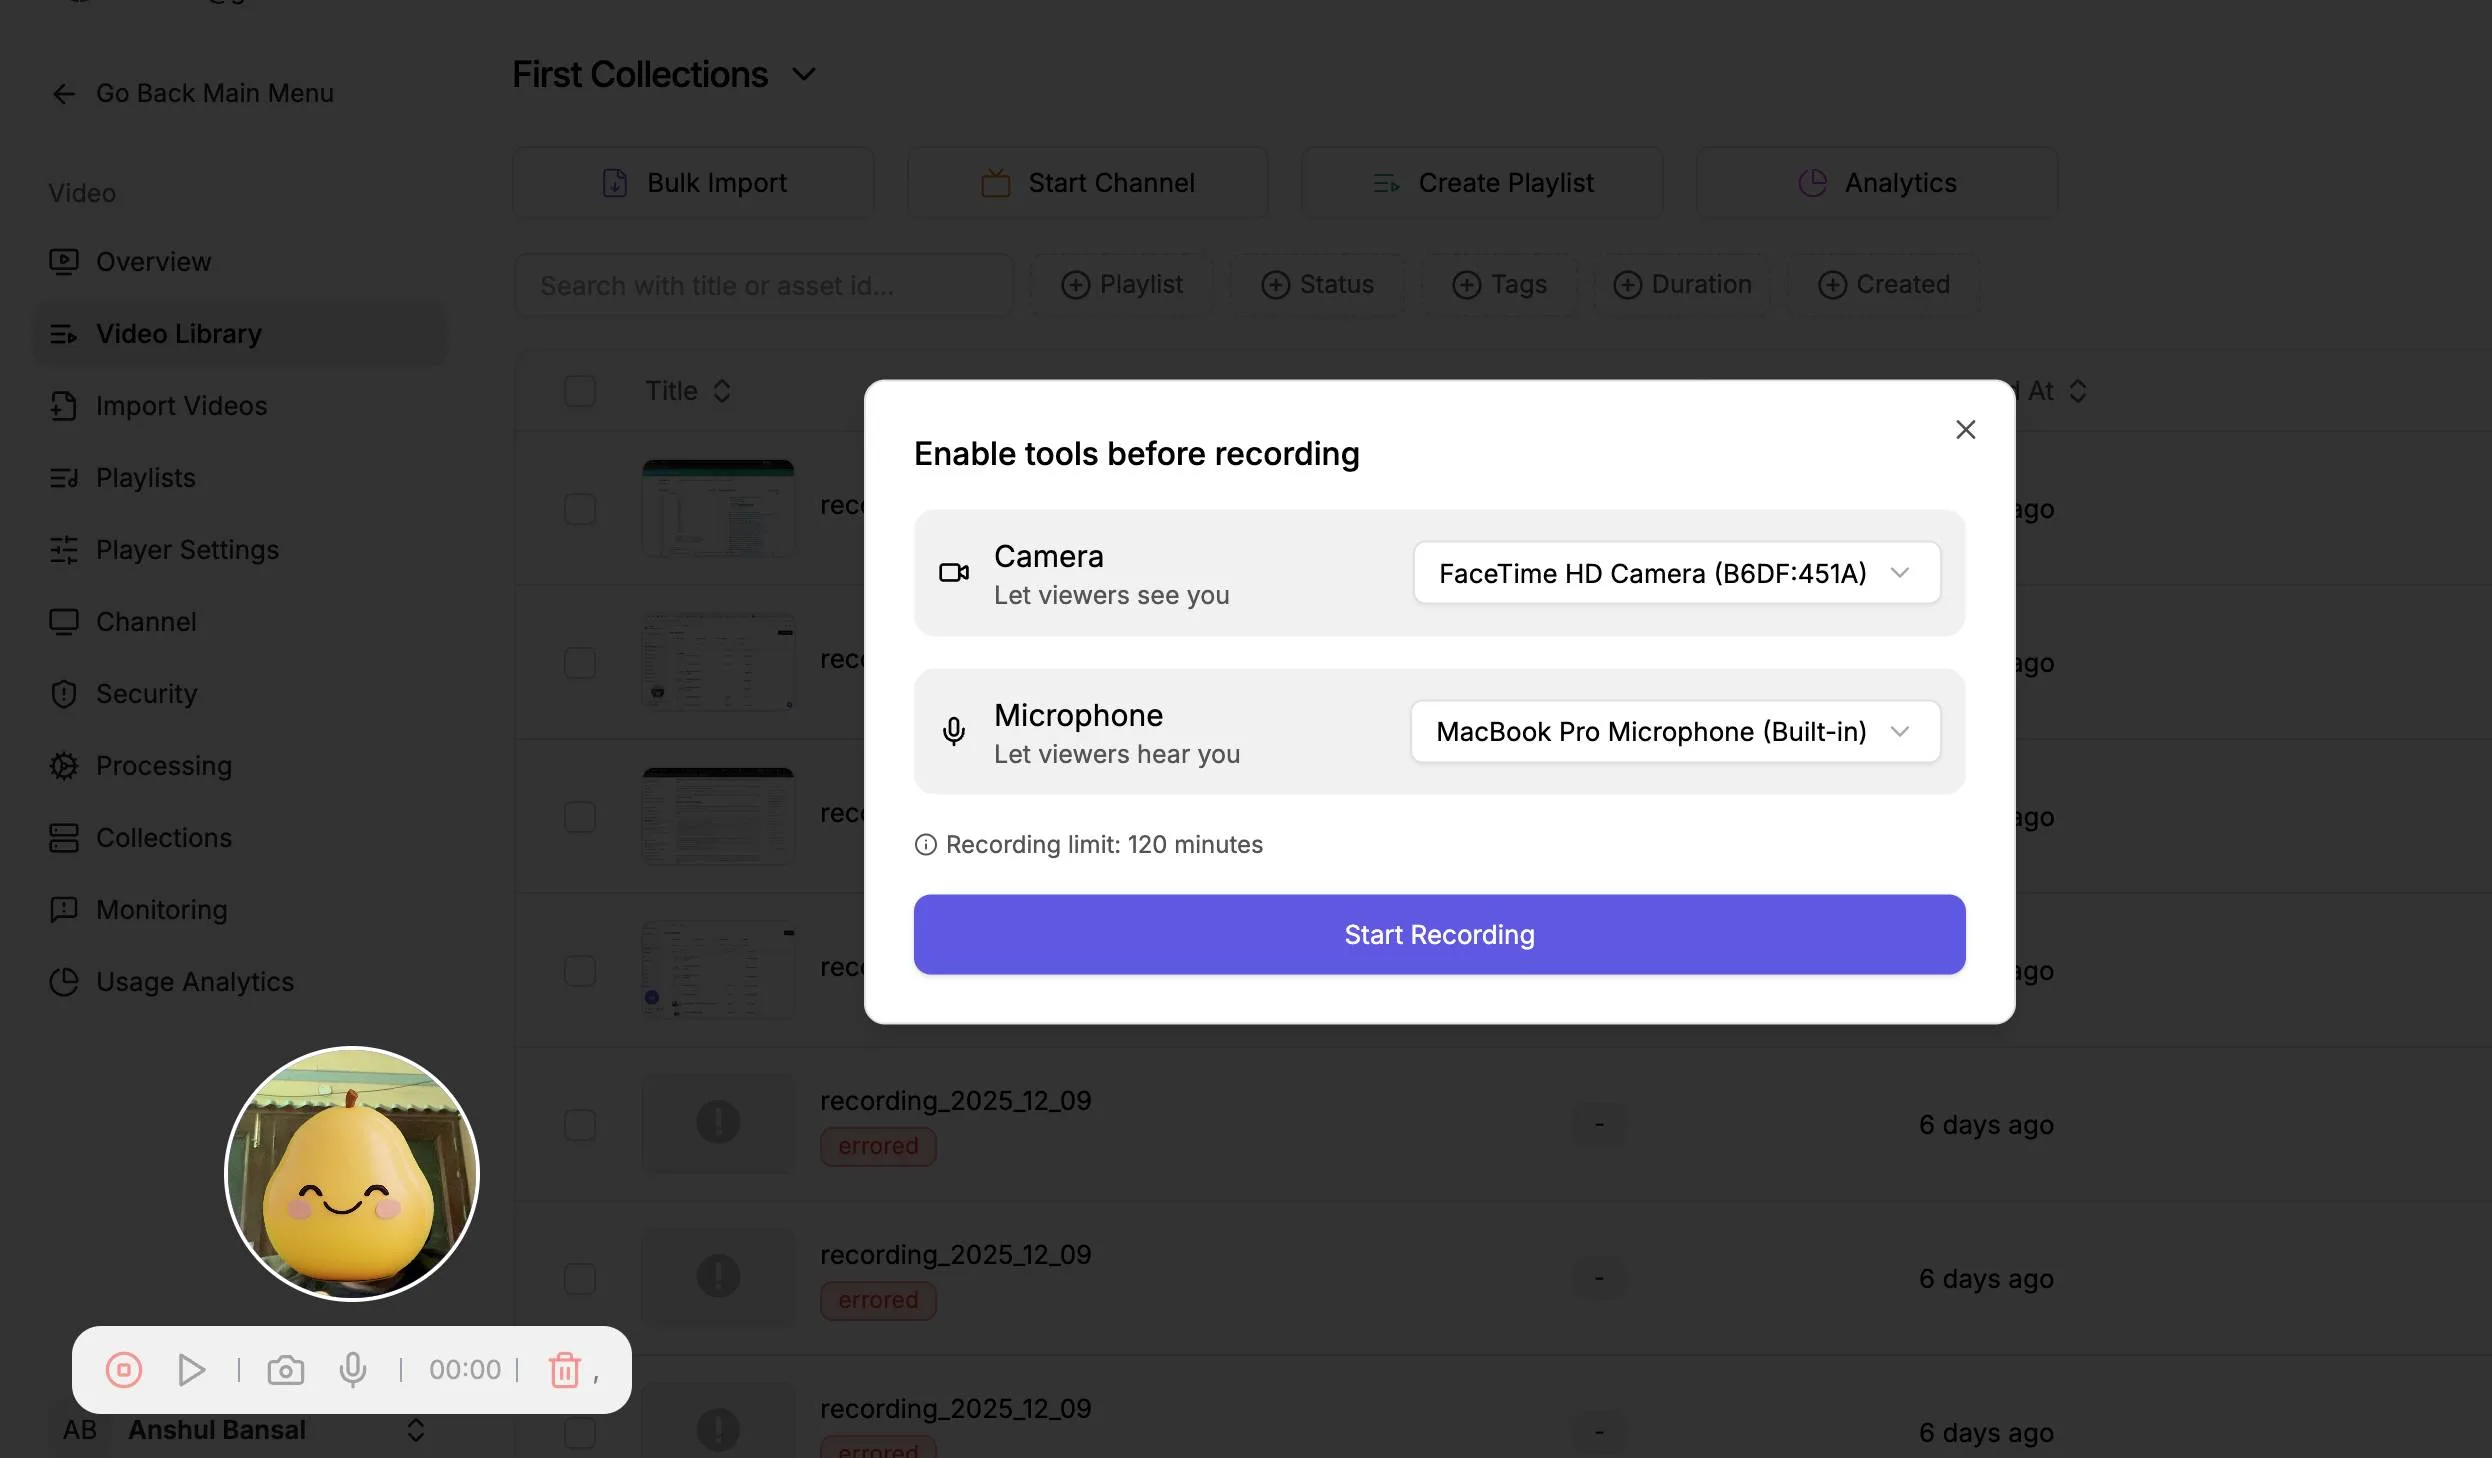
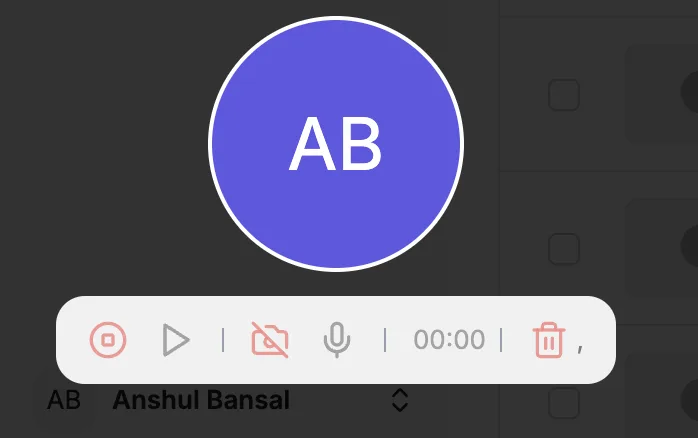
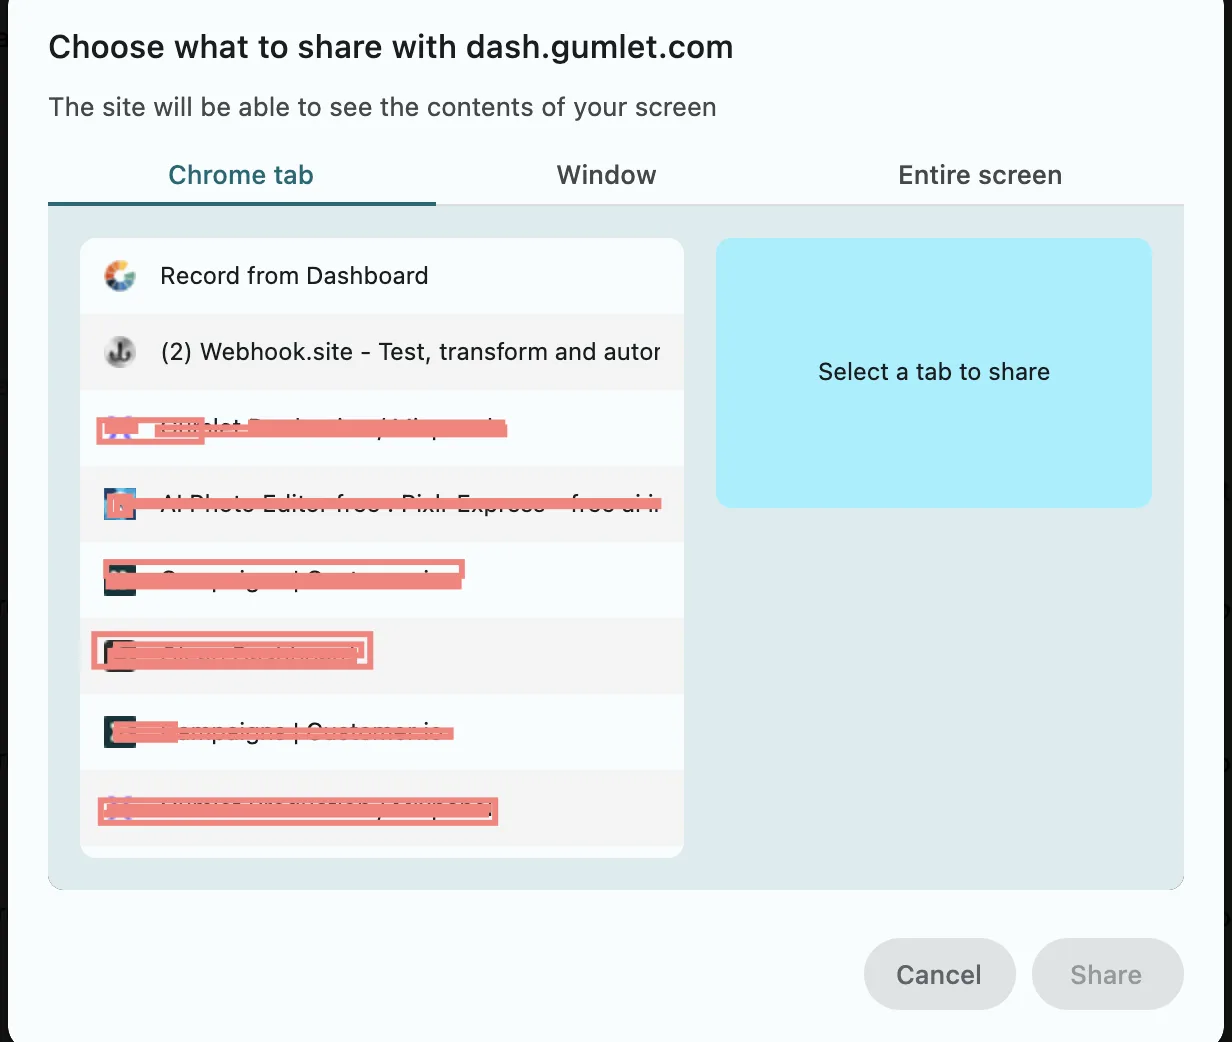
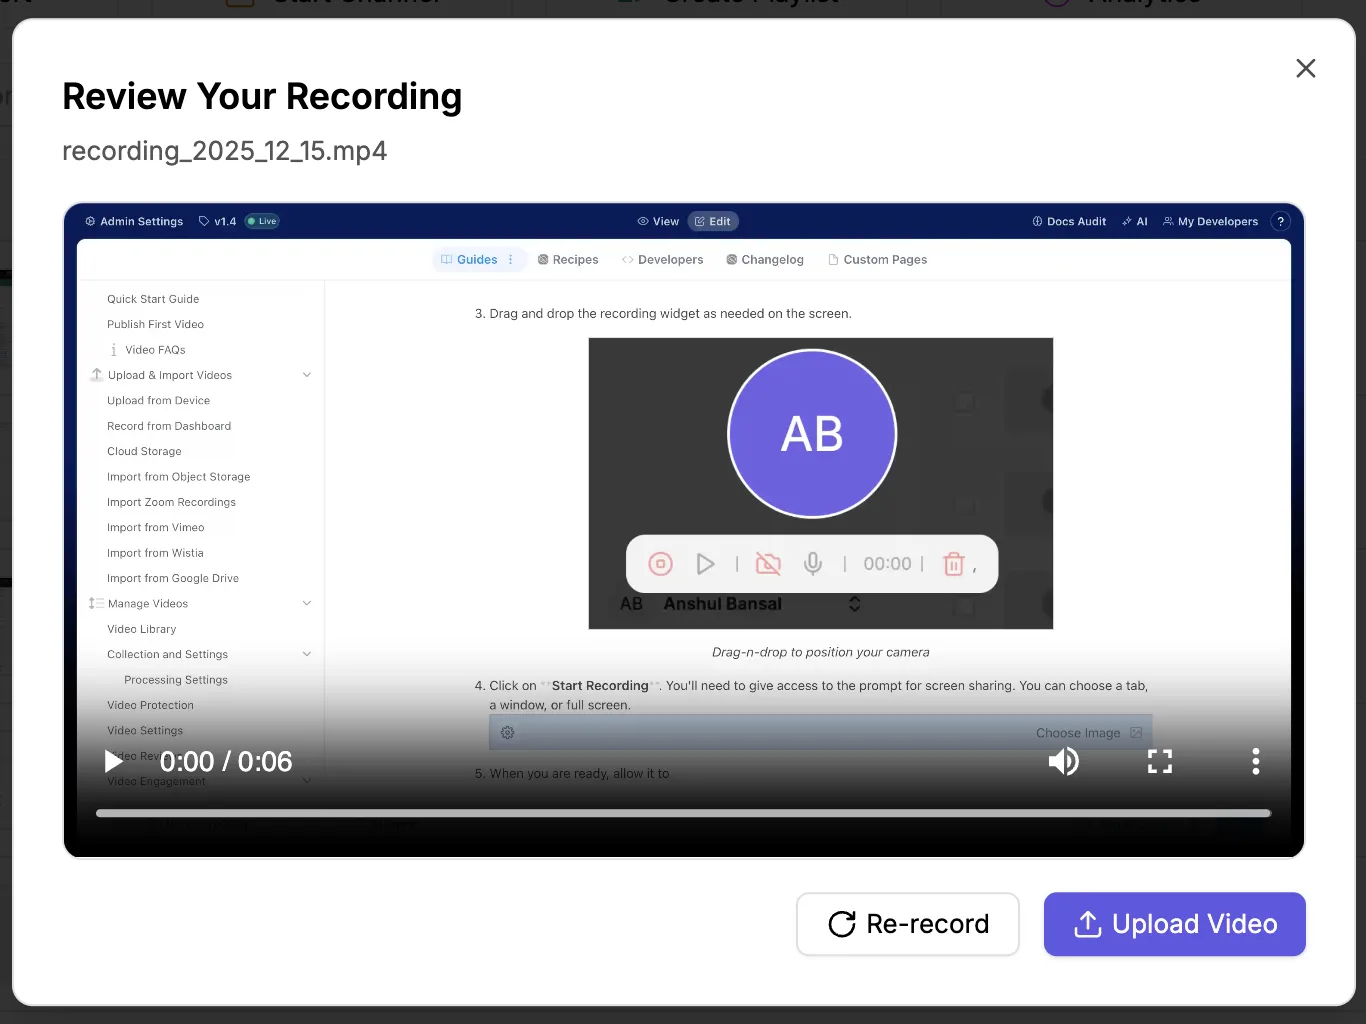
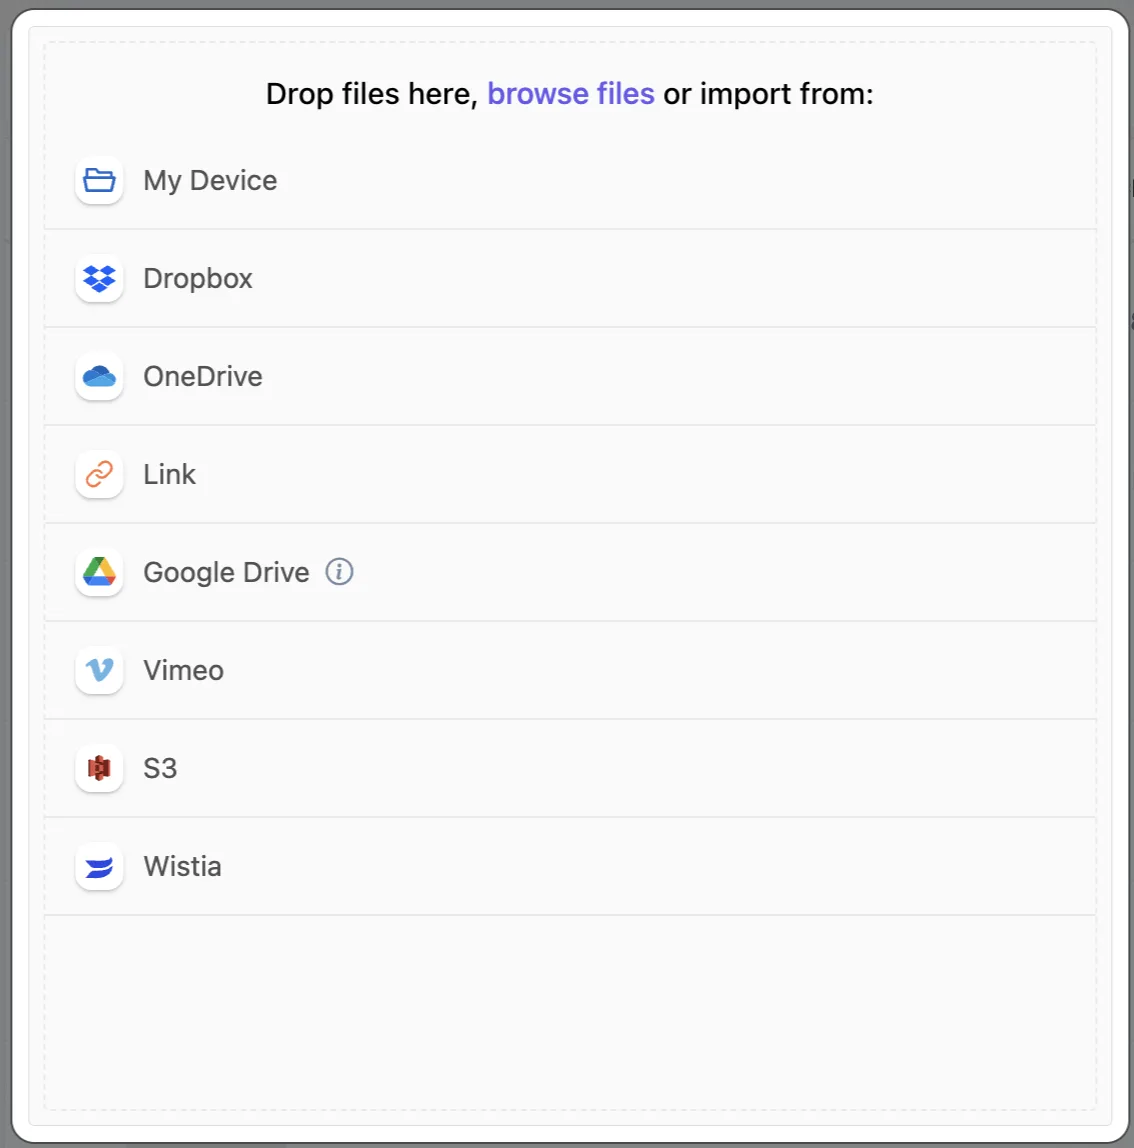
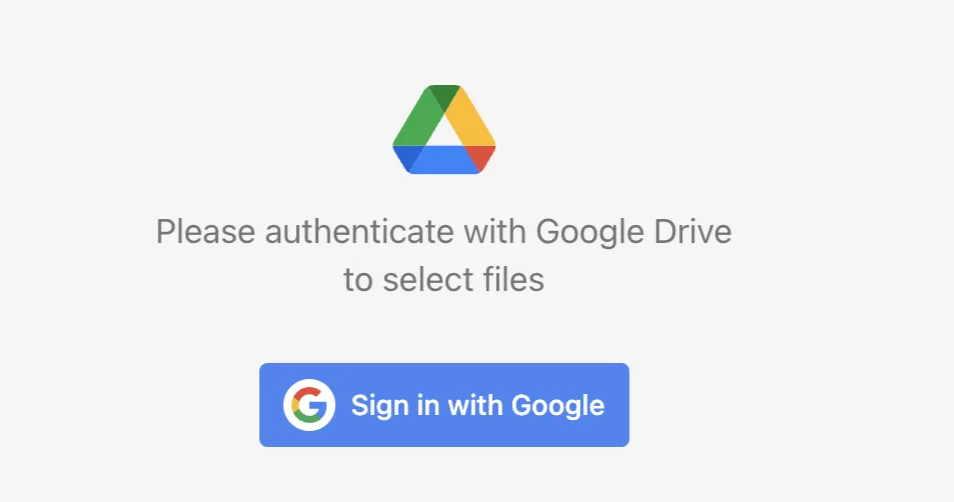
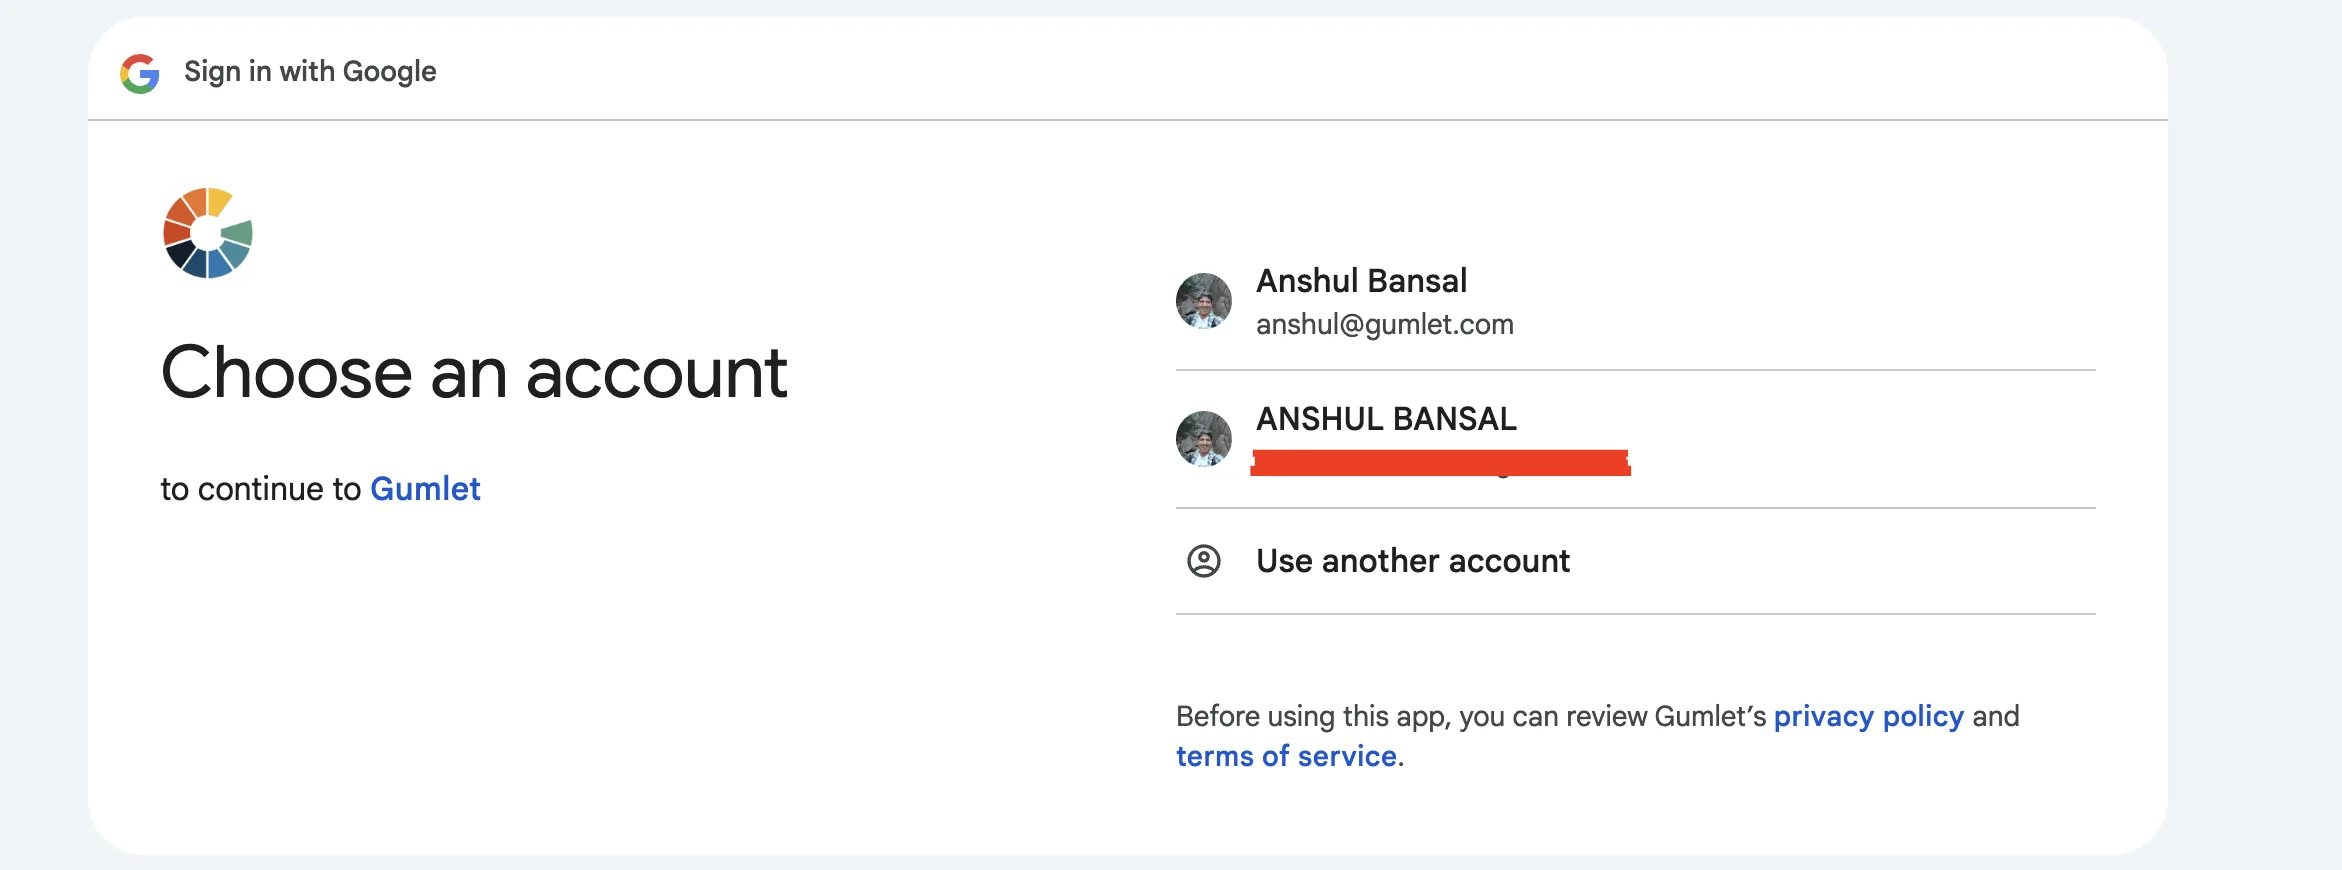
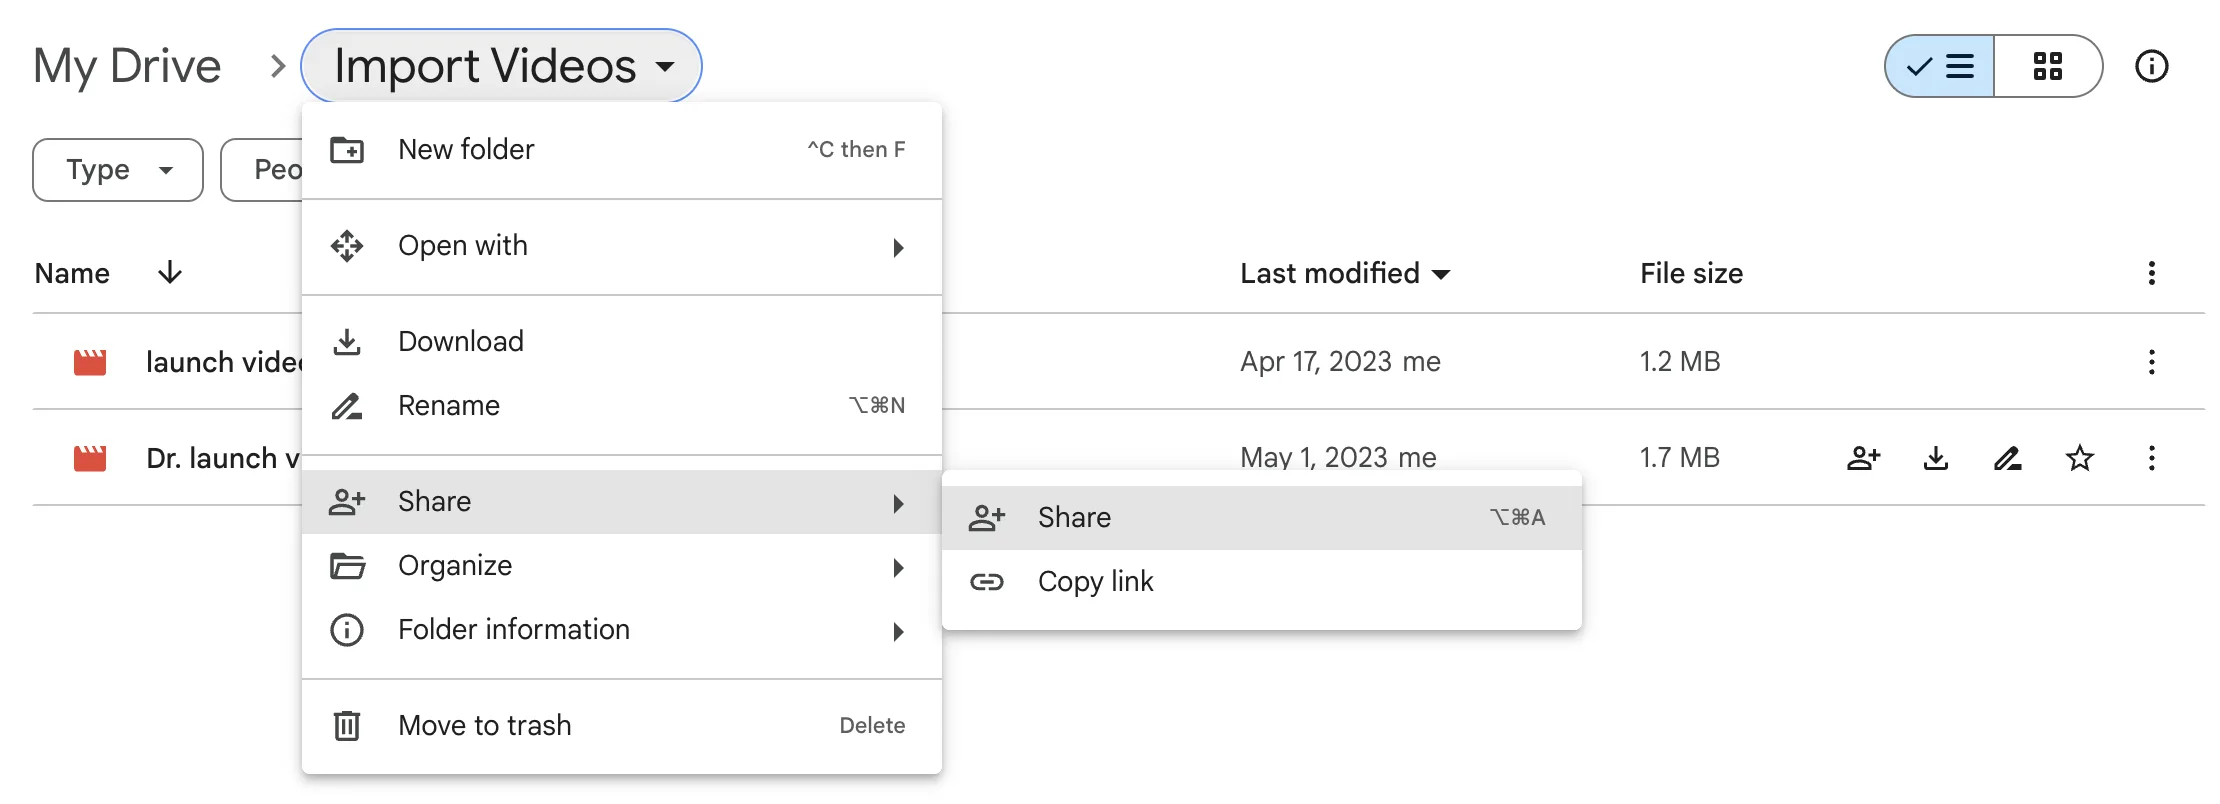
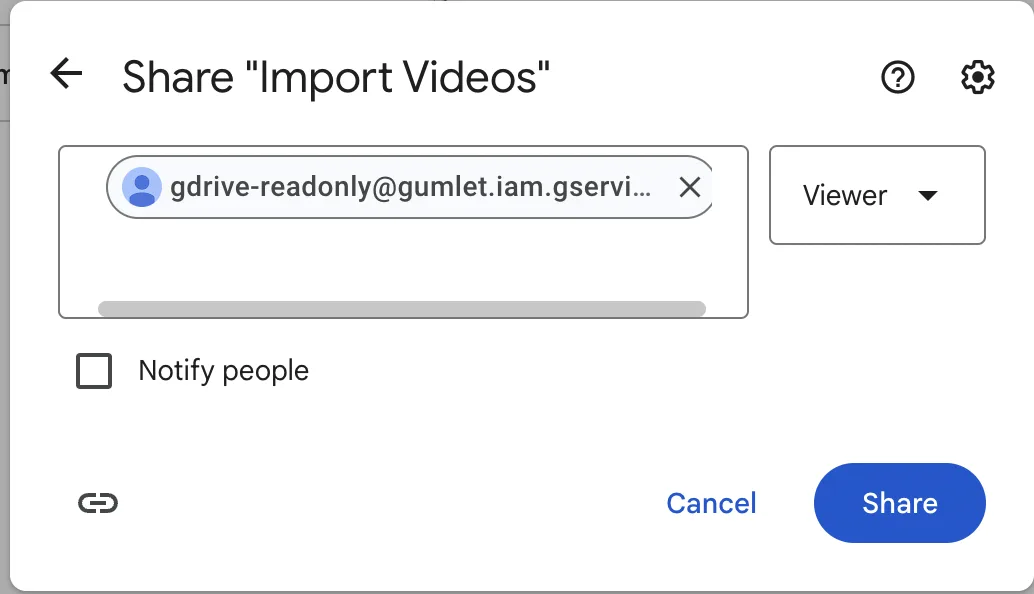
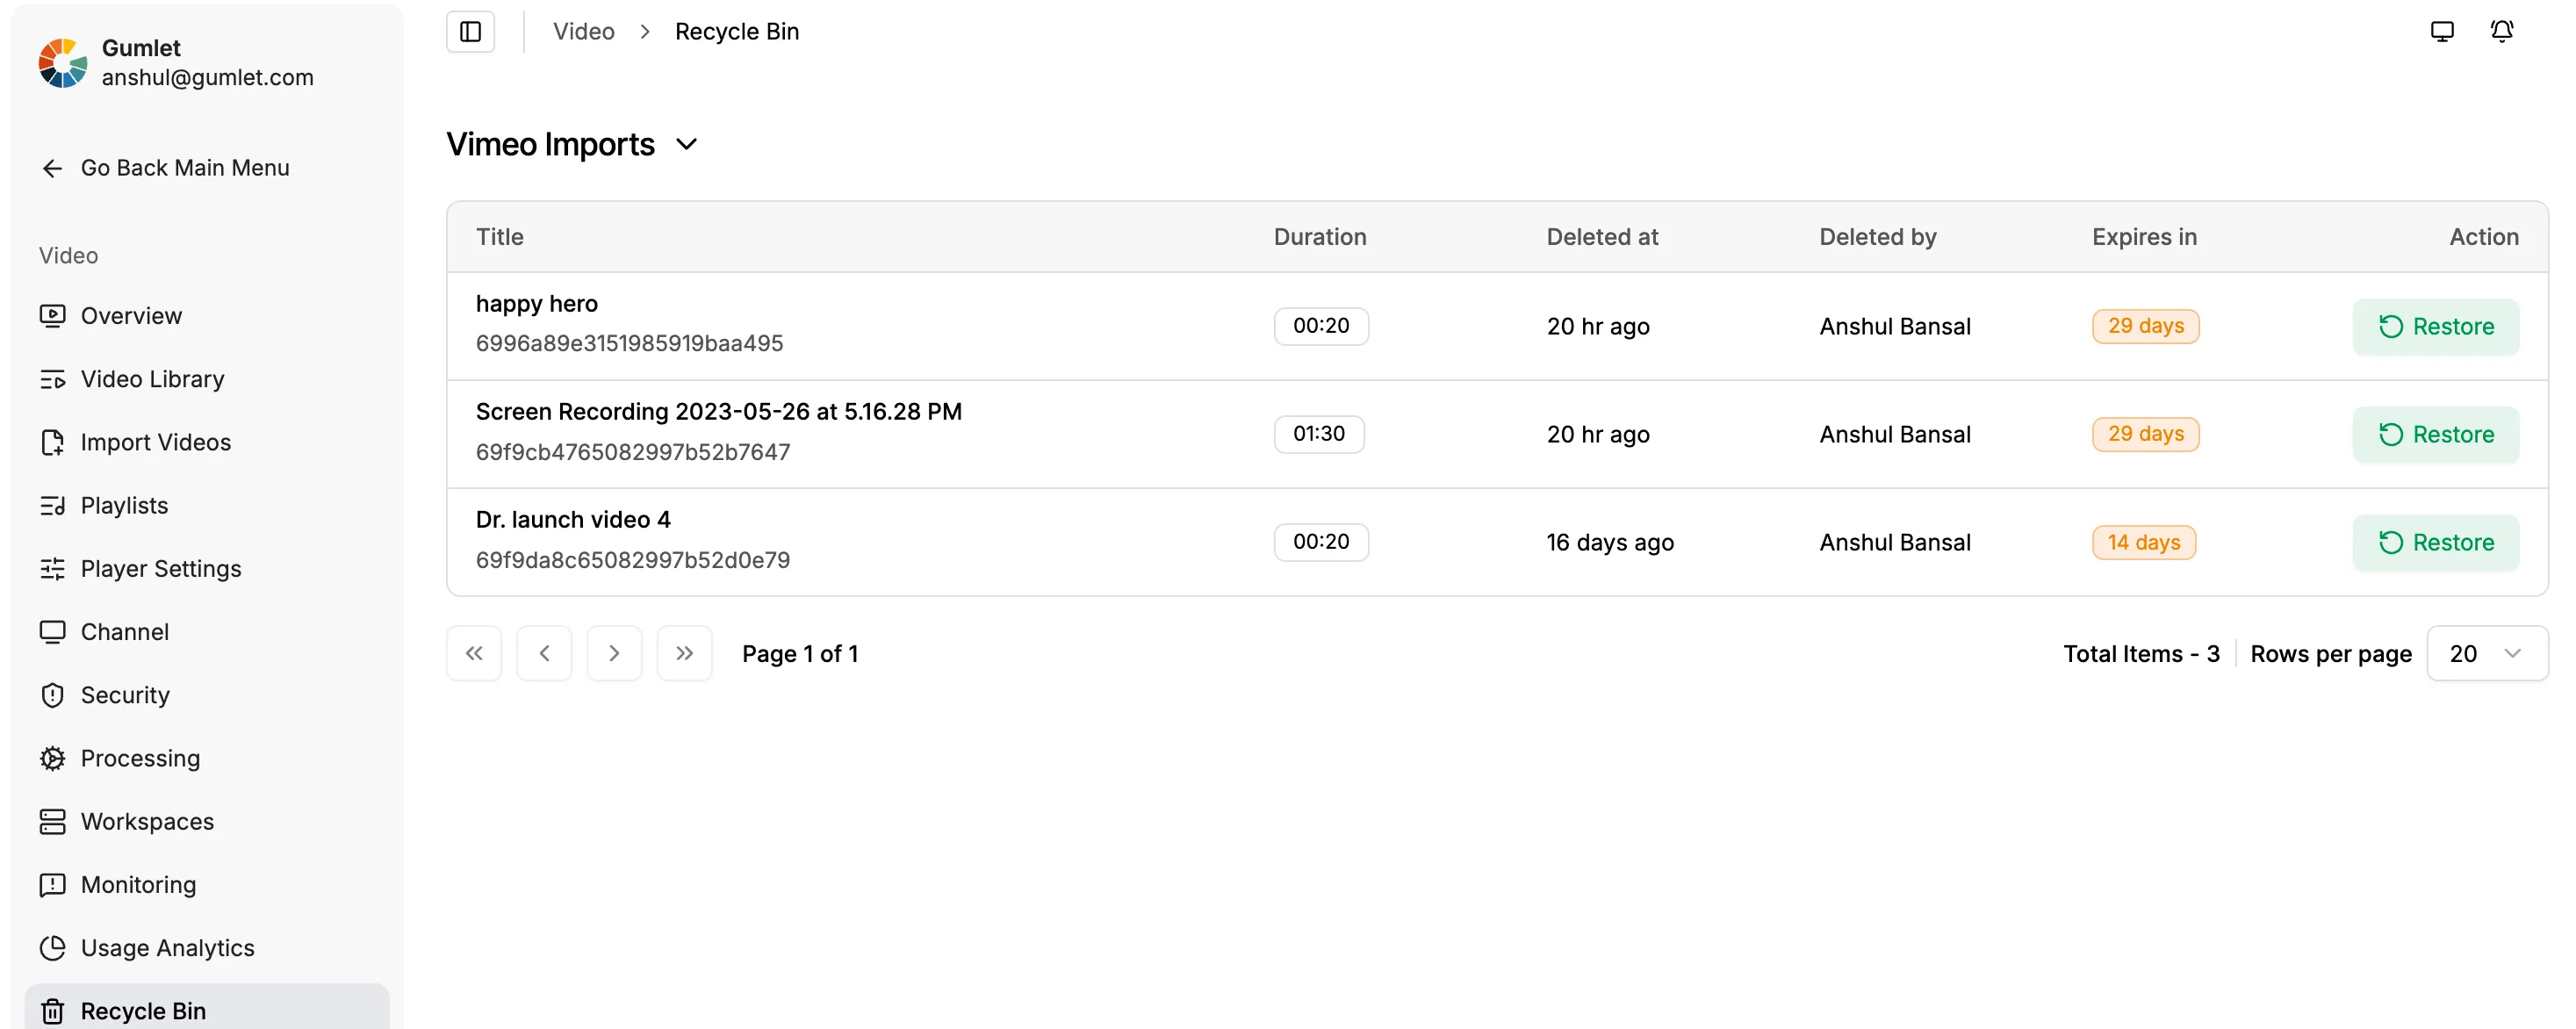
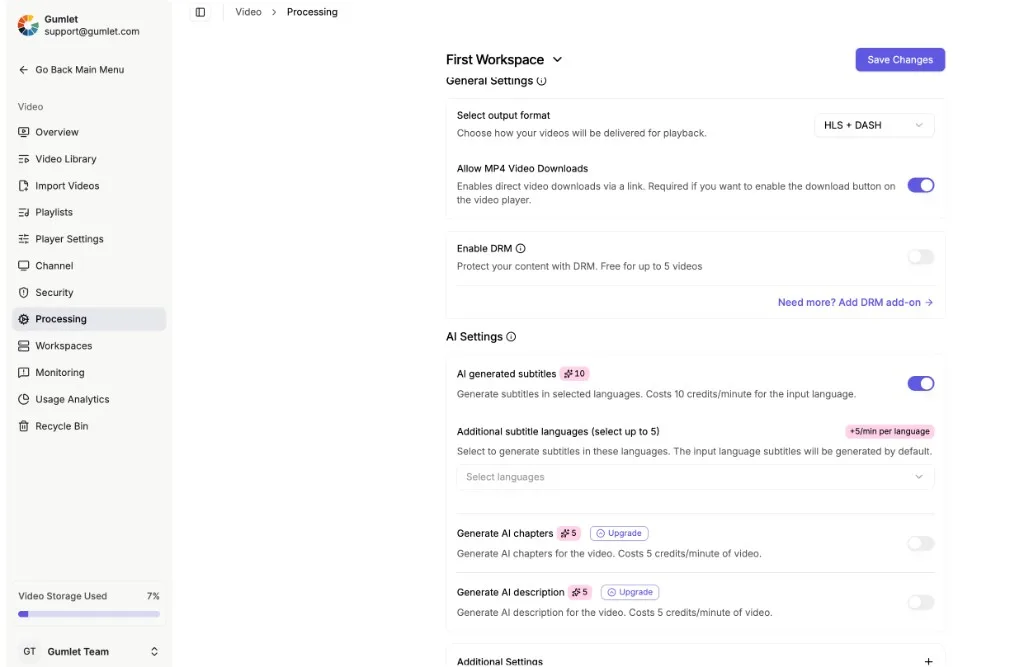

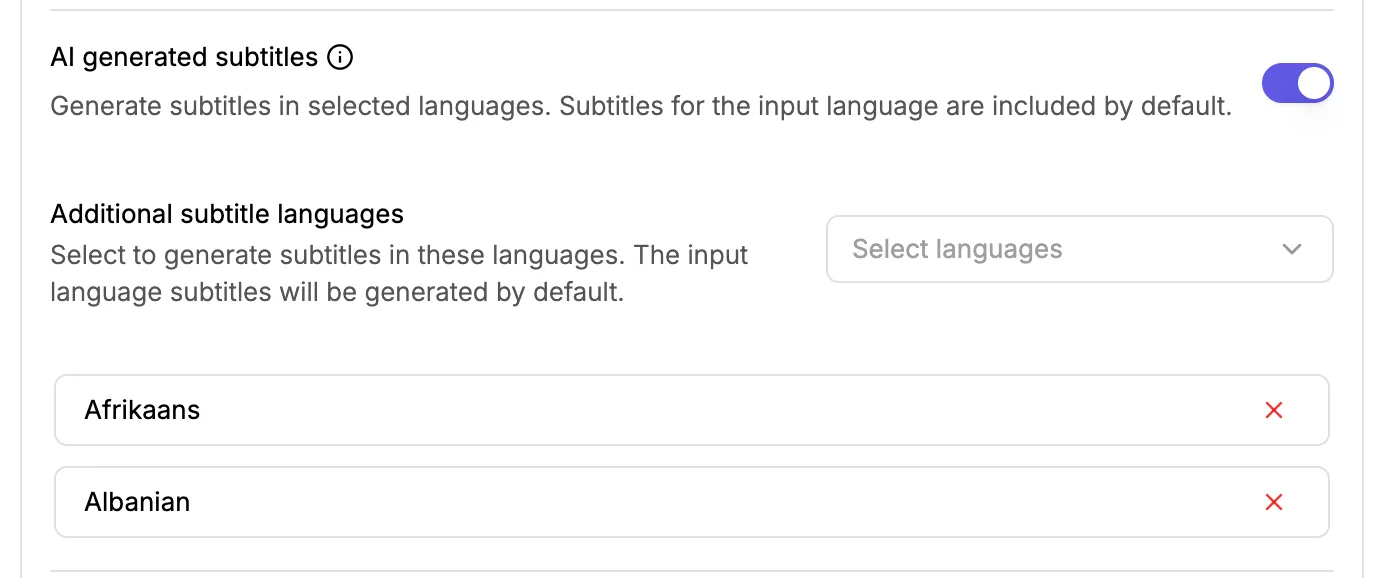
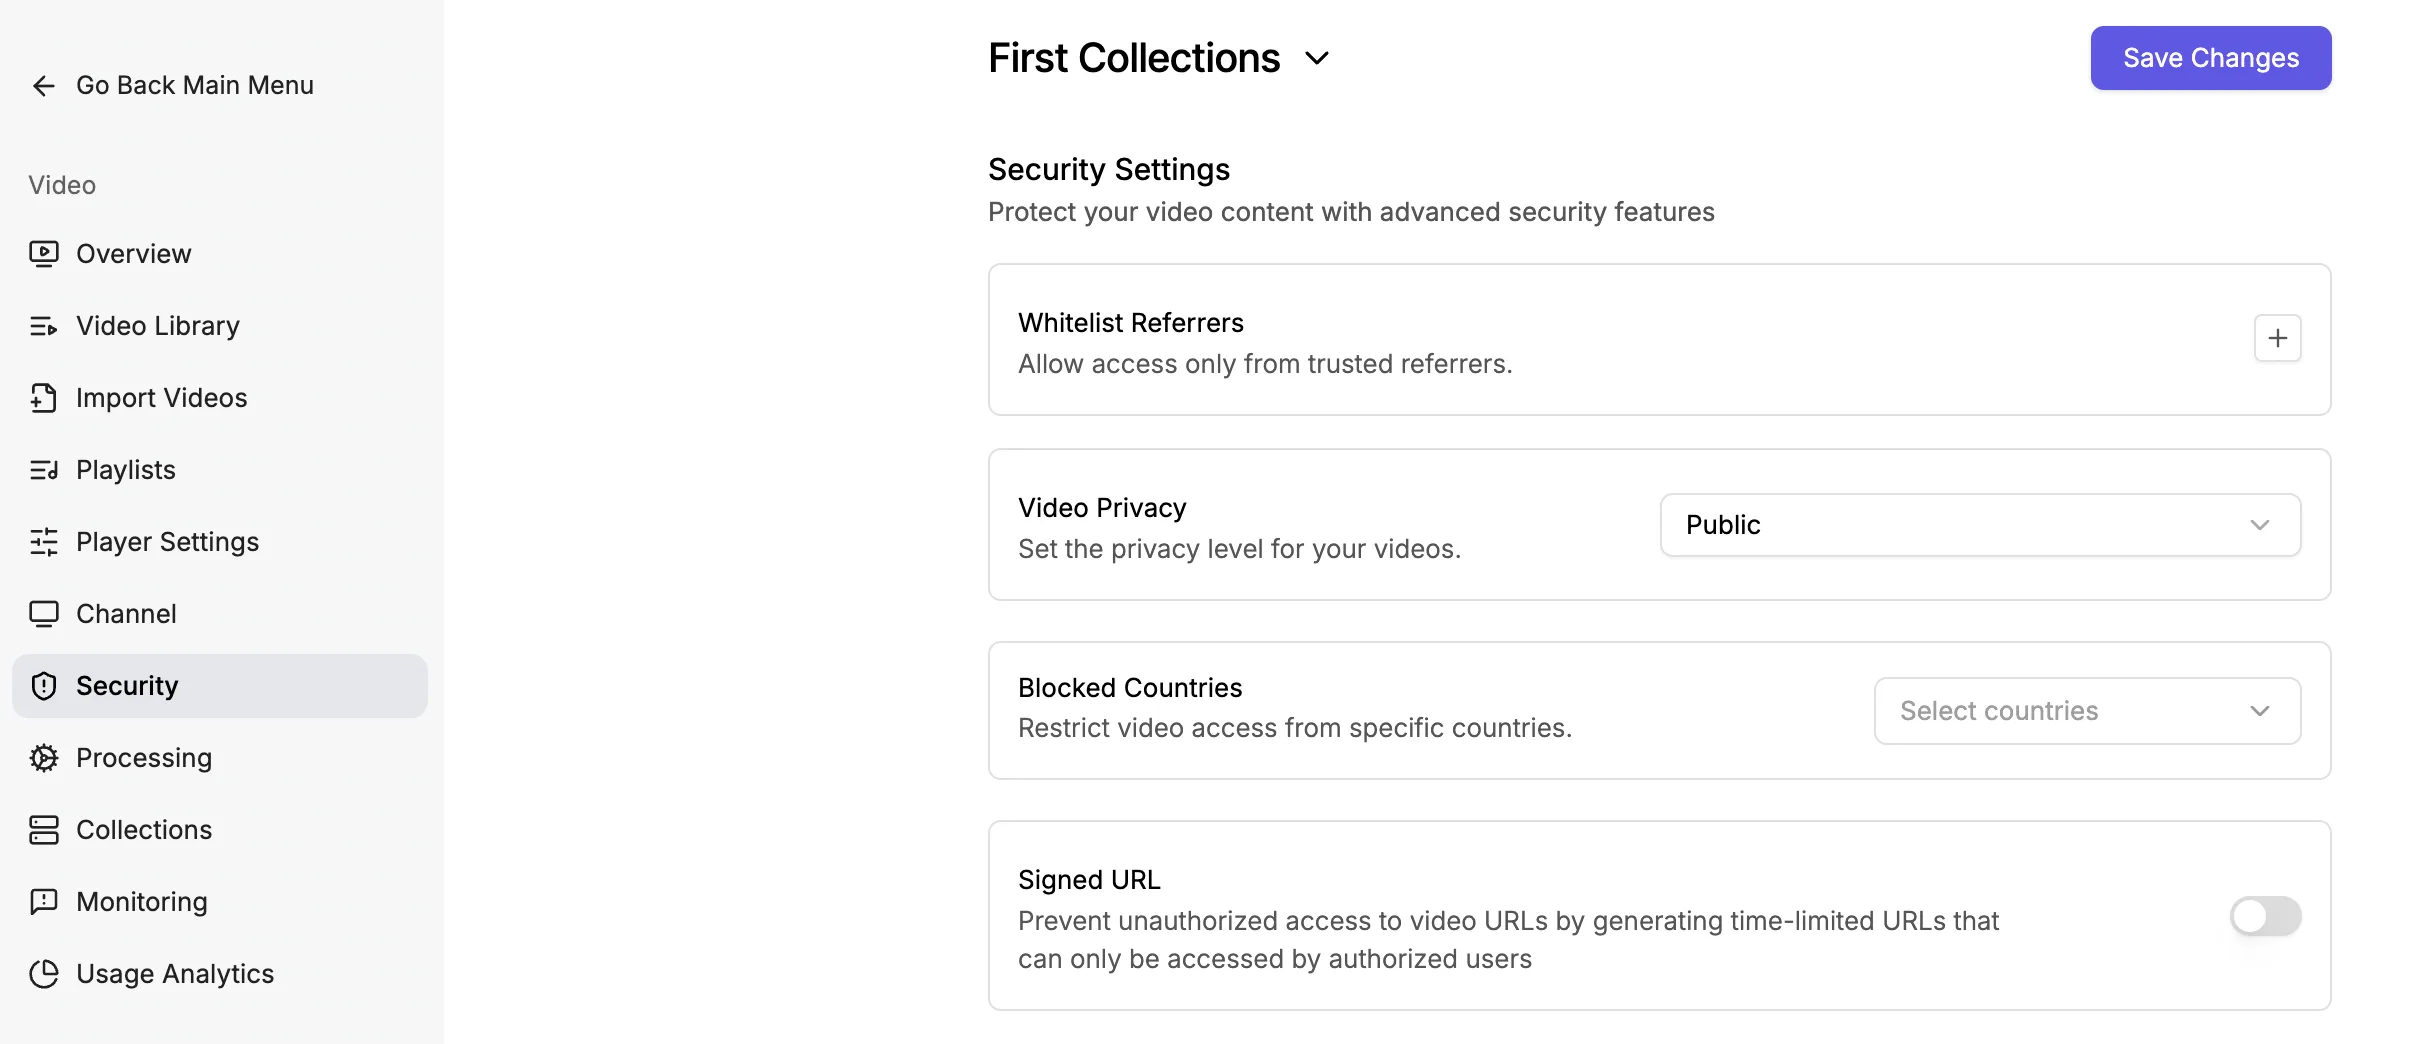
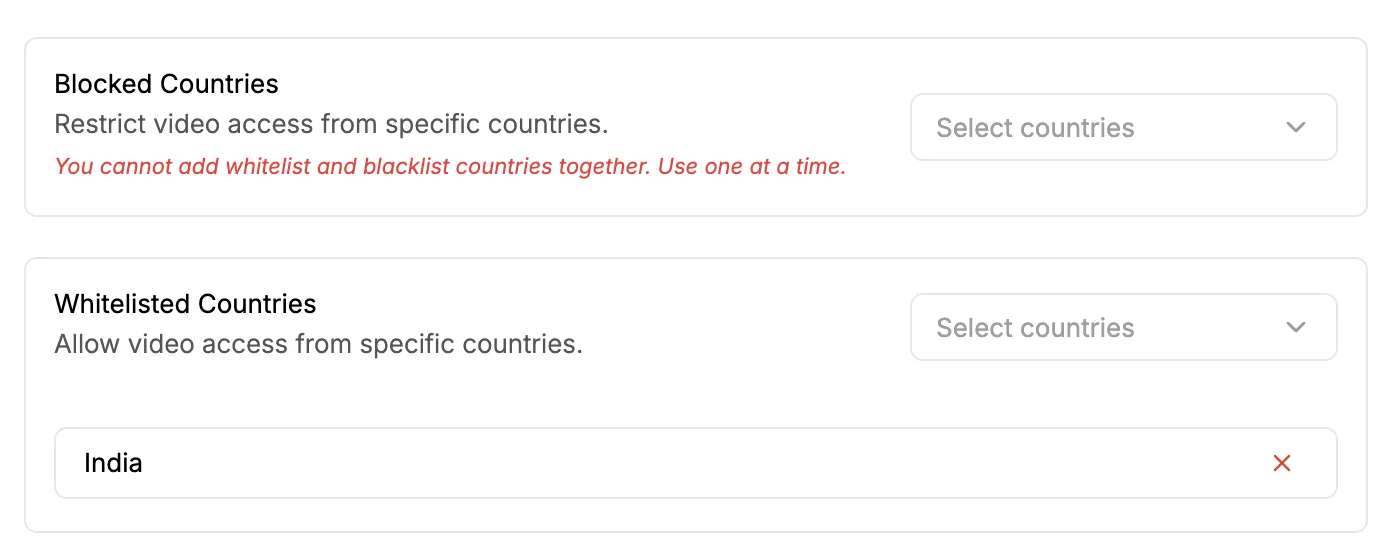
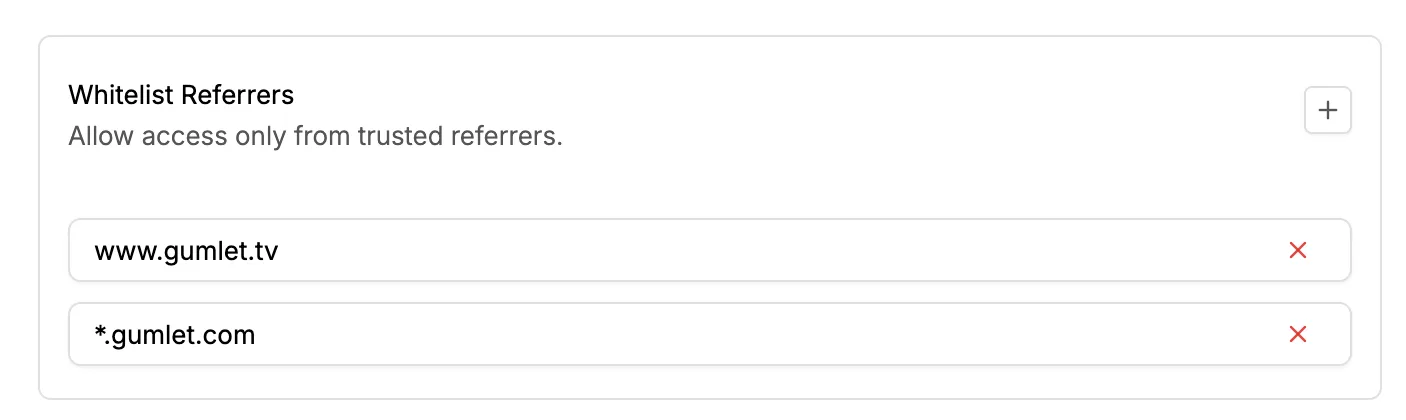



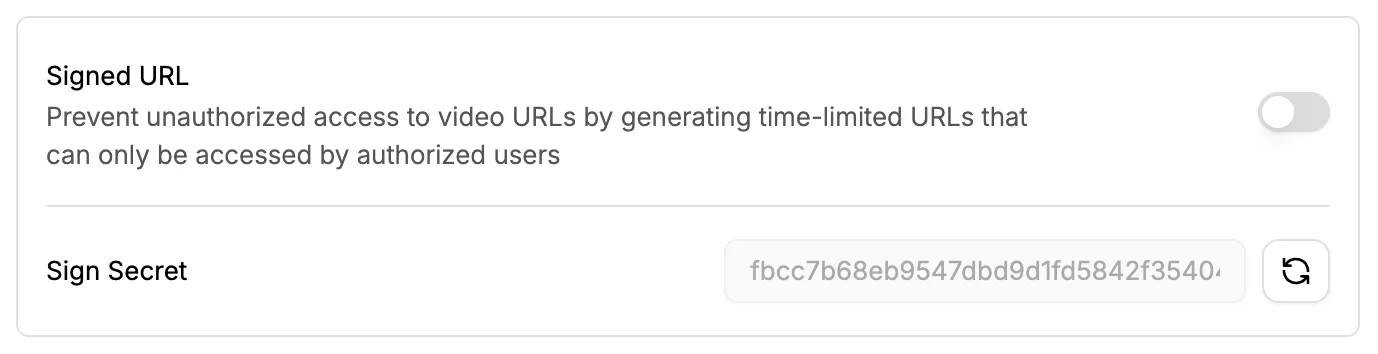
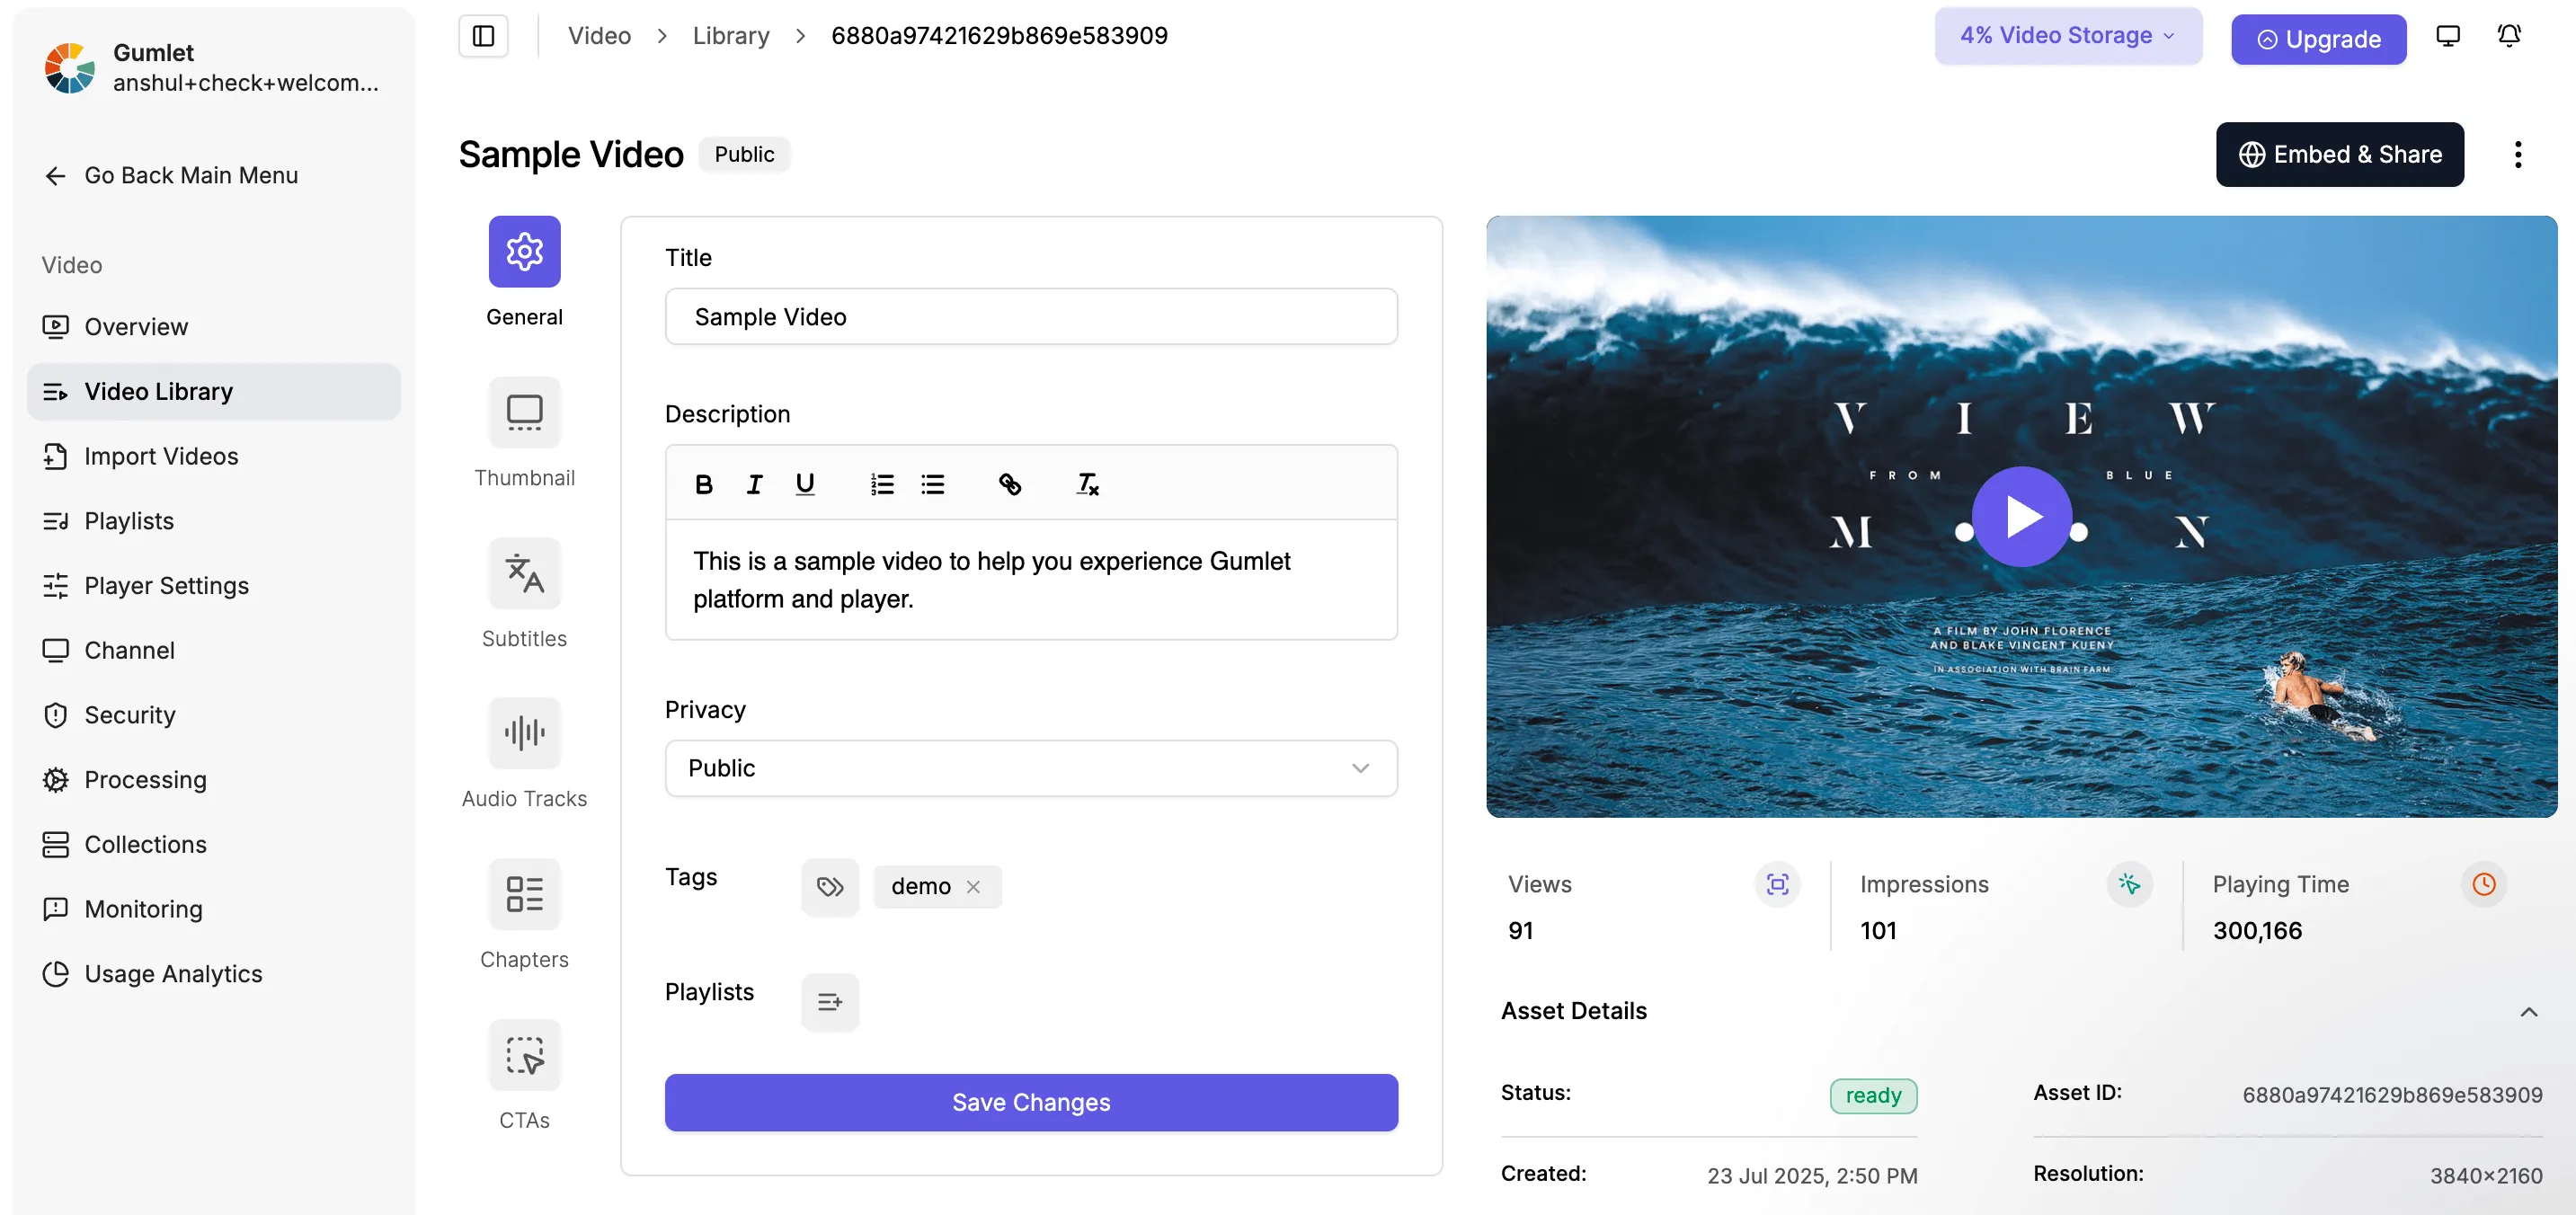
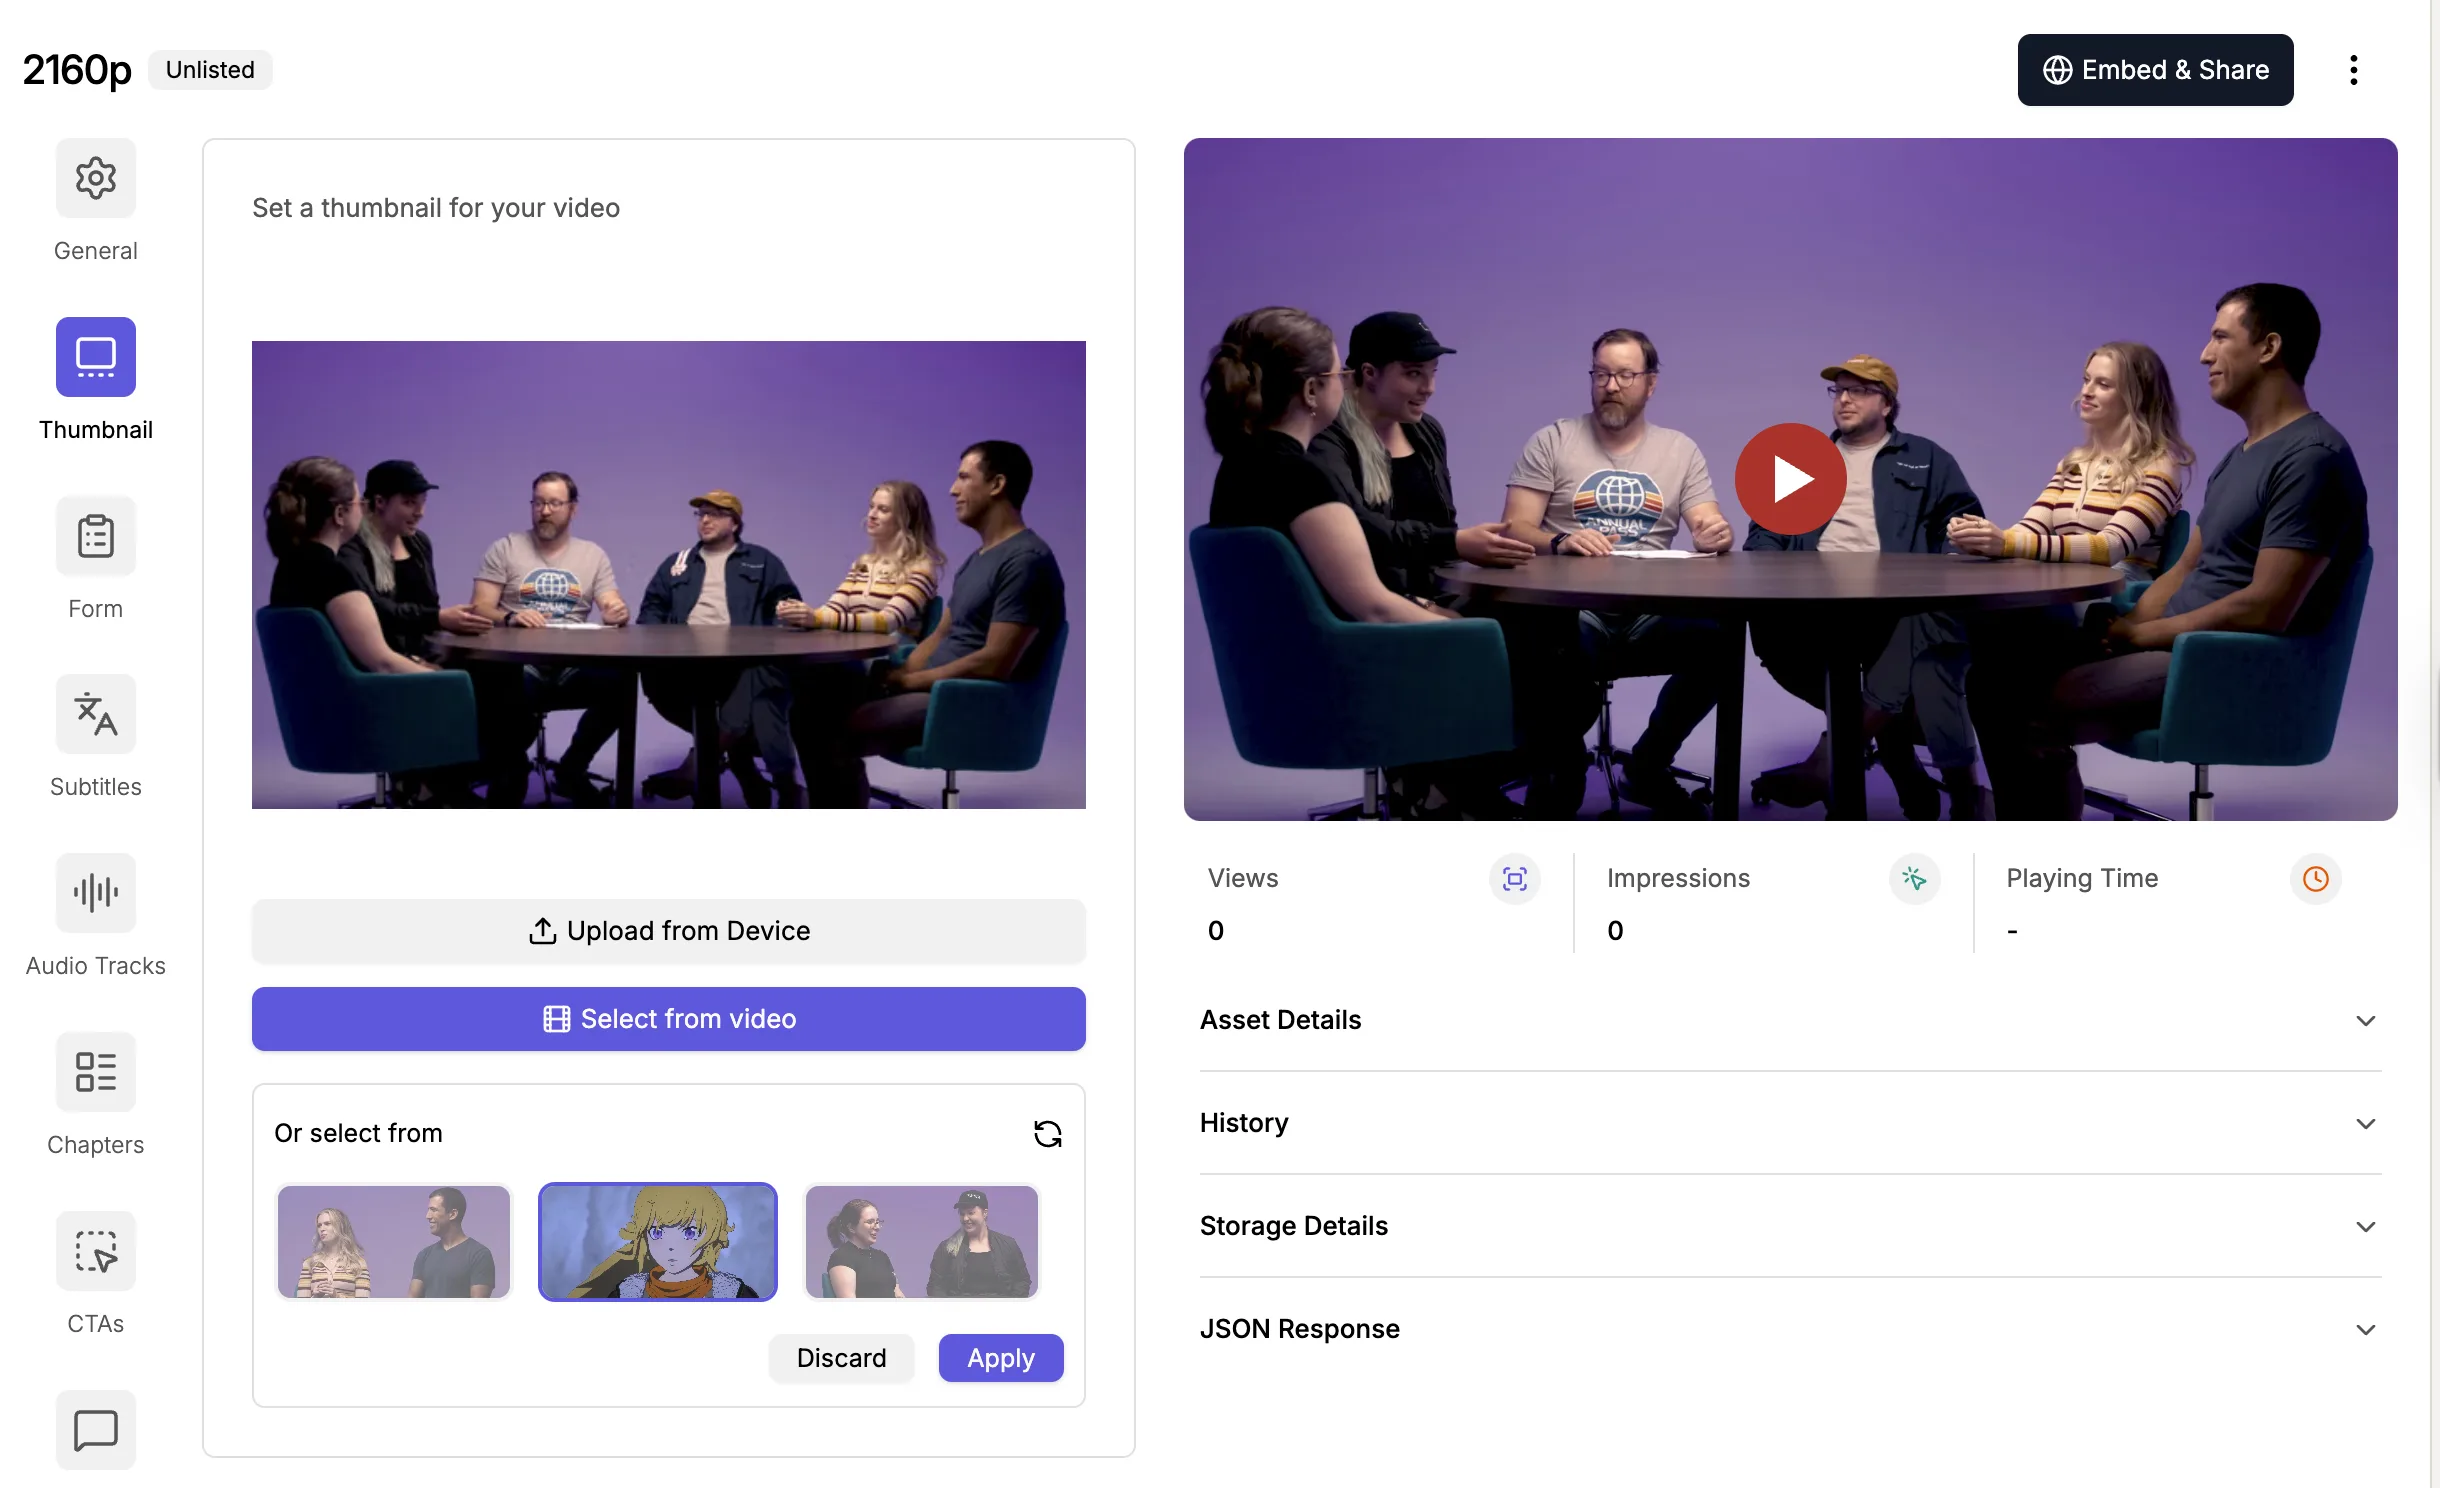
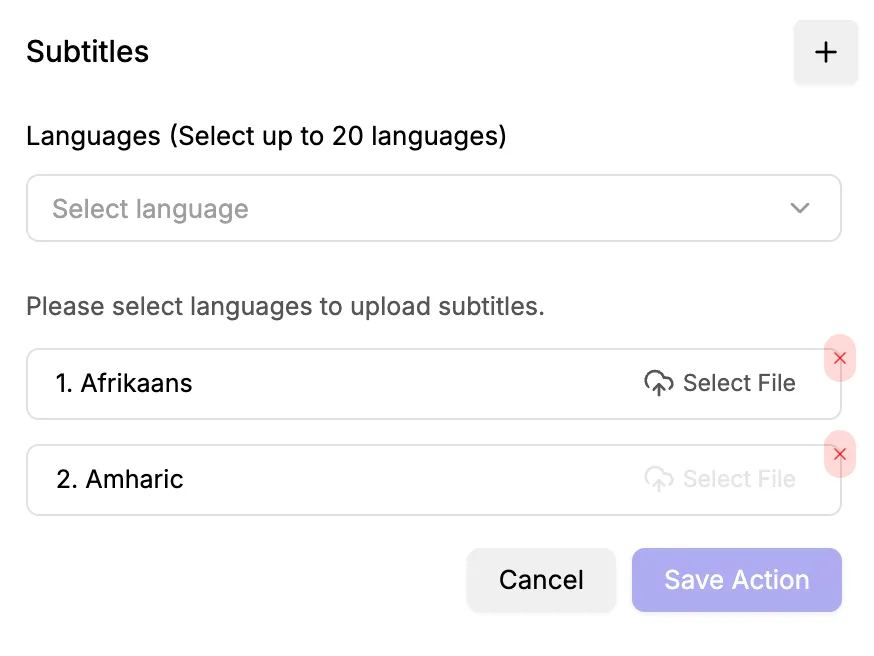
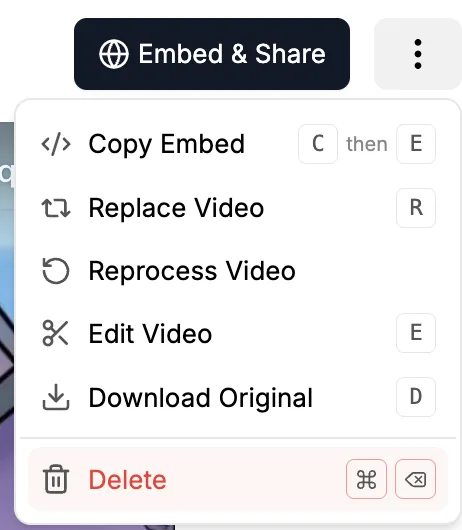
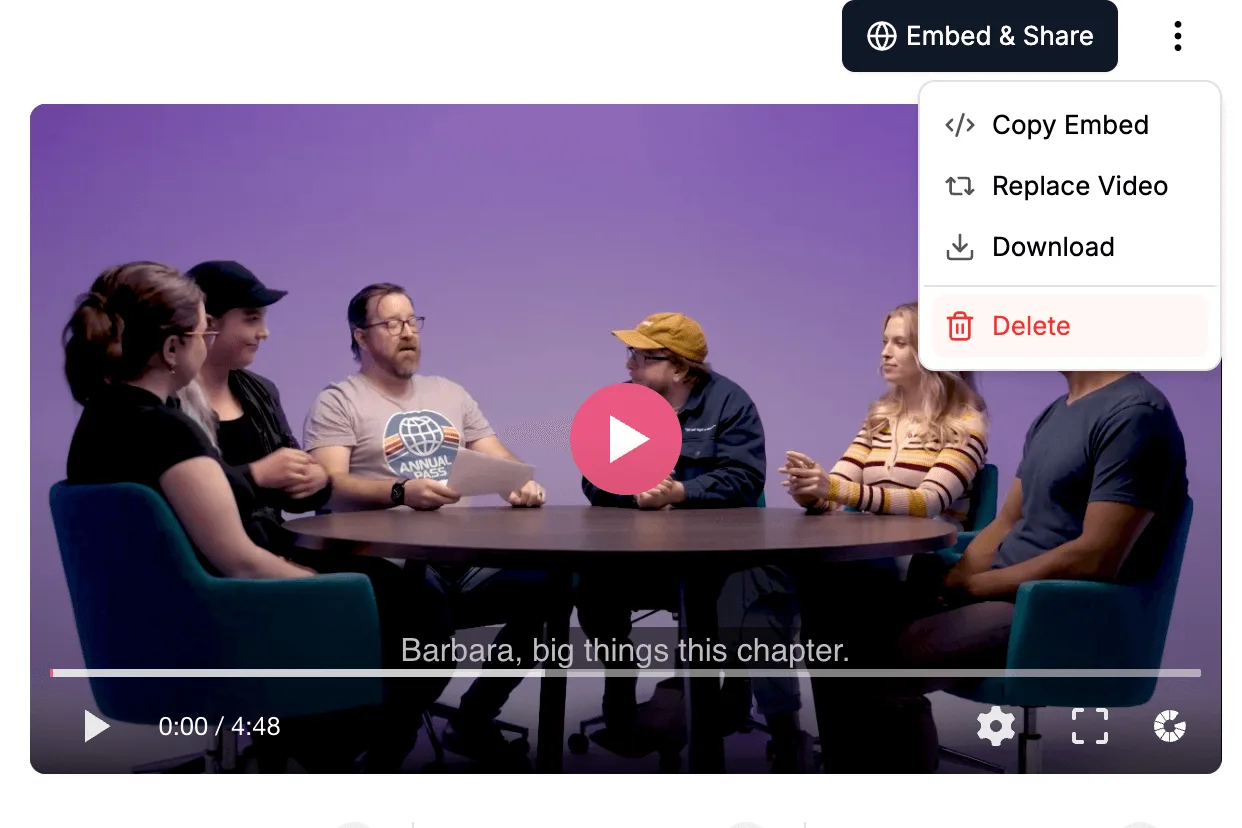
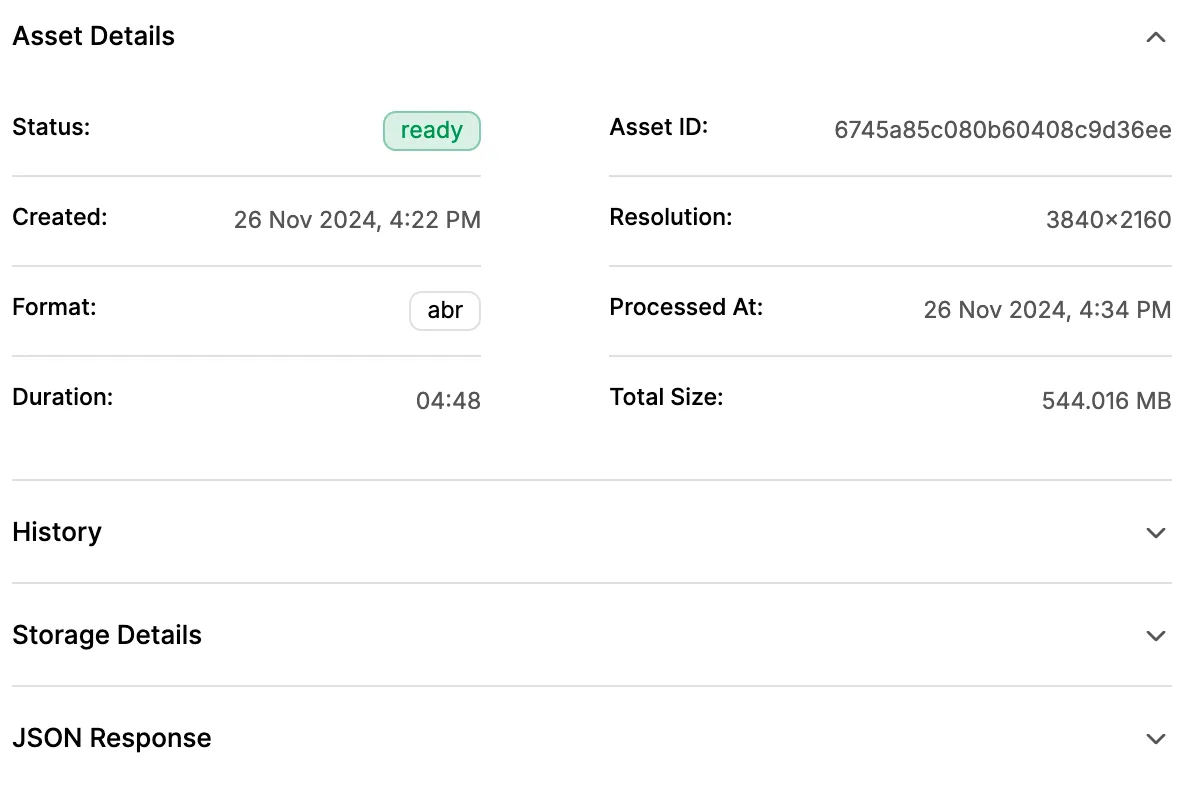
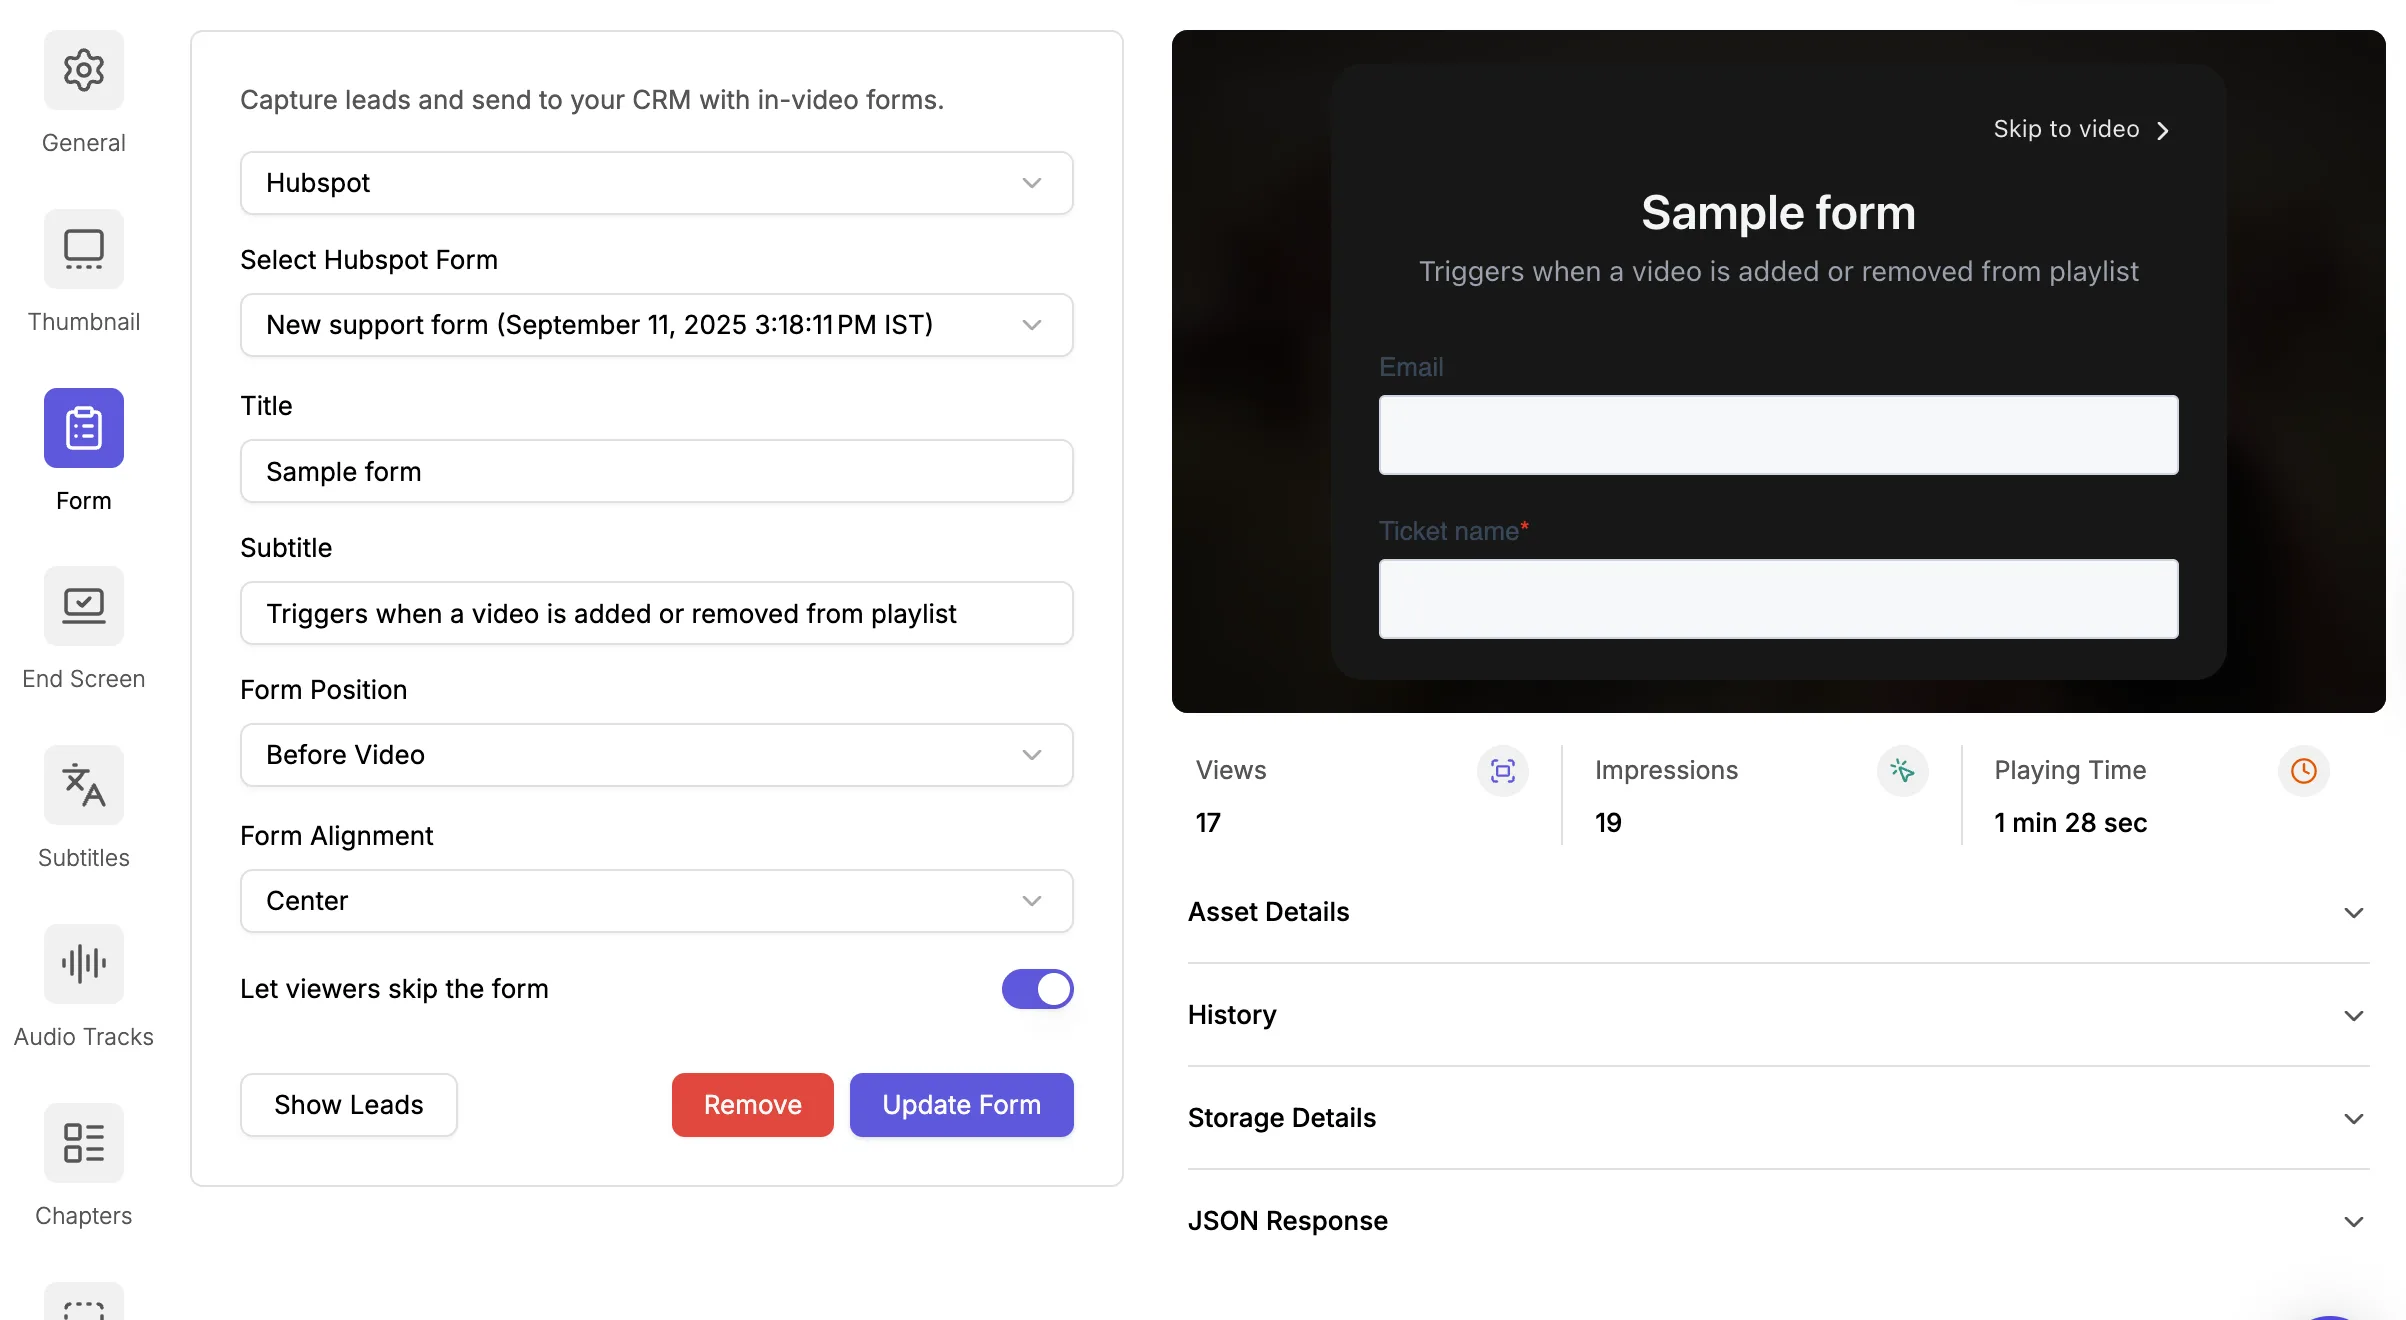
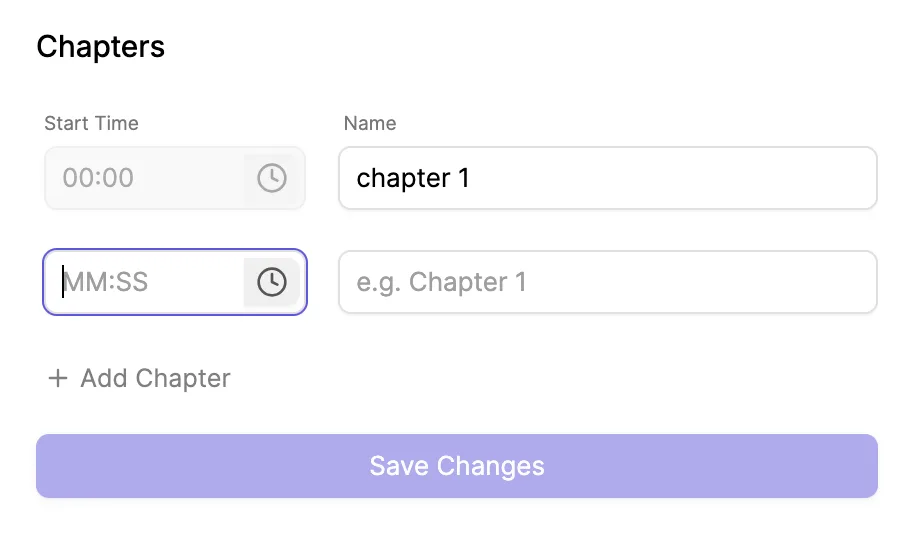
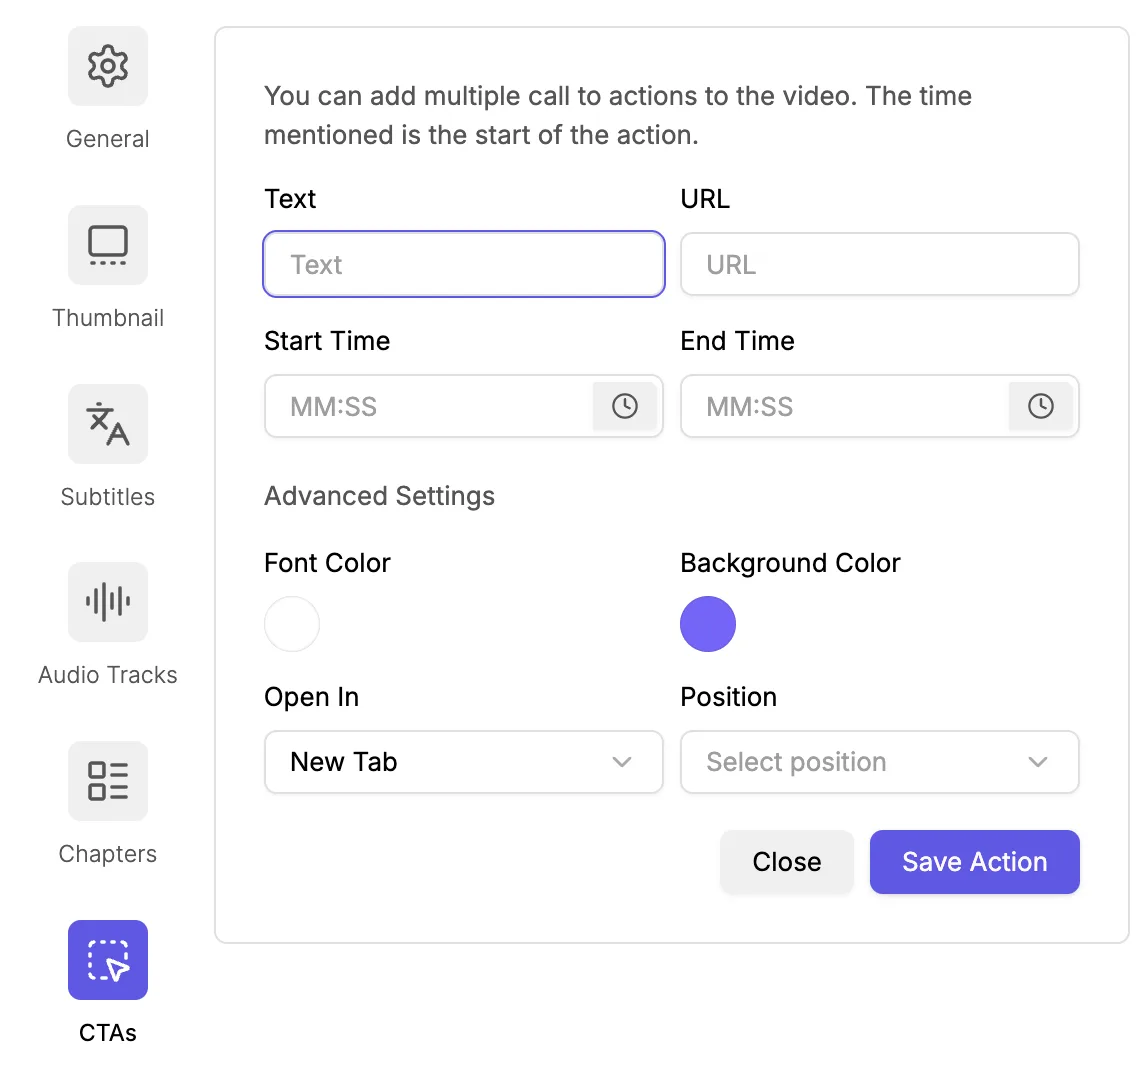
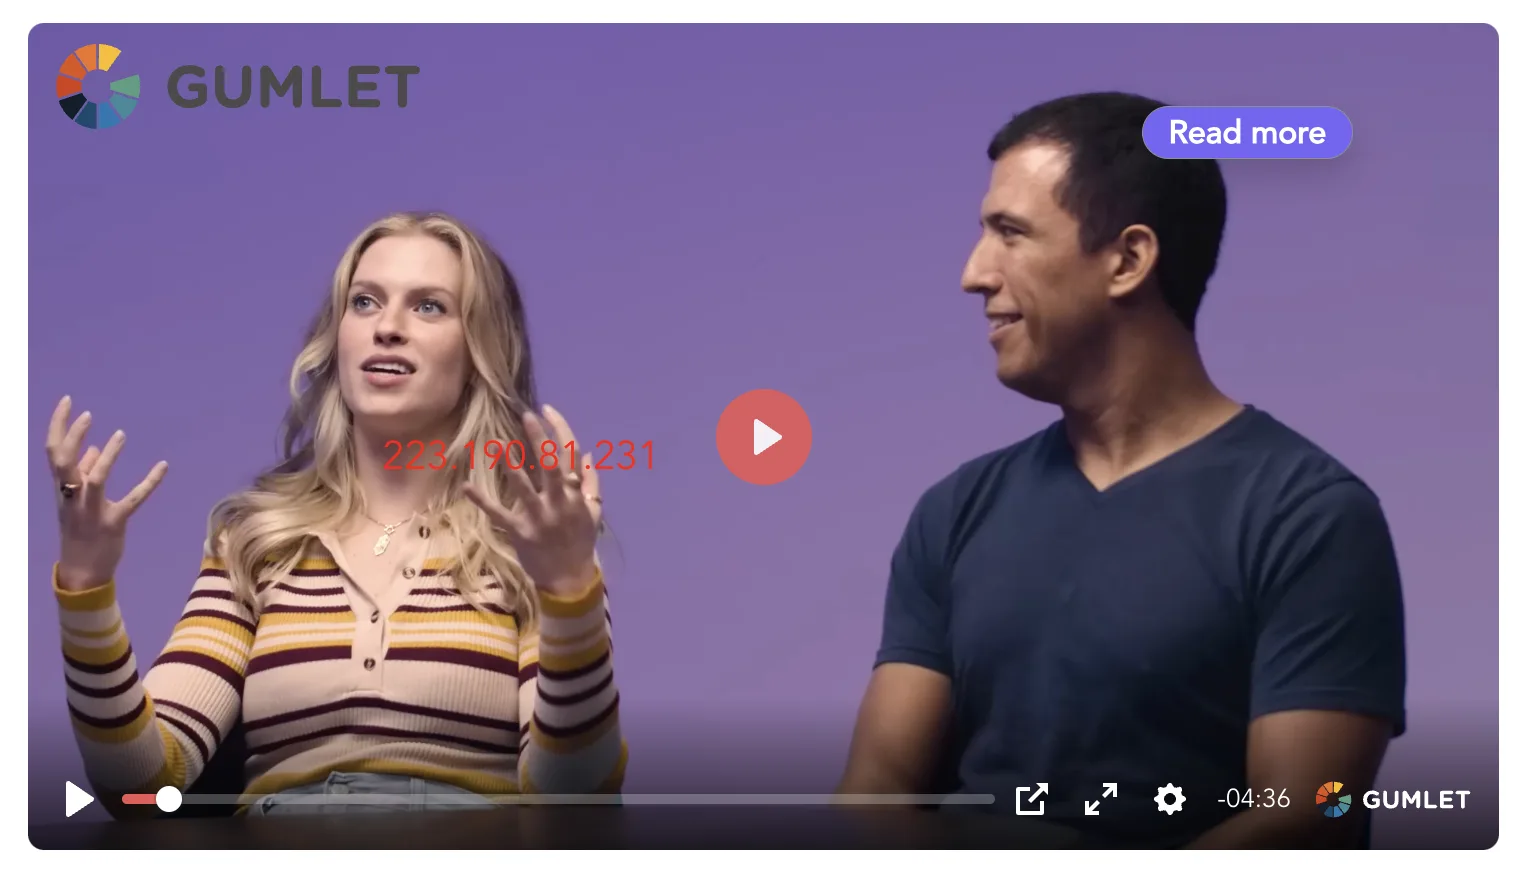
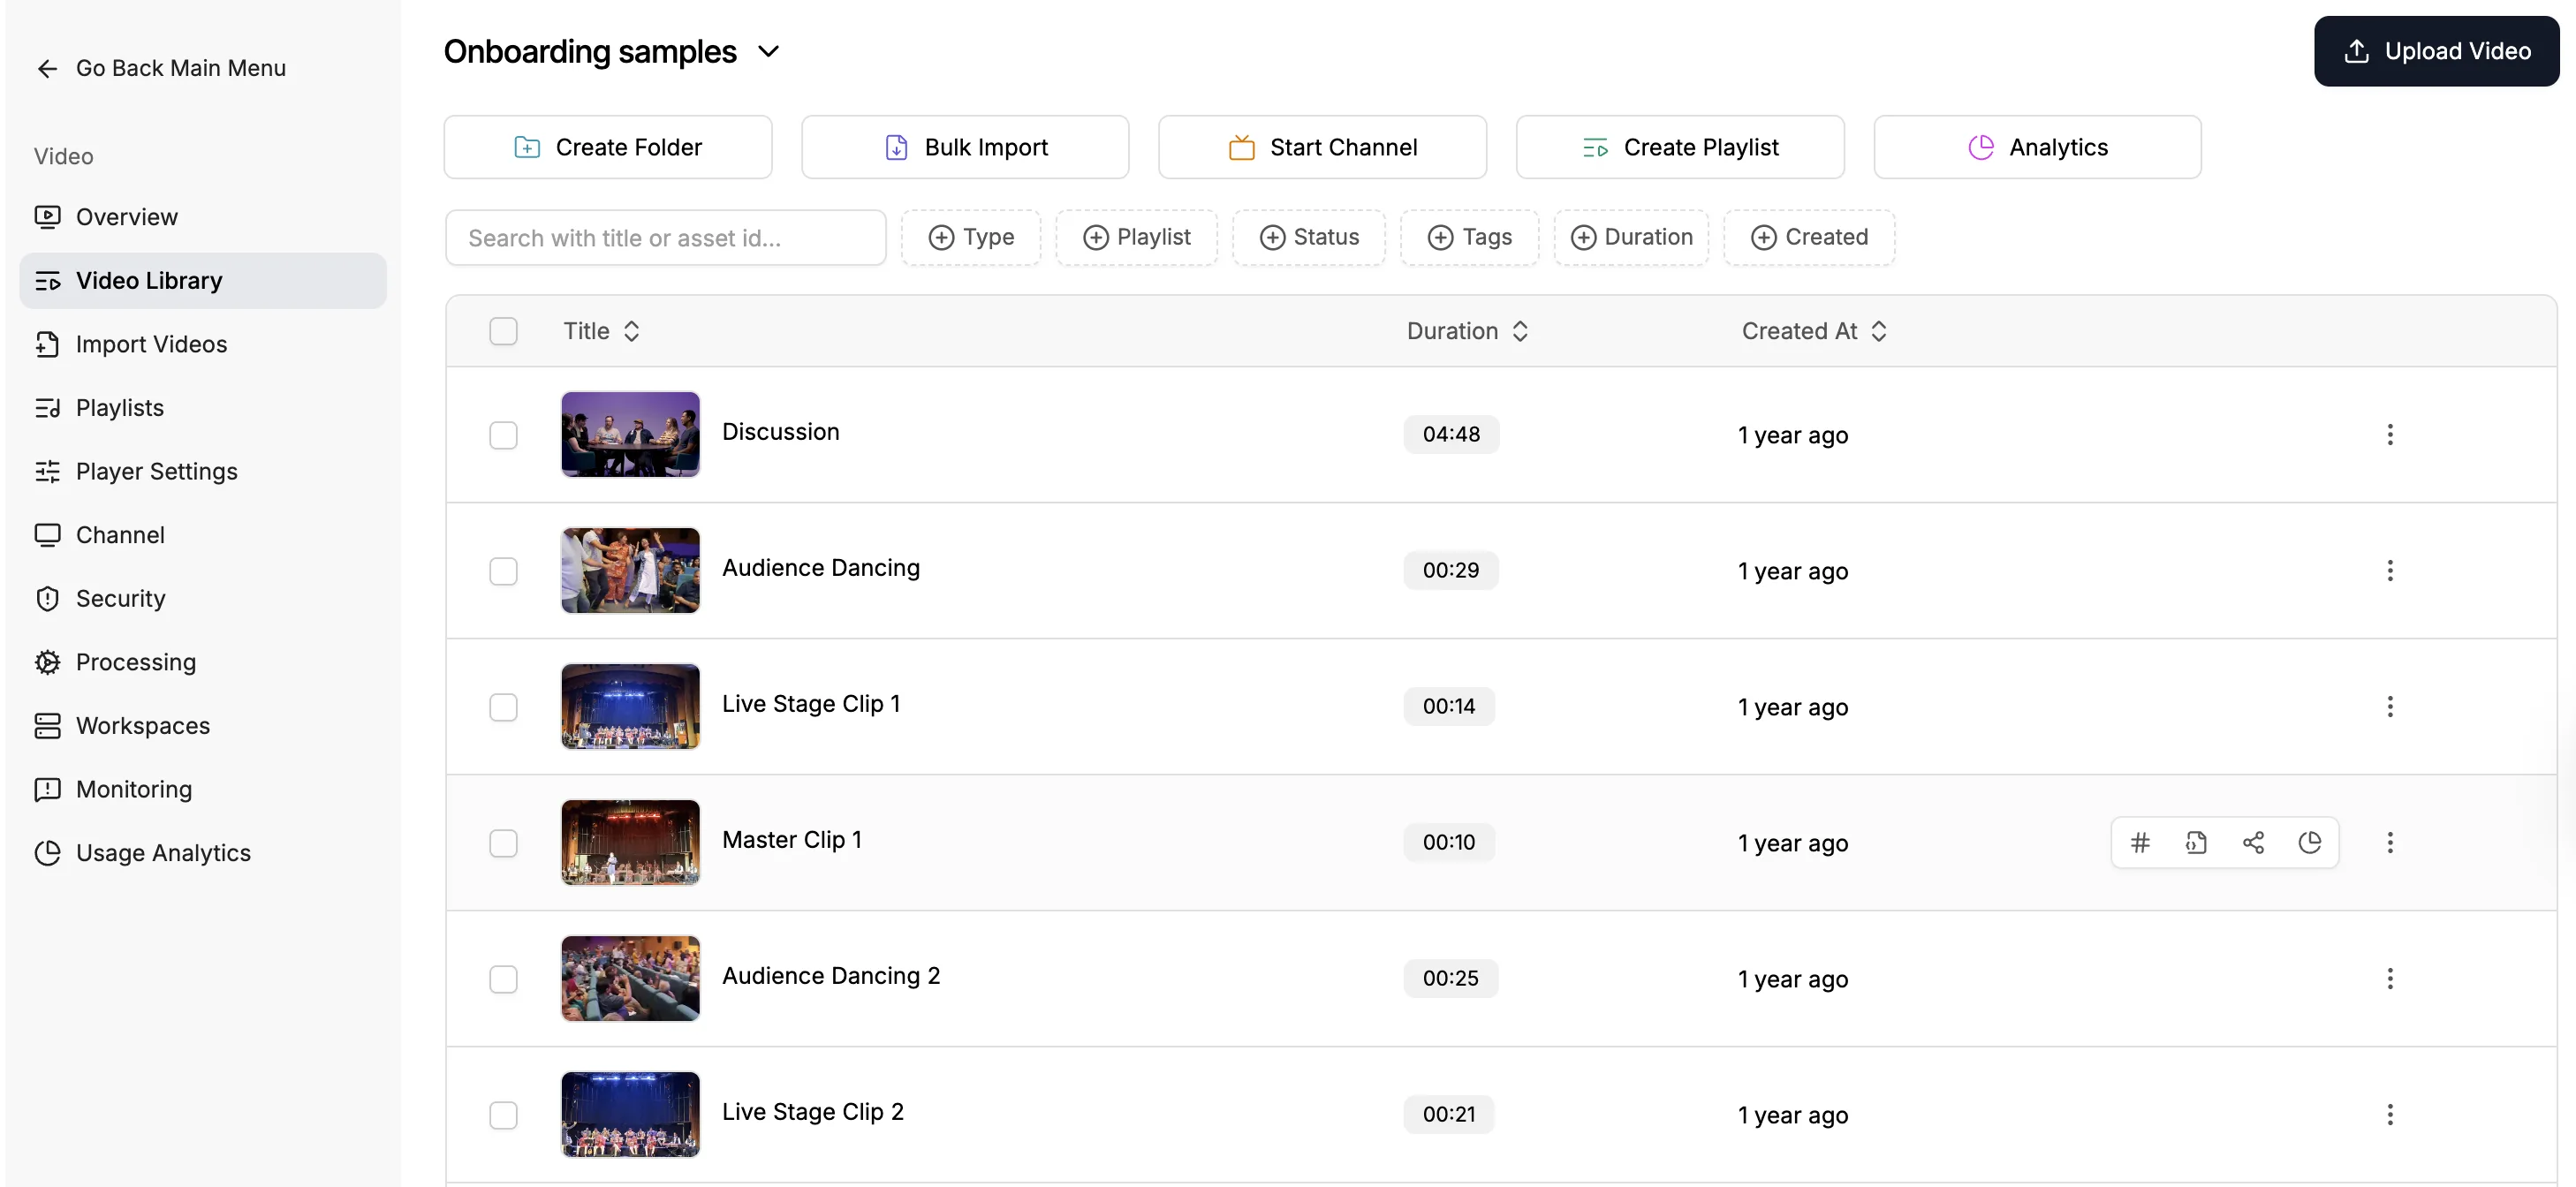
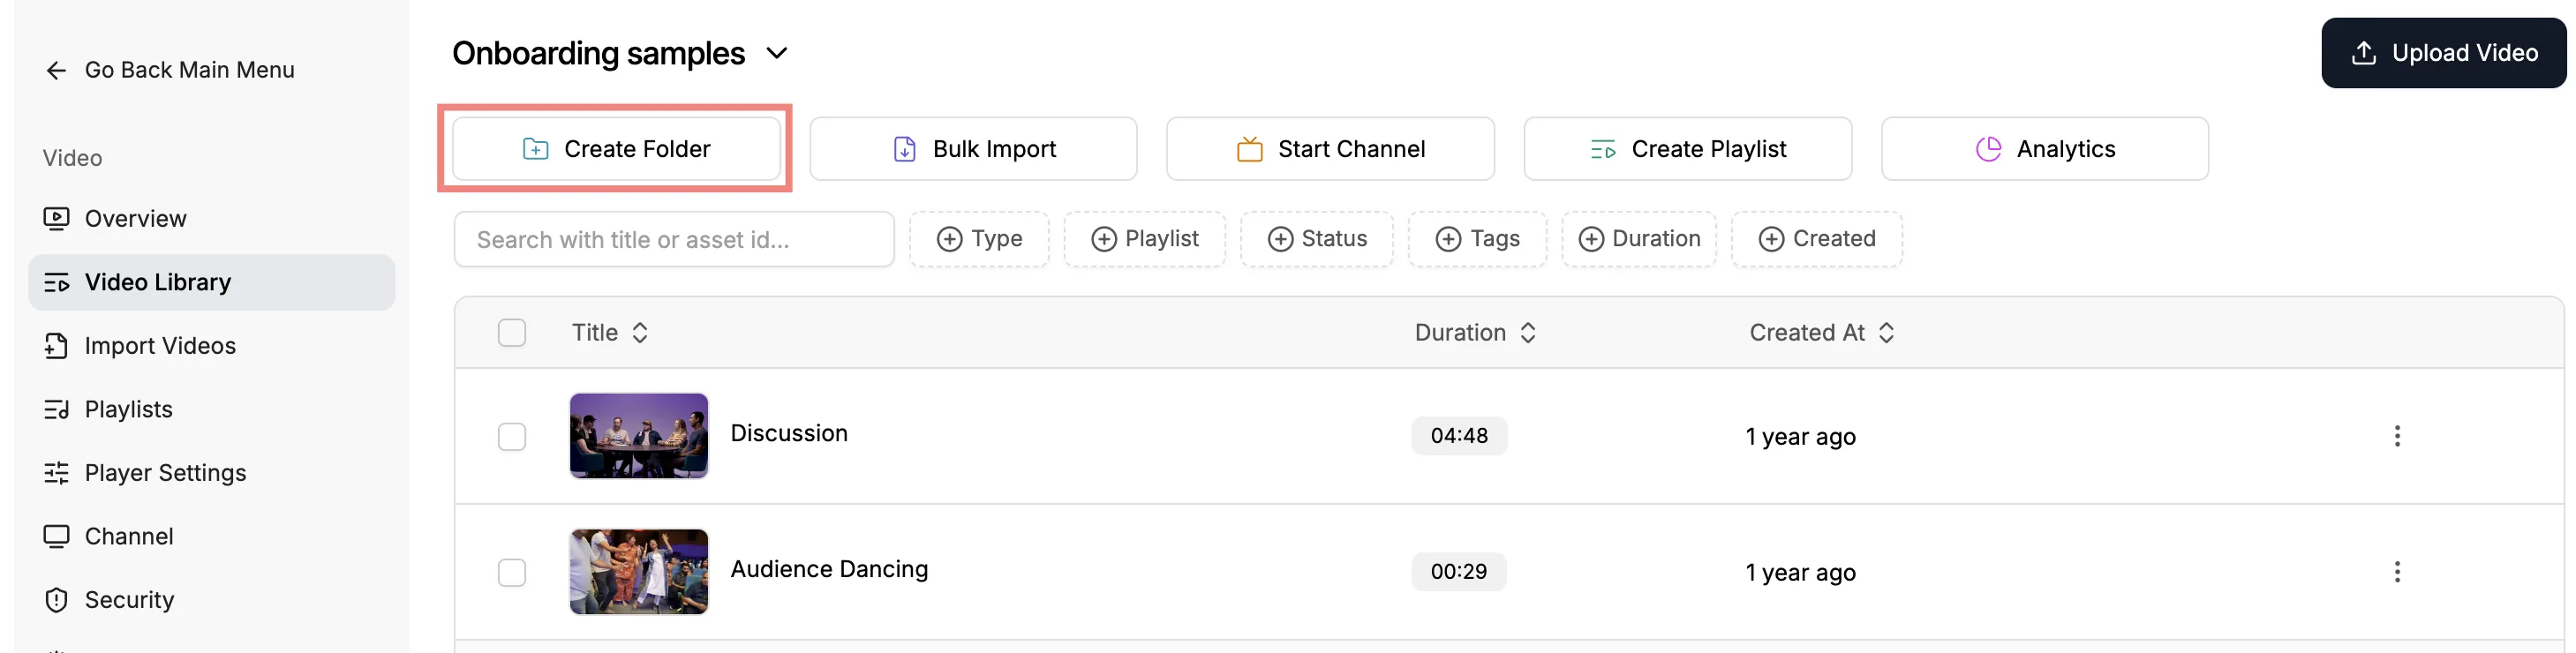
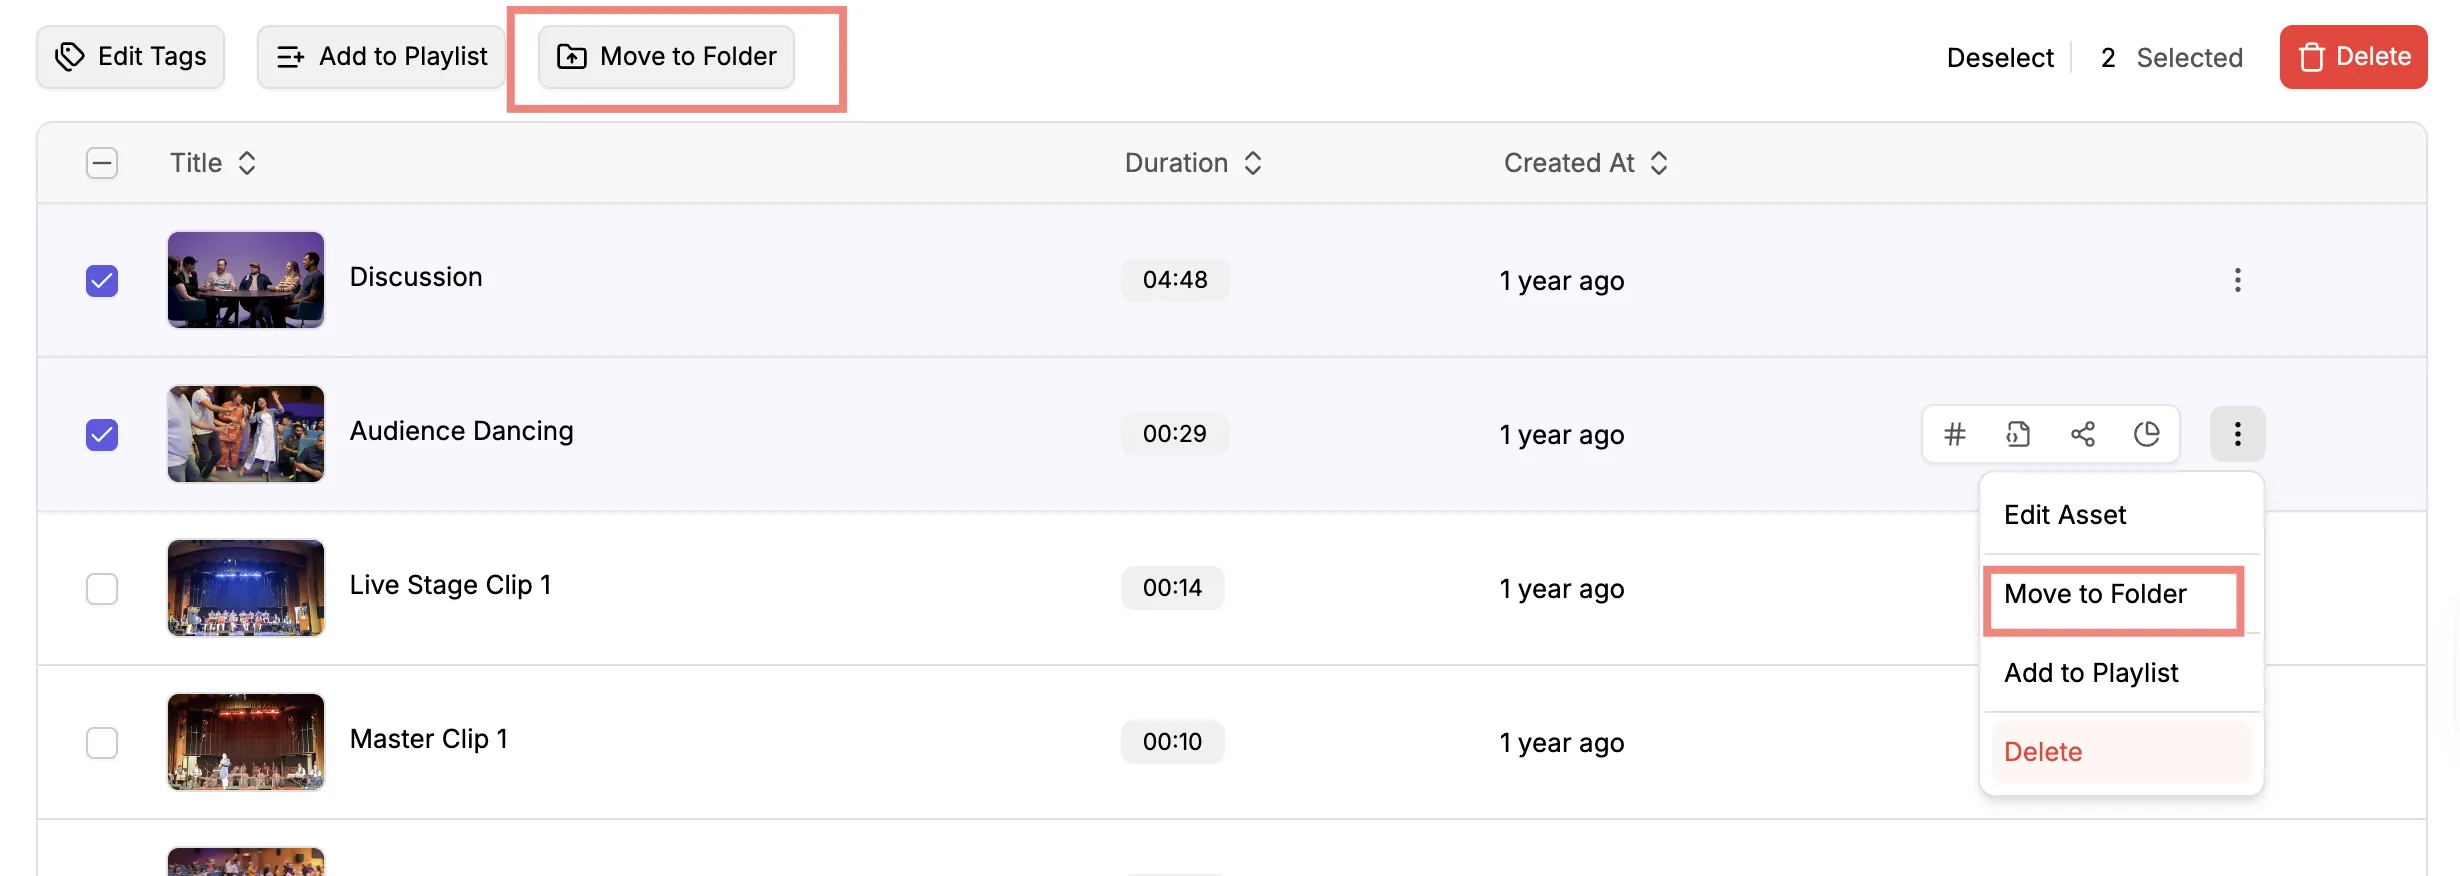
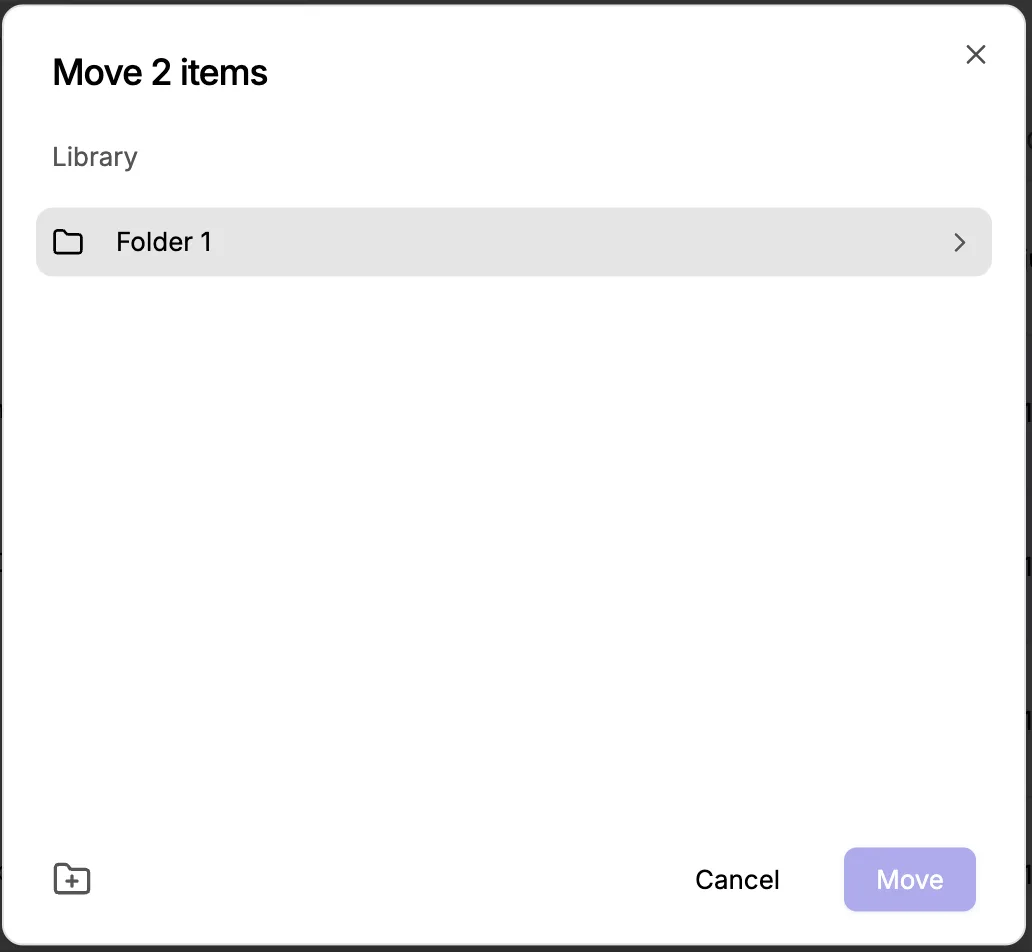
``` Make your own floating player here: --- updatedAt: 2026-03-24T07:14:10.000Z --- # Full screen Video Player Embed a video to your website with default full screen preview Embed video in default full screen preview mode on your website—a powerful upgrade for your marketing websites and landing pages. Engage your users with fast loading, full screen, high quality videos. [![Full screen video player demo](images/full-screen-video-player.gif)](https://gumlet.github.io/embed-player-addons/modal-player.html) ### Sample Embed Code for Full screen Video Player ```
``` Get your own full screen embed code here: --- updatedAt: 2026-08-06T04:33:16.000Z --- # Pause Video when off-screen Pause playback instantly the second the video player leaves the screen Automatically manage video playback based on viewport scroll position to preserve bandwidth, maintain accurate analytics, and enforce strict viewability compliance. ### Sample Embed Code Replace your {asset_id} with your asset ID. ```javascript
``` # Player Customization All you need to make your player We understand the importance of having a video player tailored to your specific needs. Gumlet's video player can be customized to match your brand. You can configure all player settings in one place. ## Basic Settings ![](/5b28d7898a5f-player-customization-01.webp) ### Autoplay When autoplay is enabled, the video will play automatically when the page loads. By default, this setting is disabled. _Note: The audio will be muted across all browsers and devices._ ### Loop When enabled, your video will play in auto-loop mode. ### Enable Download Button When enabled, it will display a button on the player that your users can use to download the video. _Note: The download button will only appear if the video is processed with the MP4 version enabled._ ### Show Title Display the video title on embedded videos. This is good for your visitors to get context. ### Allow Cast Enable your viewers to stream and enjoy your content on bigger displays. The player integrates with Apple AirPlay and Google Chromecast for easy casting. _Note: This feature is not supported for DRM‑protected videos, Dynamic Watermark‑enabled streams, referrer‑restricted playback, or HLS‑only sources; DASH or MP4 formats are required instead._ ### Resume Embedded Videos Let your audience resume where they left off. We keep the last-played second for unique audiences, stored securely on their devices. It's useful for OTT & Education videos. ## Advanced Settings ![](/05411e133acd-player-customization-02.webp) ### Disable seek bar Enable this to disable seeking on your videos. This setting is helpful for educational and training use cases where the institute/organization doesn't want users to skip content. ### Disable Player Controls Remove all the controls from your player and let your audience focus on the video content. ### Powered by Gumlet The Gumlet player includes a `Powered by Gumlet` logo by default. If you'd like to remove this logo for aesthetic or branding reasons, you will need to update your Gumlet plan accordingly. You need Gumlet's Growth or Business plan to disable the Gumlet logo in the player. ### Dynamic Watermark When enabled, we add a moving watermark directly to your videos. You will see moving text with user IPs when you embed the videos. The dynamic watermark adds an extra layer of security to your video. You can configure the watermark style and text: * text color * text size * background-color * frequency (ms) * visibility duration: Watermark visible duration (ms) * watermark\_text: you need to send it dynamically in the iframe source * `Sample iframe source: https://play.gumlet.io/embed/674fea04f1412ab64f697e11?watermark_text=support@gumlet.com, some_id` you can embed using `watermark_text` query param. _Below is a sample video with the dynamic watermark_: [Gumlet video player]() The embed code for the above sample video: ```html
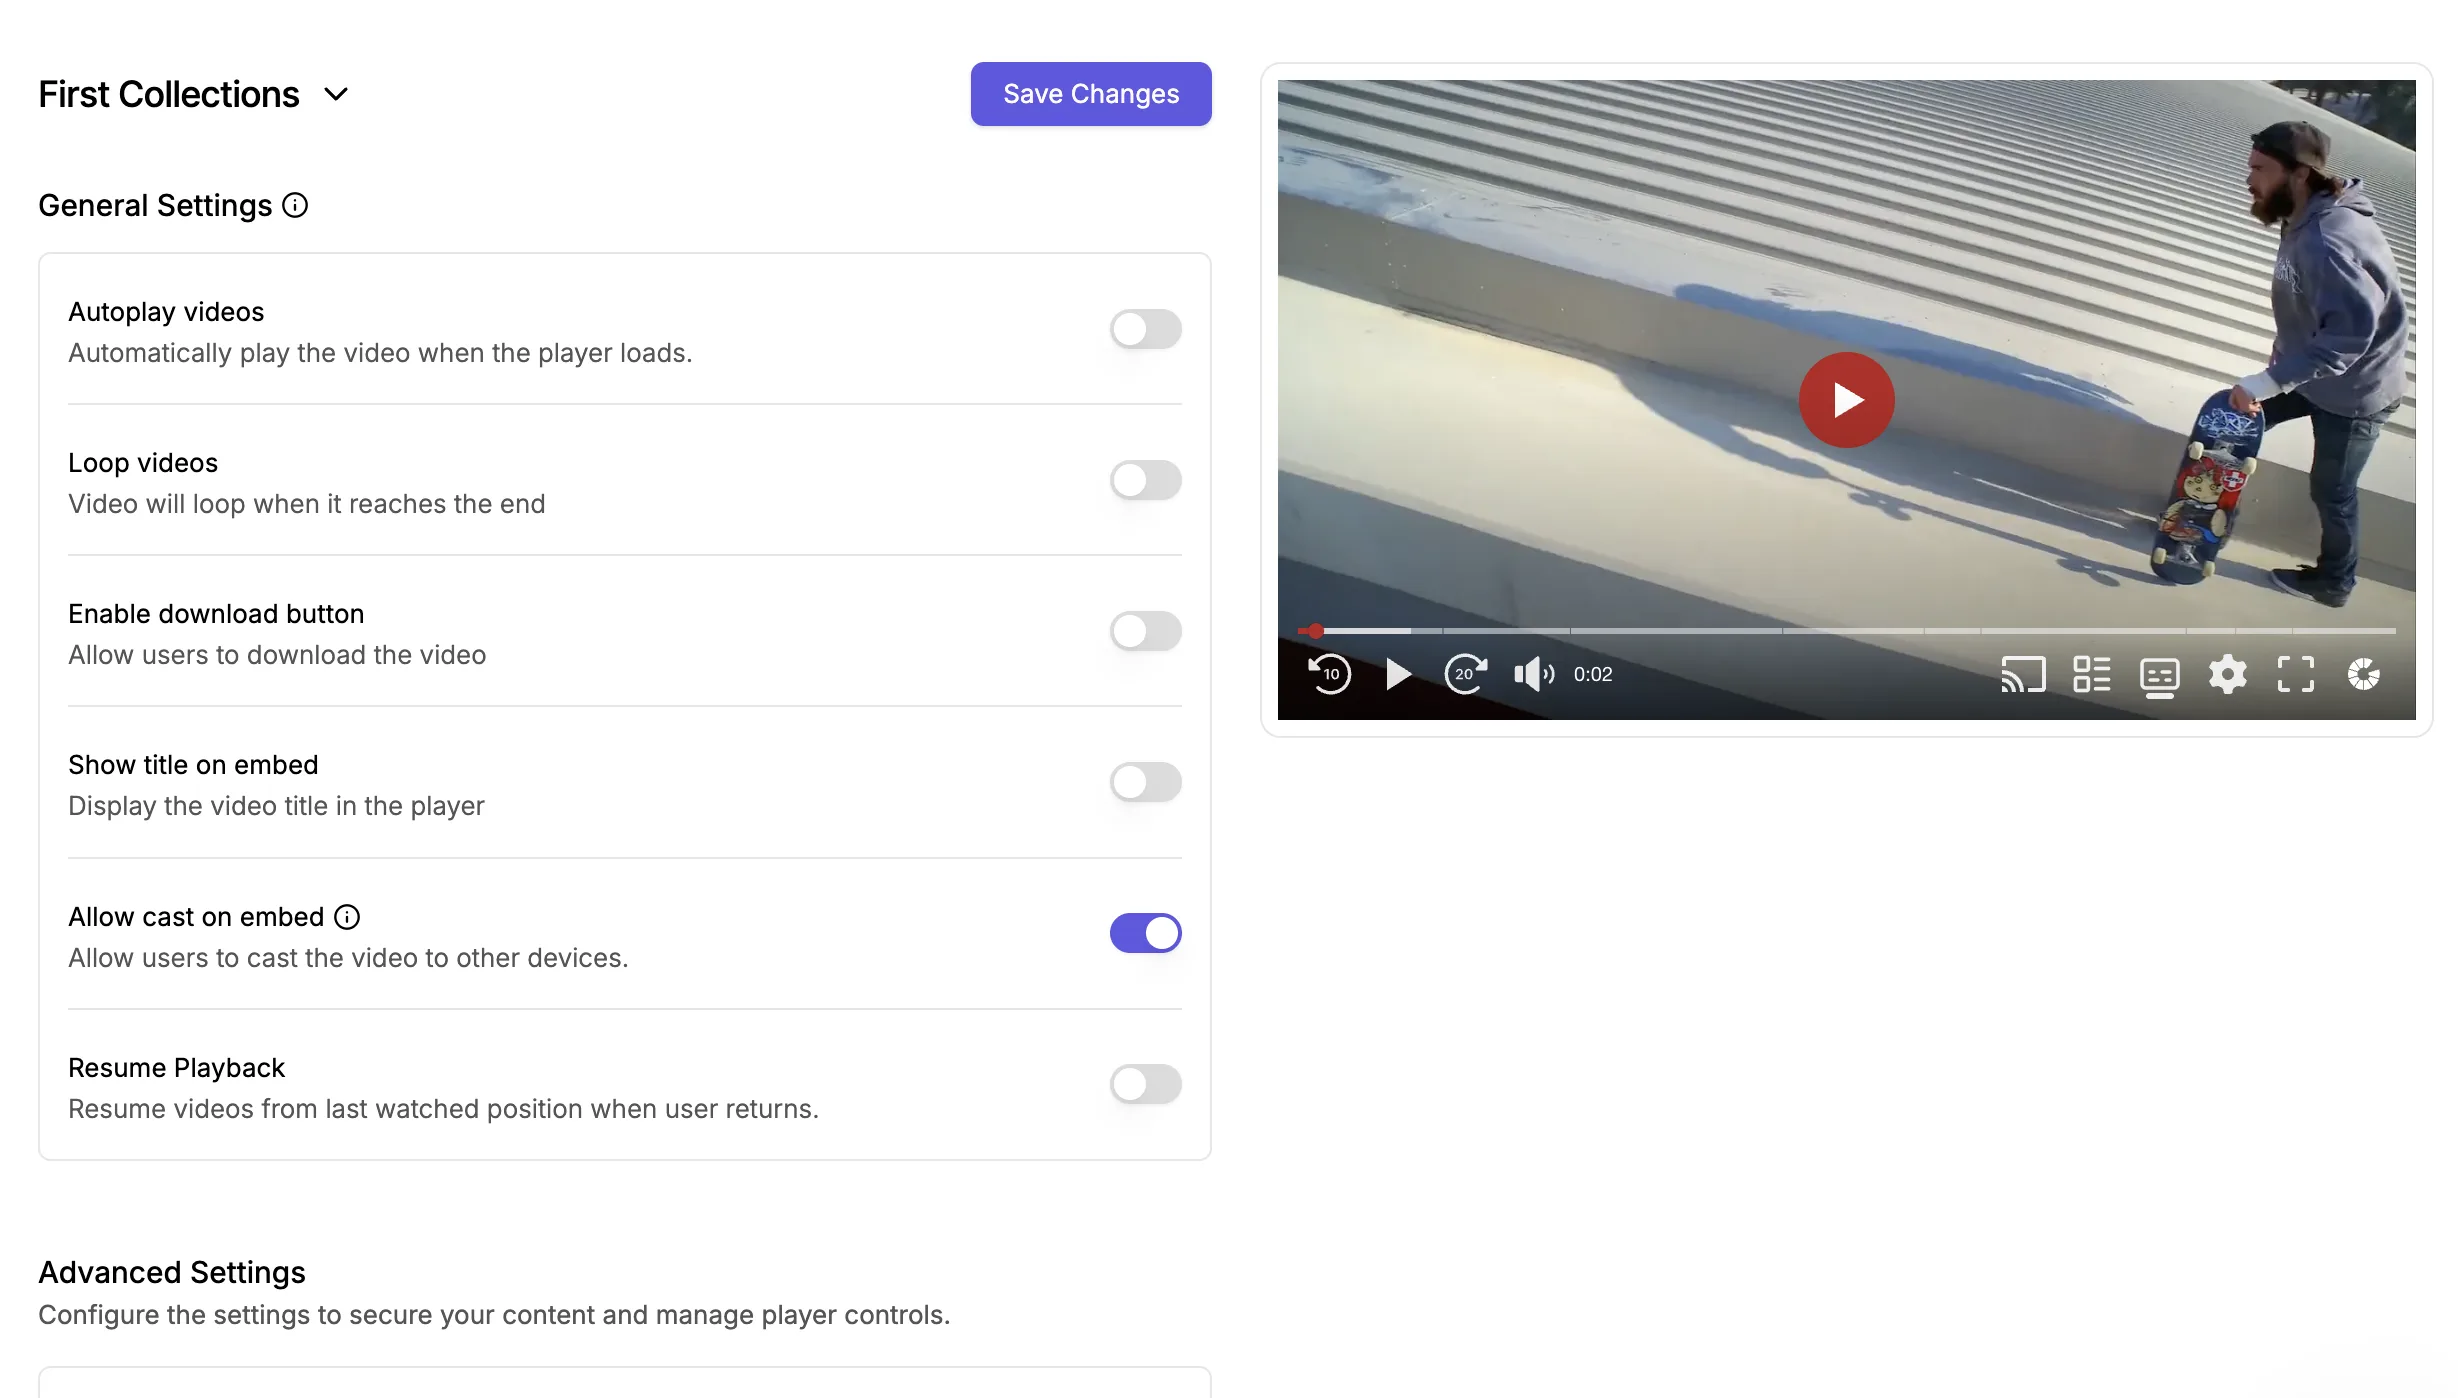
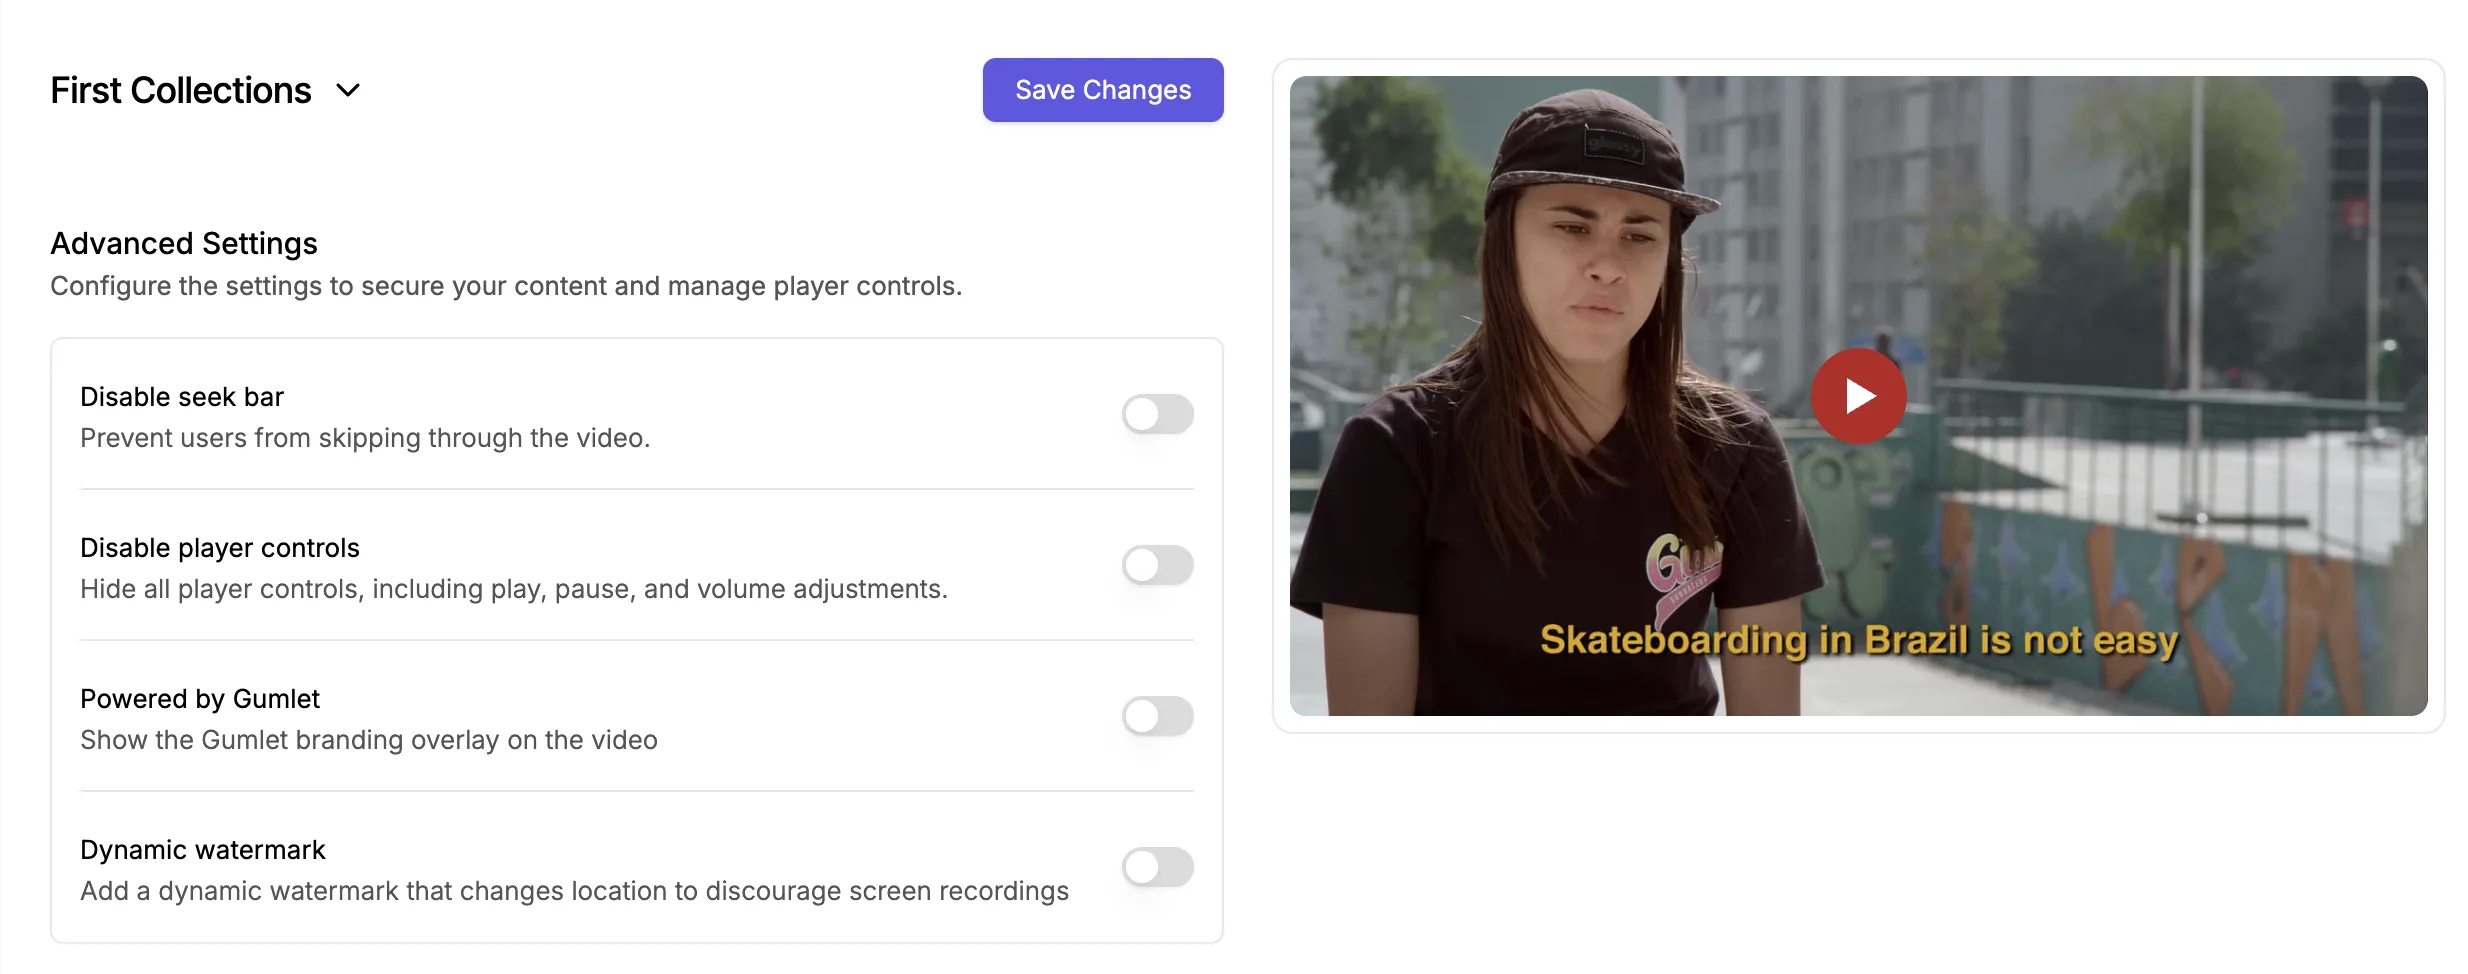
``` _Note: It will only work where you add the Embed code. It won't work for MP4, M3U8, and MPD URLs._ ## Player Branding ### Logo URL This parameter takes the image URL as input. It overlays the image fetched over the player. ### Logo Position The overlay image can be modified with the Logo position parameter. ### Logo Width & Height (in px) Change the size of the logo added. Add height and width of the logo in pixels. ![Video Player](/b145640d9bdc-player-customization-03.webp) ## Captions Settings ![](/5609b04f6fdf-player-customization-04.webp) ### Text color Change the text color of the subtitle ### Background Color Change the background color of the subtitle ### Font Size Change the default font size of the captions. The default is medium. ### Show Captions Automatically Show captions automatically on the player. Users can still hide it in the player and select their preferred language. ## Advertising & Monetization ![](/f0faa87eff9b-player-customization-05.webp) ### VAST Tag The VAST tag takes the URL as input. Our player will automatically play ads defined in this VAST tag during playback. Gumlet player also supports Google's IMA SDK. You can inject ads in between video playback. ### Facebook Pixel ID Add the FB pixel ID to track video engagement and create a lookalike audience for improved targeting. To get your pixel ID or create a new one, navigate to [how to get FB Pixel ID](https://www.facebook.com/business/help/952192354843755). You can also pass the Pixel ID per embed using the `facebook_pixel_id` query parameter in the iframe `src` URL. See the [FAQs](#faqs) for the events the player sends and how to handle visitor consent. ### Google Tag ID Add the Google Analytics (GA4) ID to track video engagement and create a lookalike audience for improved targeting. To get your GTAG ID or create a new one, navigate to [how to get GA4 ID](https://support.google.com/analytics/answer/12270356). ### Advanced Customizations | Customization | Description | | :------------------------------------------------------------------------------------- | :----------------------------------------------------------------------------------------------------------------------- | | [Customize Video Player](/video/player-customization/customize-video-player) | Create custom embed code with branding elements, controls, autoplay behavior, dynamic watermarks, and monetization tags. | | [Floating Video Player](/video/player-customization/floating-video-player) | Enable sticky or Picture-in-Picture playback to keep videos visible while users scroll. | | [Full-screen Video Player](/video/player-customization/full-screen-video-player) | Adjust display behavior, screen orientation, and full-screen triggers across various devices. | | [Pause Video when Off-Screen](/video/player-customization/pause-video-when-off-screen) | Automatically halt playback and data buffering as soon as the player leaves the viewport. | ## FAQs ### Which events does the player send to Facebook Pixel? The Gumlet player sends the following events to your Facebook Pixel: | Event | When it is sent | | :------------------- | :--------------------------------------------------------- | | `Played` | When a user starts playing the video. | | `Seconds Played` | When a user pauses the video. | | `25 Percent Played` | When the playhead reaches 25% of the total video duration. | | `50 Percent Played` | When the playhead reaches 50% of the total video duration. | | `75 Percent Played` | When the playhead reaches 75% of the total video duration. | | `100 Percent Played` | When the video ends. | ### Which parameters are sent with each Facebook Pixel event? Every event includes the video `title` and `asset_id`. The `Seconds Played` event also includes `seconds`, which is the total number of seconds the video had played when the user paused it. The page URL and browser details are collected automatically by the Facebook Pixel itself. Gumlet only adds the video title and ID. ### Does the player send a PageView event? Yes. Facebook Pixel sends `PageView` automatically when the pixel is initialized on the page. ### Can I choose which events are sent or disable automatic events? No. The event set is fixed, and automatic events can't be disabled. ### How do I connect Facebook Pixel to the player? Add your Pixel ID in the workspace's player settings, or pass it in the iframe `src` URL using the `facebook_pixel_id` query parameter: ```html ``` ### Does the Facebook Pixel integration include the Conversions API (CAPI)? No. The player uses the browser Facebook Pixel only. Conversions API (CAPI) is not supported. ### How do I respect visitor consent for Gumlet analytics and Facebook Pixel? The video stays playable when both are turned off. Each is controlled separately through query parameters in the iframe `src` URL: * **Gumlet Insights:** Add `disable_insights=true` to turn off Gumlet analytics for that visitor. This only prevents insights-related cookies. It doesn't remove existing cookies or stop the player from setting its own cookies used for a better viewing experience. It also doesn't stop Facebook Pixel events. * **Facebook Pixel:** Don't set a workspace-wide Pixel ID. Instead, add `facebook_pixel_id` to the iframe `src` only after the visitor opts in, and remove it if they withdraw consent. When you change these query parameters, the iframe reloads automatically. You don't need to reload it yourself. ```html ``` # Channel Membership Gumlet allows you to make channels private or public and invite members. Channel membership is a feature of Gumlet that helps video courses and content creators. Many independent creators told us that integrating high-level security features, such as DRM and dynamic watermarks, without the assistance of developers was sometimes challenging. That's why we created a “Patreon-like” channel membership with Gumlet to address this issue. Here is how it works: * Video workspaces serve as the top-level structure for organizing videos. * Each video workspace can have one video channel. Video channels can be public or private. * Using playlists (similar to folders), you can select which videos from the workspace appear on the channel. ![](/6947bae4ccb0-channel-membership-01.webp) ### Public Channels Public channels are those where any user can subscribe to view your channel without needing to be invited by you. You can still view who joined your channel. When new content is added to the channel, members can view it. Public channels are helpful if you want to get user-level analytics data while keeping your content free and open for everyone to view. You can attach a custom domain to your channel to ensure you reap the SEO benefits of hosting channels on your domain. ### Private Channels If you make a channel private, you can invite users to join. Only the invited users can view the videos on the channel. Since the channels are hosted on Gumlet, you can easily enable high-level security features, such as DRM, with just a click. This ensures that you can easily sell your courses online with Gumlet and that your content remains accessible only to those who have subscribed. There are already several ways to customize the channel's appearance. ([Channel Customization](/video/channels#title--description)) #### How do private channels work? Here is a brief on getting started with channels and membership. Set up a channel without any code and deliver value to your audience. Here are the quick steps to get started: 1. Add channel details and enable it. 1. Add a few playlists to the channel. 2. Mark your videos Private, i.e., videos that are part of these playlists shown on the channel.l 2. Invite members with their name and email ID on [channel settings](https://dash.gumlet.com/video/channel) 3. The invitee will get an email with a secure link to join the channel. ![](/74aab2bebe10-channel-membership-02.webp) 4. They need to join the channel by creating an account with Gumlet, or they can log in if they already have an account. ![](/439b13fb5d2d-channel-membership-03.webp) 5. Once they verify, they are part of your video community. 6. If they can't verify the same email address to which you sent the invitation, they can't view the content. ![](/df9196f1ec37-channel-membership-04.webp) #### Video Privacy Settings with Channel Visibility | Video Privacy | Channel Access | Video Embed | Inside Channel | | --------------- | -------------- | ------------------ | ------------------ | | public/unlisted | member-only | will play | will play | | public/unlisted | public | will play | will play | | private | member-only | won't play | will play | | private | public | won't play | won't play | | password | member-only | play with password | play with password | | password | public | play with password | play with password | ### Invite Members You can invite members to subscribe to your channels. When a member is asked, they get an email with a secure link to subscribe to your channel. ![](/0f6c93609855-channel-membership-05.webp) There are two ways to invite: 1. Invite using name and email. 2. Invite members using CSV. You can invite multiple members at once. Here are the quick steps: 1. Download the sample CSV 2. Add your members 3. Upload the CSV to invite Invitation link For public channels, you can just copy the preview link from the channel settings or copy the URL from the URL bar when you are on a channel page. For private channels, the invitation is the only way as it goes out with an access token to make it secure and can be used by the invited user only. ### Channel Analytics The channels hosted on Gumlet come equipped with a wealth of analytics that will help you better understand your subscribers, allowing you to improve your content and security. You can track all the metrics mentioned [here](/video-analytics/introduction) for channels, playlists, and videos separately. #### Channel Analytics * Find the detailed analytics for your playlists * Get detailed video analytics from specific playlists #### User-level Analytics * Find which members are watching what * Understand the time spent by members on your channel # Embed Playlists Embed playlists directly to your platform for a seamless experience Embed video playlists in your product, website, or LMS so viewers can enjoy a continuous, curated sequence of videos without leaving your experience. Here is a step-by-step guide to setting up a playlist on your platform: 1. Navigate to **Video → Playlists** and create a new playlist if you don’t already have one. 2. Add videos to your playlist. 3. Click on the three dots and copy the embed code. ![](/8ba410e12f6d-embed-playlists.webp) 4. Paste the code directly into your website, or add it to an HTML block if you are using a CMS, LMS, etc. 5. Publish or share the page with your audience so they can continuously watch videos directly on your website. ### Sample Playlist Embed Code ```html
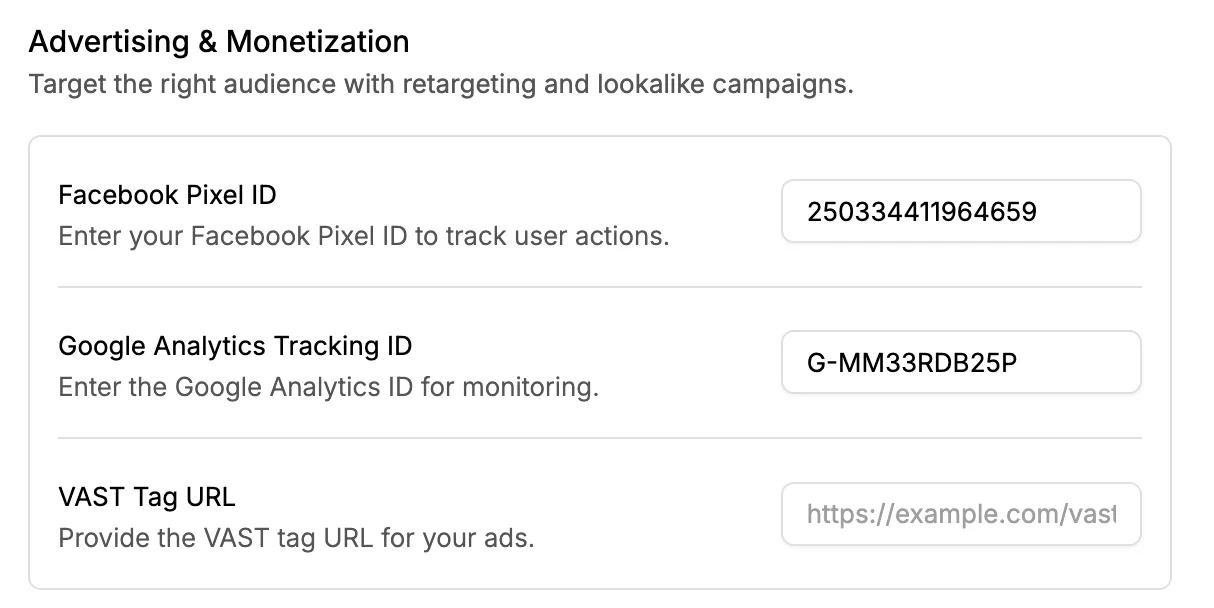
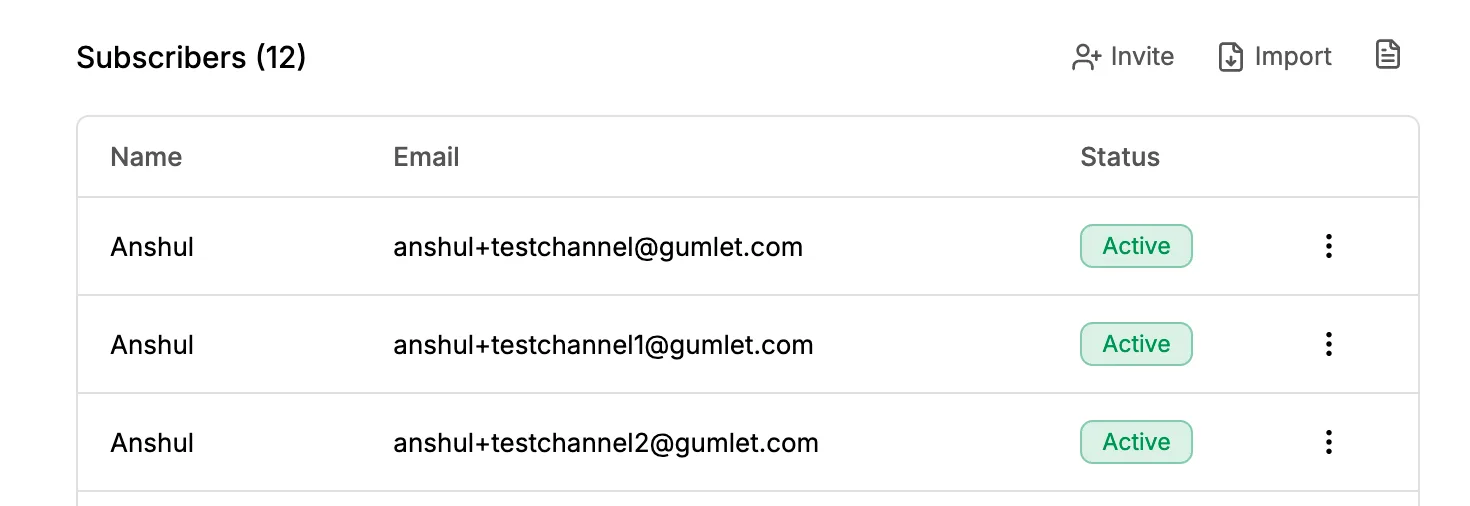
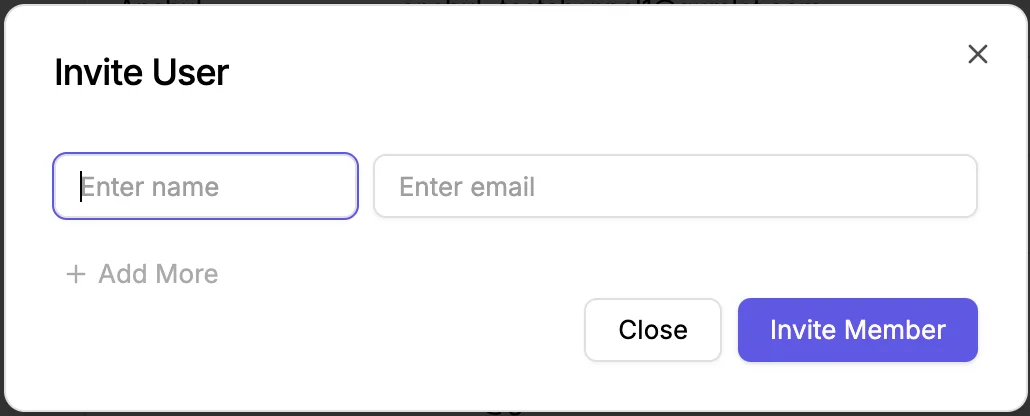
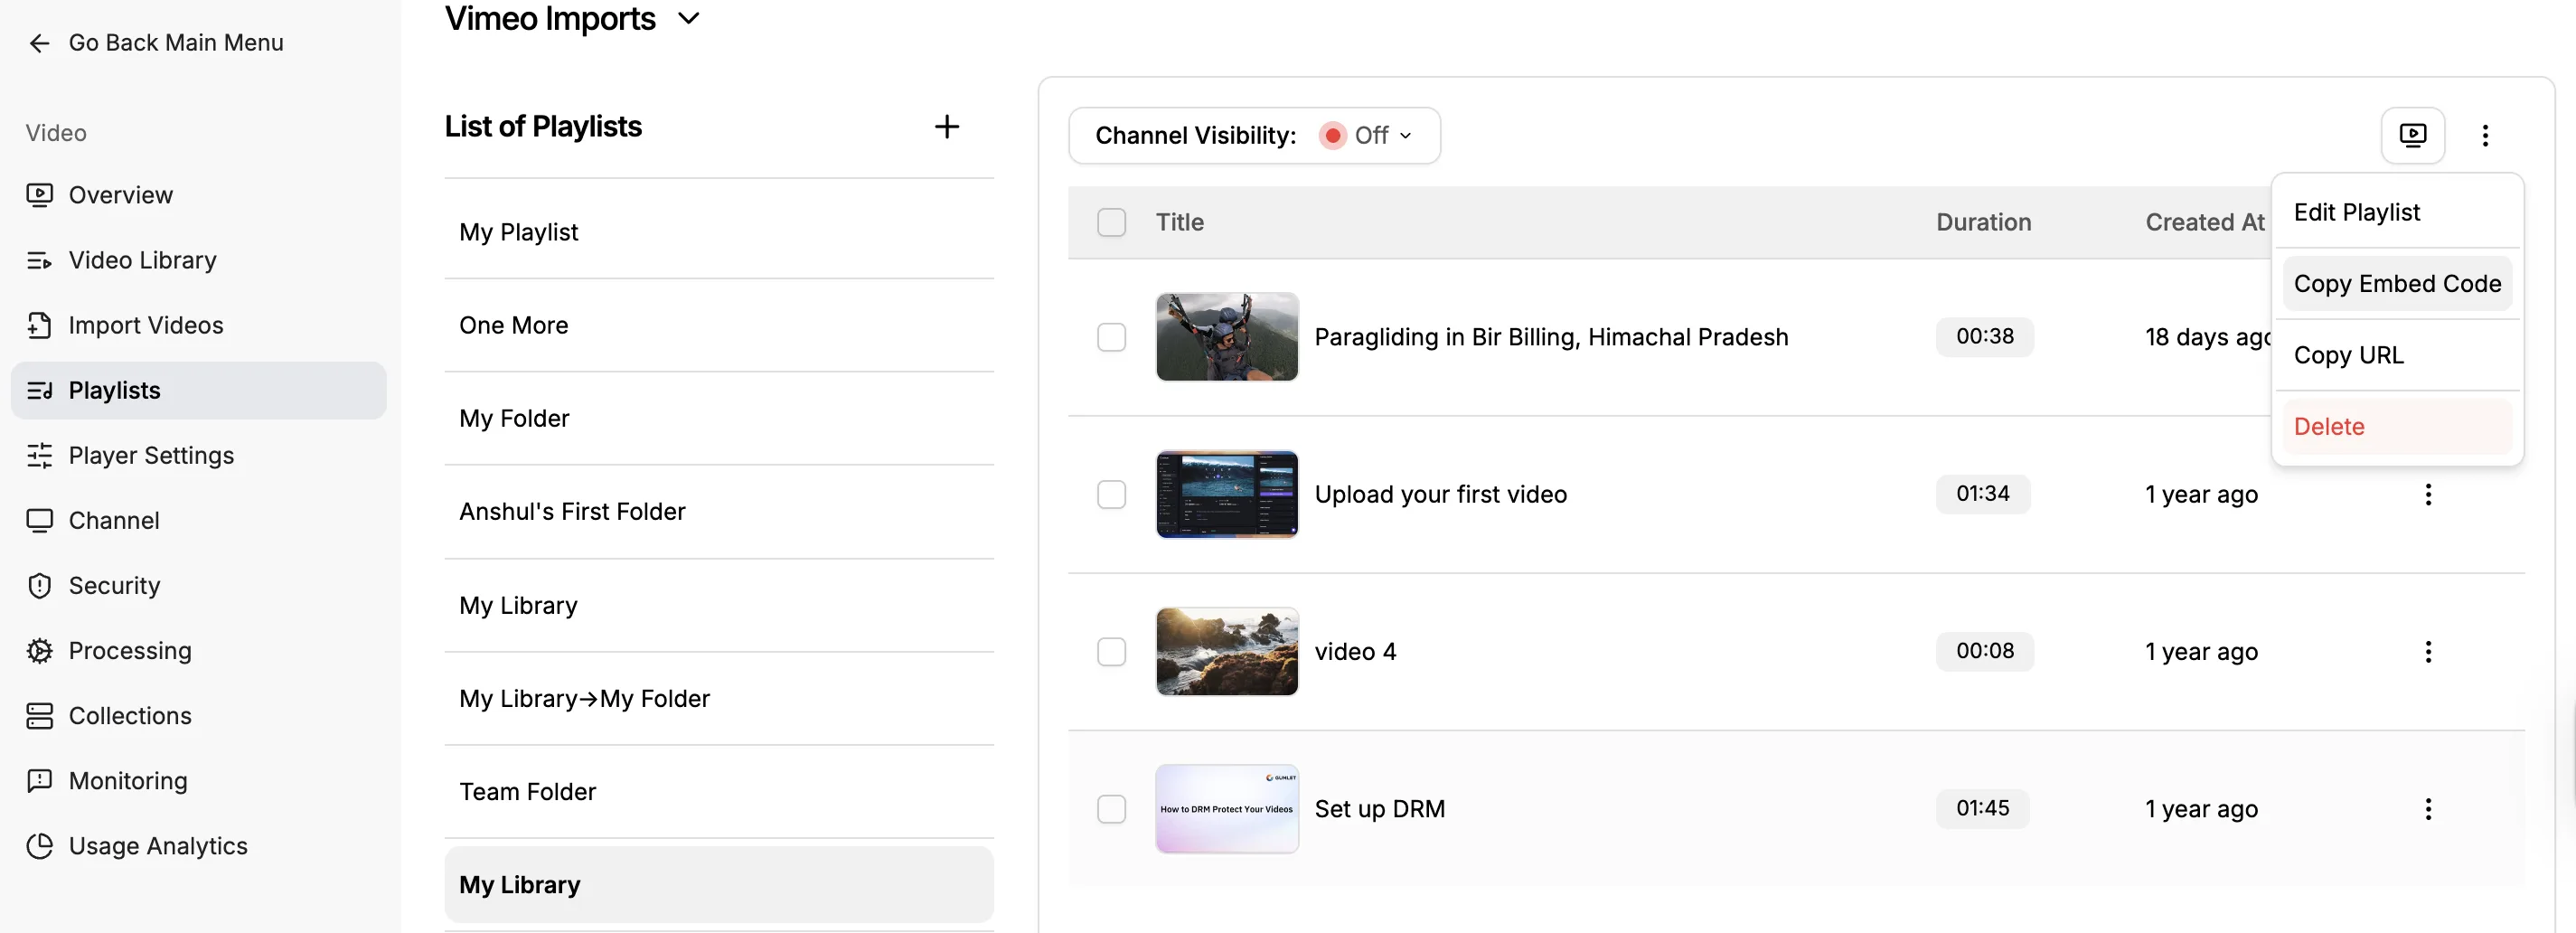
``` [Gumlet Video Tutorial](https://play.gumlet.io/embed/playlist/674b4622dad6bb7514c68f13) Your playlist embed will use the same settings as your player in the video library. Any changes you make there will be applied here automatically. # Channel Custom Domain Brand your channels with custom domain names Here is the guide to mapping your domain to Gumlet channels: Prerequisites: * A domain name and access to modify DNS records * A paid Gumlet account with CNAME ## Set up a domain in channel settings Navigate to [Video Library](https://dash.gumlet.com/video/manage) > Channel ![Add a CNAME](/1bd6f117f378-channel-custom-domain-01.webp) ### Create a CNAME record in your DNS records 1. Create a CNAME record for your domain. For example: `channel.example.com` is the domain where you want to map the video channel. 2. Map the CNAME value to `channel.gumlet.tv` `channel.example.com` CNAME `channel.gumlet.tv` Cloudflare user? If you are adding a DNS record in Cloudflare, set proxy status to "DNS only" (not proxied); it will not work when proxied. ### Verify the CNAME Once you add a CNAME record, click on the verify button. If everything is correct, your custom domain will be successfully created. ![](/4f56ea018eb9-channel-custom-domain-02.webp) That's it! Your custom domain will be live with a valid SSL certificate in a few minutes. Open your custom domain in a new tab to validate the setup. ![](/94207c3930ee-channel-custom-domain-03.webp) ### Copy the Channel URL Copy the channel URL from the top of the page to see the channel page on your domain. Additionally, the videos on the channel pages are now hosted on your new domain name. --- updatedAt: 2025-06-11T06:29:17.000Z --- # Channel FAQs Frequently asked questions about channels ### Can I change the background color of a channel? No, it's not possible to change the color of the channel pages. However, our channel page is designed to adapt to light or dark mode based on browser/device mode. ### Can I add branding to the channel? Yes, you can add a logo, title, and description to the channel. ### How to Invite Members to My Channel? Navigate to Video Library > Channel Settings > Invite Members. You can invite members via a CSV or by entering their name and email address. ### Can I embed the channel on my website? No, it's not possible at the moment. Our team is currently working on this feature. ### Can I embed the entire playlist on my website? No, it's not possible at the moment. You can share the playlist URLs with your audience to show them. You can subscribe to feature requests here - . # Channel and Playlists Create video channels and playlists for your audience Video channels and playlists are one of the best ways to share content with your audience. Instead of copying and pasting a new video link every time you upload, share your channel URL or invite members to access your content. They can then view updates directly in their dashboard whenever new videos are added. Let's dig deeper into how to set up a channel. ## Channel Settings You can create a channel that lets your audience access all your videos in one place. ![Channel settings](/3fd4051d53e8-channel-01.webp) ### Enable Channel Turn your video channel on or off at any time. When the channel is disabled, your audience will not be able to access it. ### Title & Description Set a clear title and description for your channel. These appear on your channel page and are also added as meta tags to improve your channel's visibility. ### Channel Logo Upload your brand logo so your channel reflects your visual identity and looks professional. ### Hero Banner Add a hero banner image to highlight your channel and make it more visually engaging and SEO-friendly. ### Favicon Icon Use your own brand icon as the favicon to make your channel look more branded and trustworthy. ### Theme Color Choose a theme color from the color picker to align the channelchannel'sance with your brand and make it stand out. ### Included Playlists Select one or more playlists to show on your channel. You can easily reorder them to display playlists in the exact sequence you want. ### Member Settings We allow you to create two types of channels. 1. Public Channels 2. Members Only Channels Read more about channel membership here - [Channel Membership](/video/channels/channel-membership) ### Dynamic Watermark Settings When a user is logged in to the channel, we will display the dynamic watermark text as per your requirements. By default, we display the user's IP address, but you can change it to the user's name or email for added security. _Note: You need to enable the dynamic watermark in the player settings to display the watermark._ ### Disable Email Invites We send an invitation email when you invite a member via the dashboard or API. You can disable automatic emails and instead copy the invitation link from the members list in the dashboard or from the invite API response. ### Custom Domain (CNAME) Now add a custom domain name for your channel. With a CNAME, you can preview video channels on your domain name. A guide to setting up a Custom Domain for a channel - [Custom Domain to a Channel](/video/channels/channel-custom-domain) ### Channel Preview Here is the sample channel for your reference: [Channel Preview](https://gumlet.tv/channel/674fe9f2deed8d45e905a3e3/) ![Channel Preview](/1d83e4b35dc8-channel-02.webp) ### RSS Link Each of your channels includes a unique RSS Feed URL for easy subscription and updates. ## Playlists Create shareable playlists directly from the Video CMS and share them as curated video albums. ### Create a playlist 1. Click on the "Create a Playlist" button. ![](/c8b5a3624c2e-channel-03.webp) 2. Give it a name to be visible on your shareable page, so give it what makes sense. ![](/0384aa1e57c4-channel-04.webp) 3. Manage your playlists from the left bar. You can update the name, description, and order of the playlist. ![Playlists](/c66cf832885a-channel-05.webp) Here is the sample playlist: [View Playlist](https://www.gumlet.com/channel/6463750ab1e0eada61671cde/playlist/65a7adeafd8260c6df55d088/) ### Ordering Videos in Playlist Sort videos quickly, either alphabetically or by upload time. You can also manually reorder videos by moving them up or down. Once updated, your changes will be reflected in your embedded playlist, shareable playlist URL, and the playlist on your channel page. ![](/d9611117dbd8-channel-06.webp) ### Embed Playlist You can also embed playlists directly on your website, app, or blog to give your audience a seamless viewing experience without leaving your platform. [Learn more](/video/channels/embed-playlists). ### Show them on the channel Enable the toggle `Show on channel` to add the playlist to the video channel. It will be added to the channel's structured information and data. How to create engaging channels? Here are the quick steps: 1. Create playlist(s) with the title of your video series, such as `Series 1` or `Chapter 2`, something that resonates with your content. 2. Select videos and add them to playlist(s), to have a curated album of videos. 3. Edit Playlist settings and enable `Show on channel` toggle. 4. Enable the channel and give it a title, description, upload a logo, and set up the Member settings. 5. Invite members to your channels and share your expertise. _Note: Only one channel can be created with one workspace. There is a one-to-one mapping between the channel and workspace._ --- updatedAt: 2026-03-06T11:54:02.000Z --- # oEmbed, Embedly & Iframely Gumlet supports oEmbed, embedly and iframely. Gumlet embed code and `gumlet.tv` watch pages have native support for [oEmbed](https://oembed.com/), [Embedly](https://embed.ly/provider/gumlet) and [Iframely](https://iframely.com/domains/gumlet). If you are using any platform like WordPress that utilises them, just pasting a video watch link will automatically convert that link to embed code. ## oEmbed If you are displaying video on your own platform without using Gumlet player or embed, you can still leverage oEmbed support. Here is how you can do it. oEmbed is a standard framework across the Internet for Embedding video and other content. We support oEmbed for the widespread acceptability of Gumlet videos across platforms and devices. ### Getting oEmbed response from Gumlet Get the oEmbed response using a request: ```php HTTP GET https://api.gumlet.com/v1/oembed?url={video_url} ``` ```php Sample Request GET https://api.gumlet.com/v1/oembed?url=https://gumlet.tv/watch/64be6a1705ab8a164db198a5 ``` The video URL (***video\_url***) can support any of these schemes: | This URL is ... | URL Scheme | | :---------------- | :---------------------------------------- | | A watch page | | | A play embed code | | You can add any parameters mentioned in the [Table](/video/embed-stream#parameter-reference) to customize. Here is the sample response: ```json Sample Response { "version": "1.0", "type": "video", "provider_name": "Gumlet", "provider_url": "https://www.gumlet.com/", "title": "launch video 3", "thumbnail_url": "https://video.gumlet.io/6435267e83c96cf7c982e560/64be6a1705ab8a164db198a5/thumbnail-1-0.png?v=1692964590857&width=800&height=450&dpr=2.0", "thumbnail_width": 800, "thumbnail_height": 450, "width": 800, "height": 450, "html": "" } ``` The response fields can be described as below: | Field | Description | | :---------------- | :-------------------------------------------------------------- | | version | The type of the **oEmbed**, which in this case is *video*. | | type | The version of the **oEmbed Specifications**. | | provider\_name | The name of the oEmbed provider, i.e. Gumlet | | provider\_url | The name of the oEmbed provider, i.e. | | title | The title of the video | | thumbnail\_url | The thumbnail URL of the video | | thumbnail\_width | The width of the thumbnail | | thumbnail\_height | The height of the thumbnail | | width | The width of the video | | height | The height of the video | | html | The ` ``` ### Add discovery for your page If you are building your own page with Gumlet video and want other players to convert it to Embed code automatically, you can add the oEmbed URL to the `` section of your page. ```html ``` The discovery tag helps editors, and platforms discover the oEmbed tag when you add the URL to a system that supports oEmbed discovery. --- updatedAt: 2026-05-06T06:29:35.000Z --- # WordPress Video Plugin An official plugin by Gumlet for video browsing, uploading & embedding, dynamic watermark configuration, and shortcode. Official Gumlet plugin for WordPress: embed Gumlet videos with a **Gutenberg block** or **shortcode**, optional **dynamic watermarking**, **user-level analytics**, and when you add an **API key**—**browse your Gumlet library** and **upload** new video/audio from WordPress. ## Install the plugin ![](images/gumlet-wordpress-video-plugin-01.webp) 1. In WordPress: **Plugins → Add New**, search for **`gumlet video`**, install **Gumlet Video**, and activate. 2. Or install from [WordPress.org – Gumlet Video](https://wordpress.org/plugins/gumlet-video/). ## API key (library browse & upload) Library browse and direct upload use Gumlet’s API. The key is **stored in WordPress** and used **only on the server** to proxy requests to Gumlet; it is **not** exposed to site visitors. ![](images/gumlet-wordpress-video-plugin-02.webp) 1. In Gumlet: **[Developer → API keys](https://dash.gumlet.com/developer/api-keys)** — create a key. 2. In WordPress: **Settings → Gumlet Video** → open the **API** tab → paste the key → **Save Options**. 3. Use **Test connection** to verify before or after save (if the field is filled, the test uses that value; otherwise it uses the saved key). ***Tip:** Paste the **key string only**. If you accidentally paste a full header like `Bearer YOUR_API_KEY`, recent plugin versions normalize that so requests still work.* **Who can use it:** Only users who can **manage\_options** (typically **Administrators**) can use the API-backed features (REST proxy, library, upload). This is intentional so the key stays with trusted roles. ## Gumlet Video Library (WordPress admin) ![](images/gumlet-wordpress-video-plugin-03.webp) After the API key is saved: * Go to **Media → Gumlet Video Library**. * Choose a **workspace**, **search** by title, **upload** video/audio to Gumlet, and use **New post with this video** for a selected asset when you want a draft with the block pre-filled. ![](images/gumlet-wordpress-video-plugin-04.webp) ## Gutenberg block ("Gumlet Video") ![](images/gumlet-wordpress-video-plugin-05.webp) 1. Add the **Gumlet Video** block. 2. Either: * **Browse library** — pick an asset from your Gumlet account, or * **Upload** — send a file to the workspace you selected, or * Paste an **Asset ID** manually. The block supports responsive sizing, autoplay/loop options, and (where applicable) audio track and caption language. ## Shortcode Embed anywhere that runs shortcodes: ```text [gumlet id=YOUR_ASSET_ID] ``` Fixed size: ```text [gumlet id=YOUR_ASSET_ID width=600 height=450] ``` Default audio track and caption language (when your asset supports them): ```text [gumlet id=YOUR_ASSET_ID audio_track_language=en caption_language=es] ``` ## Dynamic watermark 1. Configure the watermark in **Gumlet Video** (player / video settings in your Gumlet dashboard), e.g. **[Video → Player settings](https://dash.gumlet.com/video/manage?tab=edit_player)** (or your current dashboard path for player customization). 2. In WordPress: **Settings → Gumlet Video** (main **Settings** tab) — enable **Name**, **Email**, and/or **User ID** for the dynamic watermark, then save. 3. Embed with the block or shortcode as above. ## User-level analytics In **Settings → Gumlet Video**, enable **Track user analytics** so engagement can include logged-in user context when supported by your Gumlet setup. ## Frequently asked questions **Can I use email and name in the dynamic watermark?**\ Yes, you can combine **name**, **email**, and **user ID** in the plugin settings. **Can I disable the dynamic watermark?**\ Yes, turn it off in your Gumlet player / video settings in the dashboard. **Is the plugin free?**\ The WordPress plugin is free. **Dynamic watermarking** on your videos requires a **Business** (or applicable) Gumlet plan. See [Gumlet pricing](https://www.gumlet.com/pricing/?tab=video). # Autoplay videos For advanced use cases of autoplay videos Get more control over your videos using Gumlet's advanced player customization options for autoplay videos. You can update settings for autoplay videos for different use cases: ### Auto-play videos once Autoplay the video once to capture users' attention and allow them to watch at their own pace. Use query params: `?autoplay=true` [Gumlet video player](https://play.gumlet.io/embed/68872b9a73359ab61167481e?autoplay=true) _Note: You can also enable this setting for all videos inside the player settings._ ### Auto-play videos in a loop Allow users to watch videos at their own pace and rewatch them easily, keeping them available for playback indefinitely. Use query params: `?autoplay=true&loop=true` [Gumlet video player](https://play.gumlet.io/embed/68872b9a73359ab61167481e?autoplay=true\&loop=true) _Note: You can also enable this setting for all videos inside the player settings._ ### Auto-play video without any controls Most suitable for marketing videos to play without any controls. Viewers can play/pause and unmute the video. Use query params: `?autoplay=true&loop=true&disable_player_controls=true` [Gumlet video player](https://play.gumlet.io/embed/68872b9a73359ab61167481e?autoplay=true\&loop=true\&disable_player_controls=true) _Note: You can also enable this setting for all videos inside the player settings._ ### Auto-play videos in the background Most suitable for e-commerce videos and website hero videos, where high-quality videos play continuously without any controls or music. Use query params: `?background=true` [Gumlet video player](https://play.gumlet.io/embed/68872b9a73359ab61167481e?background=true) Summary of autoplay use cases: | Use case | query param(s) | | :----------------------------------- | :----------------------------------------------------- | | Auto-play videos once | `autoplay=true` | | Auto-play videos in a loop | `autoplay=true&loop=true` | | Auto-play video without any controls | `autoplay=true&loop=true&disable_player_controls=true` | | Auto-play videos in the background | `background=true` | --- updatedAt: 2026-03-06T11:55:57.000Z --- # Content Security Policy (CSP) The new Content-Security-Policy HTTP response header helps you reduce XSS risks on modern browsers by declaring which dynamic resources are allowed to load. If you are making use of CSP, you must add the following directives to your CSP header for our iframe code to work properly. If not done, Gumlet iframe won't load and video won't be visible. ```Text CSP Header frame-src 'self' https://play.gumlet.io; ``` # Embed & Stream A complete guide on embedding & streaming Gumlet videos Embedding videos processed by Gumlet takes no time. Copy the embed code from the video CMS or video details page. ## Get Embed code To play videos on your website, blog, or any other CMS, Gumlet's embed code makes it easy to get started. It has a customizable player, video meta configuration, SEO snippet, and security features. You can configure your player settings [here](/video/player-customization). Here are the different ways to embed your videos quickly. ### Video settings page Navigate to the video settings page, then click on the **Embed & Share** button. Under the **Embed** tab, you can customize the embed code and generate a new one. ![](/37120c1ca2cd-embed-stream-01.webp) ## Embed Code Preview ```html ``` Replace the `{{asset_id}}` `src` above with the asset ID of the video you want to embed. The height and width specified in the embed code above are for illustrative purposes only; adjust these properties to suit your needs for the best viewing experience. Customize your embedded video by passing query parameters along with the URL. For example: `https://play.gumlet.io/embed/{{asset_id}}?player_color=#F0F0F0` The above example will change your player color to `#F0F0F0`. ### Parameter Reference Here is the list of available parameters for configuring your player and video settings. | Query Parameter | Description | Possible Values | Default Value | | -------------------- | ------------------------------------------------------------------------------------------------------------------------------------------------------------------------------------------------------------------------------------------------------------------------------------------------------------------------------------------------------------------- | ------------------------------------------------------------------------------------ | ------------------------------------ | | autoplay | Plays the video automatically on page load. | `true` or `false` | `false` | | thumbnail | Provide a custom thumbnail image for the video embed. | Any valid image URL | Auto-generated thumbnail | | background | Autoplay videos without any controls | `true` or `false` | `false` | | vast\_tag\_url | VAST tag that should be used to display ads while playing this video | Any valid VAST tag URL | `undefined` | | loop | Play your videos in loop mode | `true` or `false` | `false` | | ~~start\_high\_res~~ | (Deprecated - use `lock_highest_res` instead) Start video playback at the highest resolution. | `true` or `false` | `false` | | lock\_highest\_res | Lock the video playback to the highest resolution. | `true` or `false` | `false` | | player\_color | The theme color for the player | Any hex color value | `#6658EA` | | gm\_property\_id | Gumlet insights property ID to which the viewer analytics needs to be logged | Any valid property ID | Default Property ID of your account. | | token | [DRM playback token](/developers/drm/license-server-setup#generate-token-and-expiry). This must be passed if the video is DRM-encrypted. | Generate a one-time token for DRM playback. | `undefined` | | expires | [DRM token expiry timestamp](/developers/drm/license-server-setup#generate-token-and-expiry) in milliseconds since epoch. This must be passed if a video is DRM-encrypted. | Expiration timestamp for the DRM playback token. | `undefined` | | playsinline | This parameter controls whether videos play inline or in full screen on iOS. Valid values are: `true`: Results in fullscreen playback. This is currently the default value, though the default is subject to change. `false`: Results in inline playback for mobile browsers and for `WebViews` created with the `allowsInlineMediaPlayback` property set to `YES`. | `true` or `false` | `true` | | logo\_url | URL of the logo to display during video playback. | Any valid image URL. | `undefined` | | logo\_height | Logo height in pixels. | Any pixel height. | `100px` | | logo\_width | Logo width in pixels. | Any pixel width. | `100px` | | logo\_position | Logo position in the player. | `top`, `topleft`, `topright`, `right`, `bottomright`, `bottom`, `bottomleft`, `left` | `bottomright` | | gm\_user\_id | User ID (custom tracking) | A string or integer | undefined | | gm\_user\_name | User name (custom tracking) | A string | undefined | | gm\_user\_email | User email (custom tracking) | A string | undefined | | gm\_custom\_data\_1 | Custom Data 1 | A string | undefined | _Note: Autoplay videos will have their audio disabled on all browsers._ ### Advanced parameters Here is a list of parameters to make your player customizable by enabling specific actions on the control bar. You can also customize the player using the player customizer [here](/video/player-customization/customize-video-player). | Query Parameter | Description | Possible Values | Default Value | | ------------------------- | ----------------------------------------------------------------------------------------------------------------------------------------------------------------------------------------------------------------------------------------------------------------------------------------------------------- | ---------------------------------------------------------------------------------------------------------------------------------------------------------- | -------------------------------- | | disable\_player\_controls | Disables all the player controls except the large play button in the center of the player. | `true` or `false` | `false` | | disabled\_player\_control | If `disable_player_controls` is not used, you can disable one or more player controls. You can add this parameter multiple times, each with a different value. For example, to disable the progress bar and the cast button, you can send: `?disabled_player_control=cast&disabled_player_control=progress` | `rewind`, `fast-forward`, `play`, `progress`, `pip`, `current-time`, `duration`, `mute`, `volume`, `cast`, `captions`, `airplay`, `fullscreen`, `settings` | undefined | | audio\_track\_language | for pre-selecting the default audio language (if you have multiple), this accepts the ISO language code listed [here](/video/tutorials/subtitle-language-list) | `en` or `es` or others | original source language or `en` | | caption\_language | for pre-selecting the default captions language (if you have multiple), this accepts the ISO language code listed [here](/video/tutorials/subtitle-language-list) | `en` or `es` or others | original source language or `en` | ### You can get the MP4 and other plaback URLs On the asset details page, click on Publishing Options > URLs, you will get the access to .mp4, .m3u8, .mpd URLs as use as per your need. ![Different type of URLs](/e97617c1baad-embed-stream-02.webp) ### Are you a developer or using APIs? If yes, use the asset ID from the API response with the iframe code [here](#embed-code-preview). ### Are you using WordPress? If yes, use the Gumlet Video WordPress plugin. Learn more about plugin [here](/video/embed-stream/gumlet-wordpress-video-plugin). If you do not use the plugin, some player features may not work as WordPress removes the additional attributes from the iframe embed code. ### Are you using Shopify or any other ecommerce platform? Use `background=1` in the query parameter in the source and your video will auto-play like native experience without any controls. Sample iframe src: `https://play.gumlet.io/embed/64be6a1705ab8a164db198a5?background=true` ### How to create time-limited video preview URLs? There are two ways, if you want to use APIs to generate limited time embed code or preview page URL, refer to the [Signed URL here](/video/manage-videos/video-protection-settings-section#signed-url). Otherwise, you can generate a secure expiry URL from the dashboard. Read more [here](/video/manage-videos/video-protection-settings-section/time-based-expiry-urls). # Timeline, Settings & My Library Understand the main areas of the Gumlet editor - the timeline where you edit, Settings where you manage your project, and My Library where uploaded files live. ### Editor layout | Area | Purpose | | ------------ | ------------------------------------------------------------------------ | | **Header** | Save, **Replace Video**, Help, Theme (Light / Dark) | | **Sidebar** | Add content (Video, Text, Image, Background, Zoom) and open **Settings** | | **Canvas** | Live preview; drag and resize overlays | | **Timeline** | Arrange, trim, split, and layer clips | ![](/094f6ada9ea5-timeline-settings-my-library-01.webp) --- ### Timeline The timeline is where your video takes shape. Clips and overlays appear as blocks on horizontal **tracks**. ![](/8d8d57556eac-timeline-settings-my-library-02.webp) #### Tracks * Your Gumlet source video loads on the timeline when you open the editor. * Add more tracks by placing items on empty rows, or use existing tracks for layering. * Track header controls: * **Reorder track** — drag the grip to move the track up or down * **Magnet** — enable/disable magnetic timeline (snaps clips together) * **Delete track** — remove an empty or unwanted track #### Playhead and transport | Control | Action | | -------------- | -------------------------------- | | Click timeline | Move playhead (seek) | | `Space` | Play / Pause | | `⌘/Ctrl + ←` | Jump to start | | `⌘/Ctrl + →` | Jump to end | | Time display | Shows `current / total` duration | #### Zoom | Control | Action | | ---------------------------------- | --------------------------- | | **Timeline Zoom** slider | Zoom in/out on the timeline | | **Zoom Out** / **Zoom In** buttons | Step zoom | | **Reset Zoom** | Return to default | | `⌘/Ctrl + -` | Zoom out | | `⌘/Ctrl + +` | Zoom in | | `⌘/Ctrl + Scroll` | Zoom with mouse wheel | #### Context menu Right-click a selected item for **Duplicate**, **Split at playhead**, and **Delete**. --- ### Settings Open the sidebar **Settings** icon (gear). ![](/3fa5c3ce989e-timeline-settings-my-library-03.webp) **Reset project** - permanently deletes the saved timeline for this asset on the server and in your browser. Use only when you want to start over. **This cannot be undone.** #### Save History Lists autosave checkpoints for the current asset. Use **Load this save** to restore an earlier version of your timeline. #### Keyboard Shortcuts Full list of editor shortcuts. See also Trim, split, cut & crop. --- ### Save your project | Action | How | | --------------- | ------------------------------------------------------- | | **Autosave** | Every 5 seconds to browser storage | | **Manual save** | Header save icon or `⌘/Ctrl + S` | | **Cloud sync** | Timeline syncs to Gumlet project storage while you edit | #### Cloud vs local on reload If you return and both a cloud snapshot and local autosave differ, choose: * **Load cloud version** — use the last synced cloud copy * **Keep my work** — continue from local autosave --- ### My Library (uploaded files) **My Library** appears in the **Video** and **Image** sidebar panels. It holds files you upload from your device. #### Upload | Panel | How to upload | | --------- | ---------------------------------------------- | | **Video** | Click the **Upload** icon in the panel toolbar | | **Image** | Click **Upload** inside the My Library tab | #### How files appear * Grid of thumbnails with filename, file size, and upload time * Click a file to add it to the project, or **drag** onto the canvas/timeline * Hover a file and click **trash** to remove it from the library _Note: Clearing browser site data removes My Library files. You will need to re-upload them._ --- ### Sidebar panels reference | Icon | Panel | Use for | | ---------- | ---------- | -------------------------------------- | | Video | Video | Upload and add video clips | | Text | Text | Text overlays and titles | | Image | Image | Upload and add images | | Background | Background | Composition background color | | Zoom | Zoom | Zoom In / Zoom Out effects on clips | | Settings | Settings | Project reset, save history, shortcuts | --- updatedAt: 2026-06-22T07:26:32.000Z --- # Add Text, Background, Images & Styles Add overlays and styling to your Gumlet video - text titles, background colors, uploaded images, and enter/exit animations. ### Add text overlays 1. Open the sidebar and click the **Text** icon. 2. Choose a template from **Default Text Styles**, or drag a template onto the canvas or timeline. 3. Click the text on the canvas and type in the field (**“Enter your text here…”**). ![](images/add-text-background-images-styles-01.webp) #### Position and resize on canvas * **Drag** the text to move it. * Use the corner handles to **resize**. * Use the rotation handle to **rotate**. * Canvas toolbar: **Duplicate**, **Fill Canvas**, **Delete**. *** ### Style text With a text item selected, use the **Style** tab in the sidebar. ![](images/add-text-background-images-styles-02.webp) | Section | What you can change | | -------------- | -------------------------------------------------------------- | | **Typography** | Font family, font weight, text transform, font size (1–12 rem) | | **Colors** | Text color; background color behind the text box | | **Alignment** | Left, center, or right | *** ### Add enter and exit animations With text (or a video clip) selected, open the **Settings** tab. ![](images/add-text-background-images-styles-03.webp) 1. Expand **Enter Animations** and pick a preset, or choose **None**. 2. Expand **Exit Animations** and pick a preset, or choose **None**. Animations play during preview and are included when you **Replace Video**. *** ### Add a background color The composition background is separate from the text box background color. ![](images/add-text-background-images-styles-04.webp) 1. Open the sidebar **Background** icon (palette). 2. Pick a color from the swatch, enter any CSS value (hex, gradient, etc.), or choose a preset under **Solid Colors** or **Gradients**. 3. Click **Reset** to restore the default. The background fills the frame behind all clips and overlays. It is saved with your project and exported on **Replace Video**. *** ### Add images ![](images/add-text-background-images-styles-05.webp) 1. Open the sidebar **Image** icon. 2. Open the **My Library** tab. 3. Click **Upload** and select an image from your device. 4. Click the thumbnail or **drag** it onto the canvas or timeline. #### Style images With an image selected, use **Style** for appearance and **Settings** for enter/exit animations (same pattern as text). *** ### Add extra video clips Use this to layer B-roll, intros, or other footage onto your Gumlet source video. ![](images/add-text-background-images-styles-06.webp) 1. Open the sidebar **Video** icon. 2. Click the **Upload** icon in the panel toolbar (tooltip: **“Upload video”**). 3. Select a video file from your device. 4. Click or drag the file from **My Library** onto the timeline. # Trim, Split, Cut & Crop Edit the length and framing of your clips - shorten segments, cut at a point, and crop video to a new aspect ratio. ### Trim a clip Trimming removes footage from the start or end of a clip without splitting it. 1. Select a clip on the timeline. 2. Hover the **left or right edge** of the clip until the resize cursor appears. 3. **Drag** the edge inward to shorten, or outward to reveal more of the source (if available). ![](/911001e7f7d4-trim-split-cut-crop-01.webp) There is no dedicated **Trim** menu item - trimming is done entirely by dragging clip edges on the timeline. --- ### Split (cut) a clip Splitting divides one clip into two segments at the playhead. Use this to cut out a section, reorder parts, or merge segments later. ![](/a33c72b9de5e-trim-split-cut-crop-02.webp) #### Keyboard 1. Select **one** clip on the timeline. 2. Move the playhead over the selected clip. 3. Press `S`. #### Toolbar 1. Select one clip and position the playhead. 2. Click the **scissors** icon on the timeline toolbar. #### After splitting * Each segment can be moved, trimmed, or deleted independently. * To remove a middle section: split twice, select the middle segment, press **Backspace**. * See [Merge clips](/video/gumlet-video-editor/merge-clips) to join remaining segments. If split is disabled, check the tooltip: you may need to select a single item and move the playhead over it. --- ### Crop a video clip Cropping changes which part of the video frame is visible in the clip - not the overall aspect ratio of the composition. ![](/12697260fe77-trim-split-cut-crop-03.webp) 1. Select a **video** clip on the timeline or canvas. 2. Open the **Settings** tab in the sidebar. 3. Turn on the **Crop** switch. 4. Pick an **Aspect Ratio** preset (16:9, 9:16, 1:1, 4:5, 5:4, 4:3, 3:4, 21:9). 5. Drag the **handles** on the canvas to fine-tune the crop area. 6. Click **Reset** to clear the crop. Cropped framing is included when you **Replace Video**. --- ### Change composition aspect ratio The overall output frame (composition) is separate from per-clip crop. ![](/1407502c2976-trim-split-cut-crop-04.webp) 1. On the timeline toolbar, open the **aspect ratio** dropdown. 2. Choose **16:9** (Widescreen), **9:16** (Vertical), **1:1** (Square), or **4:5** (Portrait). This sets the canvas frame for the entire project. Individual clips can still be cropped within that frame. --- ### Duplicate and delete | Action | How | | ------------- | ---------------------------------------------------------- | | **Duplicate** | Select item → `⌘/Ctrl + D`, or right-click → **Duplicate** | | **Delete** | Select item → `Backspace`, or right-click → **Delete** | --- ### Keyboard shortcuts | Shortcut | Action | | -------------------- | --------------------- | | `S` | Split at playhead | | `Backspace` | Delete selected items | | `⌘/Ctrl + D` | Duplicate selection | | `⌘/Ctrl + Z` | Undo | | `⌘/Ctrl + Shift + Z` | Redo | | `Space` | Play / Pause | Open **Settings** in the sidebar for the full shortcut list. --- updatedAt: 2026-06-22T07:17:27.000Z --- # Merge Clips Combine multiple video segments into one continuous video. In the Gumlet editor, you merge clips by arranging them side by side on the timeline, then export using **Replace Video**. ### How merging works There is no separate **Merge** button. Merging happens in two steps: 1. **Arrange** clips so they play one after another on the timeline (no gaps). 2. **Replace Video** to render the full timeline as a single MP4 and upload it to Gumlet. The exported file replaces your asset’s original source. ### Merge segments from one video (split then join) Use this when you want to cut out a section and keep the rest, or reorder parts of the same source video. 1. Place the playhead where you want to cut. 2. Select the clip and press `S` (or click the **scissors** icon) to **Split at the playhead**. ![](images/merge-clips-01.webp) 3. Repeat to create as many segments as you need. 4. **Delete** unwanted segments (`Backspace`). 5. **Drag** remaining segments next to each other on the same or adjacent tracks. ![](images/merge-clips-02.webp) ### Merge clips from different sources ![](images/merge-clips-03.webp) Use this to combine your Gumlet source video with uploaded footage. 1. Your Gumlet asset loads on the timeline when you open the editor. 2. Open the sidebar **Video** icon → upload additional videos to **My Library**. 3. Drag each clip onto the timeline. 4. **Trim** clip edges so only the parts you need remain. 5. **Drag** clips into playback order—earlier clips on the left, later clips on the right. ![](images/merge-clips-04.webp) ### Close gaps with magnetic timeline Each track has a **magnet** icon in the track header. * **Enable magnetic timeline** — clips snap together; moving one clip closes gaps between neighbors. * **Disable magnetic timeline** — clips can have empty space between them. ![](images/merge-clips-05.webp) ### Layer clips instead of merging end-to-end ![](images/merge-clips-06.webp) To play two clips **at the same time** (picture-in-picture, overlay), place them on **different tracks** so they overlap in time. This is layering, not merging. ### Publish your merged video 1. Preview the full timeline with **Space** (play/pause). 2. Click **Replace Video** in the header. 3. Confirm - this **overwrites** the asset’s original source on Gumlet. 4. Wait for render and upload to finish. Keep the tab open. # Playback Speed Change how fast your video plays. The Gumlet editor has two separate speed controls - one for preview and one for individual clips. ### Preview speed (whole project) Preview speed affects how fast the timeline plays back while you edit. It does **not** change the speed of clips in your final export. ![](/29fc6b05ebc7-editor-playback-speed-01.webp) 1. On the timeline toolbar, find the speed dropdown (shows **1x** by default). 2. Choose a speed: | Speed Options | | ------------- | | 0.25x | | 0.5x | | 1x | | 1.5x | | 2x | Use slower speeds to check fine edits; use faster speeds to skim long timelines. Preview speed is saved with your project state. It is an editing convenience only - the exported video uses each clip’s own speed setting (below). --- ### Per-clip speed ![](/75fa03641278-editor-playback-speed-02.webp) Per-clip speed changes how fast a **specific video clip** plays. This **is** included when you **Replace Video**. 1. Select a **video** clip on the timeline or canvas. 2. Open the **Settings** tab in the sidebar. 3. Find **Playback Speed**. 4. Choose a speed from the dropdown: | Option | | ----------- | | 0.25x | | 0.5x | | 0.75x | | 1x (Normal) | | 1.25x | | 1.5x | | 1.75x | | 2x | | 3x | | 4x | When you change clip speed, the clip’s **duration on the timeline updates** automatically; a 10-second clip at 2x becomes 5 seconds on the timeline. --- ### Preview speed vs clip speed | | Preview speed | Per-clip speed | | ----------------------------- | ------------------------- | --------------------- | | **Where** | Timeline toolbar dropdown | Clip **Settings** tab | | **Range** | 0.25x – 2x | 0.25x – 4x | | **Affects export** | No | Yes | | **Affects timeline duration** | No | Yes | --- ### Common workflows #### Slow-motion effect 1. Select the clip. 2. Set **Playback Speed** to **0.5x** or **0.25x**. 3. Preview with `Space`. 4. **Replace Video** to export. #### Speed up a long section 1. Select the clip. 2. Set **Playback Speed** to **1.5x**, **2x**, or higher. 3. Trim the clip if needed after the duration shrinks. #### Review edits faster (without changing export) 1. Set the toolbar preview dropdown to **1.5x** or **2x**. 2. Scrub and play through the timeline. 3. Reset preview to **1x** before replacing if you prefer. # Gumlet Video Editor Edit Gumlet-hosted videos in your browser - trim, split, add text, and publish changes back to the same asset without leaving the Gumlet workflow. **Beta** - The editor is actively being improved. The Gumlet Video Editor is a browser-based timeline editor opened from the Gumlet dashboard for a specific video asset. Edits are saved as a **project** (timeline state). When you are ready, use **Replace Video** to render your timeline and upload the result to Gumlet, overwriting the asset’s original source file. ### What you can do | Capability | Description | | ------------------ | ----------------------------------------------------------------- | | Trim, Split & Crop | Cut clips on the timeline and rearrange segments | | Merge Clips | Join multiple clips to create a single video | | Add Media | Add images or video on video to create engaging content | | Add background | Add background color with text/image to create a nice intro/outro | | Text overlays | Add styled text on top of your video | | Replace video | Render and upload the edited file back to Gumlet | ### Prerequisites 1. A Gumlet account with access to the video asset. 2. The asset must be **ready** and expose a progressive download URL in Gumlet metadata. 3. A modern desktop browser (Chrome, Edge, or Safari recommended). 4. **WebCodecs support** is required for Replace Video (in-browser render). If your browser lacks `VideoEncoder` / `AudioEncoder`, replace will not start. ### Open the editor from the dashboard 1. Log in to [Gumlet Dashboard](https://dash.gumlet.com/video/manage). 2. Open **Video Library** → select your asset. 3. Click **Edit Video**. ![](/6a8df6448652-gumlet-video-editor-01.webp) The editor opens with your asset loaded on the timeline. ### Open via URL (direct link) ```plaintext https://editor.gumlet.com/?asset_id= ``` You must be logged in to Gumlet. Without `asset_id`, you are redirected to the video library. --- ![Gumlet Video Editor](/db0a471c2869-gumlet-video-editor-02.webp) ### Timeline basics * **Play / Pause** — `Space` * **Split at playhead** — `S` * **Duplicate selection** — `⌘/Ctrl + D` * **Delete selection** — `Backspace` * **Undo / Redo** — `⌘/Ctrl + Z` / `⌘/Ctrl + Shift + Z` * **Zoom timeline** — `⌘/Ctrl + -` (zoom out), `⌘/Ctrl + +` (zoom in) * **Go to start / end** — `⌘/Ctrl + ←` / `⌘/Ctrl + →` Open **Settings** in the sidebar for the full keyboard shortcut list. --- ## Save your project The editor autosaves your timeline to browser storage (IndexedDB) every 5 seconds. ## Replace video on Gumlet **Replace Video** renders your edited timeline in the browser and uploads it to Gumlet, **overwriting the original source** for that asset. ### Steps 1. Click **Replace Video** in the header. 2. Read the confirmation — this action **cannot be undone**. 3. Click **Replace Video** again to start. 4. A blocking progress modal shows: * **Rendering your edits** — in-browser video render * **Uploading to Gumlet** — multipart upload to your asset 5. When complete, choose **Visit Asset Details** or **Keep Editing**. Keep the tab open until upload finishes. --- ## Reset project Under **Settings → Project**, you can reset the saved timeline for this asset. This deletes the project on the server and in the browser; the next load uses the latest stored cloud version. **This cannot be undone** and may remove recent edits that have not yet been saved to the cloud. ### Important notes | Topic | Detail | | --------- | ---------------------------------------------------------------------- | | Overwrite | The uploaded file replaces the asset’s original source on Gumlet | | Duration | Longer or higher-resolution timelines take longer to render and upload | --- updatedAt: 2026-01-13T09:39:21.000Z --- # Usage Analytics Get real-time usage statistics for video processing and streaming The [Usage Analytics](https://dash.gumlet.com/video/analytics) section shows account-wide or workspace-wise usage statistics. Get a detailed breakdown of streaming, storage, and transcoding usage. In the top-right corner, you can find the selection for workspace and the month for which the usage is displayed. ### Aggregated Stats This section shows aggregated stats for the entire month. It includes details of all three parameters: transcoding minutes, storage minutes, and streaming bandwidth. ![Aggregated monthly usage stats](images/video-usage-analytics-01.webp) ### Streaming, Transcoding & Storage Usage These charts show daily minutes of storage, transcode, and bandwidth. Please note that storage minutes are the cumulative value of all videos. Streaming and transcoding minutes are calculated per usage in a given month. ![](images/video-usage-analytics-02.webp) ### Top Streaming Assets Get access to top-streamed assets on Gumlet. You can view up to 1000 top assets and discover popular videos across various workspaces. This will enable you to improve your video content and production quality for a significant audience. You can also download the data in CSV format. ![Top streamed asset table on Gumlet Dashboard](images/video-usage-analytics-03.webp) --- updatedAt: 2026-03-06T11:57:05.000Z --- # Reports Get notified about your usage on daily, weekly, monthly basis You can schedule reports from Gumlet about your video processing, storage, and streaming usage. ![](images/reports.webp) You can schedule reports for your account or at a workspace level for different metrics. Also, you can send the notifications to multiple email IDs. *Note: The reports are available to paid users only.* --- updatedAt: 2026-01-13T09:39:21.000Z --- # Alerts Set up alerts for proactive alerts on usage metrics Select a metric, add a condition, and specify a duration to check. If the condition is met, you will receive a notification. ![](images/alerts.webp) **How to Set Up an Alert?** * Select a metric, for example, Streaming GBs > 1000 GB in the last hour * Select frequency as hourly. * Also, choose the workspace(s). The default is `All Workspaces`, all videos across workspaces in your account. * If you want to set up a monthly usage alert, i.e., from the 1st of the month. * Select 'Monthly' as the frequency, and it will notify you when the conditions match the cumulative usage values for that month, i.e., from the start of the month to the current date. *Note: The alerts are available to paid accounts only.* # Hubspot Integration Connect HubSpot with Gumlet to capture leads through video forms and sync them to your HubSpot CRM and lists. [HubSpot Integration](https://play.gumlet.io/embed/69eb199b8388784de9b92236?background=true\&autoplay=false\&loop=false\&disable_player_controls=false) ## Before you begin Make sure you have: * Access to **Integrations** in your Gumlet dashboard. * A HubSpot account with permission to authorize apps. * Existing HubSpot forms, if you want to embed HubSpot forms in your video. * Existing HubSpot lists, if you want to sync Gumlet form leads to HubSpot lists. ![](/e64a1e998988-hubspot-integration.webp) ## Connect HubSpot 1. Go to **[Integrations](https://dash.gumlet.com/integrations/hubspot)** in your Gumlet dashboard. 2. Select **HubSpot**. 3. Click **Connect HubSpot**. 4. Sign in to HubSpot and authorize Gumlet. 5. Once approved, you’ll be redirected back to Gumlet and the integration will be connected. ## Permissions required When connecting HubSpot, Gumlet requests the following permissions: * `crm.lists.read` * `crm.lists.write` * `crm.objects.contacts.read` * `crm.objects.contacts.write` * `forms` These permissions are used to fetch HubSpot forms, read and update contacts, and sync leads to HubSpot lists. ## How to use HubSpot can be used in two ways inside Gumlet. ### Use HubSpot forms in your video 1. Go to **Video Details**. 2. Open **Form / Lead Capture**. 3. Select **HubSpot** from the dropdown. 4. Choose the HubSpot form you want to embed. 5. Save or publish the video settings. When a viewer submits the form, the lead is captured directly in HubSpot. ### Sync Gumlet form leads to HubSpot lists 1. Go to **Video Details**. 2. Open **Form / Lead Capture**. 3. Select **Gumlet Form** from the dropdown. 4. Choose a list from the **HubSpot Sync List** dropdown. 5. Save or publish the video settings. When a lead is captured through the Gumlet form, it is also added to the selected HubSpot list. ## Disconnect HubSpot You can disconnect HubSpot anytime from the integration page. 1. Go to **Integrations**. 2. Open **HubSpot**. 3. Click **Disconnect**. 4. Confirm the action in the modal. After disconnecting, new leads from Gumlet will stop syncing to HubSpot until you reconnect. --- updatedAt: 2026-05-13T06:42:48.000Z --- # Mailchimp Integration Connect Mailchimp with Gumlet to capture leads through video forms and add them to your Mailchimp lists. ## Before you begin Make sure you have: * Access to **Integrations** in your Gumlet dashboard. * A Mailchimp account with permission to authorize apps. * Existing Mailchimp lists, if you want to sync Gumlet form leads to Mailchimp lists. ![](images/mailchimp-integration.webp) ## Connect Mailchimp 1. Go to **[Integrations](https://dash.gumlet.com/integrations/hubspot)** in your Gumlet dashboard. 2. Select **Mailchimp**. 3. Click **Connect Mailchimp**. 4. Sign in to Mailchimp and authorize Gumlet. 5. Once approved, you’ll be redirected back to Gumlet and the integration will be connected. ## Permissions required When connecting Mailchimp, Gumlet requests the following permissions: * `audiences.read` * `contacts.write` * `account.metadata.read` These permissions are used to fetch Mailchimp lists, create or update contacts. ## How to use ### Sync Gumlet form leads to Mailchimp lists 1. Go to **Video Details**. 2. Open **Form / Lead Capture**. 3. Select **Gumlet Form** from the dropdown. 4. Choose a list from the **Mailchimp Sync List** dropdown. 5. Save or publish the video settings. When a lead is captured through the Gumlet form, it is also added to the selected Mailchimp list. ## Disconnect Mailchimp You can disconnect Mailchimp anytime from the integration page. 1. Go to **Integrations**. 2. Open **Mailchimp**. 3. Click **Disconnect**. 4. Confirm the action in the modal. After disconnecting, new leads from Gumlet will stop syncing to Mailchimp until you reconnect. --- updatedAt: 2026-03-06T18:02:04.000Z --- # Audio Transcoding How Gumlet handles audio-only transcoding and delivery. Gumlet allows you to transcode and deliver only audio streams via CMS or APIs. Audio streams are streamed through adaptive bitrate streaming formats like `HLS` and `DASH`. They can also be delivered in `MP4` format. When you upload audio via API or on the Dashboard, we automatically detect it as audio-only and process it accordingly. There is no change required from your side to process audio. We support input audio in `mp3`, `opus`, `flac`, `wav`, `ac3`, `m4a`, `aac` formats. Our output is always in `AAC-LC`. --- updatedAt: 2026-03-06T18:06:09.000Z --- # Video SEO Google search is an entry point for people to discover your videos. Providing [additional details about the videos](https://developers.google.com/search/docs/appearance/video) to Google explicitly can lead to better SEO. We share this additional data with `VideoObject` metadata. Gumlet embed player already adds the metadata and follows best practices so that your embedded videos can be crawled and indexed by Google. # On-the-fly Video Optimization The on-the-fly (OTF) video optimization pipeline allows you to dynamically manipulate, resize, and trim video assets using simple URL query parameters. This offers a highly scalable solution to process videos on the fly for large enterprises. ## How It Works The video optimization workflow mirrors the image optimization pipeline: 1. **Set up an image source** within your Gumlet dashboard. 2. **Backend Configuration:** Our tech team must configure the source backend to enable the on-the-fly video optimization pipeline. 3. **Delivery:** Fetch a video through your Gumlet Subdomain (e.g., `example.gumlet.io/file.mp4`). The video is instantly pushed to the optimization pipeline on its initial request. 4. **Storage:** The fully processed file is delivered to and saved in your configured workspace, using that workspace's default optimization and encoding settings. **Availability Note** This feature is currently restricted to selected accounts. If you need this configured for your workspace storage origin, please reach out to chat support for additional configuration info. --- ## Interactive Parameter Reference for Video API Use these parameters in your query strings to modify video outputs in real time. | Parameter | Type | Description | | ------------------ | --------- | ------------------------------------------------------------------------------------------------------------------------------------------------- | | `w` | `integer` | Resizes the output video by the specified width in pixels. | | `h` | `integer` | Resizes the output video by the specified height in pixels. | | `duration` | `integer` | Trims the video to a specific duration (in seconds). | | `start_offset` | `integer` | Removes all video content preceding the specified timestamp (in seconds). | | `end_offset` | `integer` | Removes all video content following the specified timestamp (in seconds). | | `thumbnail` | `boolean` | `thumbnail=true` outputs the video thumbnail | | `thumbnail-width` | `integer` | When combined with `thumbnail=true`, output the thumbnail with specified width | | `thumbnail-height` | `integer` | When combined with `thumbnail=true&thumbnail-width=500&mode=crop`, output the thumbnail with specified width x height cropped. | | `time` | `integer` | When combined with `thumbnail=true`, output the thumbnail from the video at specified time. | | `format=gif` | string | When combined with `thumbnail=true`, output the GIF from the video. You can also use the `time` parameter to get the GIF from the specified time. | ### Examples with different parameters | Parameter | Video | | ------------------------------------------------------------------- | ------------------------------------------------------------------------------------------------------------------------------------------------------------------------------------------------------------------------------------------------------------------------------------------------------------------------- | | `Original` | `https://votf.gumlet.io/7643454-sd_640_338_25fps.mp4` Width: 640 Height: 338 Duration: 17s [](https://votf.gumlet.io/7643454-sd_640_338_25fps.mp4?original=true) | | `width=320` | `https://votf.gumlet.io/7643454-sd_640_338_25fps.mp4?width=320` [](https://votf.gumlet.io/7643454-sd_640_338_25fps.mp4?width=320) | | `duration=9` | `https://votf.gumlet.io/7643454-sd_640_338_25fps.mp4?duration=9` [](https://votf.gumlet.io/7643454-sd_640_338_25fps.mp4?duration=9) | | `start_offset=5` | `https://votf.gumlet.io/7643454-sd_640_338_25fps.mp4?start_offset=5` [](https://votf.gumlet.io/7643454-sd_640_338_25fps.mp4?start_offset=5) | | `end_offset=4` | `https://votf.gumlet.io/7643454-sd_640_338_25fps.mp4?end_offset=4` [](https://votf.gumlet.io/7643454-sd_640_338_25fps.mp4?end_offset=4) | | `thumbnail=true` | `https://votf.gumlet.io/7643454-sd_640_338_25fps.mp4?thumbnail=true` ![thumbnail=true](https://votf.gumlet.io/7643454-sd_640_338_25fps.mp4?thumbnail=true) | | `thumbnail=true&thumbnail-width=300&thumbnail-height=300&mode=crop` | `https://votf.gumlet.io/7643454-sd_640_338_25fps.mp4?thumbnail=true&thumbnail-width=300&thumbnail-height=300&mode=crop` ![thumbnail=true\&thumbnail-width=300\&thumbnail-height=300\&crop=mode](https://votf.gumlet.io/7643454-sd_640_338_25fps.mp4?thumbnail=true\&thumbnail-width=300\&thumbnail-height=300\&mode=crop) | | `thumbnail=true&time=10` | `https://votf.gumlet.io/7643454-sd_640_338_25fps.mp4?thumbnail=true&time=10` ![thumbnail=true\&time=10](https://votf.gumlet.io/7643454-sd_640_338_25fps.mp4?thumbnail=true\&time=10) | | `thumbnail=true&time=10&format=gif` | `https://votf.gumlet.io/7643454-sd_640_338_25fps.mp4?thumbnail=true&time=10&format=gif` ![thumbnail=true\&format=gif](https://votf.gumlet.io/7643454-sd_640_338_25fps.mp4?thumbnail=true\&time=10\&format=gif) | --- updatedAt: 2026-03-06T18:25:29.000Z --- # Supported Subtitle Language List We support 127 languages to transcribe and translate your videos with subtitles We support word-level alignment for transcription to provide you with accurate subtitles for your videos. This means your subtitles are on time with sentence-level/pause in speech-level boundaries. ## Transcription Here is the list of supported languages we support for transcription (speech to text): | Language | Code | | ---------- | ---- | | Arabic | ar | | Catalan | ca | | Chinese | zh | | Czech | cs | | Danish | da | | Dutch | nl | | English | en | | Finnish | fi | | French | fr | | German | de | | Greek | el | | Hebrew | he | | Hindi | hi | | Hungarian | hu | | Italian | it | | Japanese | ja | | Korean | ko | | Malayalam | ml | | Norwegian | no | | Nynorsk | nn | | Persian | fa | | Polish | pl | | Russian | ru | | Spanish | es | | Telugu | te | | Turkish | tr | | Ukrainian | uk | | Urdu | ur | | Vietnamese | vi | ## Translation Here is the list of supported languages we support for translation (text to text): | Language | Code | | ------------- | ---- | | Afrikaans | af | | Albanian | sq | | Amharic | am | | Arabic | ar | | Armenian | hy | | Assamese | as | | Azerbaijani | az | | Bashkir | ba | | Basque | eu | | Belarusian | be | | Bengali | bn | | Bosnian | bs | | Breton | br | | Bulgarian | bg | | Burmese | my | | Catalan | ca | | Chinese | zh | | Croatian | hr | | Czech | cs | | Danish | da | | Dutch | nl | | English | en | | Estonian | et | | Faroese | fo | | Finnish | fi | | French | fr | | Galician | gl | | Georgian | ka | | German | de | | Greek | el | | Gujarati | gu | | Haitian | ht | | Hausa | ha | | Hebrew | he | | Hindi | hi | | Hungarian | hu | | Indonesian | id | | Icelandic | is | | Italian | it | | Japanese | ja | | Kannada | kn | | Kazakh | kk | | Central Khmer | km | | Korean | ko | | Latin | la | | Luxembourgish | lb | | Lingala | ln | | Lao | lo | | Lithuanian | lt | | Latvian | lv | | Macedonian | mk | | Malagasy | mg | | Malay | ms | | Malayalam | ml | | Maltese | mt | | Māori | mi | | Marathi | mr | | Mongolian | mn | | Nepali | ne | | Norwegian | no | | Nynorsk | nn | | Norwegian | no | | Occitan | oc | | Punjabi | pa | | Persian | fa | | Polish | pl | | Pashto | ps | | Portuguese | pt | | Romanian | ro | | Russian | ru | | Sanskrit | sa | | Sindhi | sd | | Serbian | sr | | Shona | sn | | Sinhala | si | | Slovak | sk | | Slovenian | sl | | Somali | so | | Spanish | es | | Sundanese | su | | Swahili | sw | | Swedish | sv | | Tamil | ta | | Telugu | te | | Tajik | tg | | Thai | th | | Tibetan | bo | | Turkmen | tk | | Tagalog | tl | | Turkish | tr | | Tatar | tt | | Ukrainian | uk | | Urdu | ur | | Uzbek | uz | | Vietnamese | vi | | Welsh | cy | | Yiddish | yi | | Yoruba | yo | --- updatedAt: 2026-05-29T06:08:39.000Z --- # Automate videos with Integrations We support Zapier, Pabbly, Make and webhooks Gumlet provides seamless integration with popular automation platforms, allowing you to build powerful video workflows without writing a single line of code. Connect Gumlet with thousands of apps using our native integrations on Zapier, Make, Pabbly, and Albato, or leverage webhooks for custom automation. ## Why Automate Your Video Workflows? Video automation eliminates manual tasks and streamlines your media management pipeline. Whether you're uploading videos from cloud storage, notifying teams of new uploads, or syncing data across platforms, Gumlet's integrations make it effortless to: * **Automate video uploads** from Google Drive, Dropbox, and other storage services * **Notify teams** via Slack, Discord, or email when new videos are added * **Sync data** to Google Sheets, Notion, and CRM platforms * **Create playlists and workspaces** automatically based on triggers * **Distribute content** to multiple platforms like YouTube and Vimeo * **Invite channel members** and share content securely through dashboard *** ## Supported Integration Platforms ### 1. Zapier - Enterprise-Grade Automation **Platform URL:** Zapier is the world's largest no-code automation platform with 8,000+ apps and 450+ AI tools. #### Key Features: * No-code automation with AI capabilities * Full audit trails and compliance controls * Visual workflow builder * Free tier available for getting started * Average setup time: less than 6 minutes #### Popular Zapier Templates for Gumlet: | Use Case | Template | Benefits | | -------------------------- | ------------------------------------------------------------------------- | -------------------------------------------------------- | | **Video Tracking** | Store new videos added in Gumlet in Google Sheets rows | Track all uploads, maintain a central video inventory | | **Email Notifications** | Send outbound emails for new Gumlet videos | Alert stakeholders immediately when videos are published | | **Cross-Platform Uploads** | Upload new Dropbox files to Gumlet and create Notion database items | Automatically ingest content and log metadata | | **Email Integration** | Send emails in Gmail for new videos added in Gumlet | Trigger email campaigns based on video events | | **Vimeo Integration** | Upload new Vimeo videos to Gumlet automatically | Centralize all video hosting | | **Team Notifications** | Send channel messages in Slack for new videos added in Gumlet | Keep teams informed in real-time | | **Cloud Storage Sync** | Upload new Dropbox videos to Gumlet | Automate ingestion from popular cloud providers | | **Chat Alerts** | Send channel messages in Discord when new videos are added in Gumlet | Multi-channel notification system | | **Playlist Management** | Create Google Sheets rows for new playlists in Gumlet | Track playlist creation and organization | | **Update Tracking** | Update Google Sheets rows when videos are updated in Gumlet | Maintain synchronized data across platforms | | **Form Integration** | Invite channel members to Gumlet channels with new Google Forms responses | Connect form submissions to video distribution | #### Popular Integrations: Gumlet works seamlessly with over 25 million pre-built Zaps including: * **Communication:** Slack, Discord, Gmail, Mailchimp * **Productivity:** Google Sheets, Google Drive, Notion, Airtable * **Video:** YouTube, Vimeo, SproutVideo * **Forms & Surveys:** Google Forms, Typeform, Facebook Lead Ads * **AI:** ChatGPT (OpenAI) * **Scheduling:** Google Calendar, Calendly **Get Started:** *** ### 2. Make (Integromat) - Visual Workflow Builder **Platform URL:** Make provides a powerful visual automation platform with 3,000+ apps and advanced workflow capabilities. Unlike linear platforms, Make allows you to build complex, multi-step automations with unlimited scenarios. #### Key Features: * Visual, non-linear workflow design * Advanced routing and logic capabilities * Real-time execution and monitoring * Custom API call support * Webhook-based instant triggers * Free tier with generous execution limits (10 executions monthly) #### Available Modules & Triggers: | Module Type | Actions Available | Use Case | | ------------------------ | ------------------------------------------------------------------------------------ | ------------------------------------------------- | | **Playlist Management** | Create Playlist, Add Asset to Playlist, Remove Asset from Playlist, Update Playlist | Organize videos dynamically and manage workspaces | | **Workspace Management** | Create Workspace, List Workspaces, Get Workspace, Update Workspace, Delete Workspace | Organize and maintain video categories | | **Asset Management** | Search Video Assets, Upload Video | Find and upload videos programmatically | #### Make Use Case Templates: 1. **Optimized Media Upload Workflow** * Automatically generate presigned URLs * Upload videos via API * Complete multipart uploads seamlessly * Perfect for programmatic video ingestion 2. **Automated Playlist Management** * Create playlists automatically * Add specific assets as they become available * Ensure dynamic content delivery 3. **Dynamic Workspace Update Protocol** * Automatically update workspaces based on new assets * Maintain current and relevant media catalogs * Schedule regular updates 4. **Playlist Modification** * Add assets to specific playlists immediately * Remove outdated content automatically 5. **Comprehensive Workspace Retrieval System** * Regularly retrieve all workspaces * Ensure data accuracy * Plan content strategy based on current inventory 6. **Playlist Content Rotation Strategy** * Update playlists on a continuous cycle * Rotate assets for fresh content 7. **Workspace Creation and Curation** * Automatically create new workspaces * Coordinate with playlists and assets * Build comprehensive media experiences **Get Started:** *** ### 3. Pabbly Connect - Affordable Automation for Teams **Platform URL:** Pabbly Connect offers enterprise-ready automation at 30% lower cost than competitors. #### Key Features: * **No charges for triggers and internal steps** (unlike competitors) * Do **3X more workflow executions** compared to other platforms * Dedicated customer support (real people, not bots) * Perfect for small to medium businesses * Filters and path routers for advanced logic * Multi-step integration support #### Gumlet Triggers in Pabbly: * **Video Status Changed** - Trigger workflows when video processing status updates * **New Video Added** - Automate when videos are uploaded to Gumlet * **Playlist Created/Updated** - React to playlist changes #### Gumlet Actions in Pabbly: * **Upload Video** - Add new videos to Gumlet * **Execute Custom API Requests** - GET, POST, PUT, PATCH, DELETE operations #### Example Integration: Google Drive to Gumlet **Scenario:** Automatically upload videos from Google Drive to Gumlet **Steps:** 1. Connect Google Drive to Pabbly Connect 2. Set trigger: "New file created in specific Google Drive folder" 3. Connect Gumlet to Pabbly Connect 4. Set action: "Upload Video to Gumlet" 5. Map the file details from Google Drive to Gumlet fields 6. Test the automation 7. Activate and let it run automatically **Benefits:** * Videos are ingested every 10-15 minutes (depending on poll interval) * No manual uploads needed * Fully automated workflow * Works indefinitely once set up **Get Started:** *** ### 4. Albato - Affordable, User-Friendly Automation **Platform URL:** Albato provides no-code automation with 1,000+ app integrations at 30% lower cost than Zapier. It's designed for simplicity and accessibility with exceptional customer support. #### Key Features: * **30% more affordable** than Zapier * 1,000+ app integrations available * Intuitive builder designed for beginners * Exceptional customer support with real people * Multi-app scenario creation * Webhook support for custom integrations * All skill levels welcome #### Gumlet Integration Capabilities: **Triggers:** * New Video Added - Start workflows when videos upload * Video Status Changed - React to processing updates * Playlist Created/Updated - Trigger on playlist events **Actions:** * Upload Video - Add videos to Gumlet * Create/Update Workspaces - Organize video content * Custom API Requests - Execute specialized operations #### Common Albato + Gumlet Workflows: 1. **Google Drive → Gumlet → Slack** * New file in Google Drive * Upload to Gumlet * Notify team in Slack 2. **Email → Gumlet → Google Sheets** * Email trigger with video attachment * Upload to Gumlet * Log details in spreadsheet 3. **Dropbox → Gumlet → Notion** * Dropbox file change * Ingest to Gumlet * Create Notion database entry 4. **Cloudinary → Gumlet** * Automate workflows triggered by new video uploads * Sync between Cloudinary and Gumlet * Effortlessly upload videos using Gumlet's API **Get Started:** *** ## Direct API & Webhooks ### Webhooks - Real-Time Automation For advanced users and custom integrations, Gumlet provides webhooks that asynchronously notify your application of events, outside the API request-response cycle. #### Webhook Documentation: * **Main Webhooks Documentation:** [Webhooks](/developers/webhooks) * **Storage Webhooks Documentation:** [Storage Webhooks](/developers/vod-developers-section/storage-webhooks) #### Types of Webhooks Available: 1. **Storage Webhooks** * Automatically ingest videos into Gumlet based on storage events * Triggered by storage services (Google Drive, Dropbox, S3, etc.) * Perfect for continuous ingestion workflows 2. **Event Webhooks** * Video upload complete * Video processing started * Video processing completed * Transcoding finished * Live stream events * Workspace changes 3. **Custom Webhooks** * Build your own automation with any service that supports webhooks * Complete multipart uploads programmatically * Full API control for custom scenarios #### Setting Up a Webhook in Pabbly: 1. **Generate Webhook URL in Pabbly** * Create a new integration workflow * Select Webhook as trigger * Copy the generated webhook URL 2. **Configure Webhook in Gumlet** * Paste webhook URL in Gumlet settings * Set up secret token (create API key in Users section) * Test the connection 3. **Map Data Fields** * Data flows from Gumlet to other apps * Automatically synchronized when triggers fire * No manual data entry needed #### Webhook Integration Benefits: * **Real-time Processing** - Events trigger immediately * **Cost-Effective** - Only pay for actual webhook calls * **Reliable** - SOC 2 certified secure transmission * **Flexible** - Works with any automation platform * **Scalable** - Handle high-volume video processing *** ## Common Use Cases & Templates ### Use Case 1: Content Creator Video Distribution **Scenario:** A content creator uploads videos to Google Drive and needs them automatically uploaded to Gumlet, YouTube, and shared on social media. **Integration Stack:** Zapier + Google Drive + Gumlet + YouTube + Slack **Workflow:** 1. New video uploaded to Google Drive 2. Zapier detects the new file 3. Video is uploaded to Gumlet 4. Gumlet processes and creates preview 5. Video is simultaneously uploaded to YouTube 6. Slack notification sent to marketing team 7. Notion database updated with video metadata **Platforms:** Use **Zapier** for this workflow *** ### Use Case 2: E-Learning Platform Automation **Scenario:** A university needs to automatically ingest lecture videos from Dropbox, organize them into workspaces, send notifications to students, and track uploads. **Integration Stack:** Pabbly + Dropbox + Gumlet + Email + Google Sheets **Workflow:** 1. Professor uploads lecture to Dropbox 2. Pabbly detects new video file 3. Video automatically uploaded to Gumlet 4. New workspace created per course 5. Email sent to enrolled students 6. Spreadsheet updated with upload timestamp 7. Dashboard shows video status **Platforms:** Use **Pabbly Connect** for cost-effective scaling *** ### Use Case 3: Automated Content Organization **Scenario:** An agency produces hundreds of videos monthly and needs automatic organization, metadata tagging, and team notifications. **Integration Stack:** Make + Gumlet + Google Sheets + Slack **Workflow:** 1. Videos uploaded to Gumlet via presigned URL 2. Make monitors for upload completion 3. Automatic playlist creation per client 4. Assets added to appropriate workspaces 5. Metadata synced to Google Sheets 6. Slack notification with video link 7. Weekly workspace cleanup removes old content **Platforms:** Use **Make** for advanced workflow logic *** ### Use Case 4: Real-Time Monitoring & Alerts **Scenario:** A video streaming platform needs real-time monitoring of all video uploads, processing status changes, and immediate notifications. **Integration Stack:** Webhooks + Gumlet API + Custom Backend **Workflow:** 1. Webhook configured in Gumlet settings 2. Upload events trigger webhook immediately 3. Processing status changes captured in real-time 4. Custom backend receives webhook payloads 5. Database updated with video metadata 6. Email/SMS alerts sent based on conditions 7. Analytics dashboard updated live **Platforms:** Use **Webhooks** for maximum control and real-time capabilities *** ### Use Case 5: Multi-Channel Publishing **Scenario:** A media company publishes videos to multiple platforms (YouTube, Vimeo, LinkedIn) from a single Gumlet source. **Integration Stack:** Zapier + Gumlet + YouTube + Vimeo + LinkedIn **Workflow:** 1. Video published in Gumlet 2. Zapier triggers on new video 3. Video details extracted 4. Simultaneously upload to YouTube 5. Upload to Vimeo with same metadata 6. Share link on LinkedIn 7. Google Sheets updated with all platform URLs 8. Team notified via Slack **Platforms:** Use **Zapier** for widespread app ecosystem *** ## API Documentation For developers building custom integrations, Gumlet provides comprehensive API documentation. **API Documentation:** [API references](/reference) ### Key API Capabilities: * **Video Management:** Upload, update, delete videos * **Playlist Operations:** Create, manage, organize playlists * **Workspaces:** Build and manage video workspaces * **Webhooks:** Set up event-based notifications * **Analytics:** Retrieve video performance data * **Live Streaming:** Manage live video streams * **DRM & Access Control:** Implement security policies ### API Authentication: * Requires an API Key from your Gumlet account * All requests use HTTPS * Support for OAuth 2.0 * Rate limiting: Check documentation for current limits Get started today and eliminate repetitive video management tasks! --- updatedAt: 2025-07-08T06:52:26.000Z --- # Embed Videos on Zendesk Embedding Gumlet videos requires some changes to Guide Settings on Zendesk Follow these simple steps to ensure your video content is playable on the Zendesk Knowledgebase - Guide. ### Steps to Whitelist Embeds on Zendesk: 1. Go to Knowledgebase settings 2. Choose Guide Settings ![](images/embed-videos-on-zendesk-01.webp) 3. Navigate to the Security section, Enable `Display unsafe content` and update settings. Once the above setting is enabled, go to the [video library](https://dash.gumlet.com/video/manage) in Gumlet. ### Steps to Embed Gumlet video on Zendesk 1. Copy the Embed code of the video you want to Embed. 2. Paste the code in the link pop-up. ![](images/embed-videos-on-zendesk-02.webp) 3. Click on the Add link to embed the video. ![Video is embedded successfully](images/embed-videos-on-zendesk-03.webp) --- updatedAt: 2025-07-08T06:52:26.000Z --- # Embed Videos on Shopify Embedding Gumlet videos is easy on Shopify Follow these simple steps to embed the branded videos on your website and product page. ### Steps to Embed: 1. Go to the Product Page on the Shopify dashboard and click on `Show HTML`. ![](images/embed-videos-on-shopify-01.webp) 2. Go to the [video library](https://dash.gumlet.com/video/manage) and copy the Embed code. 3. Paste the copied code directly into the HTML editor ![Gumlet Video is embedded on the product page](images/embed-videos-on-shopify-02.webp) --- updatedAt: 2025-10-28T12:07:32.000Z --- # Embed Videos on Framer Embedding Gumlet videos is easy on Framer Follow these simple steps to embed the videos on the Framer website and apps. ### Steps to Embed: 1. Go to the Gumlet Video plugin on the [Framer marketplace](https://www.framer.com/marketplace/plugins/gumlet-video-aiabt9len880wxnubdun218nc/). ![](images/embed-videos-on-framer-01.webp) You can also browse the plugin from the Framer editor. ![](images/embed-videos-on-framer-02.webp) 2. Click Open Plugin to add a Gumlet video. ![](images/embed-videos-on-framer-03.webp) 3. Go to the [video library](https://dash.gumlet.com/video/manage) and copy the video ID. ![](images/embed-videos-on-framer-04.webp) 4. Paste the copied video ID in the Gumlet plugin and update settings from the sidebar. ![Gumlet Video is embedded on the product page](images/embed-videos-on-framer-05.webp) ### How to get Gumlet Video ID? 1. Log in to your Gumlet account to access your videos [here](https://www.gumlet.com/login/). 1. If you do not have an account with Gumlet, you can sign up [here](https://www.gumlet.com/signup/). 2. Upload your videos and copy the asset ID once they are ready. 2. Navigate to [video library](https://dash.gumlet.com/video/manage) and copy the video ID. ![](images/embed-videos-on-framer-04.webp) --- updatedAt: 2026-03-18T09:56:39.000Z --- # Embed Videos on GoHighLevel Learn how to Embed Gumlet videos on GoHighLevel Embed Gumlet videos on your GoHighLevel (GHL) website using the Gumlet plugin available in the GHL Widget Marketplace. ### Steps to Embed 1. Install the Gumlet plugin from the [marketplace](https://marketplace.gohighlevel.com/integration/6941341f0b72464416853094/). ![](images/embed-videos-on-highlevel-01.webp) 2. Drag-and-drop the Gumlet plugin from Widget Marketplace section to your website. ![](images/embed-videos-on-highlevel-02.webp) 3. Go to the [video library](https://dash.gumlet.com/video/manage) and copy the video asset ID. ![](images/embed-videos-on-highlevel-03.webp) 4. Paste the asset ID in the Widget settings and click **Save**. The video will appear on the page. ![](images/embed-videos-on-highlevel-04.webp) --- updatedAt: 2025-09-19T04:24:29.000Z --- # Embed Videos on Wix Learn how to Embed Gumlet videos on Wix Follow these simple steps to embed the videos on the Wix websites. ### Steps to Embed: 1. Go to the Wix website and search for Embed. Drag-and-Drop the Embed on the screen. ![](images/embed-videos-on-wix-01.webp) 2. Edit Code to see the HTML settings. 3. Go to the [video details page](https://dash.gumlet.com/video/manage) and copy the embed code. ![](images/embed-videos-on-wix-02.webp) 4. Paste the copied embed code under the HTML Settings > Code option. 5. When you save it, the video will appear on the page you added it. ![](images/embed-videos-on-wix-03.webp) --- updatedAt: 2025-09-19T04:25:17.000Z --- # Embed Videos on Squarespace Learn how to Embed Gumlet videos on Squarespace Follow these simple steps to embed the videos on the Squarespace websites. ### Steps to Embed: 1. Go to the Squarespace website and when you add a new block, search for Embed. ![](images/embed-videos-on-squarespace-01.webp) 2. Edit the content of the Embed block. Go to Code Snippet > Embed data. ![](images/embed-videos-on-squarespace-02.webp) 3. Go to the [video details page](https://dash.gumlet.com/video/manage) and copy the embed code. ![](images/embed-videos-on-moodle-03.webp) 4. Paste the copied embed code under the HTML Settings > Code option. 5. When you save it, the video will appear on the page you added it. ![](images/embed-videos-on-squarespace-04.webp) --- updatedAt: 2026-02-06T09:36:23.000Z --- # Embed Videos on Moodle Learn how to Embed Gumlet videos on Moodle with dynamic watermark and user level analytics Follow these simple steps to embed videos in Moodle. ### Steps to Embed: 1. Go to the Moodle courses in Edit mode and create/edit a page. ![](images/embed-videos-on-moodle-01.webp) 2. Click on View > Source Code to edit the source code. ![The arrow shows embed code from Gumlet. The next step will explain how to get the embed code.](images/embed-videos-on-moodle-02.webp) 3. Go to the [video details page](https://dash.gumlet.com/video/manage) and copy the embed code. ![](images/embed-videos-on-moodle-03.webp) 4. Paste the copied embed code under the source code section. The video will be added. ## Dynamic watermark and User-level analytics support We need a plugin to get Moodle user data on your course pages. You can install and enable the FilterCodes plugin - [](https://moodle.org/plugins/filter_filtercodes) ### Add dynamic watermark 1. You can look at the user params available [here](https://moodle.org/plugins/filter_filtercodes#yui_3_18_1_1_1770369522069_196) and add them as shown below in `watermark_text` param. You can pass multiple profile attributes to show on the dynamic watermark. 2. Update the src to: ```html https://play.gumlet.io/embed/6745a85c080b60408c9d36ee?watermark_text={userid},{email} ``` *Note: The above sample src will show Moodle userid and email* 3. To make sure this is working, we recommend verifying the moving watermark on the course page. ### Add user level analytics 1. You can look at the user params available [here](https://moodle.org/plugins/filter_filtercodes#yui_3_18_1_1_1770369522069_196). Gumlet accept 3 params, `gm_user_id`, `gm_user_name` and `gm_user_email`. 2. Update the src to ```html HTML https://play.gumlet.io/embed/6745a85c080b60408c9d36ee?watermark_text={userid},{email}&gm_user_id={userid}&gm_user_name={firstname} {lastname}&gm_user_email={email} ``` 3. To ensure everything is working correctly, we recommend verifying the `src` value from the from the browser's console (rendered HTML code). ![A sample with dynamic watermark and user-level-analytics](images/embed-videos-on-moodle-04.webp) ### Sample embedded code with dynamic watermark and user-level-analytics ```
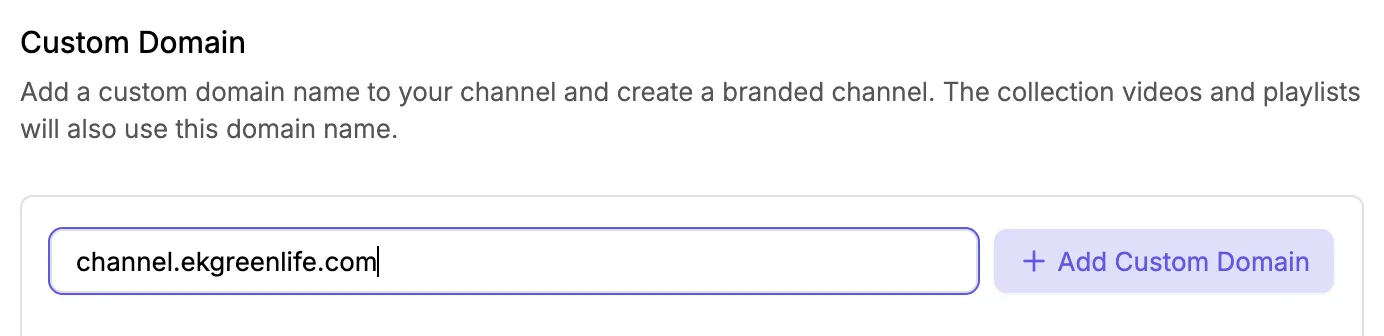

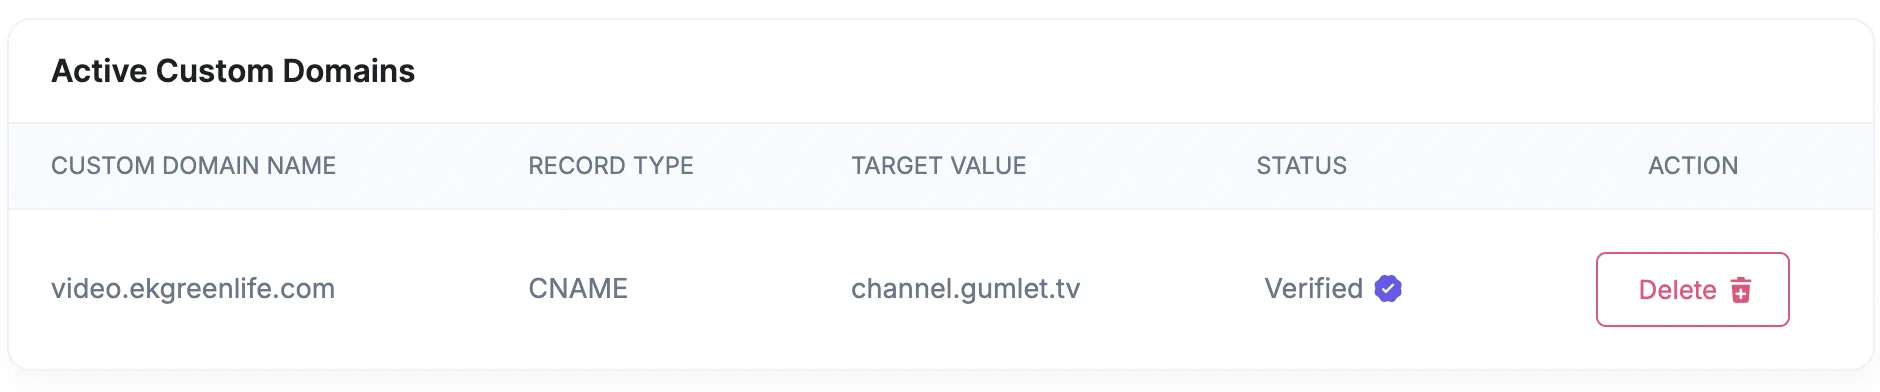
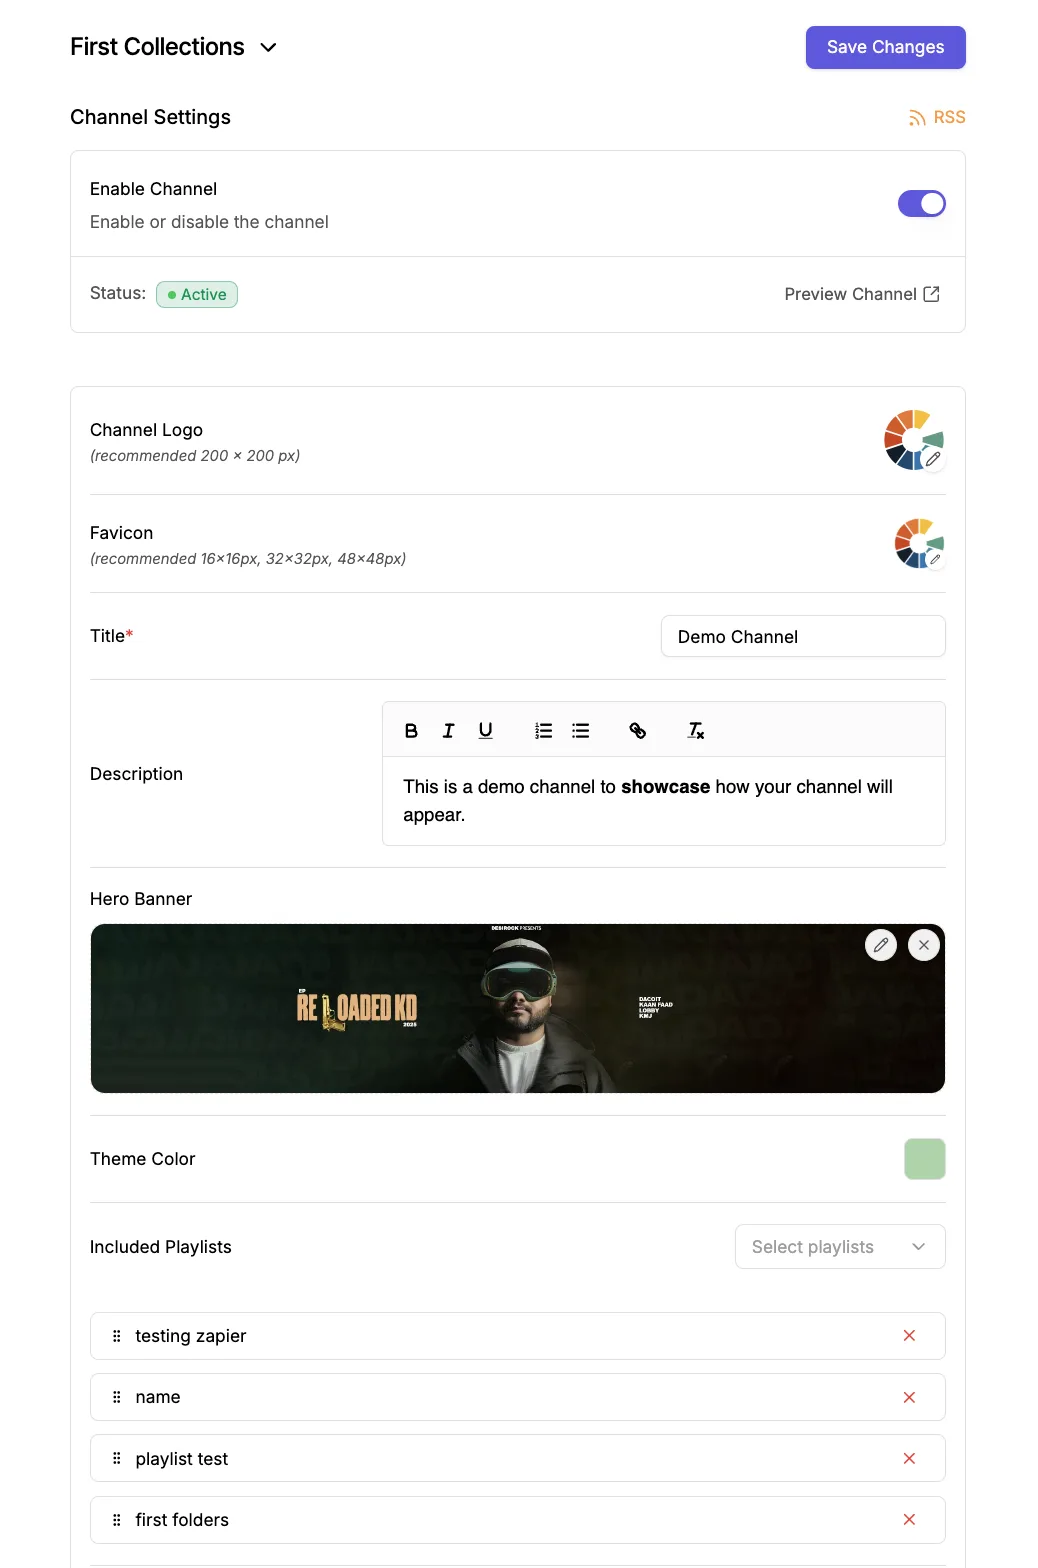


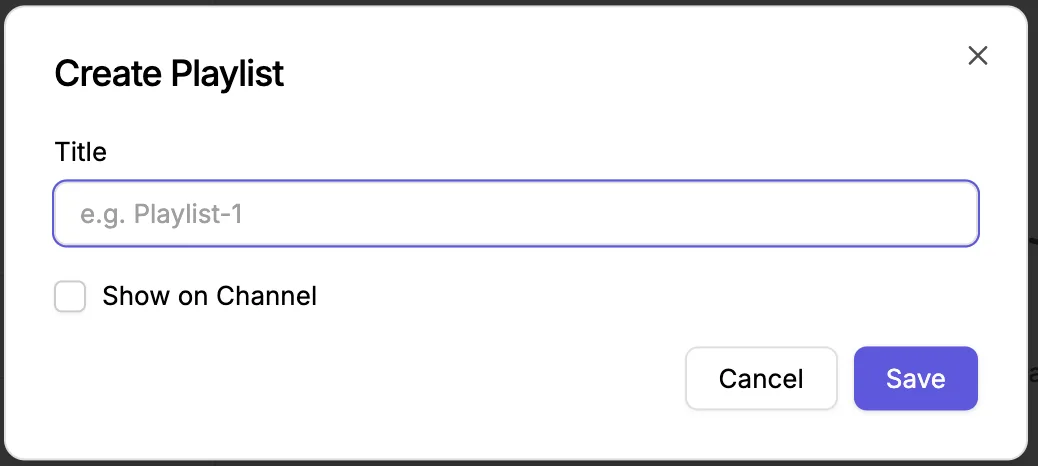
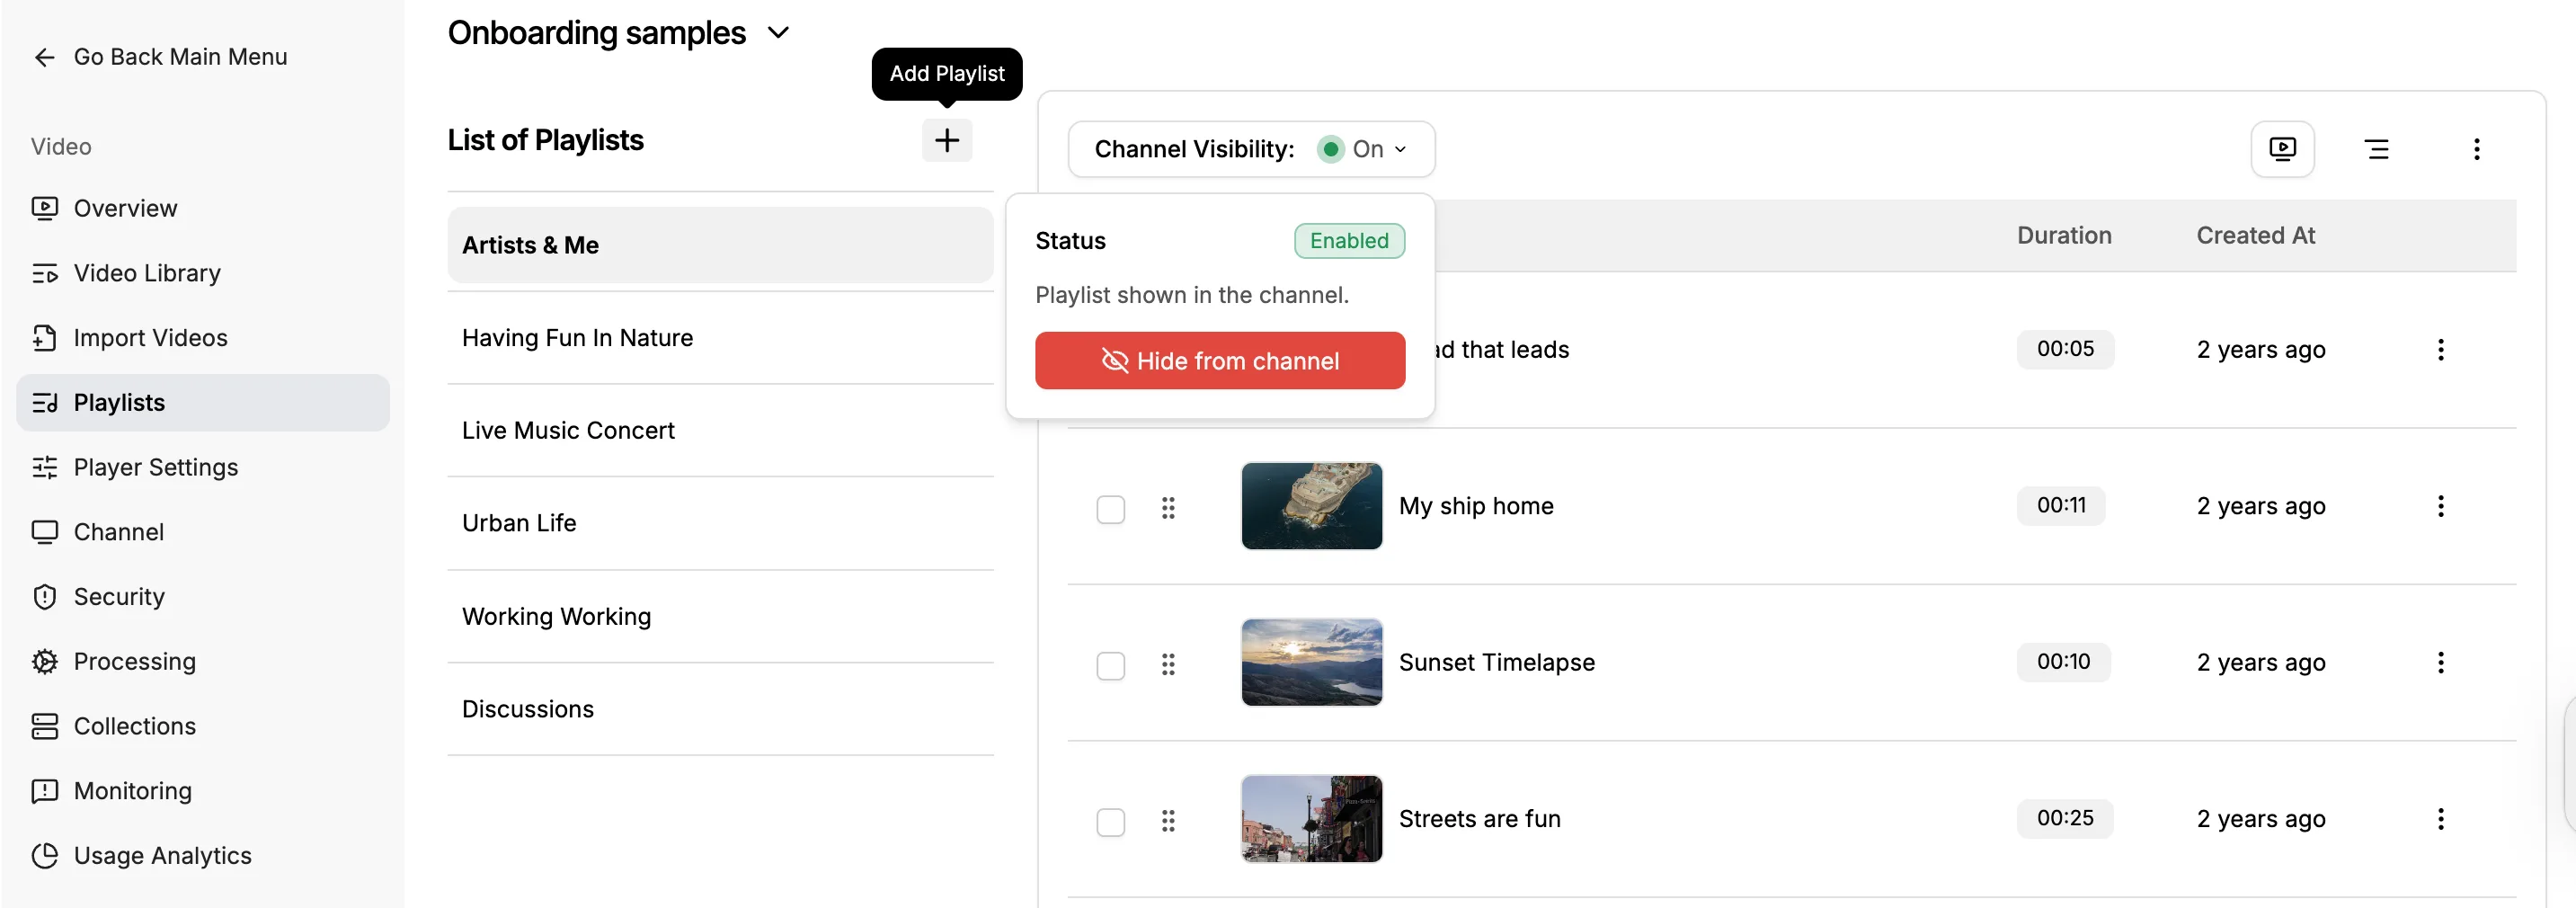
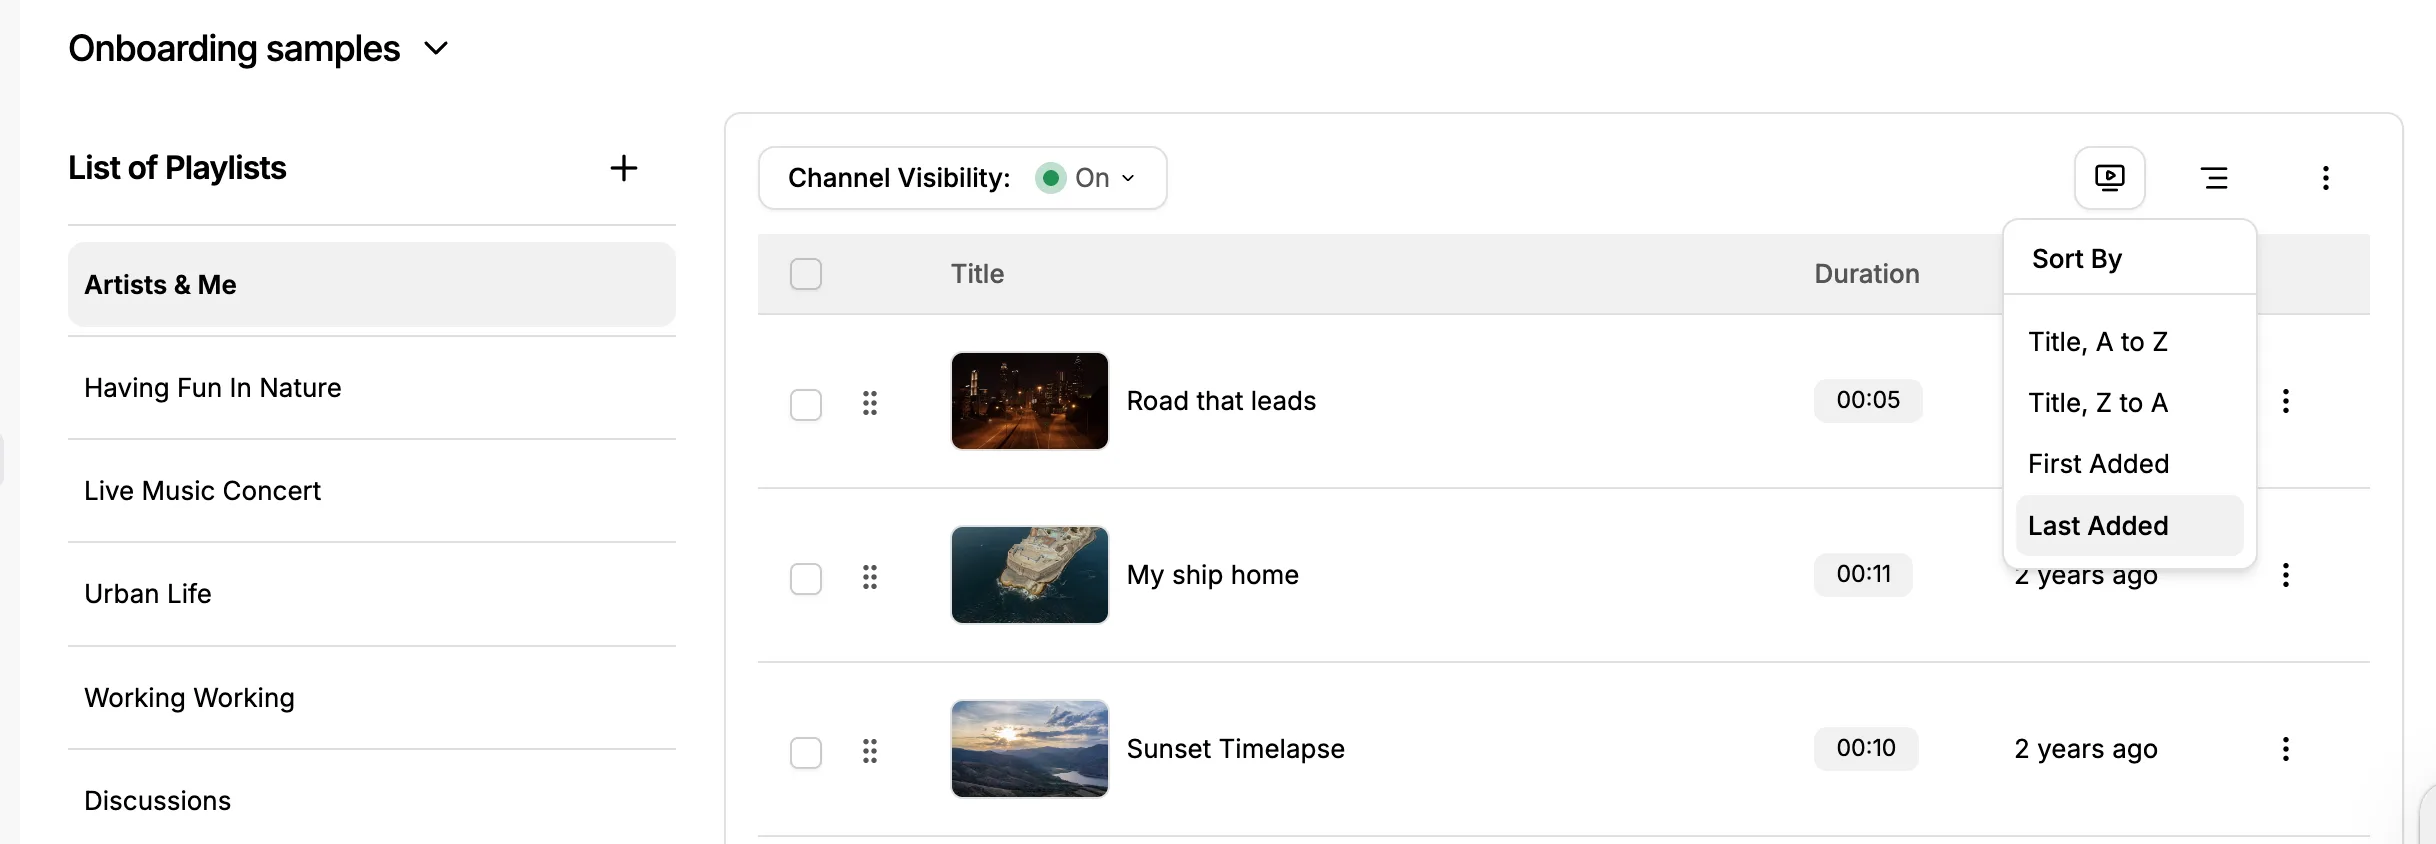
``` --- updatedAt: 2026-04-28T12:16:04.000Z --- # Embed Videos on Bubble Learn how to embed Gumlet videos in your Bubble.io using the Gumlet Video plugin available on the Bubble marketplace. Embed Gumlet videos on Bubble by installing the Gumlet Video plugin, adding it to your page, and configuring it with your Gumlet video asset ID. ## Steps to Embed 1. Install the [Gumlet Video plugin](https://bubble.io/plugin/gumlet-video-1754038125640x200719415416717300) from the Bubble marketplace. 2. Open your Bubble app editor and add the **Gumlet Video** plugin element to the page where you want to display the video. 3. Go to your Gumlet video library and copy the video **Asset ID** for the video you want to embed. ![](images/embed-videos-on-bubble-01.webp) 4. In Bubble, select the Gumlet Video element and paste the Asset ID into the plugin field or property for the video. 5. Preview or publish your Bubble app. The Gumlet video will appear on the page. ![](images/embed-videos-on-bubble-02.webp) --- updatedAt: 2026-09-07T00:00:00.000Z --- # Embed Videos on Tutor LMS Learn how to Embed Gumlet videos, including DRM-protected videos, on Tutor LMS Tutor LMS is a WordPress LMS plugin. The easiest way to embed Gumlet videos on a Tutor LMS lesson is with the official [Gumlet WordPress plugin](https://wordpress.org/plugins/gumlet-video/), which also works for DRM-protected videos. ### Steps to Embed (using the Gumlet WordPress plugin): 1. Install and activate the Gumlet Video plugin from your WordPress dashboard: **Plugins > Add New**, search for "Gumlet Video". 2. Open a course in **Tutor LMS > Courses** and go to the lesson you want to add the video to. 3. In the lesson's **Video** panel, set the video source to **Shortcode**. 4. Go to the [video details page](https://dash.gumlet.com/video/manage) and copy the asset ID, then paste it as a shortcode: `[gumlet id=]` ![](images/embed-videos-on-tutor-lms-01.webp) 5. Save the lesson. The video will play using the Gumlet player, including for DRM-protected videos. ### Alternative: paste the embed code directly If you'd rather not install the plugin, you can paste Gumlet's iframe embed code directly into the lesson. 1. In the lesson's **Video** panel, set the video source to **Embedded**. 2. Go to the [video details page](https://dash.gumlet.com/video/manage) and copy the embed code. 3. Paste the copied embed code into the Embedded field and save. ![](images/embed-videos-on-tutor-lms-02.webp) This works the same way for DRM-protected videos — Tutor LMS preserves the `encrypted-media` permission the iframe needs for DRM playback. --- updatedAt: 2026-09-07T00:00:00.000Z --- # Embed Videos on Kajabi Learn how to Embed Gumlet videos, including DRM-protected videos, on Kajabi Kajabi's built-in "Video" media option only accepts an uploaded file, so it can't be used to embed a Gumlet video. Instead, embed Gumlet videos directly into the lesson content using the code view in Kajabi's editor. ### Steps to Embed: 1. Go to **Products > Courses** and open the lesson you want to add the video to. 2. Under **Media**, select **None**. 3. In the lesson content editor, click the code view icon (``) in the toolbar. ![](images/embed-videos-on-kajabi-01.webp) 4. Go to the [video details page](https://dash.gumlet.com/video/manage) and copy the embed code. 5. Paste the copied embed code into the source code box and click **Ok**. ![](images/embed-videos-on-kajabi-02.webp) 6. Save the lesson. The video will appear where you added it, including DRM-protected videos. ### Note Kajabi's lesson editor preview (inside the course builder) may not play DRM-protected videos correctly, since the editor's preview frame doesn't pass through the `encrypted-media` permission the video needs. This is limited to the editor preview — DRM videos play normally on the published, live lesson page. --- updatedAt: 2026-09-07T00:00:00.000Z --- # Embed Videos on Teachable Learn how to Embed Gumlet videos, including DRM-protected videos, on Teachable Teachable's built-in **Video** and **Embed media** content blocks don't accept a Gumlet embed code. Use the **Custom code** block instead, under Advanced Tools — this is available on the Basic plan and higher. ### Steps to Embed: 1. Go to your course's curriculum and open the lesson you want to add the video to. 2. Click **Add content**, then scroll to **Advanced Tools** and select **Custom code**. ![](images/embed-videos-on-teachable-01.webp) 3. Go to the [video details page](https://dash.gumlet.com/video/manage) and copy the embed code. 4. Paste the copied embed code into the Custom Code block. ![](images/embed-videos-on-teachable-02.webp) 5. Save the lesson. The video will play where you added it, including DRM-protected videos. ### Note Teachable doesn't provide support for custom code blocks and can't guarantee their compatibility with future versions of Teachable. Course progress and completion tracking don't apply to videos added this way. --- updatedAt: 2026-09-07T00:00:00.000Z --- # Embed Videos on Thinkific Learn how to Embed Gumlet videos, including DRM-protected videos, on Thinkific Thinkific's built-in **Video** field only accepts a file from your Asset Library, so it can't be used to embed a Gumlet video. Instead, embed the video directly into the lesson's Content area using its code view. ### Steps to Embed: 1. Go to your course's curriculum and open the Text lesson you want to add the video to. 2. In the **Content** editor toolbar, click the code view icon (``). 3. Go to the [video details page](https://dash.gumlet.com/video/manage) and copy the embed code. 4. Paste the copied embed code into the code view. ![](images/embed-videos-on-thinkific-01.webp) 5. Click the code view icon again to switch back to the visual editor and confirm the video appears. ![](images/embed-videos-on-thinkific-02.webp) 6. Save the lesson. The video will play where you added it, including DRM-protected videos. --- updatedAt: 2026-09-15T00:00:00.000Z --- # Embed Videos on LearnWorlds Learn how to Embed Gumlet videos, including DRM-protected videos, on LearnWorlds with dynamic watermark and user-level analytics support LearnWorlds has a built-in **Embed** learning activity that accepts any embed code, including a Gumlet video embed. ### Steps to Embed: 1. Go to your course's **Course outline** and click **Add activity** on the section you want to add the video to. 2. Select the **Embed** category, then choose **Embed**. ![](images/embed-videos-on-learnworlds-01.webp) 3. Go to the [video details page](https://dash.gumlet.com/video/manage) and copy the embed code (use the DRM embed code if the video is DRM-protected). 4. Paste the copied embed code into the **Copy and paste your embed code** box and save. ![](images/embed-videos-on-learnworlds-02.webp) 5. The video will play in the course player wherever you added it, including DRM-protected videos. ## Dynamic watermark and User-level analytics support LearnWorlds lets you pass logged-in user and course details straight into the embed URL as variables — no extra plugin needed. The following variables are available: `{{USER_ID}}`, `{{USER_NAME}}`, `{{USER_EMAIL}}`, `{{COURSE_ID}}`, `{{COURSE_TITLE}}`, `{{UNIT_ID}}`. ### Add dynamic watermark 1. Add the `watermark_text` param to the embed `src` using any of the variables above. You can pass multiple values to show on the dynamic watermark. 2. Update the src to: ```html https://play.gumlet.io/embed/6a352c7f5c94624b7740c645?watermark_text={{USER_ID}},{{USER_EMAIL}} ``` *Note: The above sample src will show the LearnWorlds user ID and email* 3. Verify the moving watermark on the course page to confirm this is working. ### Add user level analytics 1. Gumlet accepts 3 params: `gm_user_id`, `gm_user_name` and `gm_user_email`. 2. Update the src to: ```html https://play.gumlet.io/embed/6a352c7f5c94624b7740c645?watermark_text={{USER_ID}},{{USER_EMAIL}}&gm_user_id={{USER_ID}}&gm_user_name={{USER_NAME}}&gm_user_email={{USER_EMAIL}} ``` 3. To ensure everything is working correctly, we recommend verifying the `src` value from the browser's console (rendered HTML code). ### Sample embedded code with dynamic watermark and user-level-analytics ```html ``` --- updatedAt: 2026-01-08T15:52:23.000Z --- # Introduction **Gumlet** is a cloud-based image optimization and delivery service. We help thousands of websites and mobile apps deliver the most optimized images 🌁 to their users. We want to empower every developer to deliver the **best-looking images** to their end-users while **reducing the page weight.** Gumlet helps you get started in minutes and helps you reduce your page weight by more than 40%. Check how much optimization Gumlet can deliver with our [Website Analyzer tool](https://www.gumlet.com/analyzer/). ## How does Image Optimization work? ![](images/image-introduction-01.webp) The optimization process involves three key components: 1. **Original Images Storage** This is where your original, full-size images are stored. Gumlet accesses these images to start the optimization process. We do not modify these images. 2. **Gumlet's Image Optimization Service** 1. Image Source & Origin Cache Original images are fetched and temporarily cached to speed up access. 2. Global Image Processing Infra and Cache Images are resized and compressed. The optimized images are also cached to improve delivery speed for future requests. 3. Cloudfront CDN for Global Delivery Optimized images are delivered through Cloudfront CDN, ensuring they reach the user from the nearest location to minimize loading times. 3. **Client (Devices/Browsers/Apps)** 1. Various Client Devices Images optimized for specific device requirements are delivered to smartphones, tablets, and desktops. 2. Gumlet.js This JavaScript tool automates the process by determining the device’s needs and requesting the optimized image from Gumlet’s servers. ## Gumlet can do ⚡️ **Automatic optimization:** We automatically convert images to the best format and size for the user browser and device. Our Gumlet.js library can help you integrate with any platform in less than 10 minutes. ⏱ **Faster image loading:** Your images are loaded via [Amazon CloudFront CDN](https://aws.amazon.com/cloudfront/features/#Amazon_CloudFront_Infrastructure) with 700+ PoPs worldwide. Lower latency of CDN + optimized images = super fast website. 🌎 **Improve SEO:** Lighter page means faster page load speed. With Google putting more weight on[ page speed for ranking](https://webmasters.googleblog.com/2018/01/using-page-speed-in-mobile-search.html), you get SEO advantages by using Gumlet. 💳 **Improve conversions:** Faster page speeds make your users happy and [increase conversions](https://www.thinkwithgoogle.com/marketing-resources/data-measurement/mobile-page-speed-new-industry-benchmarks/). 🌼 **Simplify image management:** Avoid creating multiple sizes of the same image and manage its storage. ![](images/image-introduction-02.gif) # Quick Start Guide In-depth guide about different configurations of image source. When you log in to Gumlet, you will be redirected to [Image Overview](https://dash.gumlet.com/image/dashboard): The new Image Dashboard is designed to help you get started quickly, so you save those GBs and we load your website & apps faster. Do more with the image dashboard: * Tutorial videos * Create more image sources * Get usage analytics for the current month * Get source-wise consumption for the current month ![Image Overview](/b39ec311d4db-image-getting-started-01.webp) ## Tutorial video to create an image source [Gumlet video player](https://play.gumlet.io/embed/67778029f763ba76c47ed41b?background=false\&autoplay=false\&loop=false\&disableControls=false) ## Add Source Creating an image source is the first step toward delivering optimized images. The image source provides Gumlet with information on how to fetch your original image and offers various configuration options. Navigate to and create a new source. ![Select your original image storage to continue](/56bf69dd12fb-image-getting-started-02.webp) ### Source Types You can select from different source types depending on your current setup. Each source type has different storage backends supported, and at the end of source creation, you will get a full guide on setting up image delivery most efficiently. You can refer to our [Original Media Storage](/image/manage-sources/original-image-storage) guide to check supported storage backends. Check out WordPress, Next.js, React.js and App integration guide [here](/image/getting-started/image-integration-guide). ## Installation The best and easiest way to install gumlet.js is by including it in `` section of all your pages. ```html ``` Please replace `{{mysubdomain}}` in the above code with the subdomain you created on [Gumlet](https://www.gumlet.com/). Please also replace `{{example.com}}` with the domain from which images are currently being served. Once the above steps are complete, your users will **automatically** start getting responsive images! Yes, it's that simple. However, we recommend making the following changes to `` tags to make images even more optimized. ### Rename `img` src="" to data-src="" If you are currently serving images from a CDN or your web server, the chances are that you would have all `` tags with `src` attributes. We recommend you change them to `data-src` attributes. For example: ```html Gumlet Logo Gumlet Logo ``` If you don't do this step, whenever a user loads a page, the browser will request an image available in the `src` attribute, and as soon as gumlet.js processes it, the request is canceled. This is very inefficient and should be avoided. Once you set the `data-src` attribute, gumlet.js will ensure that the browser loads only the required image, and no extra requests are made to the server. #### For more integration options, navigate to [Integration Guides](/image/getting-started/image-integration-guide). Gumlet is live now! This is all that was needed to deliver responsive images to your users. ### Serving Static Files It is super easy to serve other static files (like JavaScript, CSS files, PDFs, etc) via CDN using Gumlet. All you need is a valid Gumlet subdomain. The next step is to replace the hostnames in the URLs of your static files with the Gumlet subdomain in your web application. Check if your static files are accessible via your Gumlet subdomain . ## CDN & Custom Domain Gumlet will utilize a content delivery network (CDN) to accelerate the delivery of your images and other static files. All paid plans come with free custom domains, check out pricing [here](https://www.gumlet.com/pricing/?tab=image). For additional custom domains, a monthly charge of $ 5 per domain applies. Go through this [document](/image/manage-sources/image-custom-domain) for more information on a custom domain. ![](/303b4ac5f9b8-image-getting-started-03.webp) --- updatedAt: 2025-07-28T08:36:28.000Z --- # Process First Image Process the first image to get the understanding of how it works Once you set up an image source, you will be taken to the setup verification experience. ![](images/process-first-image-01.webp) * Enter an image URL to test the setup quickly. * You will get to see the original and optimized images when `Verify Setup` is clicked ![](images/process-first-image-02.webp) * Now, Click on `Integrate Now` to integrate on your choice of platforms. You can also navigate to the [Integrations](/image/getting-started/image-integration-guide) section to learn more. --- updatedAt: 2026-01-08T16:07:37.000Z --- # Integration Guide Integrate with your app and website with our pre-built SDKs These guides describe steps to integrate Gumlet with your apps or website depending on the platform that you are using. We have listed the most popular platforms but if your integration is unavailable, contact us on our support chat. * [JavaScript (Gumlet.js)](/image/integration-guides/image-integration-javascript-gumletjs) * [Android and iOS apps](/image/integration-guides/image-integration-ios-and-android-apps) * [Next.js](/image/integration-guides/image-integration-nextjs) * [Magento](/image/integration-guides/image-integration-magento) * [WordPress](/image/integration-guides/image-integration-wordpress) * [React](/image/integration-guides/reactjs) * [React Native](/image/integration-guides/react-native) * [Nuxt](/image/integration-guides/nuxt) --- updatedAt: 2026-01-08T15:52:23.000Z --- # Image FAQs Frequently Asked Questions for image optimization ## 🌄 Original Images ### What access permissions do you require for our original images? We only need **read** access to your original image storage. We fetch originals for processing but never write or modify them. You retain full control over your high-quality originals. ### What happens to my original images? We only fetch originals for processing; we never modify them. You retain your originals under your control. ### What is the price for fetching the original images? There is no charge for fetching original images from your source. ### I store my originals in Amazon S3. Will I be charged by Amazon each time I fetch? We cache your original image locally after the first fetch. If a 1 MB image is resized three times, you’re only charged by S3 once (1 MB transfer + 1 request). Subsequent resizes use our cache. ### Can I store my original images with Gumlet? No. We don’t provide storage. Use any object storage (e.g., S3, GCS, DigitalOcean Spaces). You retain full control and avoid vendor lock-in. ### What happens if my original image is modified? We cache your original for up to **3 months**. Even if you update the source, our cache serves the old version until you clear it via dashboard or API. ### What happens if my original image is deleted? After deletion, until cache expiry (max 3 months), we serve the cached version. If we need to revalidate after deletion, requests return a **404**. Flushing cache immediately will also cause a **404**. ### Do you support serving images from Google Drive? No. Use an object storage service (e.g., Google Cloud Storage) to serve your originals. ### Is there any limit on the input file? Maximum input dimensions: **8192 × 8192** pixels. ### What input image formats are supported? See full list under **[Input Formats](/image/image-transform-api/image-formats#input-formats)**. ### What happens when my original image is not found? Do my users see a broken image? By default, we return **404**, and your users may see a broken image. You can configure a **fallback image** in source settings to serve as an alternative. ### How to set up S3 Image Source? Here is the document for S3 integration - [AWS S3 Set Up](/image/manage-sources/original-image-storage#amazon-s3). Alternatively, you can watch [this video](https://www.gumlet.com/watch/6507e815a804f1fe545e10e6/). *** ## 🌅 Output Images ### How are processed images stored? Processed images are cached in our system **and** in the CDN cache. Once generated, they’re delivered without extra processing time. ### What is the maximum output image size? Maximum output dimensions: **8192 × 8192** pixels. ### What output formats are supported? See full list under **[Output Formats](/image/image-transform-api/image-formats#output-formats)**. ### Does Gumlet automatically remove EXIF metadata? Yes—unnecessary EXIF data is removed from processed images. Originals remain untouched. To preserve metadata, enable the **[metadata](/image/image-transform-api/image-formats#metadata)** parameter. *** ## 🔗 Integration & Setup ### How to set up a custom domain? Watch our video tutorial:\ [![Custom Domain Set Up](https://play.gumlet.io/embed/6549348531e4ee41bf7ec5c9/)](https://gumlet.tv/watch/6549348531e4ee41bf7ec5c9/) ### What is the impact of adding JavaScript on my page load time? Our JS plugin is just **6 KB**, loads in < 50 ms via `async`. It won’t block your page load. ### How to optimize images served via CSS background? Remove `background-image` in CSS. Instead, add `data-bg="URL"` and let our library load the correctly sized background. See **[set image as background](/image/integration-guides/image-integration-javascript-gumletjs#set-the-image-as-the-background)**. ### Does Gumlet handle lazy loading? Should I use a third-party library? Gumlet.js supports lazy loading—no need for external libraries. Learn more in **[lazy load images](/image/integration-guides/image-integration-javascript-gumletjs#lazy-load-images)**. ### Can I serve images from multiple sources? Yes. Create multiple sources in the dashboard and configure Gumlet.js to point to each domain. See **[load images from multiple domains](/image/integration-guides/image-integration-javascript-gumletjs#load-images-from-multiple-domains)**. ### Can I serve CSS / JS / other files through Gumlet? Yes. Non-image files pass through unmodified via our CDN.\ Example: * Store `https://example.com/css/main.css` in a “web folder” source. * Serve as `https://example.gumlet.com/css/main.css`. *** ## 🔍 SEO ### Can serving images from Gumlet CDN be SEO-negative? No—it's actually beneficial. We mark images as originating from your site via HTTP headers, so search engines attribute them to you.\ Learn more: * [Search Engine Land article](https://searchengineland.com/google-relcanonical-now-supported-in-http-headers-82266) * [Google documentation](https://support.google.com/webmasters/answer/139066?hl=en) *** ## 🗄 Caching ### How long are my images cached? * Originals: **up to 90 days** * Processed: **up to 100 days** ### Is there any way to modify browser cache time? Yes. Default: 100 days. Change it in **Cache Management** on the source. ### Is there any way to modify CDN cache time? Not generally recommended. Contact support if you must adjust CDN TTL. ### What is the default cache time for errors? Errors are cached for **5 minutes** by our CDN. Enterprise customers may request longer TTL via support. *** ## 🛠️ Platform Compatibility ### WordPress / WooCommerce Yes - install our [WordPress plugin](https://wordpress.org/plugins/gumlet/) to get started in minutes. ### Shopify Yes, you can use the [Shopify](/image/integration-guides/shopify) Integration guide to optimize your store images. ### Magento Supported. Follow our [Magento integration guide](/image/integration-guides/image-integration-magento). ### Django, Laravel, Angular, Rails, etc. Use Gumlet.js (our JS plugin). See **[Getting started guide](/image/getting-started/image-getting-started)**. ### Webflow, Wix, Squarespace, Weebly Not supported yet. We’ll consider plugins if demand grows. ### Mobile apps (iOS and Android) Use the [mobile apps integration](/image/integration-guides/image-integration-ios-and-android-apps) guide. *** ## 💳 Payment ### What currencies are supported? Payments accepted in **USD**. Other currencies convert at the prevailing exchange rate. ### Are my payment details secure? We use [Stripe](https://www.stripe.com) to process and store payment details—your card data never touches our servers. ### When do you charge my credit card? Invoices are generated on the **1st of every month**. If you have a saved card, it’s charged that day. *** ## 💵 Pricing ### How is the bandwidth charge calculated? You’re billed per GB for CDN data transferred beyond your plan. No separate fees for requests, transformations, caching, or storage.\ Learn more: [Gumlet Pricing](https://www.gumlet.com/pricing/?tab=image) --- updatedAt: 2025-11-06T07:47:44.000Z --- # Original Media Storage Details about storage systems supported by Gumlet ![](images/original-image-storage.webp) ## What is original media storage? Gumlet does not store your original media. You must store original media in the storage of your choice and give us read access to those storage systems. Storing media on your storage system ensures you always retain full control over media. You can prevent vendor lock-ins and have full rights to your original media. ## Storage Providers We support the following storage providers. You can set up your source with any of them. ### Web Folders If you have source images stored in a folder on your server, you can use it as an image source for Gumlet. For example, let's assume all your images are stored at `example.com/source-images/` You can specify this as the base URL while setting the image source. Once the setup is complete, your image `example.com/source-images/yourimage.jpg` will be available at `example.gumlet.com/yourimage.jpg`. You can now manipulate the image as `example.gumlet.com/yourimage.jpg?width=300` ### Web Proxy A Web Proxy source allows your Gumlet source to serve any image with a publicly addressable URL. If you use this source, we recommend you URL encode all the external URLs supplied. If the external URL of the image is `https://domain.com/pic.jpg` and you want to serve it from your web source named *example*, you should write the URL as per below. ```text https://example.gumlet.com/fetch/https%3A%2F%2Fdomain.com%2Fpic.jpg?width=300 ``` You can also specify referrer restrictions for web proxy sources. You can add a comma-separated list of domain names and Gumlet will only allow requests from those domains. This prevents unauthorized users from using your Gumlet source on their websites. By default, any referer is allowed until u add a referrer restriction. ### Amazon S3 You can use images stored in [Amazon S3](https://aws.amazon.com/s3/) bucket as an image source. Gumlet needs `GetObject` permission to access the images. Please create an access token with these permissions and add them while creating the image store. You can optionally specify the base path while creating an Amazon S3 image source. If your image is stored at `s3://yourbucket/some/image/path/lenna.jpg` and if you specify `/some/image/path` as base path, your resultant URL for Gumlet will become `yourdomain.gumlet.com/lenna.jpg`. Without a base path, the Gumlet URL will be `yourdomain.gumlet.com/some/image/path/lenna.jpg` ### DigitalOcean Spaces You can use images stored in [DigitalOcean Spaces](https://www.digitalocean.com/products/spaces/) as an image source. Please create a new access token as described in [this article](https://www.digitalocean.com/community/tutorials/how-to-create-a-digitalocean-space-and-api-key) and create a Gumlet source with those credentials. You can optionally specify the base path while creating a Digital Ocean Spaces image source. If your image is stored at `do://your_space/some/image/path/lenna.jpg` and if you specify `/some/image/path` as base path, your resultant URL for Gumlet will become `yourdomain.gumlet.com/lenna.jpg`. Without a base path, the Gumlet URL will be `yourdomain.gumlet.com/some/image/path/lenna.jpg` ### Wasabi Storage Gumlet supports storing images in [Wasabi storage](https://wasabi.com/). You can configure the storage in the same way and we need the same permissions as Amazon S3 for wasabi storage. ### Hetzner Storage Gumlet supports storing images in [Hetzner storage](https://www.hetzner.com/). You can configure the storage in the same way, and we need the same permissions as Amazon S3 for Hetzner storage. ### Google Cloud Storage You can use images stored in [Google Cloud Storage](https://cloud.google.com/storage) bucket as an image source. Gumlet needs `Storage Object Viewer` role to access the images. Please create a service account with that role, create a JSON key, and use that key while creating an image source. You can find a tutorial for the same at [Create and manage service account keys](https://cloud.google.com/iam/docs/creating-managing-service-account-keys). If your image is stored at `gs://yourbucket/some/image/path/lenna.jpg`, your resultant URL for Gumlet will become `yourdomain.gumlet.com/some/image/path/lenna.jpg`. ### Cloudinary If you have stored images in Cloudinary storage, you can set up Gumlet to fetch original images from Cloudinary and process them through our system. ### Cloudflare R2 If your original images are stored in Cloudflare R2, set up the original source with R2 credentials to process the images with Gumlet. ### Azure Gumlet supports storing images in [Azure cloud storage](https://azure.microsoft.com/en-us/product-categories/storage/). You need to create a [storage account](https://docs.microsoft.com/en-us/azure/storage/common/storage-account-create?tabs=azure-portal) and then create a container inside your existing storage. Gumlet needs a SAS(Shared access tokens) token for accessing images, you can create a new SAS token as described in [this article](https://docs.microsoft.com/en-us/azure/cognitive-services/translator/document-translation/create-sas-tokens?tabs=Containers). You can optionally specify the base path while creating an Azure Cloud image source. If your image is stored at `https://{{your_blob}}.blob.core.windows.net/{{your_container}}/some/image/path/lena.png?{{sas_token}}` and if you specify `/some/image/path` as the base path, your resultant URL for Gumlet will become `yourdomain.gumlet.com/lenna.jpg`. Without the base path, the Gumlet URL will be `yourdomain.gumlet.com/some/image/path/lenna.jpg` ### Linode Storage Gumlet supports storing images in [Linode storage](https://www.linode.com/). You can configure the storage in the same way and we need the same permissions as Amazon S3 for linode storage. ### Backblaze Storage Gumlet supports storing images in [Backblaze storage](https://www.backblaze.com/b2/cloud-storage.html). You can configure the storage in the same way and we need the same permissions as Amazon S3 for Backblaze storage. --- updatedAt: 2025-08-18T19:07:03.000Z --- # Source Config Parameters Gumlet allows you to configure your source to deliver the best experience ## Parameters ### Default Parameters ![](images/source-parameters.webp) Once you create an image source, you can also add default parameters. These are the parameters applied to all images from this image source, even when you don't pass them via URL *Query* parameters. Default parameters are overridden when the same parameter is supplied via the query string. For example, if you set `width` as default parameter with value `300`, all images served will have a width of 300px by default now. If an image is requested with `width=500` in the URL parameters, that image will be served with a 500px width. # Fallback Image Set a fallback or error image, in case the original image is not available This image will be delivered when we are unable to fetch images from the origin. For example, when we get a 404 error from your origin server, users will see this image. This can help maintain UI quality and display a placeholder image instead of the browser displaying a broken image. ![](/d0793b87477d-fallback-image.webp) **Steps to set up a fallback image:** * Navigate to your source and then the parameters tab in edit mode. * Enter a fallback image URL. _The fallback image is also represented as an error image._ # Origin Request Headers Use origin request headers to have better control over your integration ## Origin Request Headers Set the custom headers you want to add when Gumlet communicates with your origin server. You will find these settings in Edit Source > Parameters ![](/90e627ac9c6a-origin-request-headers.webp) If you want to whitelist Gumlet to access your content, you can set up a request header. We do not have a static IP based on our architecture. --- updatedAt: 2025-08-18T19:04:08.000Z --- # Gumlet Response Headers ## Gumlet Response Headers Set the custom response headers you want to add when you get any response from Gumlet. You will find these settings in Edit Source > Parameters. ![](images/gumlet-response-headers.webp) # Image Custom Domain Use custom domain to serve your images. Now, a custom domain can be added to the Gumlet source. This allows serving images from your domain `images.example.com` rather than a Gumlet subdomain `example.gumlet.io`. [Gumlet video player](https://play.gumlet.io/embed/6549348531e4ee41bf7ec5c9) ## Custom Domain with Gumlet CDN This guide assumes that you have already created a Gumlet source. If you are setting up the Gumlet for the first time, please follow this guide to [create an image source](/image/getting-started/image-getting-started). Once a source is created, please follow these steps to add a custom domain: ### 1. Go to edit source. ![](/eb46ef78d8a3-image-custom-domain-01.webp) ### 2. Create a custom domain Go to the "Custom Domain" section on the edit source page. 1. Enter your desired domain in the "Custom Domains" section. 2. Click Add custom domain. ![](/721bbbcb446e-image-custom-domain-02.webp) ### 3. Create a CNAME record in your DNS records Create the following CNAME record to start using your custom domain. Please replace `images.example.com` with your domain. If your gumlet source is `example.gumlet.io` then add the following CNAME record. **images.example.com CNAME example.gumlet.io** Cloudflare user? If you are adding a DNS record in Cloudflare, set proxy status to "DNS only" (not proxied); it will not work when proxied. ### 4. Verify the CNAME record Once you add a CNAME record, click on the verify button. If everything is correct, your custom domain will be successfully created. That's it! Your custom domain will be live with a valid SSL certificate in a few minutes. Open your custom domain in a new tab to validate the setup. ### 5. Update your Gumlet integration Update your Gumlet (JavaScript or WordPress) plugins to change how the images are served. Please use the new custom domain (images.example.com) in your Gumlet integration instead of the old Gumlet subdomain (example.gumlet.io). Slow site? The site may appear slow when you switch to the new domain. It would take a few minutes to build up the cache. Images will be super fast after a few page loads. ## FAQs and Troubleshooting ### Does my plan include a Custom domain? All paid plans (Pro, Appsumo, Business & Enterprise) support a custom domain. Each custom domain costs $5 / month extra. Check your plan details on the [billing panel](https://dash.gumlet.com/organization/billing) to see if you have any free custom domains. # Signed URLs Secure URLs of images by adding security token to URLs Securing image URLs can add an extra layer of security. It helps to prevent unauthorized access to your image URL. We use an 'MD5' hash function on the original URL and a secure token to generate the signature. This signature needs to be passed with an unsigned URL with the parameter `s` to make a signed URL. If the URL is altered or missing the `s` parameter, we will respond with `403 - Forbidden` status. ## Enable Secure URLs By default, this feature is disabled for any source. You can enable it by following the steps. 1. Go to [image sources](https://dash.gumlet.com/image/sources) page, and edit the source to enable a secure URL. 2. Click on the **security** tab. 3. Toggle the 'Secure URLs' button and click Save. Your secure token will appear below this option to use it to sign a URL. Enabling secure URLs for existing source will lead to 403 errors on all URLs unless all requests are signed. Please enable at your own discretion and with appropriate knowledge. ![](/a21091b33863-signed-urls-image.webp) ## Signing URLs We use 'MD5', a cryptographic hash function to sign the image URL. Your secure token, image URL, and query parameters will be input to this function. The output of this hash function will be appended to the end of your unsigned URL with the `s` parameter. Here is the **sample Nodejs code** to sign any URL. ```javascript const crypto = require("crypto"); const gumlet_source = 'demo.gumlet.com'; const image_path = 'fell.jpeg'; const query_params = 'width=300' const signed_secret = 'sample123xyz'; const unsigned_url = signed_secret + '/' + image_path + '?' + query_params; const hash = crypto.createHash('md5').update(unsigned_url).digest('hex'); const signed_url = 'https://' + gumlet_source + '/' + image_path + '?' + query_params + '&s=' + hash; console.log(signed_url); //->> https://demo.gumlet.io/fall.jpeg?width=300&s=xxxxxxxxxxxxxxxxxxxx ``` You can reference this code and implement URL signing in the language of your choice. We will soon publish examples of URL signing in different languages. ## Expiry URLs can be given an expiration date via an `expires` parameter that takes a UNIX timestamp in the query parameters like `?expires=1584199888` Any request after this timestamp will be 403 - expired. We set the remaining expiration time as max-age in the cache-control header for valid requests --- updatedAt: 2025-07-28T08:48:16.000Z --- # Cache Configuration Configure cache values based on your need and use case You can define browser cache time and CDN cache time for all of the images delivered through this Gumlet source. ![](images/cache-configuration.webp) Default CDN Cache Duration (`s-maxage`): **8640000 seconds** Default Browser Cache Duration (`max-age`): **8640000 seconds** --- updatedAt: 2025-04-08T17:38:49.000Z --- # Manage Sources Setup image source with advanced capabilities for better UX and security ### What is a Gumlet Source? Gumlet Image source is an entity that connects your original image storage with the Gumlet optimization service. You need to add some credentials based on your source. Once done, you are halfway through delivering the automatically optimized images with Gumlet to enhance user experience, reduce page load times, and SEO benefits. **You can set up a source with the following Providers:** * WordPress & WooCommerce * Web Folder * Cloud Providers like AWS S3, Google GCP, Digital Ocean Spaces, Wasabi, etc. * Cloudinary, Cloudflare, Imgix Learn more about original media storage providers [here](/image/manage-sources/original-image-storage). # JavaScript (Gumlet.js) Easily integrate Gumlet with any webpage using this tiny library ## Overview Gumlet.js allows developers to deliver responsive images to end-users easily. This lets you write a simple `` tag without any complicated src-sets & size. Gumlet.js parses the `` tag on-load to append the image src URL with the correct width for the users' device. Gumlet's _image transform service_ processes the URL and resizes your image on the fly. ### Features * Pure JavaScript with zero dependencies * 5 KB minified and gzipped * Works with all frontend frameworks like **Angular**, **React** or **Vue.js** * Uses IntersectionObserver API for reduced CPU usage * Support for `` element * Support for setting `background-image` CSS property * Automatic quality selection based on connection speed * SEO Friendly: Detects search engine bots and reveals all images at once for best SEO ## Installation The best and easiest way to install gumlet.js is by including it in `` section of all your pages. ```html ``` Please replace `{{mysubdomain}}` in the above code with the subdomain you created on [Gumlet](https://www.gumlet.com/). Please also replace `{{example.com}}` with the domain from which images are currently being served. Once the above steps are complete, your users will **automatically** start getting responsive images! Yes, it's that simple. However, we recommend making the following changes to `` tags to make images even more optimized. ### Rename `img` src="" to data-src="" If you are currently serving images from a CDN or your web server, the chances are that you would have all `` tags with `src` attributes. We recommend you change them to `data-src` attributes. For example: ```html Gumlet Logo Gumlet Logo ``` If you don't do this step, whenever a user loads a page, the browser will request an image available in the `src` attribute, and as soon as gumlet.js processes it and it cancels the request. This is very inefficient and should be avoided. Once you set the `data-src` attribute, gumlet.js will ensure that the browser loads only the required image, and no extra requests are made to the server. Gumlet is live now! This is all that was needed to deliver responsive images to your users. ## How does it work? Let us describe how gumlet.js works under the hood. We use capabilities available in modern browsers to deliver responsive images. If you write an `img` tag such as below, ```html Gumlet Logo ``` Gumlet.js will generate HTML something like the following: ```html Gumlet Logo ``` Since [Gumlet](https://www.gumlet.com) can generate as many derivative resolutions as needed, gumlet.js programmatically calculates an image's required dimensions. Once that is determined, gumlet.js puts the needed information in `src` tag. ### Dynamic Images Gumlet.js observes all existing images for changes to "src" tags. If any change is detected, the image is automatically processed. Gumlet.js also monitors if any new image is added to the DOM. If a new image is detected, the image is processed automatically. ## Usage ### Lazy load images This library supports lazy loading images. You can pass `lazy_load` parameter while initializing gumlet.js. ```html ``` If you want to disable lazy-load for certain images, you can set `data-gmlazy="false"` for that element, and the library will load the image immediately for that element. E.g. ```html ``` ### Web-Proxy source If you use a [web proxy ](/image/manage-sources/original-image-storage#web-proxy)source for your image distribution, you can set the following config parameter such that gumlet.js generates URLs for the proxy source. ```html ``` ### Enable `srcset` Generation If you want to enable the generation of `srcset` for images, you can add the following config parameter. ```html ``` ### Set the image as the background Gumlet.js also supports setting images as background for any HTML element. You need to set the `data-bg` attribute for an element, and the correctly sized image will be set as `background-image` CSS property. For example: ```html
``` ### Load images from multiple domains If you are loading images from multiple domains, you need to configure Gumlet.js to serve images from different domains. A sample configuration is given below. ```html ``` ### Client-Side WebP Detection Gumlet automatically detects WebP support from the server side and delivers a WebP image whenever possible. When you pass `format=auto` URL parameter, Gumlet service performs server-side WebP detection. This client-side implementation is helpful when you can not use the server-side WebP detection. You can pass the `auto_webp` parameter to the config. For example: ```html ``` This will append the required query parameter `format=webp` after detecting support in the browser. More information on this can be found [here](/image/image-transform-api/image-formats). ### Ignore images If you want to exclude some `` tags from being processed by gumlet.js, you can set `data-gumlet="false"` attribute and this library will not process it. E.g. ```html ``` ## Library Config Options | Option | Meaning | Default Value | Example Value | | --------------------------- | ------------------------------------------------------------------------------------------------------------------------------------------------------------------------------------------------------------ | -------------------- | ----------------------------------------------------------- | | `hosts` | An array containing objects with attributes `current` and `gumlet` hostnames. Images with matching `current` hosts will be replaced with `gumlet` hostnames. This is a required parameter. | `undefined` | `[{ current: "webserver.com", gumlet: "simple.gumlet.io"}]` | | `elements_selector_img` | CSS selector for the elements for which the image has to be processed | `"img"` | `".gumlet_img"` | | `elements_selector_bg` | CSS selector for the elements for which the background image has to be set | `"[data-bg]"` | `".gumlet_bg"` | | `elements_selector_picture` | CSS selector for the picture elements to process with Gumlet.js. | `"picture > source"` | `".gumlet_pic"` | | `data_src` | The name of the data attribute containing the original image source, excluding the `"data-"` part. E.g., if your data attribute is named `"data-src"`, pass only`"src"` | `"src"` | `"original"` | | `data_bg` | The name of the data attribute containing the background image source, excluding the `"data-"` part. E.g., if your data attribute is named `"data-bg"`, just pass `"bg"` | `"bg"` | `"background"` | | `auto_quality` | Enables automatic quality depending on connection speed. When enabled, it requests reduced image quality on slow connection types. This flag also reduces the quality when "save data" is enabled in chrome. | `true` | `false` | | `max_dpr` | Maximum DPR to apply when processing images | `undefined` | `2.5` | | `auto_webp` | Flag to indicate whether `format=auto` should be appended to URLs after detecting WebP support in the browser. | `false` | `true` | | `srcset` | Flag to indicate whether the library should set `srcset` and `sizes` | `false` | `true` | | `lazy_load` | Enable or disable lazy loading of images. | `false` | `true` | | `threshold` | The number of pixels representing the outer distance off the scrolling area from which to start lazy loading the images. | `300` | `100` | | `proxy` | Enable this flag if your distribution uses a web proxy source. | `false` | `true` | | `width_from_img` | Take width from `` tag's `width` attribute. | `false` | `true` | | `use_native_lazy_load` | Use browser's native lazy load for supported browsers. | `true` | `false` | | `default_params` | Default parameters to be passed to all image URLs | `{}` | `{compress: true}` | ## Browser Support We certify this library to work on the following browsers. We compile our library with `es2020` target. IE 11 support Version 2.0 of this library is the last version that supports IE 11. If you need IE 11 support, please use that version. | Browser | Minimum Supported Version | | ---------- | ------------------------- | | Chrome | 80 | | Firefox | 74 | | Safari | 14 | | Edge | 80 | | Opera | 67 | | iOS Safari | 14 | --- updatedAt: 2025-04-08T17:39:04.000Z --- # Android and iOS apps ## Mobile App Integration Optimized images can be served via Gumlet using your existing infrastructure with minimal code changes. Here are template code requirements for Android and iOS applications. Use this `buildImageUrl()` function to get the image URL of the resized version of your image. This function will identify the correct dimensions for your image and modify the image URL accordingly. ### Android ```java Url buildImageUrl(View view, String baseImageUrl) { int imageWidth = view.getWidth() - view.getPaddingLeft() - view.getPaddingRight(); return baseImageUrl + "?w=" + Math.round(imageWidth); } ``` ### iOS ```swift public func buildImageUrl(view: UIImageView, baseImageUrl: String) -> String { let imageWidth = round(view.frame.width - view.layoutMargins.left - view.layoutMargins.right) return baseImageUrl + "?w=" + "\(imageWidth)" } ``` --- updatedAt: 2025-12-11T17:36:46.000Z --- # Next.js Here are steps to use Gumlet service with Next.js Next.js v10 and above has in-built support for [image optimization](https://nextjs.org/docs/app/api-reference/components/image#loader). Gumlet can be easily integrated with just a few lines of code. You can use the Next.js image loader component to load images in the correct size from the Gumlet image service. The easiest way is to write a custom image loader like this. ```javascript utils/imageloader.js export default function gumletLoader({ src, width, quality }) { if(src.includes("")){ let parsedUrl = new URL(src); parsedUrl.hostname = ".gumlet.io"; parsedUrl.searchParams.set("w", width); parsedUrl.searchParams.set("q", quality || 80); return parsedUrl.toString(); } else { return `${src}?w=${width}&q=${quality || 80}`; } } ``` ```javascript next.config.js /** @type {import('next').NextConfig} */ const nextConfig = { images: { loader: 'custom', loaderFile: './utils/imageloader.js', deviceSizes: [160, 320, 480, 640, 750, 828, 1080, 1200, 1440, 1600, 1920, 2048, 2304, 2560, 2816, 3072, 3328, 3584, 3840] }, //... other config } module.exports = nextConfig ``` For more details on this, please check [next.js documentation](https://nextjs.org/docs/app/api-reference/components/image). # Magento Gumlet's no-code integration guide for Magento 2.x With this simple no-code integration guide, you would be able to serve optimized images via Gumlet that are, * Compressed without any loss in perceptual quality * Converted to WebP on supported platforms * Delivered via a superfast CDN ### Step 1: Configure the image source. [Sign Up](https://www.gumlet.com/signup) with Gumlet and follow this [Getting Started Guide](/image/getting-started/image-getting-started) to set up an image source with Gumlet. It tells us where to fetch your original images and optimize them. Kindly note that Gumlet would not modify your original images. ### Step 2: Fetch image through Gumlet endpoint Let's fetch the image from the Gumlet endpoint to check if everything is working fine. If your old URL was `https://www.example.com/media/catalog/product/p/p/example.jpg`, then the new URL should be served from `https://{{your_subdomain.gumlet.io}}/media/catalog/product/p/p/example.jpg?w=500` If the above URL works fine, please go ahead with Step 3. Unable to fetch the image? Contact if you are not able to fetch the image, as explained above. In such a situation, do not move to step 3, as this could break your website images. ### Step 3: Replace the base URL for user media files in Magento. Once the above image works with the Gumlet URL endpoint, you will need to make changes within the Magento admin panel to switch the image delivery and optimization to Gumlet. In Magento 2, go to Stores ▶️ Configurations ▶️ Web: ![1224](/a2c85b1c7fa0-image-integration-magento.webp) magento.jpg Fill **Base URL for User Media Files** with the `https://{{your_subdomain.gumlet.io}}/media.` Note that we added `/media` in the end. 1. Update the same for the "Base URLs (Secure)" section 2. Save these settings. 3. Use the sidebar to navigate to System ➡ Cache Management and Flush Magento Cache. 4. Refresh the webpage of your Magento storefront, and you should see images loading via Gumlet If you set up Magento as per the docs, and you see `/pub/` in your image URLs, then, in this case, change the value of Base URL for User Media Files in the Magento admin panel to `https://{{your_subdomain.gumlet.io}}/pub/media` ## Use Gumlet Magento Plugin for additional image optimization The above method replaces the media host, and your images will be served with Gumlet CDN. However, this doesn't reduce the media width, so the bandwidth saved is limited. We have created a Magento plugin to save more bandwidth on your media in the Magento store, without compromising quality. Here is the plugin: ### Installation #### Composer (Recommended) ```plaintext composer require gumlet/magento-image-optimization ``` ##### After Composer Install Enable and activate the module in your Magento installation: ```plaintext bin/magento module:enable Gumlet_Image bin/magento setup:upgrade bin/magento setup:di:compile bin/magento cache:flush ``` #### Manual 1. Copy the `Image` folder to `app/code/Gumlet/` in your Magento installation. 2. Run: ```plaintext bin/magento setup:upgrade bin/magento cache:flush ``` #### Compatibility * Magento 2.3 and above ## Using Gumlet to deliver non-image static assets like JS or CSS via CDN You can also use Gumlet to deliver non-image type static assets like JS, CSS, or font files. Navigate to Stores ▶️ Configurations ▶️ Web: 1. For **Base URL for Static View Files**, set `https://{{your_subdomain}}.gumlet.io/media` or `https://{{your_subdomain}}.gumlet.io/pub/media` depending on your setup. You have successfully integrated your Magento storefront with Gumlet and all your images, moving forward, will be optimized and delivered in the right format. # WordPress Integrate Gumlet with your WordPress website in 15 minutes High-quality images are an integral part of contemporary website design. They make your site stand out and generate user engagement. But if one is not careful, images can slow down the website and lead to a bad user experience. Gumlet is a complete image optimization solution. It takes care of all 5 aspects of optimized image delivery: 1. **Automatic Image Resize**: All images are resized according to the user's device screen size. Every visitor of your site gets the right-sized images. 2. **Image compression**: Gumlet uses perceptually lossless image compression to reduce the image file size without any effect on image quality. We even optimize GIFs and SVGs. 3. **Automatic WebP**: Images are delivered in "new age" WebP format whenever the browser supports it. WebP images are 40% lighter than JPEG images for the same quality. 4. **Lazy load:** The plug-in has an in-built lazy load to ensure the fastest page view experience. 5. **Caching and CDN Delivery**: All images processed via Gumlet are delivered through a super-fast image CDN worldwide. It ensures the lowest latency for all of your images. All of the above benefits are delivered via a single-click install plugin. Please follow the below instructions to make your WordPress site faster and more SEO-friendly. This plugin also works with WooCommerce. ## Gumlet WordPress Integration Guide Please follow these simple instructions closely, and your site should have optimized images in no time. ### 1. Create Account Please create a Gumlet account by [signing up](https://www.gumlet.com/signup) and log in to your Gumlet account. ### 2. Add a WordPress Source We need to know where to fetch the original images for optimization. Click the "[+ Create New Source](https://dash.gumlet.com/image/sources/)" button and select WordPress as a platform to reach the following screen. ![](/2c420cf0560b-image-integration-wordpress-01.webp) * Enter the website URL you want to optimize. * Choose a Gumlet subdomain. Please note this subdomain as it will be required in the next step. Your images will be delivered via `https://wordpress-test.gumlet.io/path/to/image.jpg` like URL. Custom domain To set up a custom domain (CNAME+SSL) to ensure your images are served via your website domain only, please refer to our [custom domain guide](/image/manage-sources/image-custom-domain). For advanced use cases only If your original images are not being served from your main domain. Instead, images are stored in Amazon S3 or Wasabi Storage; please follow [this guide](/image/getting-started/image-getting-started#add-source) for source creation. ### 3. Install and Configure Plugin For Gumlet to work properly, it is **very important to deactivate** all lazy load, image optimization, or image caching plugins. Gumlet takes care of all of these functionalities. Any other active plugin would create interference and prevent Gumlet from working. Some popular themes like Brizy and Divi have an inbuilt lazy load, so please check your theme and disable these options. If you are using a caching plugin like WP Rocket, please disable lazy load and exclude image file types from caching. Once other lazy load and image optimization plugins are disabled, install and activate [Gumlet Plugin](https://wordpress.org/plugins/gumlet/) on your WordPress. Brizy Builder? If you are using the Brizy page builder, then please disable the Gumlet Lazy load option. Brizy has an in-built lazy load that can not be disabled. Go to **Plugins > Gumlet Plugin > Settings** on your WordPress dashboard, where you will see the below plugin settings screen. ![](/5493c413b2d5-image-integration-wordpress-02.webp) Enter the subdomain created in Step 2 in the Gumlet Source field. Please make sure it is entered in `https://wordpress-test.gumlet.io` format. Do not enter the Gumlet source in format. Kindly leave the "Current Image Domain" field blank and other settings unchanged. Ready! Please save the settings and clear the WordPress cache, and you are done! Your images should be optimized and delivered via Gumlet. Refer to the FAQ below in case you face any issues. Feel free to reach out to us over support chat or email () if you need any further help. For advance use cases only If your images are loading from any other domain than your website domain, please enter that domain name in the **Current Image Domain** field. ### Bonus: Serve CSS and JS files via Gumlet CDN Our CDN accelerates the delivery of files via [a global network](https://aws.amazon.com/cloudfront/features/#Amazon_CloudFront_Infrastructure). To ensure that your website is as fast as possible, we have enabled the delivery of CSS and JS files over our CDN. If you are using a popular caching plugin like WP Rocket, it is very simple! (If not, there are [free alternatives here](#what-if-i-dont-use-wp-rocket)) 1. In the top menu, click the WP Rocket link. 2. Click the CDN tab. 3. Check the "Enable Content Delivery Network" box. 4. Enter the Gumlet subdomain created in step 2 (example.gumlet.io) in the CDN CNAME(s). 5. In the reserved for dropdown, please select CSS & JavaScript. 6. Save the changes. 7. Clear the cache. ![](/e5d4c9bade5f-image-integration-wordpress-03.webp) wp-rocket-cdn-url.png Please enter the Gumlet subdomain in the format example.gumlet.io and not . Once the above settings are done, it might take a few minutes for the changes to reflect. Kindly check if your CSS and JS files are being served via the Gumlet subdomain. Contact our support in case you face any issues. #### What if I don't use WP Rocket? Even if you are not using WP Rocket, there are plenty of [free caching plugins](https://www.shoutmeloud.com/best-wordpress-cache-plugin-faster-loading-wp.html) for WordPress. We recommend using [WP Super Cache](https://wordpress.org/plugins/wp-super-cache/). Here is a [guide](https://www.wpbeginner.com/beginners-guide/how-to-install-and-setup-wp-super-cache-for-beginners/) on how to set up CDN for WP Super Cache. Please feel free to reach out to our support chat or email for any further assistance. #### What if I don't want to use any caching plugin? There is still a way to deliver JS and CSS files via Gumlet CDN. But it will involve changing the code for your WordPress site. You can deliver any file `https://example.com/path/to/file/cssFile.css` over Gumlet CDN by simply changing its URL to the Gumlet subdomain created in step 2 `https://example.gumlet.io/path/to/file/cssFile.css`. Changing the URLs for CSS and JS files may require advanced technical knowledge of the WordPress platform. ## FAQs and Troubleshooting ### How do I check if Gumlet optimizes my images? 1. Open your site in Google Chrome 2. Right-click on any image 3. Select "Open image in a new tab" from the menu 4. If the image address starts from `.gumlet.io` then your images are being optimized by Gumlet. Kindly note that our analytics panel updates every 45 minutes. Checking Analytics right after installing the plugin is not the right way to check if the plugin works. ### How do I set up a Custom Domain (CNAME + SSL)? Please follow [this guide](/image/manage-sources/image-custom-domain). ### Does Gumlet work with the background image? Yes. Gumlet optimizes the background images set it CSS as well only if the image URL is mentioned "in-line". If the image URL is mentioned in a separate CSS file, it cannot be optimized by Gumlet. Popular themes like Elementor have settings to make sure image URLs are on the page. ![](/f2d1c077b909-image-integration-wordpress-04.webp) elementor-image-setting-update.jpeg ### Does serving images from a Gumlet subdomain affect my SEO? No. Gumlet ensures that your image SEO remains intact by sending a "canonical link" header to the search engines. This is done automatically for all users without any config required. You can check this in your network tab instantly. ![](/4992f775423b-image-integration-wordpress-05.webp) gumlet-canonical-link.png Google supports this functionality ([Read more](https://support.google.com/webmasters/answer/139066?hl=en%29)). It is also a common SEO practice ([Read more](https://searchengineland.com/google-relcanonical-now-supported-in-http-headers-82266)). It is also supported by lots of other WP plugins like ShortPixel and other CDN plugins. ### Why are my images not converted to WebP? The Gumlet plugin is very smart. Whenever it detects a browser that supports WebP format, the image is served in WebP format. However, your image URLs are never changed. The file format is changed and conveyed to the browser with an HTTP response header (MIME file type). You can check this easily with the network tab in the developer tools of the browsers. ![](/db05494033ce-image-integration-wordpress-06.webp) wordpress-webp-images.png If the Google Chrome browser does not show file type as WebP for your website, there is definitely a problem. Reach out to us on support channels, and we will fix it. AVIF Support Since Chrome v85, AVIF format is supported. AVIF is 20% more efficient than WebP. Gumlet is the first image optimization service in the world to start serving AVIF images. [Read more](https://www.gumlet.com/blog/worlds-first-service-to-provide-avif-support/). ### How do I exclude images from Gumlet optimization? Sometimes for some images, you might not want Gumlet optimization. Now there is an easy way to do it. Enter the original image URLs `https://www.gumlet.com/public/img/sea.jpeg`, **not Gumlet URLs** `https://demo.gumlet.io/sea.jpeg` to the Exclude image URLs box at the bottom of Gumlet WordPress plugin config. If you want to add multiple URLs to the exclude list, please add each new URL in a new line. ![](/2f2bf753de09-image-integration-wordpress-07.webp) ### Why are my images not resized? OR Why does the speed test still ask me to resize my images? Some WordPress themes hardcode a width and height attribute into each image tag by default. This creates problems as in modern web designs, the size of an image is defined by CSS width rules. By default, Gumlet responsive resize takes `` tag width parameter on face value to avoid shrinking any images. But if you face the issue where GTMetrix says "serve scaled images" or Google PageSpeed insights recommends "resize images", please do the following. **Uncheck "Use`` width" option** under Advanced Settings. ![](/969aad448a88-image-integration-wordpress-08.webp) ### The Gumlet plugin messes up image sizes in my grid display. How to fix it? Sometimes, enabling the Gumlet plugin may make your photo grid look like this: ![](/4d4c185029ee-image-integration-wordpress-09.webp) There is an easy solution to this problem. Please uncheck **Use Original Images** setting under Advanced settings from the Gumlet plugin panel and clear the cache. --- updatedAt: 2025-04-08T17:39:38.000Z --- # Nuxt Gumlet Integration for Nuxtjs To use Gumlet with Nuxt, you just need to specify the base URL of your service in Gumlet. ```typescript nuxt.config.ts export default defineNuxtConfig({ image: { gumlet: { baseURL: 'https://demo.gumlet.io' } } }) ``` To use Gumlet as a provider for images, here is the sample snippet: ``` ``` This will return a 300 x 500 image, which has been compressed, and will display next-gen formats for a browser Here is the official documentation for detailed integration with Nuxt: # React.js Here are the steps to integrate Gumlet Service with React.js To keep the scope of this document limited and simple, we expect you to have a ReactJS development environment set up and a basic application running. We will be making changes to the App.js file directly but you can always replicate these steps in your `base layout` so that the images are optimized in the entire application. ## Step 1: Add some images to your component to test ```javascript App.js function App() { return (
); } ``` After starting the development server navigate to http\://localhost:3000 you should see three images ## Step 2: Load the gumlet.js file in a function in the component ```javascript App.js function App() { const loadGumletScript = () => { return new Promise(function (resolve, reject){ // Checks if the script is already loaded on the page if(document.querySelector("script#gumlet-sdk-script")){ resolve(); }else { window.GUMLET_CONFIG = { hosts: [{ current: "{{example.com}}", gumlet: "{{mysubdomain}}.gumlet.io" }], lazy_load: true }; // Loads the script and appends it on the page const script = document.createElement("script"); script.src = "https://cdn.jsdelivr.net/npm/gumlet.js@2.1/dist/gumlet.min.js"; script.id = "gumlet-sdk-script"; script.sync = true; script.onload = () => resolve(); document.body.appendChild(script); } }); } return (
); } ``` Please replace `{{mysubdomain}}` in the above code with the subdomain you created on [Gumlet](https://www.gumlet.com/). Please also replace `{{example.com}}` with the domain from which images are currently being served. ## Step 3: Call the `loadGumletScript` function in the components `useEffect` hook and change the src attribute of the IMG tag to data-src ```javascript function App() { const loadGumletScript = () => { return new Promise(function (resolve, reject){ // Checks if the script is already loaded on the page if(document.querySelector("script#gumlet-sdk-script")){ resolve(); }else { window.GUMLET_CONFIG = { hosts: [{ current: "{{example.com}}", gumlet: "{{mysubdomain}}.gumlet.io" }], lazy_load: true }; // Loads the script and appends it on the page const script = document.createElement("script"); script.src = "https://cdn.jsdelivr.net/npm/gumlet.js@2.1/dist/gumlet.min.js"; script.id = "gumlet-sdk-script"; script.sync = true; script.onload = () => resolve(); document.body.appendChild(script); } }); } useEffect(() => { loadGumletScript(); }); return (
); } ``` Gumlet is live now! This is all that was needed to deliver responsive images to your users. ## Full code example ```javascript App.js import React, { useEffect } from "react"; import './App.css'; function App() { const loadGumletScript = () => { return new Promise(function (resolve, reject){ // Checks if the script is already loaded on the page if(document.querySelector("script#gumlet-sdk-script")){ resolve(); }else { window.GUMLET_CONFIG = { hosts: [{ current: "{{example.com}}", gumlet: "{{mysubdomain}}.gumlet.io" }], lazy_load: true }; // Loads the script and appends it on the page const script = document.createElement("script"); script.src = "https://cdn.jsdelivr.net/npm/gumlet.js@2.1/dist/gumlet.min.js"; script.id = "gumlet-sdk-script"; script.sync = true; script.onload = () => resolve(); document.body.appendChild(script); } }); } useEffect(() => { loadGumletScript(); }); return (
); } export default App; ``` # React Native Here are the steps to integrate Gumlet Service with React Native To keep the scope of this document limited and simple, we expect you to have a React Native development environment set up and a basic application running. We will be making changes to the App.js file directly ## Create a GumletScaledImage component This component can be used anywhere in the app for remote images which Gumlet can serve. You can go ahead and copy this code at `./components/GumletImage.js` or a location of your choice. ```javascript ./components/GumletImage.js import React, { useState, useMemo } from "react"; import { Image, StyleSheet } from "react-native"; import {PixelRatio} from 'react-native'; import PropTypes from "prop-types"; function extractHostname(url) { var hostname; //find & remove protocol (http, ftp, etc.) and get hostname if (url.indexOf("//") > -1) { hostname = url.split('/')[2]; } else { hostname = url.split('/')[0]; } //find & remove port number hostname = hostname.split(':')[0]; //find & remove "?" hostname = hostname.split('?')[0]; return hostname; } function GumletScaledImage({ style, source, ...restProps }) { const flattenedStyles = useMemo(() => StyleSheet.flatten(style), [style]); if ( typeof flattenedStyles.width !== "number" && typeof flattenedStyles.height !== "number" ) { throw new Error("GumletScaledImage requires either width or height"); } const [size, setSize] = useState({ width: flattenedStyles.width, height: flattenedStyles.height, }); let gumletConfig = { hosts: [{ current: "{{example.com}}", gumlet: "{{mysubdomain}}.gumlet.io" }] } let matchedHost = gumletConfig.hosts.find(o => o.current === extractHostname(source.uri)); let gumletSourceURL = source.uri.replace(matchedHost.current, matchedHost.gumlet); if (gumletSourceURL.indexOf("?") !== -1) { gumletSourceURL += ("&width="+flattenedStyles.width)+("&dpr="+parseInt(PixelRatio.get())) }else{ gumletSourceURL += ("?width="+flattenedStyles.width)+("&dpr="+parseInt(PixelRatio.get())) } return ; } GumletScaledImage.propTypes = { source: PropTypes.object.isRequired, style: PropTypes.object }; GumletScaledImage.defaultProps = { style: {} }; export default GumletScaledImage; ``` Please replace `{{mysubdomain}}` in the above code with the subdomain you created on [Gumlet](https://www.gumlet.com/). Please also replace `{{example.com}}` with the domain from which images are currently being served. ## Import this component and replace your existing `` components ```javascript App.js /** * Sample React Native App * https://github.com/facebook/react-native * * @format * @flow strict-local */ import React from 'react'; import type {Node} from 'react'; import { StyleSheet, View, } from 'react-native'; // Import the component created in the previous step. import GumletScaledImage from "./components/GumletImage"; const App: () => Node = () => { return ( ); }; const styles = StyleSheet.create({ container: { paddingTop: 50, }, }); export default App; ``` Gumlet is live now! This is all that was needed to deliver responsive images to your users. # Shopify How does Gumlet Shopify Extension works. Shopify is an e-commerce platform that has gained significant traction in recent years, thanks to its comprehensive feature set, ease of use, and affordable pricing for starting an e-commerce store. Integrating Gumlet on the Shopify store improves image quality and delivery speed. Here are the steps to optimize images on your Shopify website. ## Step 1: Configure Shopify origin on Gumlet Go to [Create Source](https://dash.gumlet.com/image/getting-started) on Gumlet dashboard and select `Web Folder` as the source type. You need to add `Base URL` in the input. In Shopify, this is your CDN base URL, i.e. `https://cdn.shopify.com` or `https://cdn2.shopify.com`. You can check this under the network panel tab in Chrome, shown in the screenshot below: ![](/12ccd909c58f-shopify-01.webp) Please add it to the Gumlet dashboard `Base URL` field. ![](/38c7cffffae5-shopify-02.webp) ## Step 2: Verify Source Please add any Shopify URL in the next screen and click on the button `Verify Setup`. If everything is fine, it will show that the source is successfully set up. ![](/47e9d1ef4557-shopify-03.webp) ## Step 3: Create settings\_schema.json If the above image is displayed correctly, we can now make the necessary changes in our Shopify settings and theme files to switch the image delivery and optimization to Gumlet. From your Shopify admin, click "Online Store"> "Themes". Find the theme you want to edit, click the `...` button, and then click Edit HTML/CSS. Under Config, click `settings_schema.json` and copy the code below as the last section of the config file and hit save. ```json settings_schema.json { "name": "Gumlet", "settings": [ { "type": "paragraph", "content": "Check out Gumlet's [Gumlet.com and Shopify integration](https://docs.gumlet.com/image/integration-guides/shopify) to learn more about this." }, { "type": "checkbox", "id": "enableGumlet", "label": "Enable Gumlet" }, { "type": "text", "id": "gumletUrl", "label": "Gumlet url endpoint", "info":"The source domain you set within Gumlet. Example: `https://example.gumlet.io/`." }, { "type": "text", "id": "gumletShopifyCdnUrl", "label": "Shopify CDN domain", "info":"Do not change this unless you have a proxy in place. Not sure? Leave it as is." } ] } ``` ## Step 4: Create gumlet.liquid file Create a new file `gumlet.liquid` under the Snippets directory. Please copy the code below into that file, and save it ```liquid gumlet.liquid {% capture GUMLET %} {% comment %} {% endcomment %} {% if settings.enableGumlet %} {% for i in (1..1) %} {% comment %} {% endcomment %} {% unless src or settings.gumletUrl != blank %} {{ src }} {% break %} {% endunless %} {% comment %} {% endcomment %} {% assign cdnUrl = settings.gumletShopifyCdnUrl | strip %} {% unless src contains cdnUrl %} {{ src }} {% break %} {% endunless %} {% assign gumletUrl = settings.gumletUrl | strip %} {% comment %} {% endcomment %} {% assign filters = 'bri,con,cs,exp,gam,high,hue,invert,sat,shad,sharp,usm,usmrad,vib,auto,bg,blend,bm,ba,balph,bp,bw,bh,bf,bc,bs,bx,by,border,pad,faceindex,facepad,faces,ch,chromasub,colorquant,dl,dpi,fm,lossless,q,mask,nr,nrs,colors,palette,prefix,dpr,flip,or,rot,crop,fit,h,rect,w,blur,htn,mono,px,sepia,txt,txtalign,txtclip,txtclr,txtfit,txtfont,txtline,txtlineclr,txtpad,txtshad,txtsize,txtwidth,trim,trimcolor,trimmd,trimpad,trimsd,trimtol,mark,markalign,markalpha,markbase,markfit,markh,markpad,markscale,markw,markx,marky' | split:',' %} {% comment %} {% endcomment %} {% assign imgWithQuerystring = "?" %} {% if src contains '?' %} {% assign imgWithQuerystring = '' %} {% endif %} {% for _filter in filters %} {% if [_filter] %} {% assign imgWithQuerystring = imgWithQuerystring | append:_filter | append:'=' | append:[_filter] | append:'&' %} {% endif %} {% endfor %} {% assign modifySrc = src | split:'?' | first | append: "?" %} {% assign newSrc = modifySrc | strip | replace:cdnUrl,gumletUrl | append:imgWithQuerystring %} {% endfor %} {{ newSrc | default:src }} {% else %} {{ src }} {% endif %} {% endcapture %}{{ GUMLET | strip | replace:'  ' | strip_newlines }} ``` ## Step 5: Enable Gumlet Navigate to Online store \_right: Themes \_right: Customize theme. In the sidebar, under general settings, open Gumlet and enable it. Fill out the two fields below: * Default URL endpoint - It should be `https://example.gumlet.io` * Shopify CDN domain - Its value should be `//cdn2.shopify.com` or `//cdn.shopify.com` Hit the `Save` button. ## Step 6: Edit theme files Now we get to editing your theme files. We first need to identify the files responsible for the image output on your store and begin editing them. Backup your theme files Before making changes in these files, it is recommended that you download and save them securely to be able to restore it later, in case of error. The exact process will vary depending on your theme, but the basics will be the same. Find places in your theme where existing images are being output, and replace them with the Gumlet Liquid tag you created. Here's an example: Before: ```plaintext {{ product.featured_image }} ``` After: ```plaintext {% assign feat_img_url = product.featured_image | image_url %} {% render 'gumlet', src:feat_img_url w:600 %} ``` Here's another example of using Gumlet to build a responsive image using `srcset` and `sizes`: ```plaintext {% assign feat_img_url = product.featured_image | image_url %} {{ media.preview_image.alt | escape }} ``` ## FAQs ### Can I disable Gumlet with a single click? Yes, you can enable and disable Gumlet in your Shopify store with a single click. Navigate to Online store \_right: Themes \_right: Customize theme. In the sidebar, under general settings, open Gumlet and enable/disable it. ### Can Gumlet automatically detect the right image dimension and load it? Yes, we will automatically detect the right parameters for image size and apply them. It will make sure that Gumlet delivers optimum-sized images to your end users. # Astro.js Optimize Astro.js website with Gumlet image optimisation ## Gumlet Image Integration for Astro.js Easily optimize and deliver images in your Astro app using Gumlet’s CDN and JS SDK. This guide explains setup, usage, and advanced options in a reusable component format. --- ### Installation & Setup 1. **Create a Gumlet Astro Component** Create `src/components/GumletImage.astro`: ```javascript --- // GumletImage.astro const { src, alt = "", style = "", ...rest } = Astro.props; --- {alt} ``` 2. **Load Gumlet JS and Configure in Global Layout** Add to your main layout (e.g., `src/layouts/BaseLayout.astro`): ```html ``` **Replace** `"example.com"` and `"mysubdomain.gumlet.io"` with your actual domain and Gumlet subdomain. --- ### Usage Import and use the Gumlet image component in your Astro pages: ```javascript --- import GumletImage from '../components/GumletImage.astro'; --- ``` * Use `data-src` instead of `src` for automatic Gumlet processing. * Works with lazy loading and responsive images. --- ### Image Transformations Pass additional Gumlet parameters inside `src` URL: ```javascript ``` See [Gumlet API Docs](/image/image-transform-api/image-transform-size) for available options. --- ### Advanced * Use any HTML `img` attribute as a prop. * SSR support: Output is standard HTML `` tags. * For Astro static builds, images remain optimized via Gumlet CDN. --- ### Example ```javascript ``` --- ### Troubleshooting * Double-check your Gumlet source/domain config. * Always use `data-src` (not `src`). * Gumlet JS must load before images are rendered. --- updatedAt: 2025-11-25T05:15:32.000Z --- # Craft CMS Transform Image URLs in Craft CMS using Gumlet image plugin Transform your Craft CMS images using Gumlet's powerful image transformation service. This plugin provides seamless integration, replacing Craft's native image transforms with Gumlet's on-the-fly image processing, giving you access to advanced image optimization and transformation features. ### Requirements * Craft CMS 4.0.0 or later * PHP 8.0.2 or later * A Gumlet account and domain ### Installation Craft CMS Plugin Marketplace: 1. Install the plugin via Composer: ```shell composer require gumlet/craft-gumlet-imagetransformer ``` 2. Install the plugin in Craft CMS: ```shell php craft plugin/install gumlet-imagetransformer ``` 3. Copy the config file: ```shell cp vendor/gumlet/craft-gumlet-imagetransformer/src/config.php config/gumlet-imagetransformer.php ``` 4. Update your `config/gumlet-imagetransformer.php` with your Gumlet domain: ```php return [ 'gumletDomain' => 'your-domain.gumlet.io', 'enabled' => true, 'defaultQuality' => 80, 'defaultFormat' => 'auto', ]; ``` ### Usage #### Method 1: Twig Function (Recommended) The easiest way to generate Gumlet URLs: ```html Twig {# Basic usage #} {{ asset.title }} {# With additional Gumlet parameters #} {{ asset.title }} {# With quality and format #} {{ asset.title }} ``` #### Method 2: Service Method Use the Gumlet service directly: ```html Twig {# Basic usage #} {{ asset.title }} {# With Gumlet-specific parameters #} {{ asset.title }} ``` --- updatedAt: 2026-01-08T16:07:37.000Z --- # Integration Guides Steps to integrate Gumlet image optimization product with different platforms. These guides describe steps to integrate Gumlet with your apps or website, depending on the platform that you are using. We have listed the most popular platforms, but if you find your own integration is not available, please feel free to ping us on our support chat. * [JavaScript (Gumlet.js)](/image/integration-guides/image-integration-javascript-gumletjs) * [Android and iOS apps](/image/integration-guides/image-integration-ios-and-android-apps) * [Next.js](/image/integration-guides/image-integration-nextjs) * [Magento](/image/integration-guides/image-integration-magento) * [WordPress](/image/integration-guides/image-integration-wordpress) * [React](/image/integration-guides/reactjs) * [React Native](/image/integration-guides/react-native) * [Nuxt](/image/integration-guides/nuxt) * [Shopify](/image/integration-guides/shopify) * [Astro.js](/image/integration-guides/astrojs) --- updatedAt: 2025-07-28T08:57:48.000Z --- # Usage Analytics Get real-time usage statistics for image optimisation and The [Usage Analytics](https://dash.gumlet.com/image/analytics) section shows account-wide or source-wise usage statistics. All Gumlet usage is calculated on a single metric: bandwidth used. Get a detailed breakdown of bandwidth used, bandwidth saved, total requests, and transformations. In the top-right corner, you can find the selection for source and the month for which the usage is displayed. ### Aggregated Stats This section shows aggregated stats for the entire month. ![Aggregated monthly usage stats](images/usage-analytics-for-images-01.webp) ### Usage These charts show daily bandwidth usage and total requests. ![](images/usage-analytics-for-images-02.webp) ### Transformations Learn more about image transformation-related stats. #### Transform Response Time For every transformation request, the time is taken to fetch and process the request. The lower the time, the faster the transformation. #### Origin Hit Ratio The number of requests that successfully hit the origin cache server is divided by total requests (hit + miss). The higher the hit ratio, the lower the hit on the source server. #### Bandwidth saved The better the optimization, the more the bandwidth is saved. ![](images/usage-analytics-for-images-03.webp) ### CDN The important metrics to find the efficacy of a CDN are faster response time, higher 2xx and lower 5xx errors. ![](images/usage-analytics-for-images-04.webp) #### Status 2xx The requests that are successfully processed by CDN. #### CDN Response Time The time taken by CDN to respond to the asset request. #### Status 4xx The requests that failed because it was a `Bad request`, or `Resource doesn't exist`, or `Resource is not accessible` and more. #### Status 5xx The CDN was not able to process the request due to server errors. This should be the minimum for the best experience. ### Distribution Stats ![](images/usage-analytics-for-images-05.webp) #### Top Assets Get access to top assets on Gumlet. You can view up to 100 top assets and find the popular media across sources. This will enable you to improve your video content and production quality for a significant audience. You can also download the list in a CSV file. #### Source-wise Consumption The source distribution of bandwidth in your account. *Note: These stats are available to users on paid plans only.* --- updatedAt: 2025-07-28T08:59:10.000Z --- # Reports Get notified about your usage on daily, weekly, monthly basis Make your life easier with reports from Gumlet about the bandwidth, CDN metrics, and total requests. ![](images/reports-for-images.webp) You can schedule reports for your account or at a source level for different metrics. Also, you can send the notifications to multiple email IDs. ### Coming Soon We will improve the notifications by delivering them on additional channels such as Slack, Webhook, and more. *Note: The reports are available to paid users only.* --- updatedAt: 2025-07-28T08:59:54.000Z --- # Alerts Set up alerts for proactive alerts on usage metrics Select a metric, add a condition, and specify a duration to check. If the condition is met, you will receive a notification. ![](images/alerts-for-images.webp) **How to Set Up an Alert?** * Select a metric, for example, Bandwidth (GBs) > 100 GB in the last hour * It will check usage over the last hour and notify you if the conditions are met. * Also, choose the source(s). The default is `All Sources`, all assets across sources in your account. *Note: The alerts are available to paid users only.* --- updatedAt: 2025-04-08T17:39:46.000Z --- # How Gumlet Works Gumlet service sits between your users and your image storage. It automatically keeps delivering the most optimized images to end-users. ![](images/image-how-it-works.svg) Gumlet service includes origin cache, image resize and optimization service, processed cache, and CloudFront Global CDN. You may choose any storage for your original image. You always retain control over your original master images. This also helps you stay away from any vendor lock-in. Gumlet fetches images from the specified storage, manipulates them in real-time, and delivers them. All parameters for image manipulation are supplied as query string parameters. The URL can be used anywhere, including in `` tag. ```html ``` Gumlet is designed to be fast. Our server-side processing algorithms use native C++ code and GPUs for the best image processing speed. We have image-processing servers in San Francisco, Frankfurt, and Singapore, Bangalore. This means your images are processed in a facility near your users. This and our global CDN ensure users get the fastest image delivery. --- updatedAt: 2026-03-10T07:56:20.000Z --- # Cache Infrastructure Details about how your images are cached by Gumlet We have created a multi-level caching infrastructure to ensure that images are delivered as fast as possible. This also minimizes the cost of fetching the image from the origin and processing it again. ## Origin Cache As the name suggests, this cache keeps original images cached. There is no additional cost for this cache and it's always enabled for everyone using Gumlet. #### Type This cache is an LRU cache with an eviction time of 90 days. It means that if the file was not used in the last 90 days for any transformations, we will delete the file from our cache. #### Behaviour Origin cache respects all the `Cache-Control`, `ETag` and `Last-Modified` headers from your origin server. It re-validates the cache in case it's expired using the appropriate `If-Modified-Since` and `If-None-Match` headers. #### Advantages This cache ensures that Gumlet does not frequently access origin server. Even when the re-validation is done, appropriate headers are sent to ensure that minimal data transfer is done. It helps minimise the cost of accessing origins especially for Amazon S3 which charges users based on number of requests and per GB data transferred. ## Processed Cache All processed images are cached by us to ensure that any repeat request for the same image is served as fast as possible without any delays. There is no additional cost for this cache and it's always enabled for everyone using Gumlet. #### Type This cache expiration time is 6 months. Any processed file is cached for that duration and then evicted. **Behaviour** This cache works the same way a reverse proxy like NGINX would perform the cache. It respects all HTTP cache headers. **Advantages** CDNs generally don't keep each file cached for the duration specified in cache-control headers. They generally evict the caches based on the LRU mechanism. It results in cache hit ratios lower than 100%. We typically see the cache hit ratios of about 90%. This means that even if the image was already processed, CDNs will evict 10% of the cache due to infrequent access. Our processed cache infrastructure keeps all those images cached so that requests made by clients are served super fast. ## CDN Cache Our CDN provider CloudFront also performs cache on their end. The cache performed by them is according to the s-maxage parameter provided in the Cache-Control header. We currently set it at 180 days. CloudFront decides cache behavior and eviction policy for this cache. --- updatedAt: 2026-01-13T09:39:21.000Z --- # Purge Cache Purge cache to deliver the latest content on the cloud ## Purge Cache There might be instances when you want to purge the cache for specific images. Our cache purging functionality helps you purge all 3 levels of the cache described above. You can purge the cache either via the dashboard or via API. ### Dashboard You can visit the [Purge Cache](https://dash.gumlet.com/image/cache) tab on the Gumlet dashboard. Please select the appropriate source for which the cache needs to be purged and then click enter an image URL for which you need to purge the cache. ![](images/purge-cache.webp) ### API Our cache purge API can be used to clear cache programmatically. The documentation for the same can be [found here](/reference/tag/image-sources/post/purge/subdomain). ### Purge cache for the entire source The cache purging for the entire workspace is an expensive process to execute. However, it's available to users based on their plan, if you are a business plan or enterprise plan user. To purge the cache in bulk, use the API available [here](/reference/tag/image-sources/post/purge/subdomain). # Cloudinary to Gumlet Easy and quick migration from Cloudinary to Gumlet. ## Overview Gumlet made it easier for Cloudinary users to migrate to Gumlet. We introduced the path style parameter for Cloudinary users. This means we support `f_auto,q_auto:best,w_1200` style parameters in our Gumlet URLs too. We support most parameters provided by Cloudinary. ### Using Cloudinary Backup Bucket If you store assets in Cloudinary's Media Library, you can refer to [their documentation](https://cloudinary.com/documentation/backups_and_version_management#using_your_own_backup_storage) and enable backup to your own AWS S3 bucket or Google Cloud Storage. Once this is turned on, all newly uploaded assets will automatically get added to this backup bucket. You must perform a one-time backup for your older assets to this bucket. Once the backup is created, you can connect it using the [Object Storage](/video/upload-videos/cloud-storage) documentation in Gumlet. ### Using a cloud storage Suppose you use an object storage like AWS S3 with Cloudinary. In that case, you can connect it like a standard cloud storage bucket to Gumlet using one of the integrations available [here](/video/upload-videos/cloud-storage). ### Using Gumlet Direct Integration 1. [Signup](https://www.gumlet.com/signup) to Gumlet if you don't have a Gumlet account. 2. Create a Cloudinary source by providing a cloud name. 3. Once the source is created, update the hostname from your end. Contact us! If you have any Cloudinary parameter not working then please write us to **** and we will look into it. _Note: If you want to move from Cloudinary storage to Object Storage and keep using the same path-style parameters, contact customer support to get the configuration on your source._ # Imgix to Gumlet Easy and quick migration from Imgix to Gumlet. Gumlet supports the majority of important imgix parameters. Any parameter having an invalid value will be discarded and will not have any effect on output. Below is the list of imgix parameters that Gumlet can support. ### Supported Parameters * compress * enhance * fm (format) * q (quality) * dpr * con (contrast) * bri (brightness) * gam (gamma) * hue * invert * sat (saturation) * sharp * pad * chromasub * cs (colorspace) * page * ar (aspect ratio) * crop * h (height) * w (width) * rect * fit * blur * trim * txt * txt-align * txt-color * txt-font * txt-size * txt-pad * txt-lead If you are using a parameter that is not available on this list, please contact us at We will be happy to add it for you! ### What do I need to do for this migration? 1. Please check the above list ensuring that you are not using any Imgix parameters outside the list. 2. [Signup](https://www.gumlet.com/signup?utm_source=docs\&utm_medium=imgix-to-gumlet) to Gumlet if you don't have a Gumlet account. 3. Click on "Sources" in the Images section on the left menu. Click on '+ Create New Source' and select 'Imgix'. 4. Provide your source details. Refer to our [Original Media Storage](/image/manage-sources/original-image-storage) guide to check more on storage backends. 5. Once done, update the Imgix hostname from your end with the newly created Gumlet hostname. # Imagekit to Gumlet Quick migration from Imagekit to Gumlet. Gumlet supports the majority of important Imagekit parameters. Any parameter with an invalid value will be discarded and will not change output. Below is the list of Imagekit parameters that Gumlet can support. The parameters used in query parameters are supported in Gumlet with minor changes. ### Supported Parameters * h (height) * w (width) * ar (aspect ratio) * pad * fo * fo-auto * fo-face * c-at\_max\_enlarge * c-at\_max * cm-extract * cm-pad\_extract * dpr * tr=l-image * tr=l-text * e-contrast * e-sharpen * e-gradient * e-grayscale * bl * e-shadow * b * rt * r * bg * o * t * e-usm * format conversion If you are using a parameter that is not available on this list, please contact us at We will be happy to add it for you! ### What do I need to do for this migration? 1. Please check the above list ensuring that you are not using any Imagekit parameters outside the list. 2. [Signup](https://www.gumlet.com/signup?utm_source=docs\&utm_medium=imgix-to-gumlet) to Gumlet if you don't have a Gumlet account. 3. Click on "Sources" in the Images section on the left menu. Click on '+ Create New Source' and select Preferred original media storage. 1. If you are using Imagekit storage, contact us at 4. Provide your source details. Refer to our [Original Media Storage](/image/manage-sources/original-image-storage) guide to check more on storage backends. 5. Once done, update the ImageKit hostname from your end with the newly created Gumlet hostname. 1. If you are using path based parameters for image optimization, contact us at --- updatedAt: 2025-04-08T17:39:49.000Z --- # Migration Guides Details on how to migrate to Gumlet These guides show how you can easily migrate to Gumlet from other services. Here are the services that are supported: * [Cloudinary to Gumlet](/image/migration-guides/cloudinary-to-gumlet) * [Imgix to Gumlet](/image/migration-guides/imgix-to-gumlet) * [Imagekit to Gumlet](/image/migration-guides/imagekit-to-gumlet) --- updatedAt: 2026-07-31T11:42:40.000Z --- # Size The size parameters allow you to control all aspects of resizing, cropping, and the fit-to-crop behaviour of your image. ## width (w) This parameter sets the width of the output image. `w` is an alias for this parameter. If this parameter is omitted and the `height` parameter is set, the output width is set automatically such that the aspect ratio is preserved. If both `height` and `width` parameters are set, the output image dimensions are set as per the mode parameter. If none of the `height` and `width` parameters are set, the original aspect ratio is preserved, and output dimensions depend on parameters like scale if provided. The maximum value is 8192, and any output that exceeds this width will be scaled down to this value. | width=250 | Original | | :------------------------------------------------------------: | :------------------------------------------------------: | | | | ## height (h) This parameter sets the height of the output image. `h` is an alias for this parameter. If this parameter is omitted, and the `width` parameter is set, the output height is set automatically such that aspect ratio is preserved. If both `height` and `width` parameters are set, the output image dimensions are set as per mode setting. If none of the `height` and `width` parameters are set, the original aspect ratio is preserved, and output dimensions depend on parameters like scale if provided. Maximum value for this is 8192, and any output which has more than this height will be scaled down to this value. | height=250 | Original | | :-------------------------------------------------------------: | :-------------------------------------------------------: | | | | ## dpr Specifies device pixel ratio. Valid values are between `1.0` and `3.0` and floating point numbers are valid parameters. This acts as a multiplier to both width and height. `width=200&height=300&dpr=2` is equivalent to `width=400&height=600`. This makes it easy to specify an image with the correct resolution when using `srcset` attribute of `` tag. ## enlarge This boolean parameter specifies whether the output image should be enlarged if input image dimensions are smaller than required dimensions. For example, if input image width is `800px` wide and `width=1000` is specified, the output image will still remain `800px`. If `enlarge=true` is set, then only the output image will have `1000px width`. Default value of this parameter is `false` if `mode` is `crop` or `stretch` and `true` otherwise. You can't override the default `false` if `mode` is set to `crop` or `stretch` ## mode Specifies the resize behavior when width or height parameters are provided. * **fit**: Resize to fit within boundaries specified by `width` and `height` parameters. If the ratio given differs from the original aspect ratio, only one dimension will be set as per the given value, and the other dimension will be smaller such that the original aspect ratio is maintained. * **crop**: The entire defined area is filled, maintaining aspect ratio, but it might crop part of the image. The type of cropping is determined by the crop parameter. * **stretch**: Resize to fill the area defined by height and width. It might not preserve aspect ratio, and the image might be distorted. * **min**: Preserving aspect ratio, resize the image to be as small as possible while ensuring its dimensions are greater than or equal to the `width` and `height` specified. * **max**: Preserving aspect ratio, resize the image to be as large as possible while ensuring its dimensions are less than or equal to the `width` and `height` specified. * **fill**: Preserving aspect ratio, resize the image to the maximum `width` or `height` specified, then embed on a background of the exact width and height as the original image. You can fill excess space with [fill](#fill) parameter. * **fillmax**: Resize the image by preserving the aspect ratio and without stretching the original image. If the requested width or height exceeds the original, it will fill the space with a solid color or blurred version of the image, based on [fill](#fill) parameter value. Default mode is `fit`. | mode=fit | mode=crop | mode=stretch | | :---------------------------------------------------------------------------------- | :----------------------------------------------------------------------------------- | :-------------------------------------------------------------------------------------- | | ![](https://demo.gumlet.io/lemon.jpeg?mode=fit&width=400&height=400&format=auto) | ![](https://demo.gumlet.io/lemon.jpeg?mode=crop&width=400&height=400&format=auto) | ![](https://demo.gumlet.io/lemon.jpeg?mode=stretch&width=400&height=400&format=auto) | ## fill This parameter specifies how to fill the extra space created by `mode=fill`. * `solid` Fills excess space with solid color specified by parameter `fill-color`. If `fill-color` is not specified, then the excess space will be filled with `white`. * `blur` Fills excess space with the blurred original image. * `background` Fills excess space with the top-left corner color. Default value of this parameter is `solid`. | mode=fill&fill=background | mode=fill&fill=solid&fill-color=c0c0c0 | mode=fill&fill=blur | | :---------------------------------------------------------------------------------------------------- | :------------------------------------------------------------------------------------------------------------------ | :---------------------------------------------------------------------------------------------- | | ![](https://demo.gumlet.io/lemon.jpeg?mode=fill&fill=background&width=500&height=500&format=auto) | ![](https://demo.gumlet.io/lemon.jpeg?mode=fill&fill=solid&width=500&height=500&fill-color=c0c0c0&format=auto) | ![](https://demo.gumlet.io/lemon.jpeg?mode=fill&fill=blur&width=500&height=500&format=auto) | ### fill=blur options With fill=blur, you can adjust the blur intensity. The value ranges from 1 to 100. | mode=fill&fill=blur&fill-blur=10 | mode=fill&fill=blur&fill-blur=100 | | :------------------------------------------------------------------------------------------------------------ | :------------------------------------------------------------------------------------------------------------- | | ![](https://demo.gumlet.io/lemon.jpeg?mode=fill&fill=blur&width=500&height=500&format=auto&fill-blur=10) | ![](https://demo.gumlet.io/lemon.jpeg?mode=fill&fill=blur&width=500&height=500&format=auto&fill-blur=100) | ## crop Allows you to define crop position when using `crop` as mode parameter. Valid values are `entropy`, `smart`, `top`, `topleft`, `left`, `bottomleft`, `bottom`, `bottomright`, `right`, `topright` , `faces`, `center` and `focalpoint`. While other modes are self-explanatory, let us first describe some special crop modes. * **faces:** detects all faces in an image and tries to keep them centered in the cropped image. | mode=crop&crop=faces | original | | :------------------------------------------------------------------------------------------------------- | :--------------------------------------------------------- | | ![](https://assets.gumlet.io/assets/human.jpg?mode=crop&crop=faces&width=300&height=300&format=auto) | ![](https://assets.gumlet.io/assets/human.jpg?format=auto) | * **entropy**: focuses on the region with the highest [Shanon entropy](https://en.wikipedia.org/wiki/Entropy_%28information_theory%29). * **smart**: focus on the region with the highest luminance frequency and skin tones. Gumlet automatically finds a person or other objects in the image and keeps them in the center while cropping. * **focalpoint**: focus on the point given by you. It allows you to define the point of focus by `fp-x` and `fp-y`. You can also define zoom using `fp-z`. `fp-x` and `fp-y` must be a float value between `0.0` to `1.0` and the default value will be `0.5`. `fp-z` can be in the range of `1` to `10` and the default value is `1`. Default mode if no parameter is provided is `center`. | mode=crop | mode=crop&crop=smart | mode=crop&crop=focalpoint | | :---------------------------------------------------------------------------------------- | :---------------------------------------------------------------------------------------------------- | :----------------------------------------------------------------------------------------------------------------------------- | | ![](https://demo.gumlet.io/black-leaf.jpeg?mode=crop&width=400&height=400&format=auto) | ![](https://demo.gumlet.io/black-leaf.jpeg?mode=crop&crop=smart&width=400&height=400&format=auto) | ![](https://demo.gumlet.io/black-leaf.jpeg?mode=crop&crop=focalpoint&fp-x=0.3&fp-y=0.3&width=400&height=400&format=auto) | ## mask It masks the image as per the given input. Current supported mask shapes are `ellipse` and `corners`. * **ellipse:** Mask image into ellipse shape. When the masked image is output as a PNG, the masked area will be transparent; otherwise, it will be the default background. To get the circle shape with mask, the output image must have the same width and height; otherwise, it will be oval. * **corners:** Mask corners of the image are rounded. One can control it using the `rpixels` parameter by providing a pixel value that needs to be rounded. | mask=ellipse | mask=corners | original | | :---------------------------------------------------------------------------------- | :-------------------------------------------------------------------------------- | :------------------------------------------------------ | | ![](https://demo.gumlet.io/black-leaf.jpeg?format=auto&mask=ellipse&w=400&h=400) | ![](https://demo.gumlet.io/black-leaf.jpeg?format=auto&mask=corners&rpixels=50) | ![](https://demo.gumlet.io/black-leaf.jpeg?format=auto) | ## extract (rect) Extract a region from the image. `rect` is an alias for this parameter. This operation is always applied **before** `resize` operation. Please give the parameters according to the original image. The value should be provided as a comma-separated list `left,top,width,height`. * `left` is a zero-indexed offset from the left edge * `top` is a zero-indexed offset from the top edge * `width` of the extracted image * `height` of extracted image | extract=0,0,300,300 | extract=300,300,200,200 | original | | :--------------------------------------------------------------------- | :------------------------------------------------------------------------- | :------------------------------------------------ | | ![](https://demo.gumlet.io/fall.jpeg?extract=0,0,300,300&format=auto) | ![](https://demo.gumlet.io/fall.jpeg?extract=300,300,200,200&format=auto) | ![](https://demo.gumlet.io/fall.jpeg?format=auto) | ## aspect ratio (ar) Resize and crop the image to the given aspect ratio. This parameter will work only with `mode=crop`. `ar` is proportional representation between width and height. E.g. `ar=3:4&mode=crop` will crop the image in an aspect ratio of 3:4. You can add one dimension (height or width) along with `ar` , and the other dimension will be automatically calculated based on the aspect ratio. `height=400&ar=3:4&mode=crop` Here, width 300 will be automatically calculated. | height=400&ar=3:4&mode=crop | ar=1:1&mode=crop&crop=smart | original | | :-------------------------------------------------------------------- | :-------------------------------------------------------------------- | :-------------------------------------- | | ![](https://demo.gumlet.io/flower.jpeg?height=400&ar=3:4&mode=crop) | ![](https://demo.gumlet.io/flower.jpeg?ar=1:1&mode=crop&crop=smart) | ![](https://demo.gumlet.io/flower.jpeg) | ## pad Pads/Extends the edges of the image with the color provided by the `background` parameter. The value should either be an integer, which adds padding of the same number of pixels to all edges, or it should be a comma-separated list of 4 integers as `top,right,bottom,left`. E.g. `pad=40,20,40,30` will add `40px` padding on top, `20px` on right, `40px` on bottom and `30px` on left. If you want to add the same padding to all sides, you can provide just one number like `pad=40` and it will add `40px` on all sides. Please note this operation will add additional pixels and hence increase height and width of image. This operation is applied **after** `resize`. Please provide padding parameters accordingly. | pad=30,30,30,30&bg=b03e5c | original | | :---------------------------------------------------------------------------- | :------------------------------------------------ | | ![](https://demo.gumlet.io/leaf.jpeg?bg=b03e5c&pad=30,30,30,30&format=auto) | ![](https://demo.gumlet.io/leaf.jpeg?format=auto) | ## trim Trim "boring" pixels from all edges that contain values within a percentage similarity of the top-left pixel. The value of this parameter is number between `1` to `99` representing the percentage similarity. This operation is applied **after** `resize`. If you want to match a custom color and not use the top-left pixel, you can pass a hex color code by using `trim-color` parameter. For example `trim=10&trim-color=fafafa`. | trim=50 | original | | | :--------------------------------------------------------------- | :------------------------------------------------------ | :- | | ![](https://demo.gumlet.io/black-leaf.jpeg?trim=50&format=auto) | ![](https://demo.gumlet.io/black-leaf.jpeg?format=auto) | | ## dpi Dots per inch (DPI) specifies how we should convert SVG or PDF files, which are vector images, to raster images like JPEG. The higher the parameter, the bigger the default output sizes will be. Default value is `72`. ### Image Size Parameters Summary | Parameter | Action | Default Value | Range / Allowed Values | | :-------------------- | :----------------------------------------------------------------------------------------------------- | :---------------------------------------------------------- | :---------------------------------------------------------------------------------------------------------------------------------------- | | `width` (`w`) | Sets the width of the output image. | Original aspect ratio width | Max `8192` | | `height` (`h`) | Sets the height of the output image. | Original aspect ratio height | Max `8192` | | `dpr` | Multiplies width and height by the specified device pixel ratio. | `1.0` | `1.0` to `3.0` | | `enlarge` | Controls whether images smaller than requested dimensions can be enlarged. | Mode dependent (`false` for crop/stretch, `true` otherwise) | `true`, `false` | | `mode` | Defines resizing behavior when width and/or height are supplied. | `fit` | `fit`, `crop`, `stretch`, `min`, `max`, `fill`, `fillmax` | | `fill` | Specifies how excess space is filled when `mode=fill` or `mode=fillmax`. | `solid` | `solid`, `blur`, `background` | | `fill-blur` | Sets the intensity of the blur when `fill=blur` is used. | Undefined | `1` to `100` | | `crop` | Defines the cropping position/anchor when `mode=crop`. | `center` | `entropy`, `smart`, `top`, `topleft`, `left`, `bottomleft`, `bottom`, `bottomright`, `right`, `topright`, `faces`, `center`, `focalpoint` | | `mask` | Applies a mask shape to the output image. | N/A | `ellipse`, `corners` | | `extract` (`rect`) | Extracts a specific rectangular region before resizing (`left,top,width,height`). | N/A | Comma-separated integers | | `aspect ratio` (`ar`) | Crops the image to a given ratio (used with `mode=crop`). | N/A | Ratio format (e.g., `16:9`, `1:1`, `3:4`) | | `pad` | Adds padding to image edges using the background color (`top,right,bottom,left` or single value). | N/A | Pixel integer(s) | | `trim` | Trims background pixels matching top-left pixel (or custom `trim-color`) within similarity percentage. | N/A | `1` to `99` | | `dpi` | Sets dots per inch for rasterizing vector formats (SVG, PDF). | `72` | Positive integer | --- updatedAt: 2026-07-31T11:23:59.000Z --- # Formats These parameters allow changing image output formats, adjusting quality, preserving metadata, and configuring format-specific compression settings. ## input size Gumlet supports input images up to 16384x16384 pixels. This limit is available only on Business and Enterprise plans. For the Free plan, the input image size is limited to 6000x6000 pixels. If the input image is bigger than this, Gumlet will not process the image and will only pass it through. For the growth plan, the limit is 8192x8192 pixels. ## input formats Gumlet supports the following input formats: `JPEG`, `JPEG2000`, `PNG`, `WebP`, `JPEG-XL`, `TIFF`, `PDF`, `GIF`, `SVG`, `RAW`, `HEIF`, `AVIF`. If we detect any other input formats, we serve them as-is without modifying the files. ## output formats Gumlet supports image output in the following formats: `JPEG`, `PNG`, `JPEG-XL`, `WebP`, `TIFF`, `GIF`, `SVG`, `RAW`, `AVIF`. Please see `format` parameter below to identify the correct way to request them. ## metadata Controls whether image metadata from the original image should be kept in the output image. If this parameter is set to `true`, all metadata is kept. The default value is `false` , which means all metadata will be removed to ensure the smallest output image size. ## format (fm) Gumlet serves the same image format as the source image after performing operations. If you want to change the output image format, you can use this parameter. You can use `auto`, `jpeg`, `jpg`, `jxl`, `png`, `webp`, `tiff`, `json`, `avif` or `raw`. If the original image has an alpha channel and the output does not support transparency, a `white` background is applied if `background` the parameter is not provided. If you use `format=auto` Gumlet automatically detects the best format according to the user's browser. We have this priority order: `JPEG-XL` → `AVIF` → `WebP` → `JPEG / GIF`. For example, Google Chrome supports `AVIF` as of September 2026 so we will serve that to Google chrome even if original is `JPEG`. Same way, Safari supports `JPEG-XL` so we will serve that instead of `AVIF` or `WebP` or `JPEG`. An exception to this is animated input images. Currently we only support animated GIF to WebP conversion so even if browser supports JPEG-XL or AVIF, animated images will always be served as WebP or GIF. ## json `format=json` will return information about the input image or PDF. **For** **example:** ```json { "format": "jpeg", "size": 68751, "width": 752, "height": 498, "space": "srgb", "channels": 3, "density": 72, "chromaSubsampling": "4:2:0", "isProgressive": true, "hasProfile": false, "hasAlpha": false } ``` If you would like to detect faces along with JSON information, you can pass `faces=true` along with `format=json` and the API will return detected face coordinates with other information. **For example,** if you are using Chrome, all the images above are served as WebP rather than JPEG. You can check it in `content-type` the response header. If you check the total downloaded content in the "Network" tab in Chrome and Firefox, you will see that Chrome uses less bandwidth due to WebP image delivery. ## pdf PDF files can be converted to images using the Gumlet API. You need to use `page` the parameter to extract the specified page from a PDF file. Example: `?page=2` for the 2nd page. If you find the image quality is not great, you can pass the width parameter `w` to increase the quality. For example: `?page=1&width=1000` ## gif We also support processing GIF images. You can apply all operations for GIF input images, and if `format=auto` is provided and the browser supports it, we automatically convert a GIF input to WebP. If you want to force it or all GIF, you can pass `format=webp` for GIF images. | width=200 | original | | | :------------------------------------------------ | :-------------------------------------- | :-- | | ![](https://demo.gumlet.io/avocado.gif?width=200) | ![](https://demo.gumlet.io/avocado.gif) | | ## quality (q) Sets the image's output quality. `q` is an alias for this parameter. Valid values are between `0` and `100` inclusive of them. This parameter only takes effect when using `jpeg` or `webp` as output format Setting this parameter to `100` will produce the highest quality image. The default value is `85`. ## page If the input is a multi-page image like a GIF or animated WebP, or a PDF file, this parameter will extract a page from the input and convert it to the specified output format. ## subsample (chromasub) Enables or disables chroma subsampling. When it's set to `true`, it applies `4:2:0` chroma subsampling. When it's set to `false`, it keeps the chroma subsampling parameter to `4:4:4`. Default value is `false`. ## pngcomp Specifies compression level for PNG output. This parameter should be between `1` and `9`. Default value is `6`. Value of `9` gives best compression but takes a long time to compress. ## progressive Enable/Disable progressive image scan. Default value is `True`. ## lossless This parameter `lossless=true` enables delivery of lossless images in formats that support lossless compression (WebP, AVIF and JPEG-XL). | lossless=true\&format=jxl (3.9 MB) | original (5.15 MB) | | :------------------------------------------------------------ | :------------------------------------------------- | | ![](https://demo.gumlet.io/rock.png?lossless=true&format=jxl) | ![](https://demo.gumlet.io/rock.png?original=true) | ## compress Gumlet automatically converts all JPEG images to [progressive](http://www.faqs.org/faqs/jpeg-faq/part1/section-11.html) images and applies lossless quality optimizations by default. If you set `compress=true`, we further apply lossy optimizations on the image, which can greatly reduce the resultant image size **without perceptual loss of quality**. As illustrated in the example below, most of the time it results in a 30-50% reduction in the resulting image size with almost no loss in quality. This feature only works when output is produced in JPEG or PNG format. Other output formats are already optimised with a perceptually lossless algorithm, and this parameter does not affect them. | compress=true (2.4 MB) | original (3.8 MB) | | :--------------------------------------------------- | :------------------------------------- | | ![](https://demo.gumlet.io/forest.jpg?compress=true) | ![](https://demo.gumlet.io/forest.jpg) | ## dl (Download) When used in a link, `dl` will force the browser to download the image rather than open it in a new window. Set the value to your desired filename. If no value is set, the downloaded image filename will be identical to the original. [Try Image Download](https://demo.gumlet.io/sea.jpeg?w=450&dl=medium.jpg) ### Image Formats Summary | Parameter | Action | Default Value | Range / Allowed Values | | :------------------------ | :--------------------------------------------------------------------------------------- | :-------------- | :------------------------------------------------------------------------- | | `metadata` | Controls whether original image metadata is preserved in the output image. | `false` | `true`, `false` | | `format` (`fm`) | Changes the output image format. | Source format | `auto`, `jpeg`, `jpg`, `jxl`, `png`, `webp`, `tiff`, `json`, `avif`, `raw` | | `quality` (`q`) | Sets output image quality (applies to JPEG and WebP). | `85` | `0` to `100` | | `page` | Extracts a specific page from multi-page files (PDF, GIF, animated WebP). | `1` | Integer page number | | `subsample` (`chromasub`) | Enables (4:2:0) or disables (4:4:4) chroma subsampling. | `false` | `true`, `false` | | `pngcomp` | Sets compression level for PNG output. | `6` | `1` to `9` | | `progressive` | Enables or disables progressive image scanning. | `true` | `true`, `false` | | `lossless` | Enables lossless compression for output formats that support it (WebP, AVIF and JPEG-XL) | `false` | `true`, `false` | | `compress` | Applies lossy quality optimizations to JPEG and PNG outputs. | N/A | `true`, `false` | | `dl` | Forces the browser to download the image, optionally using a custom filename. | Source filename | Any string filename | --- updatedAt: 2026-07-31T11:24:39.000Z --- # Image Operations Apply transformations like rotation, flipping, blur, sharpness, opacity, and color adjustments to optimize image display and quality. ## rotate Rotates the image as per the number of degrees provided as `0`, `90`, `180` or `270` ## flip `flip=v` will vertically flip the image. `flip=h` will horizontally flip the image. `flip=hv` or `flip=vh` will flip both horizontally and vertically. ## blur Applies a Gaussian blur of a given blur radius in float. `blur=2.5` will blur the image by taking a Gaussian blur of 2.5 pixel radius. Valid values are between `0` and `100`. | blur=10 | original | | :----------------------------------------------------------------- | :--------------------------------------------------------- | | ![blur=10](https://demo.gumlet.io/rhino.jpeg?format=auto&blur=10) | ![original](https://demo.gumlet.io/rhino.jpeg?format=auto) | ## threshold Any pixel value greater than or equal to the threshold value will be set to 255, otherwise it will be set to 0. The parameter should be an integer between `0` and `255`. | threshold=100 | original | | :---------------------------------------------------------------------------- | :-------------------------------------------------------- | | ![threshold=100](https://demo.gumlet.io/bird.jpeg?threshold=100&format=auto) | ![original](https://demo.gumlet.io/bird.jpeg?format=auto) | ## opacity (o) You can change image opacity by using this parameter. The value can be between `0` and `100`. `0` being fully transparent and `100` being most opaque. The default value is `undefined` For JPEG output, the image will be put on `white` background as its default value for [background](/image/image-transform-api/color-operations#background-bg) parameter. You can always specify a different value for `background` parameter along with opacity. | opacity=50 | opacity=50&bg=ff0000 | original | | :----------------------------------------------------------- | :--------------------------------------------------------------------------------- | :---------------------------------------------- | | ![opacity=50](https://demo.gumlet.io/flower.jpeg?opacity=50) | ![opacity=50&bg=ff0000](https://demo.gumlet.io/flower.jpeg?opacity=50&bg=ff0000) | ![original](https://demo.gumlet.io/flower.jpeg) | ## gamma (gam) Apply a gamma correction by reducing the encoding (darken) pre-resize at a factor of `1/gamma` then increasing the encoding (brighten) post-resize at a factor of `gamma`. This can improve the perceived brightness of a resized image in non-linear color spaces. JPEG and WebP input images will not benefit from the shrink-on-load performance optimization when applying a gamma correction. Valid value is between `1.0` and `3.0`. Default is `2.2` ## contrast (con) Adjust the contrast of the image. Valid values are between -100 to 100. Default value is `1`. ## sharp Sharpen the image. This operation performs an accurate sharpen of the L channel in the LAB color space. Valid values are between `0` and `100`. | sharp=10 | original | | :------------------------------------------------------------------- | :--------------------------------------------------------- | | ![sharp=10](https://demo.gumlet.io/rhino.jpeg?format=auto&sharp=10) | ![original](https://demo.gumlet.io/rhino.jpeg?format=auto) | ### Summary of Image Operations | Parameter | Action | Default Value | Range / Allowed Values | | :----------------- | :----------------------------------------------------------------------------------- | :------------ | :--------------------------------------------------- | | `rotate` | Rotates the image by specified degrees. | N/A | `0`, `90`, `180`, `270` | | `flip` | Flips the image horizontally, vertically, or both. | N/A | `v` (vertical), `h` (horizontal), `hv` / `vh` (both) | | `blur` | Applies Gaussian blur with a specified pixel radius float. | N/A | `0` to `100` | | `threshold` | Sets pixels greater than or equal to threshold to 255, and others to 0. | N/A | `0` to `255` (Integer) | | `opacity` (`o`) | Adjusts image opacity (0 is fully transparent, 100 is fully opaque). | Undefined | `0` to `100` | | `gamma` (`gam`) | Applies gamma correction to improve perceived brightness in non-linear color spaces. | `2.2` | `1.0` to `3.0` | | `contrast` (`con`) | Adjusts the overall contrast of the image. | `1` | `-100` to `100` | | `sharp` | Sharpens the image (specifically the L channel in LAB color space). | N/A | `0` to `100` | # Image AI Operations Enhance, outpaint, remove backgrounds, and add dynamic shadows to images using AI-powered operations. ### Smart & AI-Based Cropping Gumlet offers AI-powered cropping modes under the `crop` parameter that automatically detects subject matter, human faces, or high-detail regions to ensure the most important parts of your image remain centered when resizing. | Mode | Parameter Example | Description | | ------------------ | ---------------------- | ----------------------------------------------------------------------------------------------------------------------------------- | | **Smart Crop** | `mode=crop&crop=smart` | Automatically identifies people, key objects, and areas of interest using skin tones and luminance frequency to keep them centered. | | **Face Detection** | `mode=crop&crop=faces` | Detects human faces in the image and centers the crop boundary around them. | | mode=crop\&crop=faces | original | | -------------------------------------------------------------------------------------------------------- | ---------------------------------------------------------- | | ![](https://assets.gumlet.io/assets/human.jpg?mode=crop\&crop=faces\&width=300\&height=300\&format=auto) | ![](https://assets.gumlet.io/assets/human.jpg?format=auto) | For standard positional cropping modes (such as `top`, `center`, and `focalpoint`), explore the full set of parameters in the [Size](/image/image-transform-api/image-transform-size#crop) documentation. ## upscale Gumlet uses AI-powered super-resolution to enhance image quality and remove artifacts, upscaling images under 512x512 pixels up to 4x. ![](/f8acff607c1c-image-ai-operations.webp) | upscale=true | original | | ---------------------------------------------------------------- | ----------------------------------------------- | | ![upscale=true](https://demo.gumlet.io/leaves.jpeg?upscale=true) | ![original](https://demo.gumlet.io/leaves.jpeg) | ### The operations below are only available to enterprise plan users. ## remove\_bg Gumlet uses AI to remove the background from a given image and replace it with transparent pixels. | remove\_bg=true | original | | ------------------------------------------------------------------------- | --------------------------------------------------- | | ![remove\_bg=true](https://demo.gumlet.io/skateboard.jpeg?remove_bg=true) | ![original](https://demo.gumlet.io/skateboard.jpeg) | ## add\_shadow Add a drop shadow around an object using `add_shadow=true`. You can control the direction, elevation, and saturation of the light source. * `az`(Azimuth): This represents the angle of the light source. A value of 0 or 360 indicates the light is directly behind the object. The default value is 215, which creates a natural shadow effect. * `el` (Elevation): This refers to the elevation angle of the light source above the ground. The default value is 45. Lowering this value results in a larger, more diffuse shadow. * `st` (Saturation): This controls the intensity of the shadow. Higher values produce a more intense or darker shadow. The default value for the st parameter is 60. **Normal Image** ![Normal Image](https://demo.gumlet.io/skateboard.jpeg?w=400\&remove_bg=true) **Shadow** ![AI Shadow](https://demo.gumlet.io/skateboard.jpeg?w=400\&remove_bg=true\&add_shadow=true) **Custom Shadow** ![AI Custom Shadow](https://demo.gumlet.io/skateboard.jpeg?w=400\&remove_bg=true\&add_shadow=true\&st=60\&az=30\&el=20) ## extend\_bg Gumlet uses AI to extend the image and outpaint the background to match your target width and height, generating seamless content that blends with the original scene. | extend\_bg=true\&width=720\&height=360 | original | | ------------------------------------------------------------------------------------------------------------------ | ---------------------------------------------- | | ![extend\_bg=true\&width=720\&height=360](https://demo.gumlet.io/rhino.jpeg?extend_bg=true\&width=720\&height=360) | ![original](https://demo.gumlet.io/rhino.jpeg) | ## change\_bg Gumlet uses AI to replace the image background, generating seamless content that blends with the original scene. | change\_bg=true\&prompt=eating%20green%20grass | original | | ----------------------------------------------------------------------------------------------------------------------------------------- | ---------------------------------------------- | | ![change\_bg=true\&prompt=eating%20green%20grass](https://demo.gumlet.io/rhino.jpeg?change_bg=true\&prompt=eating%20green%20grass\&v=091) | ![original](https://demo.gumlet.io/rhino.jpeg) | ### Summary of Image AI Operations | Operation | Parameters | Action | Plan | | ------------ | -------------------------------------------------------------------------------------------------------------- | ------------------------------------------------------------------------------------------------------------------ | ---------- | | `crop` | `mode=crop` `crop=smart` `crop=faces` | Uses AI to automatically center crops on key subjects, human faces. | Paid | | `upscale` | `upscale=true` | Upscales images under 512x512 px up to 4x, enhancing quality and removing artifacts using AI. | Paid | | `remove_bg` | `remove_bg=true` | Uses AI to remove the background and replace it with transparent pixels. | Enterprise | | `add_shadow` | `add_shadow=true` `az` (Azimuth, default `215`) `el` (Elevation, default `45`) `st` (Saturation, default `60`) | Adds a drop shadow around an object with customizable light source angle, elevation, and intensity. | Enterprise | | `extend_bg` | `extend_bg=true` `width` `height` | Extends and outpaints the background using AI to match target dimensions while seamlessly blending with the scene. | Enterprise | | `change_bg` | `change_bg=true` `prompt` | Replace the background using AI with a prompt without breaking a sweat. | Enterprise | --- updatedAt: 2025-04-08T17:42:58.000Z --- # Color Operations These parameters allow changing colors of the image. ## colorspace (colourspace)(cs) This parameter changes colorspace of a given image. It's very useful to convert one colorspace to another for example RGB to CMYK. Supported values include `srgb`, `rgb`, `lab`, `cmyk`, `hsv`, `rgb16`, `grey16`, `cmyk`, `labq`, `cmc`, `lch`, `labs` and `b-w`. ## background (bg) Value of this parameter is used when `mode` is set as `fill` or you are converting other image type to `jpeg` or you are padding image with pad parameter. This can be any valid CSS color name like `white` or `yellow`. You can also set RGB hex value like `bg=ff00bb` to set background to `#ff00bb` value. If you don't pass any parameter, default value is `white`. ## brightness (bri) You can change brightness of image with this parameter. Valid values are from `-100` to `100` . Default value `0` means no change in original image brightness. ## saturation (sat) You can change saturation of image with this parameter. Valid values are from `-100` to `100` . Default value `0` means no change in original image saturation. ## hue (hue) You can change hue of image with this parameter. Valid values are from `0` to `360` . Default value `0` means no change in original image hue. ## tint This can be used to set a tint to the image. This can be any valid CSS color name like `white` or `yellow`. You can also set RGB hex value like `tint=ff00bb` to set tint to `#ff00bb` value. If you don't pass any parameter, default behaviour is to not apply any tint. | bri=10 | sat=-50 | hue=90 | tint=blue | | --- | --- | --- | --- | | ![bri=10](https://demo.gumlet.io/lemon.jpeg?bri=10&format=auto) | ![sat=50](https://demo.gumlet.io/lemon.jpeg?sat=-50&format=auto) | ![hue=90](https://demo.gumlet.io/lemon.jpeg?hue=90&format=auto) | ![tint=blue](https://demo.gumlet.io/lemon.jpeg?tint=blue&format=auto) | ## grayscale (greyscale) Convert to 8-bit greyscale; 256 shades of grey. This is a linear operation. If the input image is in a non-linear colour space such as sRGB, use gamma with `greyscale` for the best results. By default the output image will be web-friendly sRGB and contain three (identical) color channel. `greyscale=true` or `grayscale=true` are both valid parameters. | greyscale=true | original | | --- | --- | | ![greyscale=true](https://demo.gumlet.io/lemon.jpeg?greyscale=true&format=auto) | ![original](https://demo.gumlet.io/lemon.jpeg?format=auto) | ## invert Produces negative of image. You can use it as `invert=true` | invert=true | original | | --- | --- | | ![invert=true](https://demo.gumlet.io/flower.jpeg?invert=true&format=auto) | ![original](https://demo.gumlet.io/flower.jpeg?format=auto) | ## enhance Enhance output image contrast by stretching its luminance to cover the full dynamic range. Enable it by setting `enhance=true` ## colors Number of colors to output when using palette API to extract color palettes. Default value of this parameter is `6`. ## palette The `palette` parameter extracts a palette of color values from an image and returns them in the specified format. Palette extraction occurs after image processing, so applying any adjustments and cropping effects will change the color palette response. Valid values are `css` and `json`. This parameter generally outputs two palette sets—both choose colors based on their dominance in the image. The default set is strictly algorithmic, based on frequency of the color in the image, and is always available. The "dominance" set also weights frequency, but selects the colors to provide a more coordinated palette across the image's colorspace and names the colors by their relative values, like [Vibrant.js](http://jariz.github.io/vibrant.js/) does. The default palette set defaults to six colors, but can be overridden with the `colors` parameter. Valid values are in the range `0` – `16` The dominance palette set provides up to six named colors: * Vibrant * Vibrant Dark * Vibrant Light * Muted * Muted Dark * Muted Light The dominance palette will vary (and may not be generated) depending on whether the image's colors meet the criteria for each name. It may return all six colors, a portion, or none, although most images will return a complete set. ### palette=css The response to the image request will be a CSS file with the `text/css` MIME type. Class pairs have a "foreground" and a "background" definition. The foreground class has a `color` property defined, while the background class has a `background-color` property defined. The CSS output also includes white and black, to make displaying a colorPalette-swatch set easier. If `prefix` is also set, its value will replace "image" in the CSS class names in the output CSS file. For example: ```html ``` Above link tag gives below output. ```css .lemon-fg-1 { color:#cda156 !important; } .lemon-bg-1 { background-color:#cda156 !important; } .lemon-fg-2 { color:#1c3738 !important; } .lemon-bg-2 { background-color:#1c3738 !important; } .lemon-fg-3 { color:#85674a !important; } .lemon-bg-3 { background-color:#85674a !important; } .lemon-fg-4 { color:#94a194 !important; } .lemon-bg-4 { background-color:#94a194 !important; } .lemon-fg-5 { color:#98949c !important; } .lemon-bg-5 { background-color:#98949c !important; } .lemon-fg-6 { color:#ac5c3c !important; } .lemon-bg-6 { background-color:#ac5c3c !important; } .lemon-fg-ex-1 { color:#ffffff !important; } .lemon-bg-ex-1 { background-color:#ffffff !important; } .lemon-fg-ex-2 { color:#000000 !important; } .lemon-bg-ex-2 { background-color:#000000 !important; } .lemon-fg-vibrant { color:#c08041 !important; } .lemon-bg-vibrant { background-color:#c08041 !important; } .lemon-fg-vibrant-light { color:#dabf55 !important; } .lemon-bg-vibrant-light { background-color:#dabf55 !important; } .lemon-fg-vibrant-dark { color:#255248 !important; } .lemon-bg-vibrant-dark { background-color:#255248 !important; } .lemon-fg-muted { color:#82674a !important; } .lemon-bg-muted { background-color:#82674a !important; } .lemon-fg-muted-light { color:#c8b3b5 !important; } .lemon-bg-muted-light { background-color:#c8b3b5 !important; } .lemon-fg-muted-dark { color:#27424c !important; } .lemon-bg-muted-dark { background-color:#27424c !important; } ``` ### palette=json The response will be a JSON object with the `application/json` MIME type. The JSON object has three top-level properties: a floating-point `average_luminance` value, a `colors` array of colors for the original palette, and a `dominant_colors` array that represents the Vibrant.js-style values. Each color in the `colors` and `dominant_colors` arrays contains a hash describing its `red`, `green`, and `blue` components (expressed as floating point numbers between 0.0 and 1.0), and a `hex` value. If `palette` is set to `json`, the `prefix` parameter is ignored. Here is the JSON payload from the tree lemon image used above: ```json { "average_luminance":0.5, "colors":[ { "red":0.803922, "hex":"#cda156", "blue":0.337255, "green":0.631373 }, { "red":0.109804, "hex":"#1c3738", "blue":0.219608, "green":0.215686 }, { "red":0.521569, "hex":"#85674a", "blue":0.290196, "green":0.403922 }, { "red":0.580392, "hex":"#94a194", "blue":0.580392, "green":0.631373 }, { "red":0.596078, "hex":"#98949c", "blue":0.611765, "green":0.580392 }, { "red":0.67451, "hex":"#ac5c3c", "blue":0.235294, "green":0.360784 } ], "dominant_colors":{ "vibrant":{ "red":0.752941, "hex":"#c08041", "blue":0.254902, "green":0.501961 }, "vibrant_light":{ "red":0.854902, "hex":"#dabf55", "blue":0.333333, "green":0.74902 }, "vibrant_dark":{ "red":0.145098, "hex":"#255248", "blue":0.282353, "green":0.321569 }, "muted":{ "red":0.509804, "hex":"#82674a", "blue":0.290196, "green":0.403922 }, "muted_light":{ "red":0.784314, "hex":"#c8b3b5", "blue":0.709804, "green":0.701961 }, "muted_dark":{ "red":0.152941, "hex":"#27424c", "blue":0.298039, "green":0.258824 } } } ``` --- updatedAt: 2025-08-18T19:19:10.000Z --- # Image Overlay These parameters are used when you want to overlay one image over another. ## overlay This parameter takes image URL as its input. It overlays the image fetched from URL over the image being processed. The default option is to put the overlay at center. This can be modified with below parameters. | position=bottomleft | default position | | :--------------------------------------------------------------------------------------------------------------------- | :---------------------------------------------------------------------------------------- | | ![](https://demo.gumlet.io/flower.jpeg?overlay=https://demo.gumlet.io/logo.png?width=250&overlay_position=bottomleft) | ![](https://demo.gumlet.io/flower.jpeg?overlay=https://demo.gumlet.io/logo.png?width=250) | ## overlay\_position This parameter specifies position of image overlay. Valid values are `top`, `topleft`, `left`, `bottomleft`, `bottom`, `bottomright`, `right`, `topright` and `center`. ## overlay\_top Specifies overlay offset in number of pixels from top edge of image. This parameter overrides `overlay_position`. ## overlay\_left Specifies overlay offset in number of pixels from left edge of image. This parameter overrides `overlay_position`. ## overlay\_tile This boolean parameter repeats the overlay image like tiles over the image being processed. Default value is `false`. ## overlay\_width\_pct Maximum width of image overlay as a percentage of output width. This parameter can be between `0` and `1`. For example, if output image width is 500 pixels and if `image_width_pct` is `0.1`, the image overlay layer will be of maximum width of 50 pixels. ## overlay\_height\_pct Maximum height of image overlay as a percentage of output height. This parameter can be between `0` and `1`. For example, if output image height is 500 pixels and if `image_height_pct` is `0.1`, the image overlay layer will be of maximum height of 50 pixels. --- updatedAt: 2026-01-08T16:07:37.000Z --- # Text Overlay These parameters are used when you want to overlay text over an image. ## text This parameter takes UTF-8 text strings as input. If this parameter is omitted, none of the other text related parameters will work. If you want to write multiple lines, you can pass the `\n` character. For example, you can do `text=simple\ntext`. | text=example | original | | --- | --- | | ![text=example](https://demo.gumlet.io/flower.jpeg?text=example) | ![original image](https://demo.gumlet.io/flower.jpeg) | ## text\_top This parameter specifies position of text in an image. It's given as number of pixels from top edge of image. Default value for this parameter is `0`. ## text\_left This parameter specifies position of text in an image. It's given as number of pixels from left edge of image. Default value for this parameter is `0`. ## text\_font This parameter specifies font-face to use while writing text over image. Default font is `sans-serif` but you can specify any [web-safe fonts](https://www.w3schools.com/cssref/css_websafe_fonts.asp) to use here. ## text\_font\_size This parameter specifies font-size of the fonts to use in pixels. Default value is `48px`. ## text\_line\_height This parameter specifies line height to use in pixels. Default value is `0` pixels. ## text\_align Decides alignment of the text. Valid values are `left`, `right` and `center`. Default value is `center`. ## text\_color You can provide any web-safe color name or a hex coded color name like '#2d2d2d'. Default value is `black`. ## text\_bg\_color This parameter can change background of the text. Default value is `transparent`. | text_bg_color | original | | --- | --- | | ![text\_bg\_color=%232d2d2d&text\_color=white](https://demo.gumlet.io/flower.jpeg?text=%25%20Gumlet%20%25&text_bg_color=%232d2d2d&text_color=white) | ![original image](https://demo.gumlet.io/flower.jpeg) | ## text\_padding If you have specified `text_bg_color` other than `transparent`, this parameter will be able to put padding around text. Default value is `0` pixels. ## text\_position Decides position of text on an image. Valid values are `topleft`, `top`, `topright`, `right`, `bottomright`, `bottom`, `bottomleft`, `left` and `center`. ## text\_rotate Rotates text about its center. The rotation angle can be any angle between `0` and `360`. ## text\_wrap Automatically puts text in newline if it overflows the given width. Default value is `false` ## text\_width\_pct Maximum width of text overlay as percentage of output width. This parameter can be between `0` and `1`. For example if output image width is 500 pixels and if `text_width_pct` is `0.1`, the text overlay layer will be of maximum width of 50 pixels. ## text\_height\_pct Maximum height of text overlay as percentage of output height. This parameter can be between `0` and `1`. For example if output image height is 500 pixels and if `text_height_pct` is `0.1`, the text overlay layer will be of maximum height of 50 pixels. # Client Hints Gumlet has support for [Client Hints](https://developer.mozilla.org/en-US/docs/Web/HTTP/Client_hints#device_client_hints) out of the box. If you configure your webpage to pass client hints for images, Gumlet server will automatically send resized images. Here are the client hint headers that we support. `Sec-Ch-Viewport-Width` `Sec-Ch-DPR` `Sec-Ch-Width` The HTML page must also have Client-Hints enabled, which can be accomplished using either HTML or HTTP. To enable Client-Hints via HTML, add the following line in the `` of your page, before any ``, `